Trichome Visual Guide
One page with every trichome reference image in one place: the clear, cloudy, amber, and mixed states up close, plus the inspection routine and the harvest-decision flowchart. Use it to match what you see under your loupe against a known reference, then follow the link under each image to the full guide for that stage.
The fastest way to get harvest timing right is to compare your bud to a clean reference, not to your memory of one you saw months ago.
Clear to cloudy to amber, plus what a ready plant really looks like.
Look at these three for the quality of the light passing through the head, not for the colour name attached to it. A clear head is transparent and glassy — you can see through it, and it looks more like wet glass than like resin. A cloudy head is opaque and milky, and the light stops at the surface instead of going through. An amber head is golden and honey-toned, and by the time you are asking whether something is amber it usually is. The transition that matters most is the first one, clear to cloudy, because it is gradual, it happens unevenly across a flower, and it is the boundary that decides whether you are early or in the window.
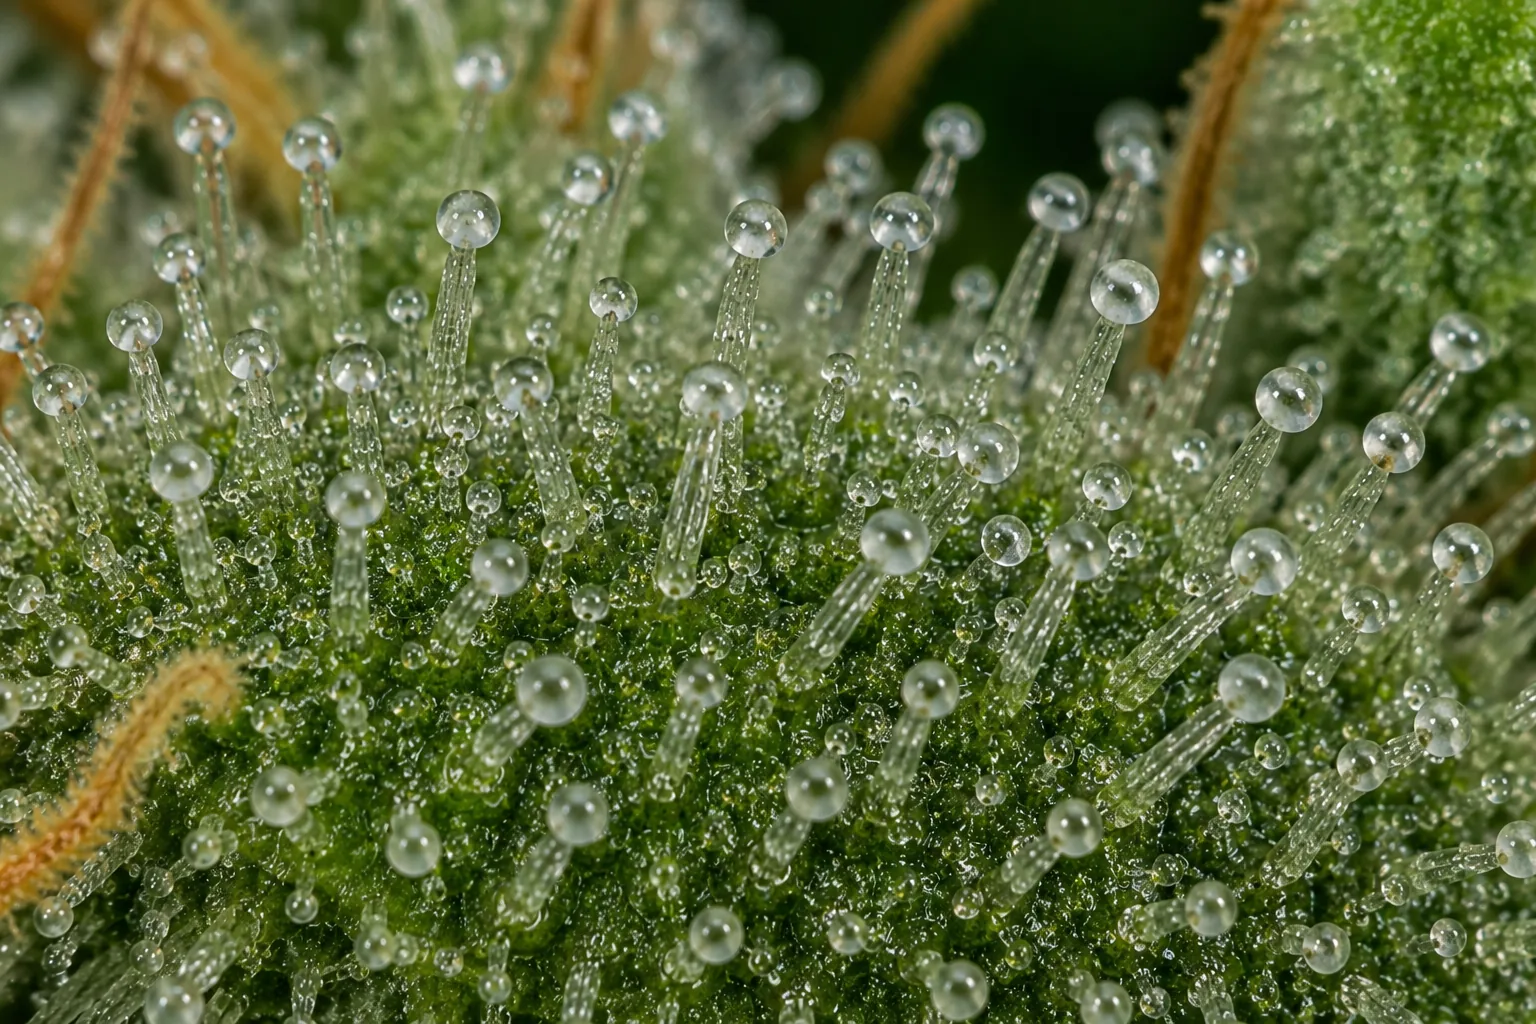
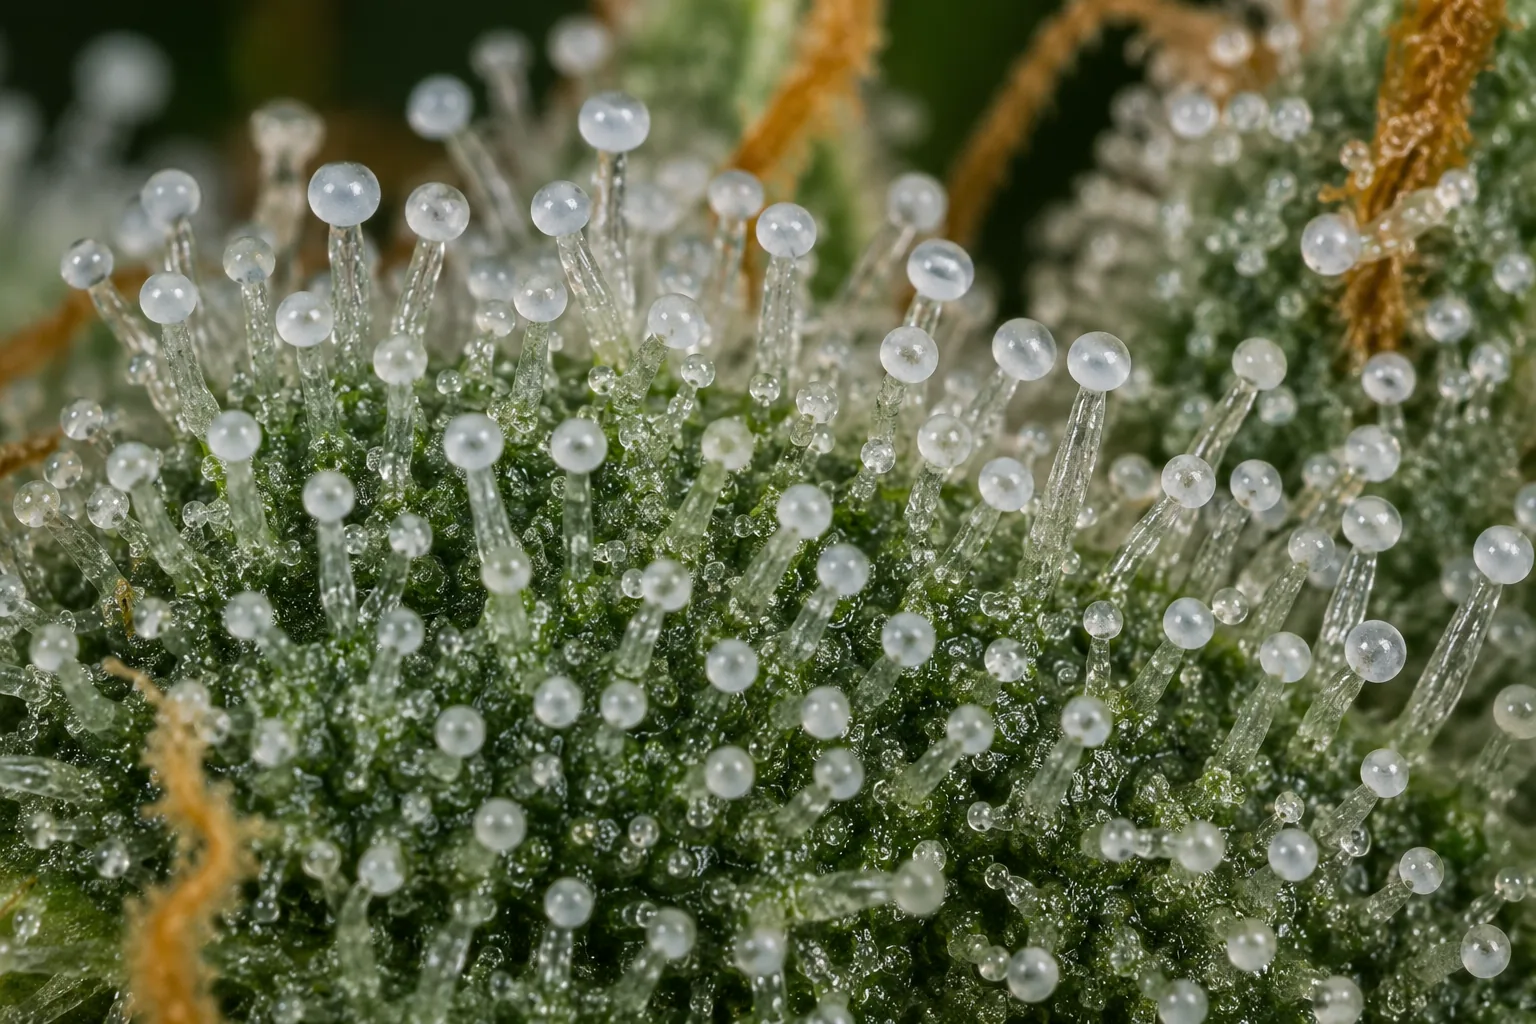
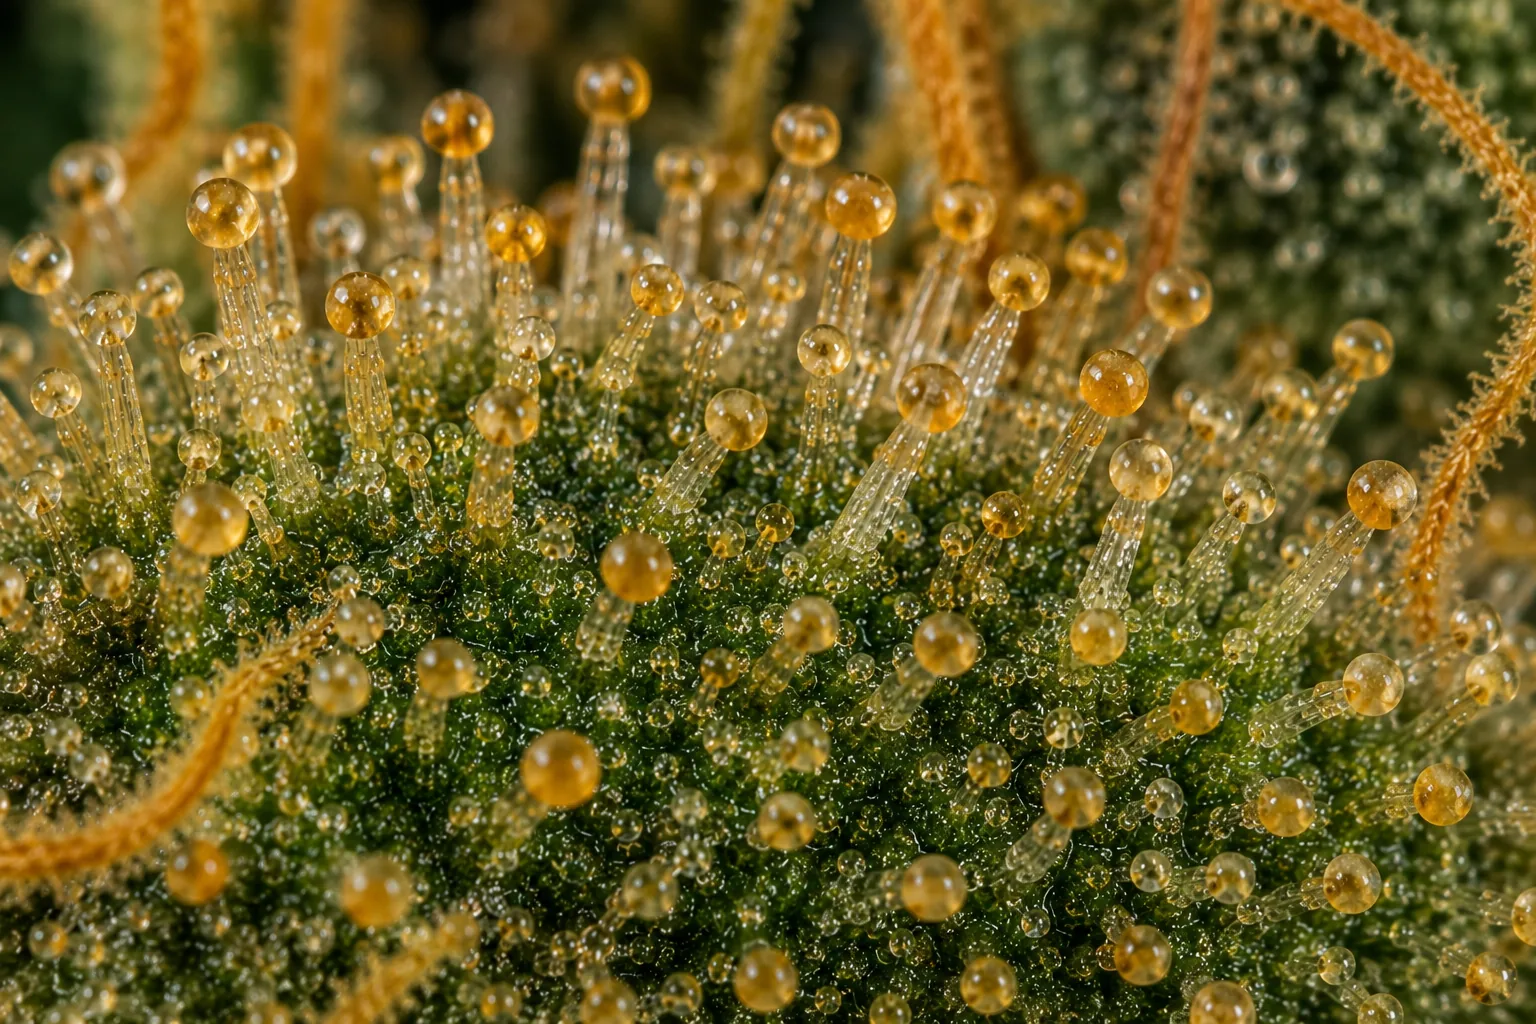
No real plant looks like a single-state macro.
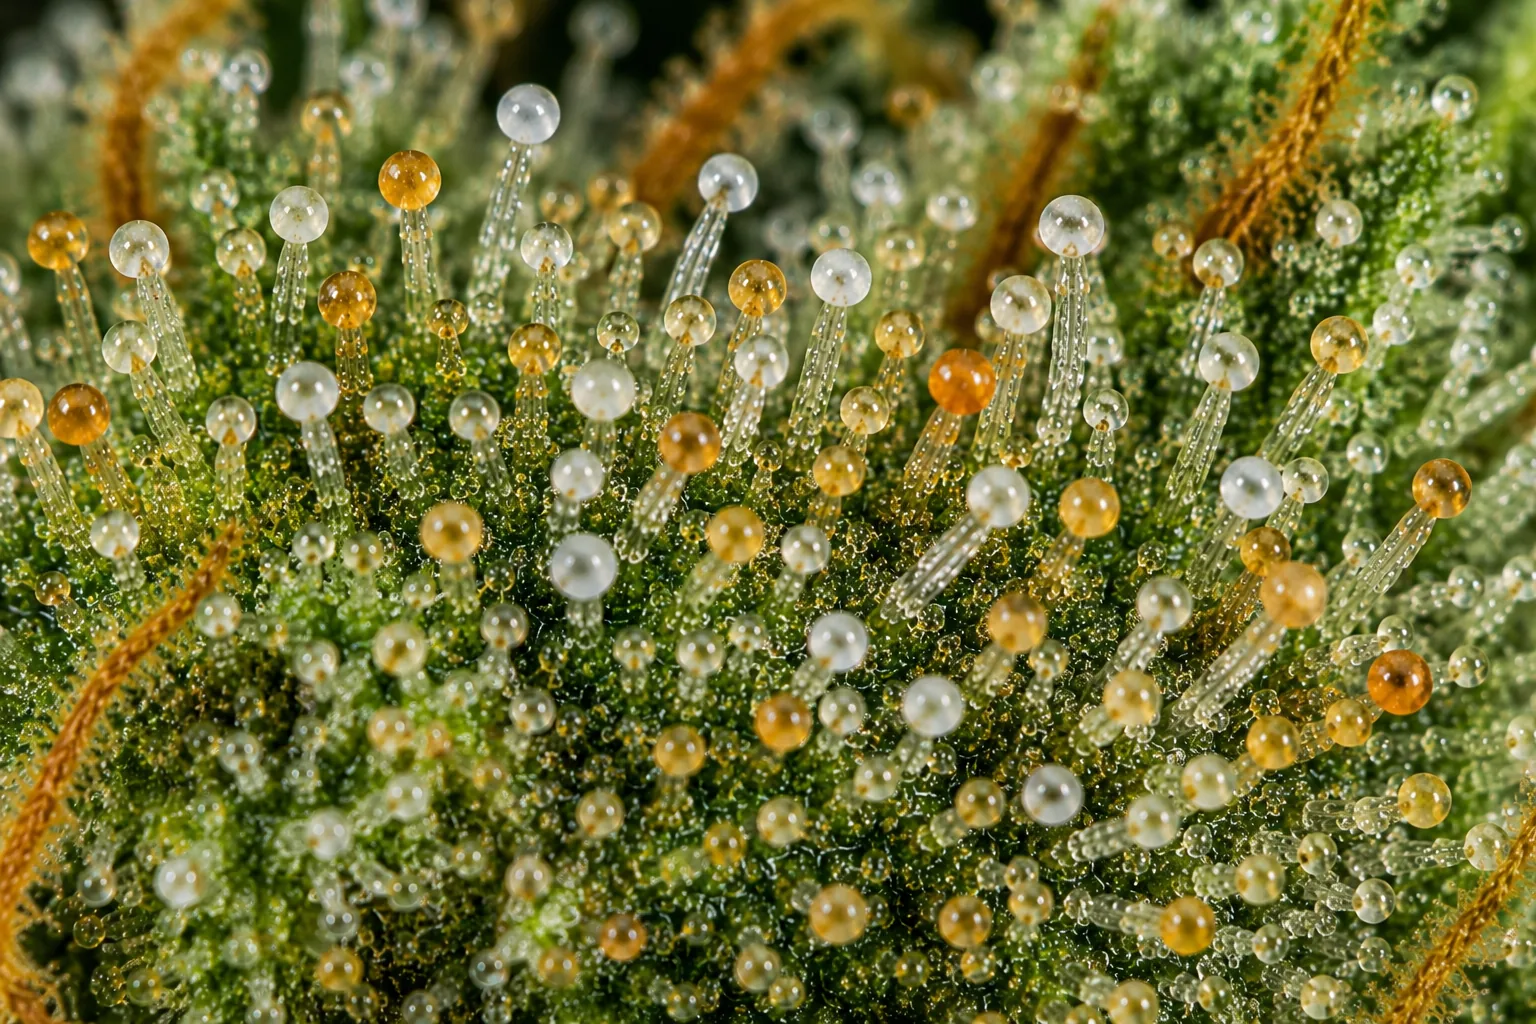
The three references above are clean examples, chosen because they show one state clearly. Your plant will not look like any of them. It will show a mixture, and the mixture is the reading — which is why the frame below is the most honest image on this page. A flower in the window is mostly milky with some amber scattered through it, and the question you are answering under the loupe is never "what colour is this head" but "what is the proportion across this surface".
That distinction matters because a plant nowhere near ready will still have a few amber heads somewhere, and a plant well past peak will still have a few clear ones. Individual heads are noise. Ratios are signal. If you find yourself building a case from one dramatic close-up, you have stopped reading the plant and started arguing with it.
How to check, and how to decide.
Comparing against a reference only works if the inspection itself is sound, and most bad readings come from method rather than from misidentifying a colour. Three things do the damage. Reading sugar leaves instead of the flower, because leaf trichomes run ahead and make the whole plant look more finished than it is. Working under the grow light, which flatters everything and hides the distinction you are trying to draw. And judging the entire plant from one top cola, when tops and lower buds routinely mature at different rates.
The routine below fixes all three: real bud sites on calyx-rich surfaces, somewhere around the middle of the flower rather than only the tip, several sites across the canopy, neutral light, and enough magnification to resolve an individual head. Do it the same way each time. When a recheck a few days later uses different lighting or a different part of the plant, you are not comparing the plant against itself, and the second reading tells you nothing.
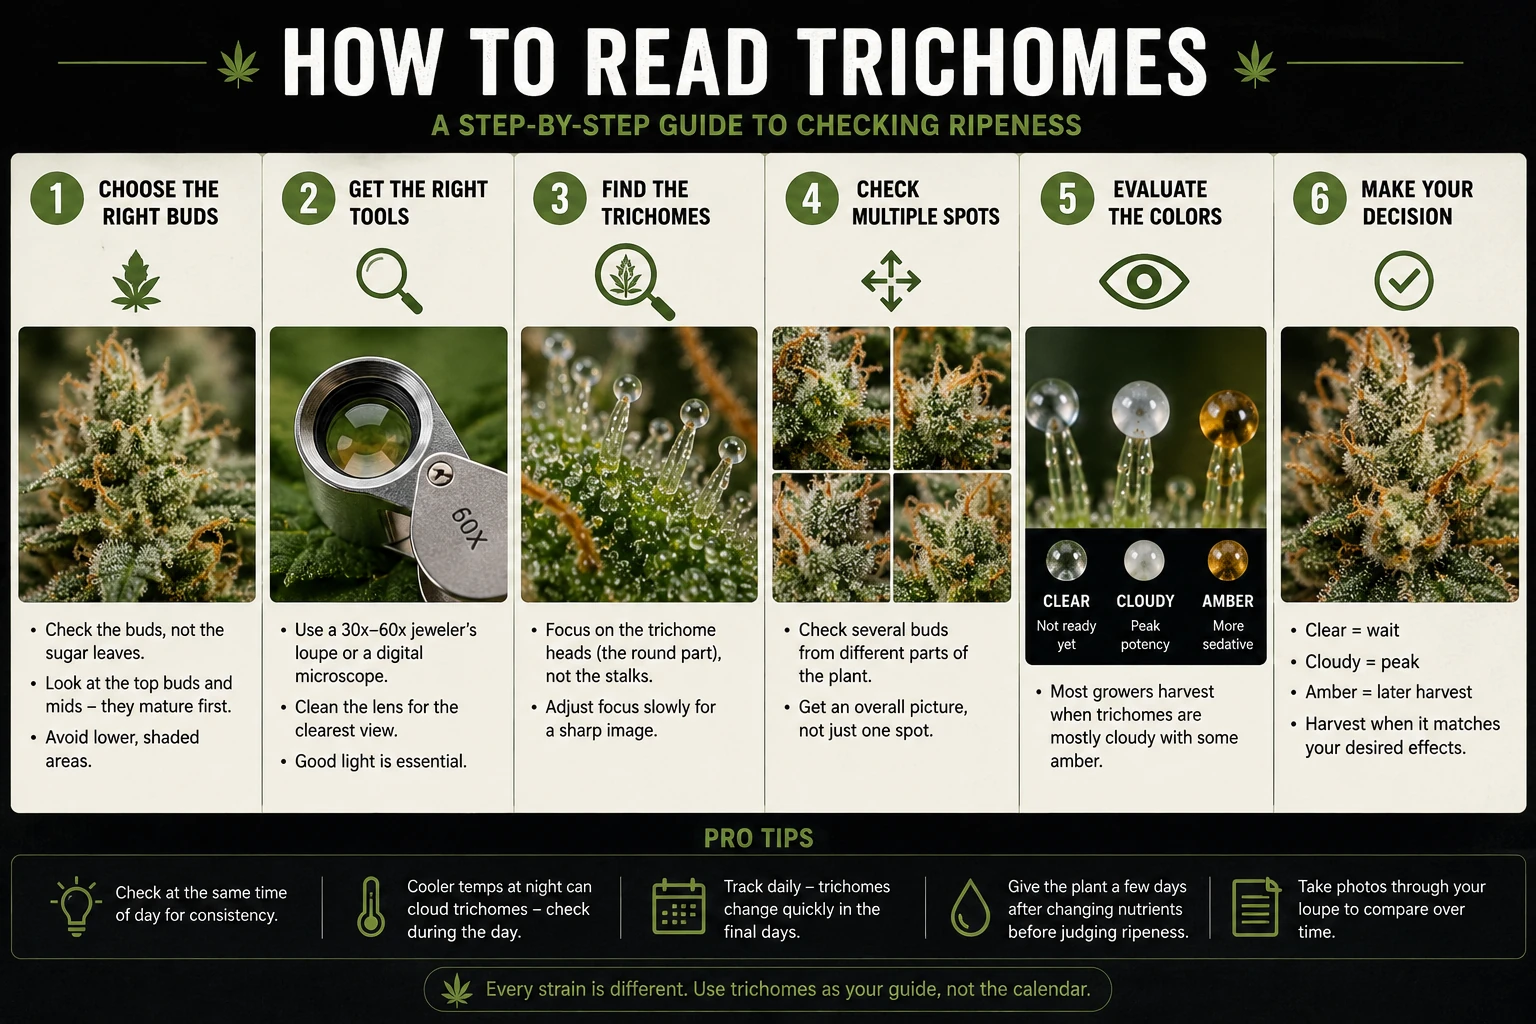
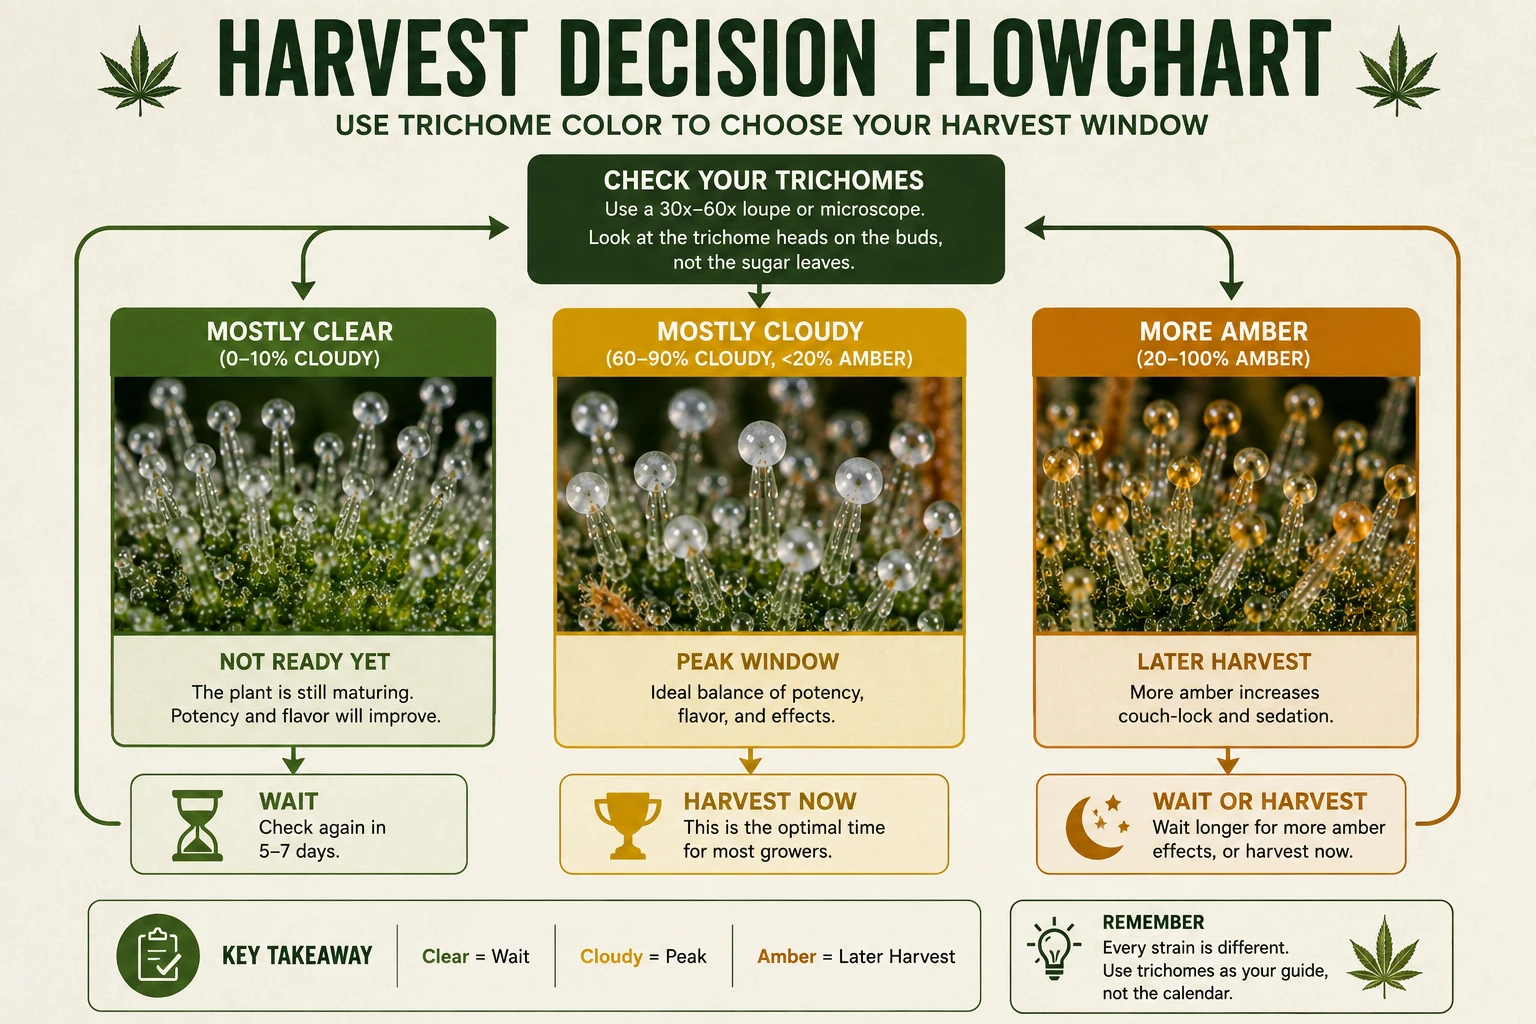
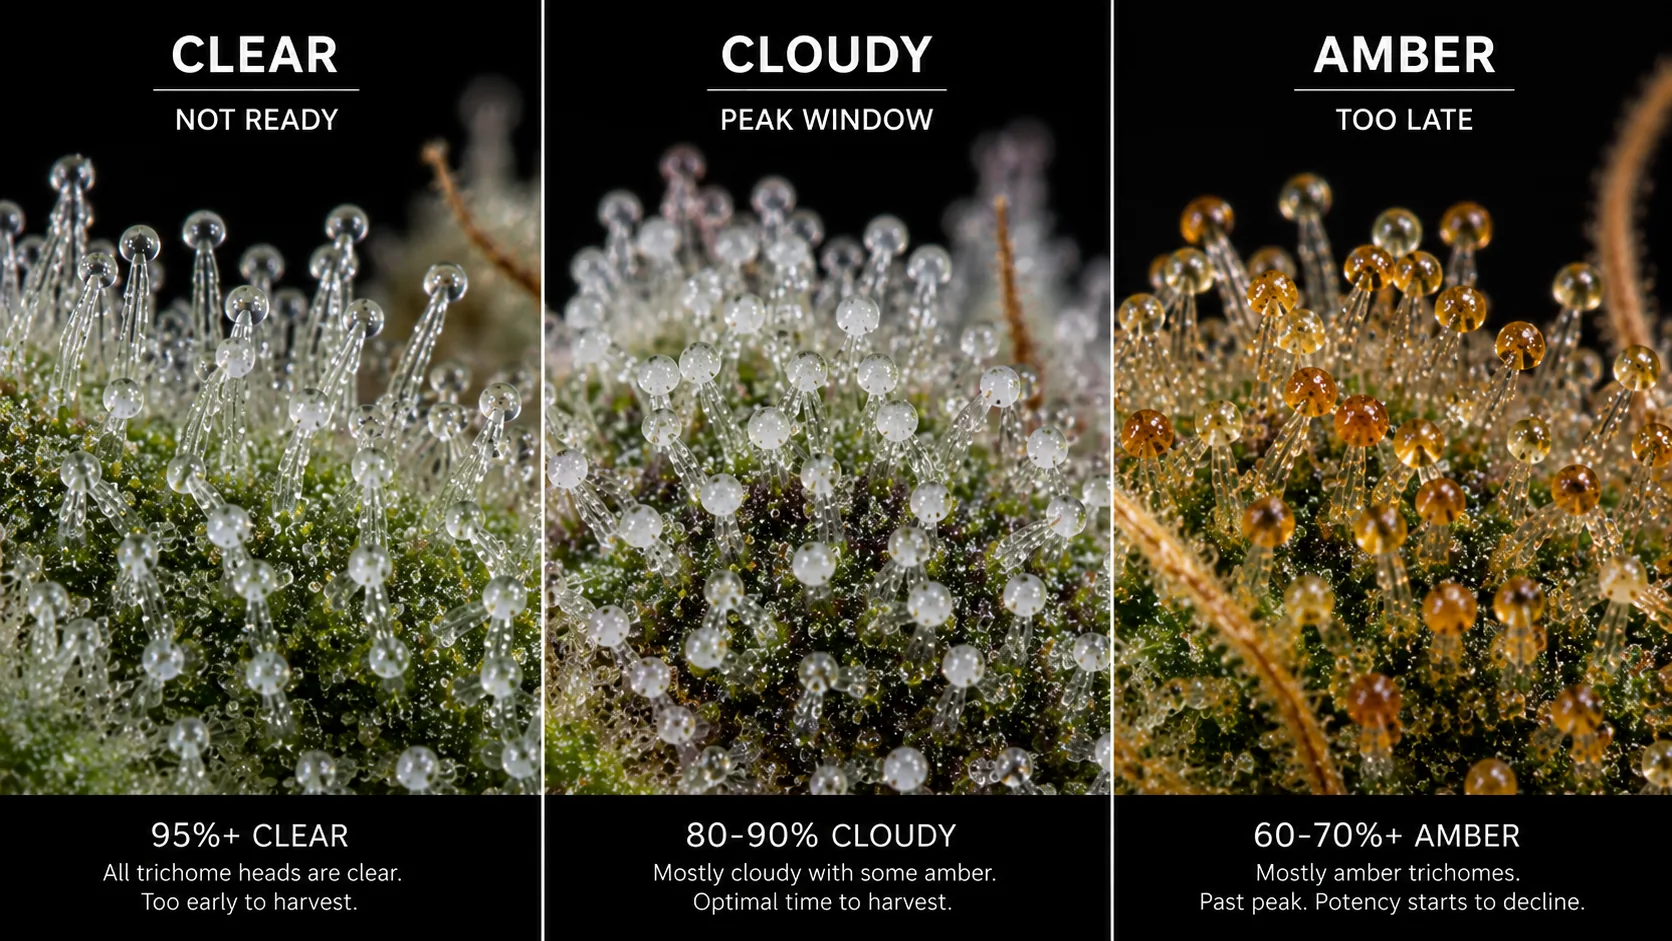
The states are not better and worse — they are different finishes.
It is easy to read the flowchart as a race with a finish line, where cloudy is right and everything else is a mistake. That is not what the window means. Mostly cloudy with very little amber tends toward a brighter, more energetic result. Mostly cloudy with some amber is the balanced middle that a lot of growers are actually aiming for. A larger amber presence leans heavier and more sedating. None of those is the correct answer; the correct answer is the one that matches what you want out of the jar.
Which is why the reference images are more useful than any single rule. Once you can reliably tell what proportion you are looking at, you can aim at a finish deliberately instead of harvesting on the day your patience ran out. The one genuinely wrong call is cutting while the plant still reads mostly clear, because that is not a stylistic choice — it is an unfinished plant. Everything after that point is preference.
- Decide what finish you want before you inspect, not while you are standing there with the loupe. The decision is much harder to make honestly once the plant is in front of you.
- When the reading is genuinely mixed and you cannot call it, wait and recheck in a couple of days under the same conditions. A short wait costs almost nothing; a rushed cut cannot be undone.
- Treat breeder timelines as a rough expectation of when to start inspecting, not as the answer. The plant under magnification outranks the number on the packet.
The full reasoning behind the call, including how pistils and overall flower maturity fit alongside the resin, lives in the harvest decision guide. If you want the same reference frames alongside every other harvest image on the site, the trichome and harvest pictures library holds the complete set.
Every trichome and harvest guide in one place.
This page is the visual index; the pages below are where each stage is explained properly. If you are starting from nothing, read what trichomes are, then the method, then come back here to practise recognising the states. If you already know what you are looking at and just need to settle a specific question — how much magnification is enough, whether the pistils are telling you anything useful, how much amber is too much — go straight to the one that matches.
Trichome and Harvest Pictures
The complete harvest image library to compare your buds against.
Trichome Magnification
30x vs 60x vs 100x, loupe vs scope, and the six-step reading routine.