Harvest timing

Trichome Magnification: What Loupe or Microscope You Need

You cannot read trichome color with the naked eye, so the tool matters. The short answer: a 30 to 60x jeweler's loupe is the practical minimum, and 60x is the sweet spot for confidently telling clear, cloudy, and amber apart. Below that you can confirm trichomes exist but not their color; far above it you see exquisite detail but lose the context of the whole bud. This page covers what each magnification gives you, loupe versus digital scope, and where on the plant to point it.

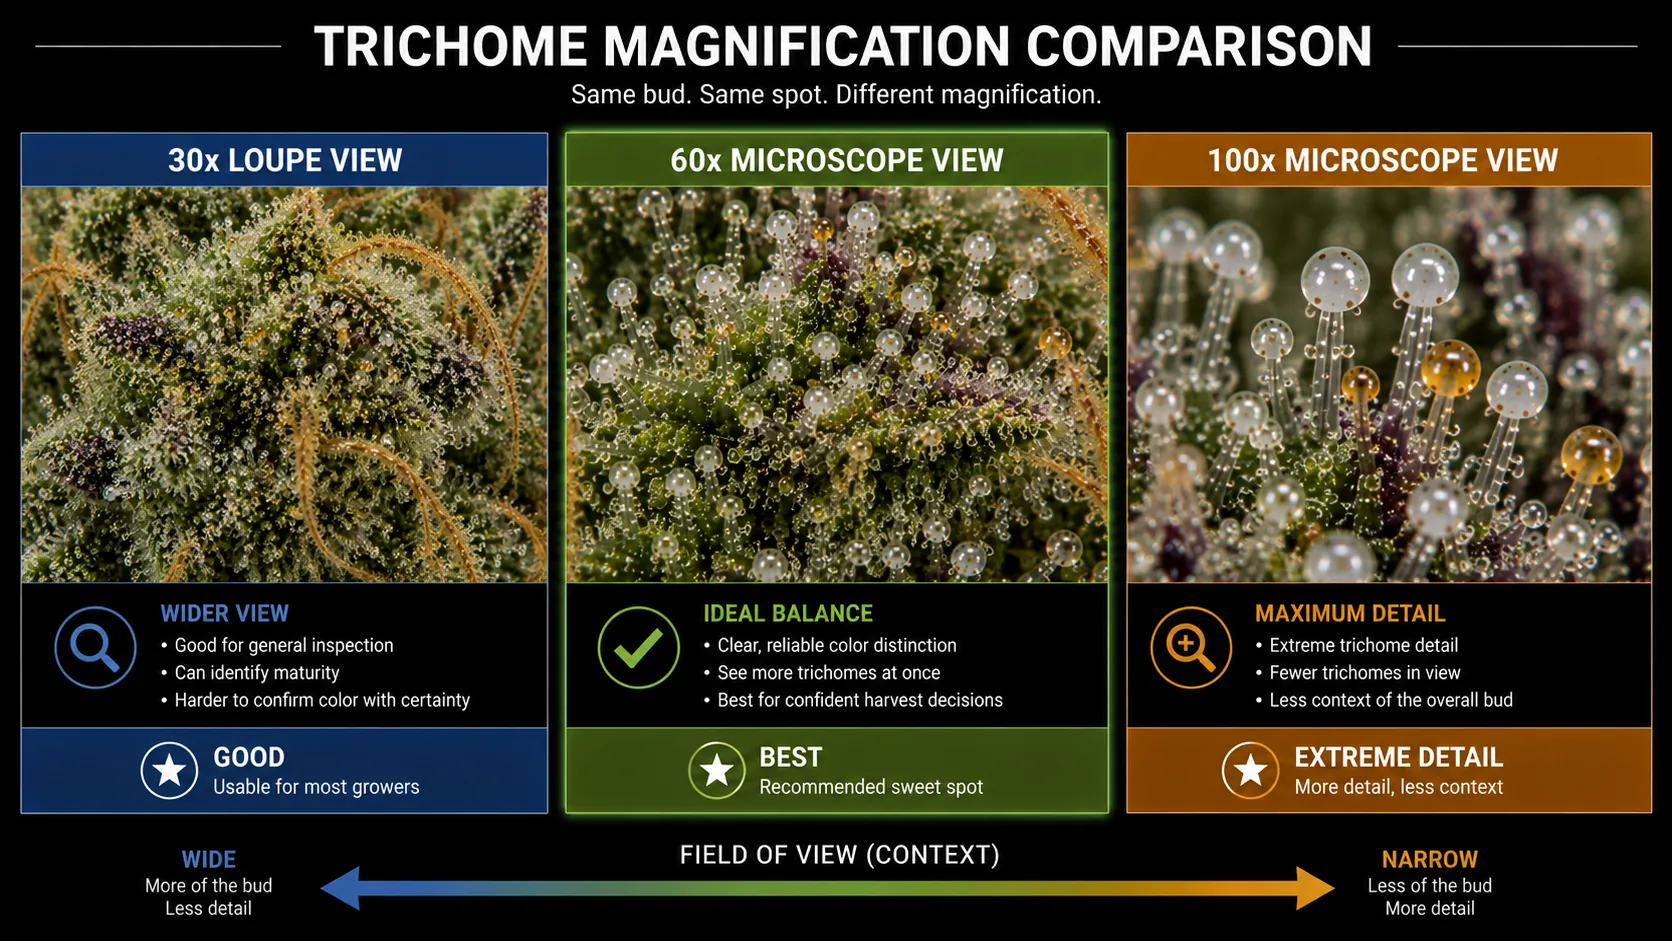
More magnification is not automatically better. The goal is reliable color reading, and that has a sweet spot.

Minimum 30x loupe confirms trichomes and rough maturity, but color is hard to call.
Best 60x is the sweet spot: clear, reliable color distinction with enough field of view.
Overkill 100x shows extreme detail but a narrow view, so you lose the overall picture.
Three-panel board comparing one bud at 30x, 60x, and 100x, detail rising as the field of view narrows.
30x to 60x to 100x: as magnification rises, detail goes up but field of view shrinks. 60x is the recommended balance.
Magnification levels

What each level actually gives you.

Magnification Field of view Best for
30x (loupe) Wide; more of the bud General inspection and confirming maturity; color is hard to call with certainty
60x (loupe or scope) Balanced The recommended sweet spot; clear, reliable clear/cloudy/amber distinction
100x+ (scope) Narrow; few heads at once Extreme detail; less useful for reading the overall balance across a bud
30x vs 60x in practice

The same bud at two magnifications.

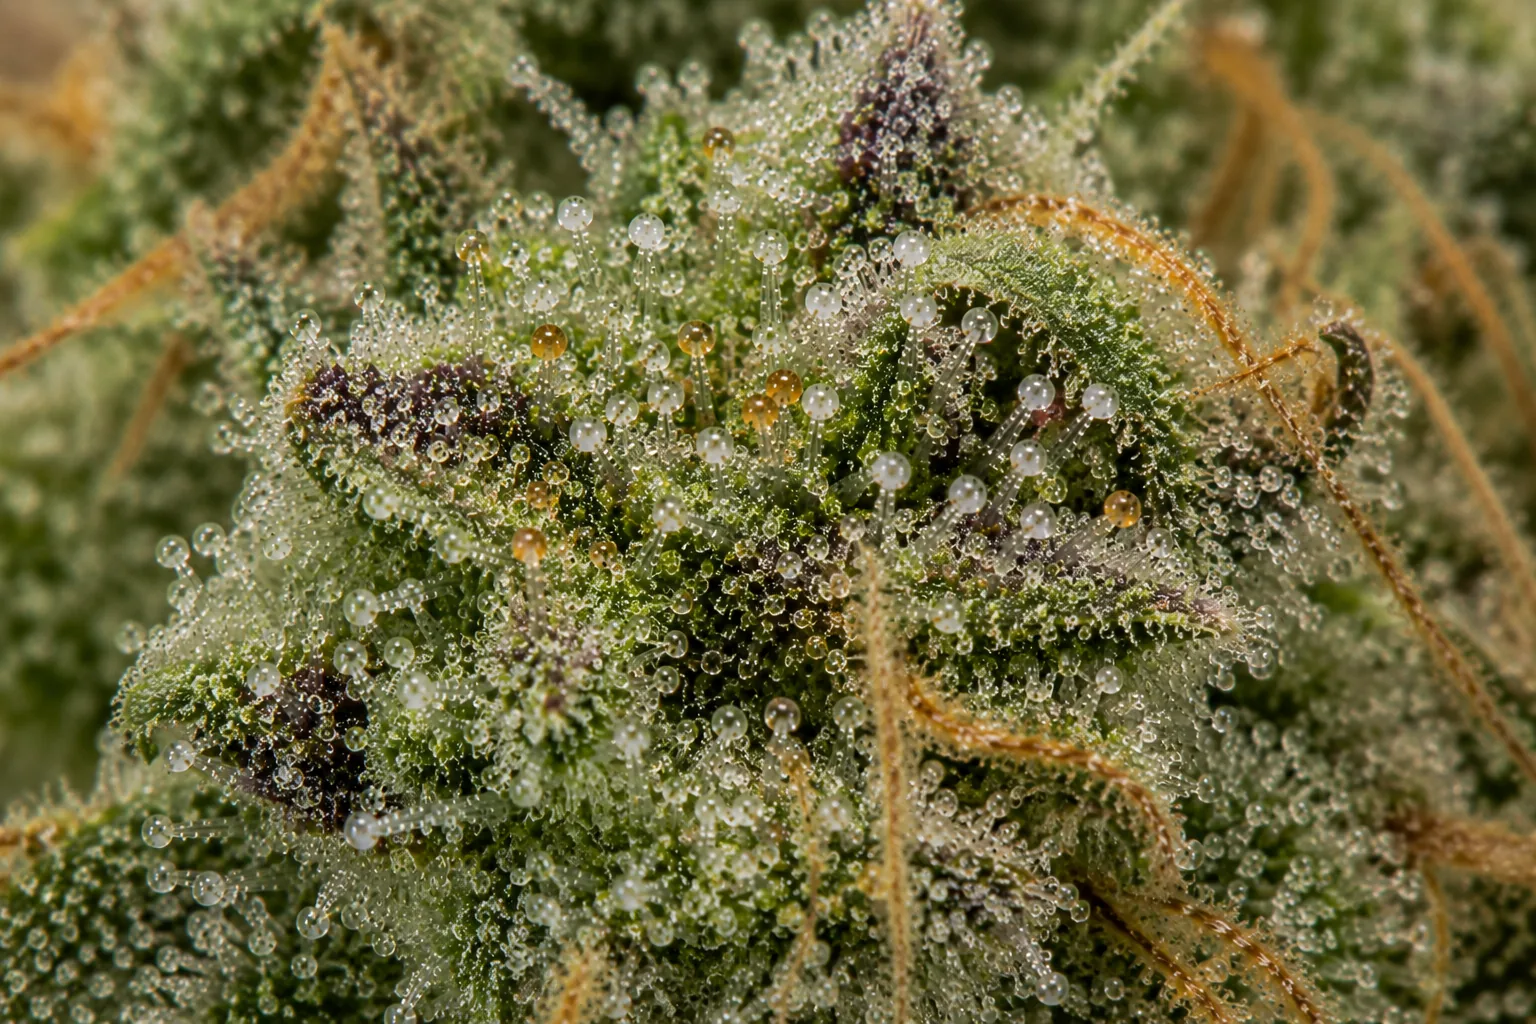
Wide loupe-level view of a frosty cannabis bud, trichome heads dense but too small to judge color with certainty.
30x loupe: wide view, good for spotting maturity, color harder to confirm.
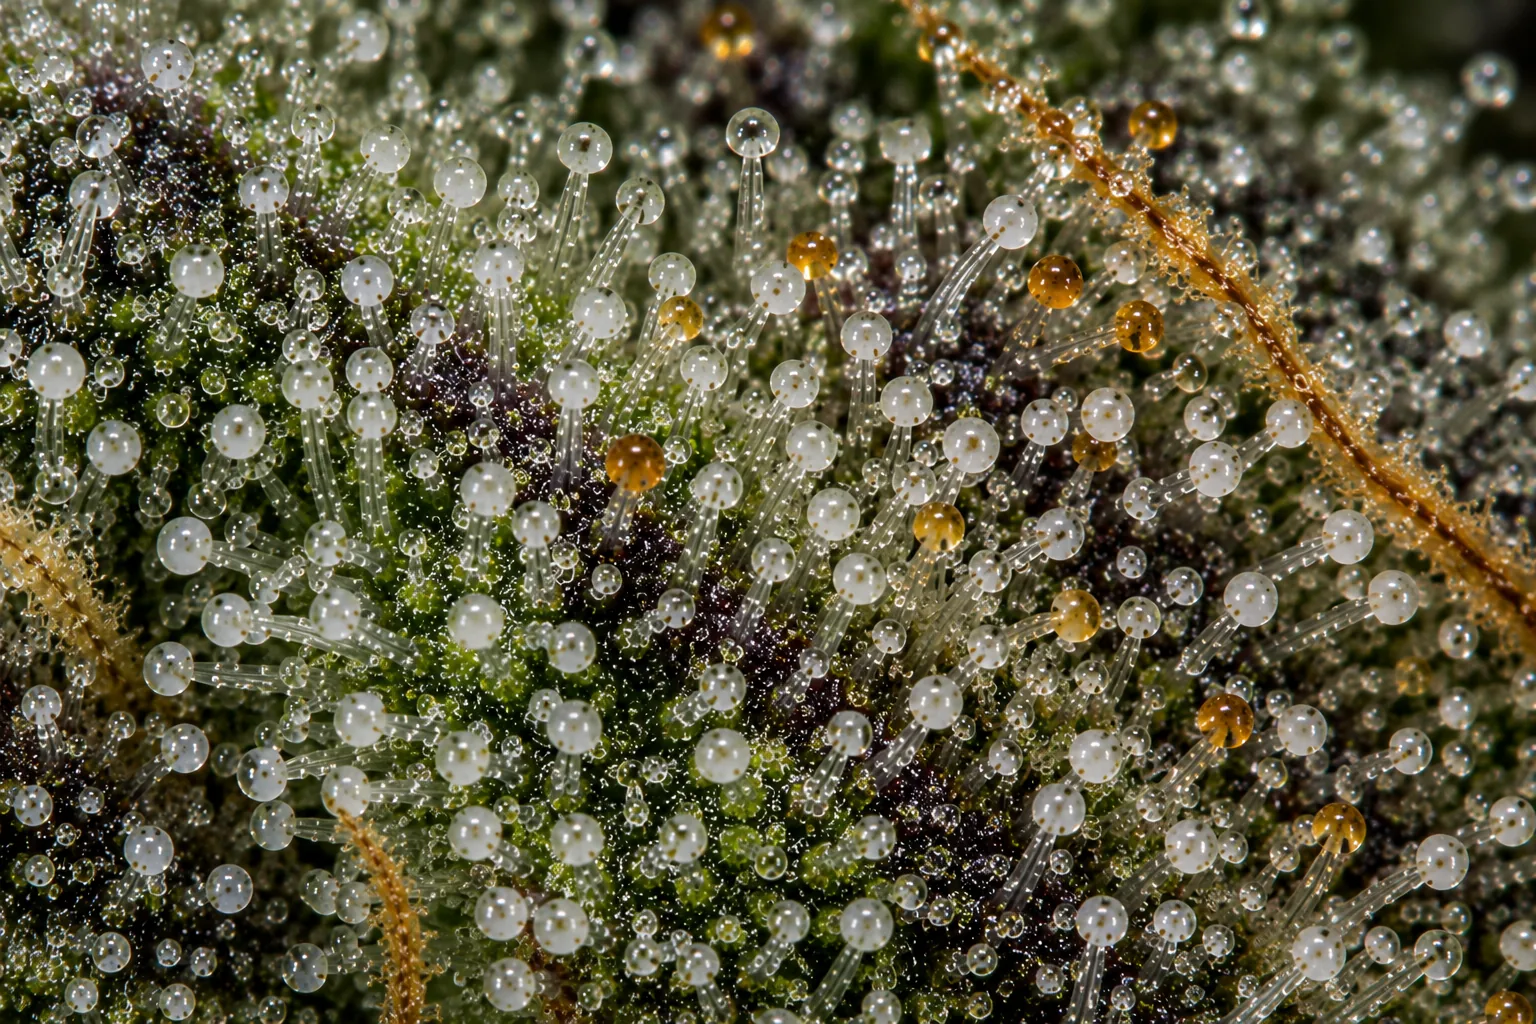
Closer scope-level view of the same bud, individual trichome heads sharp enough to read as mostly milky with a few amber.
60x scope: individual heads resolve, so color is easy to read.
Loupe vs digital scope

Which tool, and where to point it.

A jeweler's loupe is cheap, pocket-sized, and needs no power, but you have to hold it steady a couple of centimeters from the bud under grow lights, which is fiddly. A USB or phone microscope is easier for most people because it puts the image on a screen, holds focus, and lets you photograph what you see for a second opinion. Either works; the scope just removes the hand-shake problem.

Where you point it matters as much as the magnification. Read the trichome heads on the calyxes of the actual bud, sampled from several sites, not the faster-aging sugar leaves. The guide image shows the move: find your spot on the whole bud, then zoom in to read the resin. The full six-step routine is laid out further down this page.
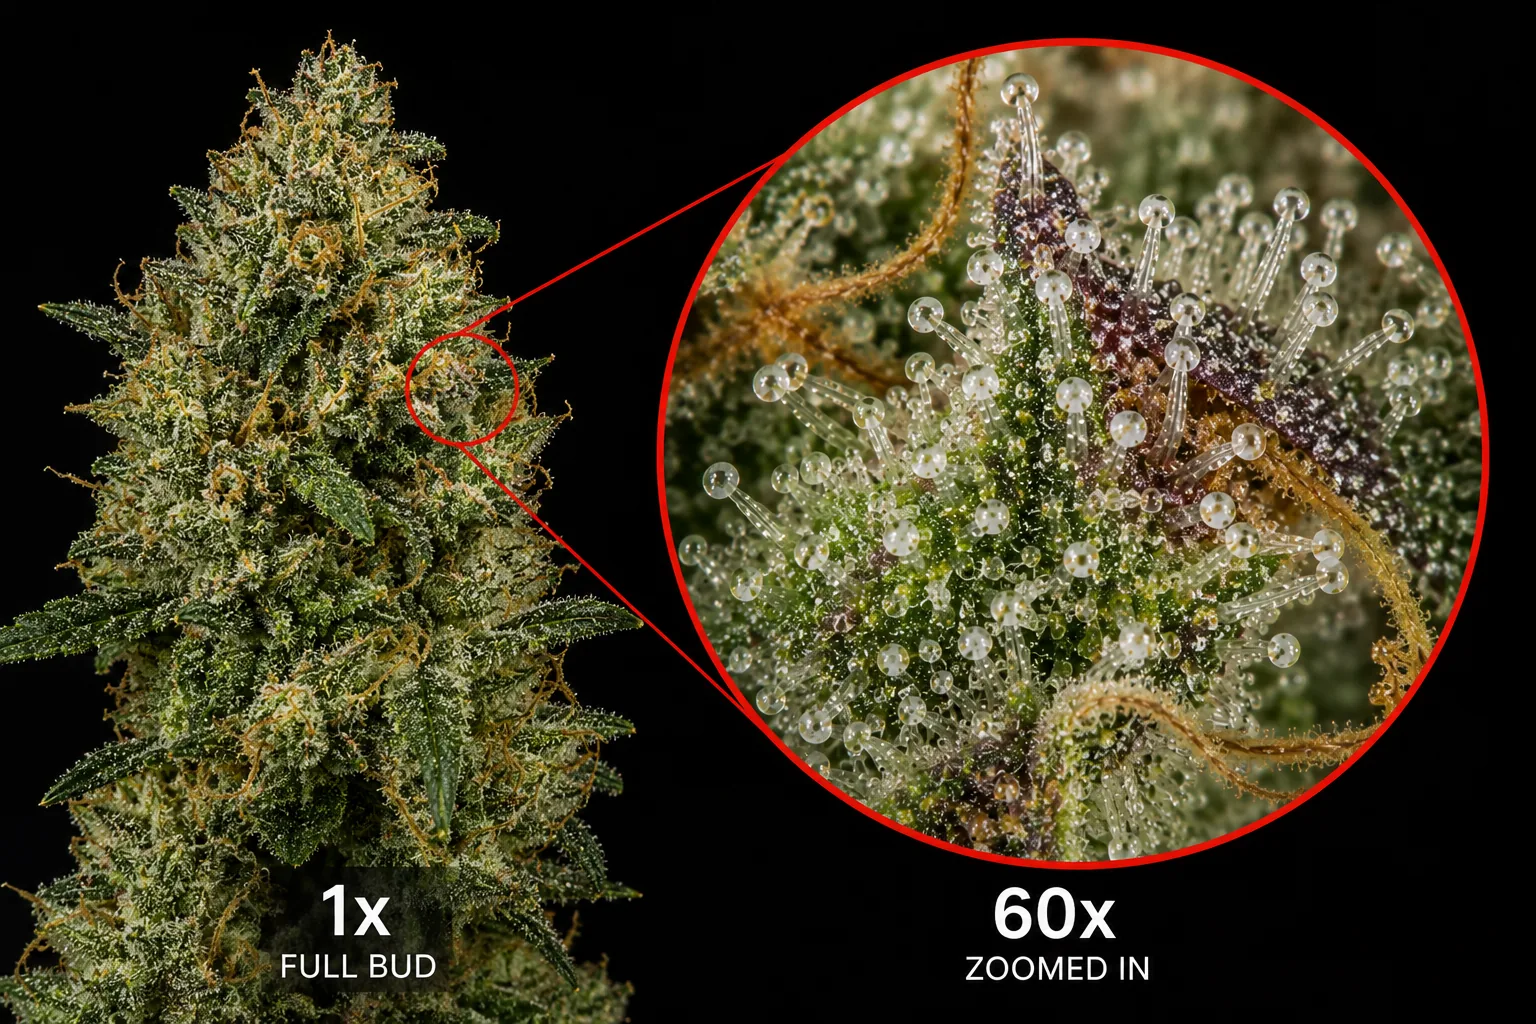
A whole frosted bud labeled 1x with a red-circled spot linked to a 60x inset zooming into the trichome heads there.
Pick a calyx on the bud, then zoom to 60x to read the heads there.
Where to look

Where on the plant to point the magnification.

Magnification only pays off when it is aimed at the right tissue. Read the trichome heads on the calyxes — the small round structures that make up the bud, where the pistils emerge. Do not time the harvest by the sugar leaves, the small resin-covered leaves protruding from the bud: their trichomes amber one to two weeks ahead of the calyxes, and reading them pulls you into harvesting early every time. Focus on the round gland heads themselves, not the stalks, and adjust focus slowly until the heads are sharp.

Start with the top colas and mid-canopy buds, since they mature fastest and give you a representative read of the flower that finishes first; skip the shaded lower popcorn for the main decision. Then sample several sites — one frosty corner is not a verdict. The canopy finishes in waves, so the tops can sit in the window while the lowers still read clear. When they disagree, you can harvest the tops and let the rest run, or wait for the plant to come together if selective harvest does not suit your setup.

The routine

The six-step read, whatever tool you hold.

Step 1

Choose the right buds

Check the top colas and mid-canopy buds first, since they mature fastest. You want a representative read of the flower that finishes first, not the shaded popcorn.

Step 2

Ready the tool

60x if you have it, a clean lens, and good neutral light. Grow-light color casts flatter everything and hide the distinction you are trying to draw.

Step 3

Find the heads

Focus on the round gland heads on the bud itself — not the stalks alone, and not the sugar leaves. Adjust focus slowly until the heads are sharp.

Step 4

Check multiple spots

Sample several buds from different parts of the plant. One frosty corner is not a verdict; you are building an overall picture of a canopy that rarely finishes all at once.

Step 5

Evaluate the colors

Read the ratio: clear means not ready, cloudy means peak potency, amber means a later, heavier finish. Most growers harvest at mostly cloudy with some amber.

Step 6

Make the decision

Match the balance to the effect you want. The decision comes from the pattern across the flower, not one dramatic head you found and fell in love with.

For what each ratio means for harvest windows and effect profiles, match your read against the trichome stages chart.

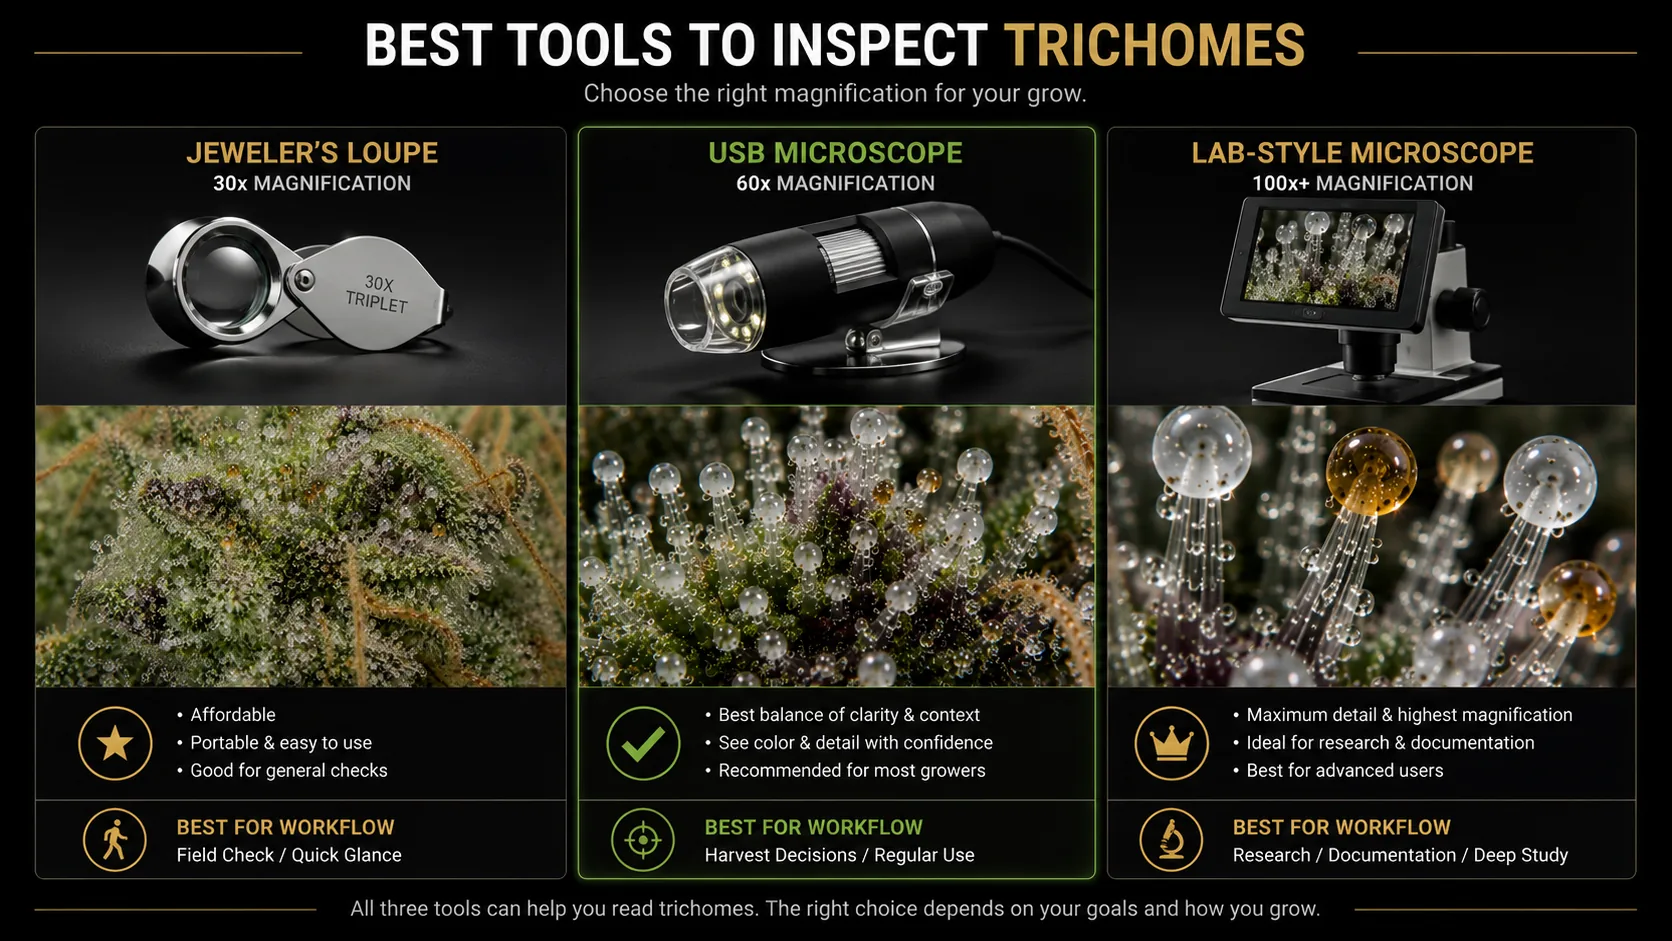
The tools

Three tools that all read trichomes.

A 30x jeweler's loupe, a 60x USB microscope, and a 100x lab scope side by side, each above a trichome macro photo.
Loupe, USB microscope, or lab-style scope: all read trichomes. For most growers a 60x USB microscope is the best balance of clarity and context.

Trichome magnification questions

What magnification do I need to see trichomes?

A 30 to 60x jeweler's loupe is the practical minimum. At 30x you can confirm trichomes are present and judge rough maturity; at 60x you can reliably distinguish clear, cloudy, and amber, which is what the harvest call depends on. 100x and above show more detail but a narrower field of view.

Is a loupe or a USB microscope better?

Both read trichomes fine; the USB or phone microscope is easier for most people because it shows the image on a screen, holds focus, and lets you save photos. A loupe is cheaper and more portable but requires a steady hand close to the bud.

Is 100x magnification too much for trichomes?

It is not harmful, just often unnecessary. At 100x you see individual heads in great detail but only a few at a time, which makes it harder to read the overall ratio of clear to cloudy to amber across a bud. For harvest decisions, 60x usually gives a better balance of detail and context.

For resolving trichomes at harvest, reach for a 60× illuminated loupe.

Resolving power, a built-in light, a steady rest, and a short working distance matter more than the headline magnification number. A dual-lens 30×/60× jeweler's loupe with its own LED covers the harvest-timing task well; a phone clip-on or USB scope trades portability for a screen. ColaXpress has not bench-tested these units — treat this as a selection based on the task, not a hands-on review.

Affiliate disclosure — if a "Check the AC Infinity loupe on Amazon" link appears in this section, it is a paid link: ColaXpress may earn a commission if you buy through it, at no extra cost to you. It never changes the guidance above. As an Amazon Associate I earn from qualifying purchases.

Check the AC Infinity loupe on Amazon

Sharp trichome reads are the payoff of a grow you controlled from the start — the compact system this site is built around is covered in the honest VIVOSUN VGrow + DWC buyer analysis, where the enclosure, method, and finish plan fit together.