Harvest & Trichomes: the complete image library
Reading trichomes and calling the harvest window. Every image below is a real teaching asset from the harvest & trichomes guides — grouped by topic, captioned, and linked to the article it lives on. Click any image to view it full size.
Compare your bud to a clean reference, not to your memory of one.
Harvest timing is the one decision in a grow that cannot be undone, and it is made by eye. That is a bad combination, because the eye is easily talked into what it wants to see. A grower who has been waiting nine weeks looks through a loupe and finds a plant that is ready; a grower who read something alarming online looks at the same plant and finds one that is late. A labelled reference held next to the real thing is the cheapest correction available, and that is the whole purpose of this page.
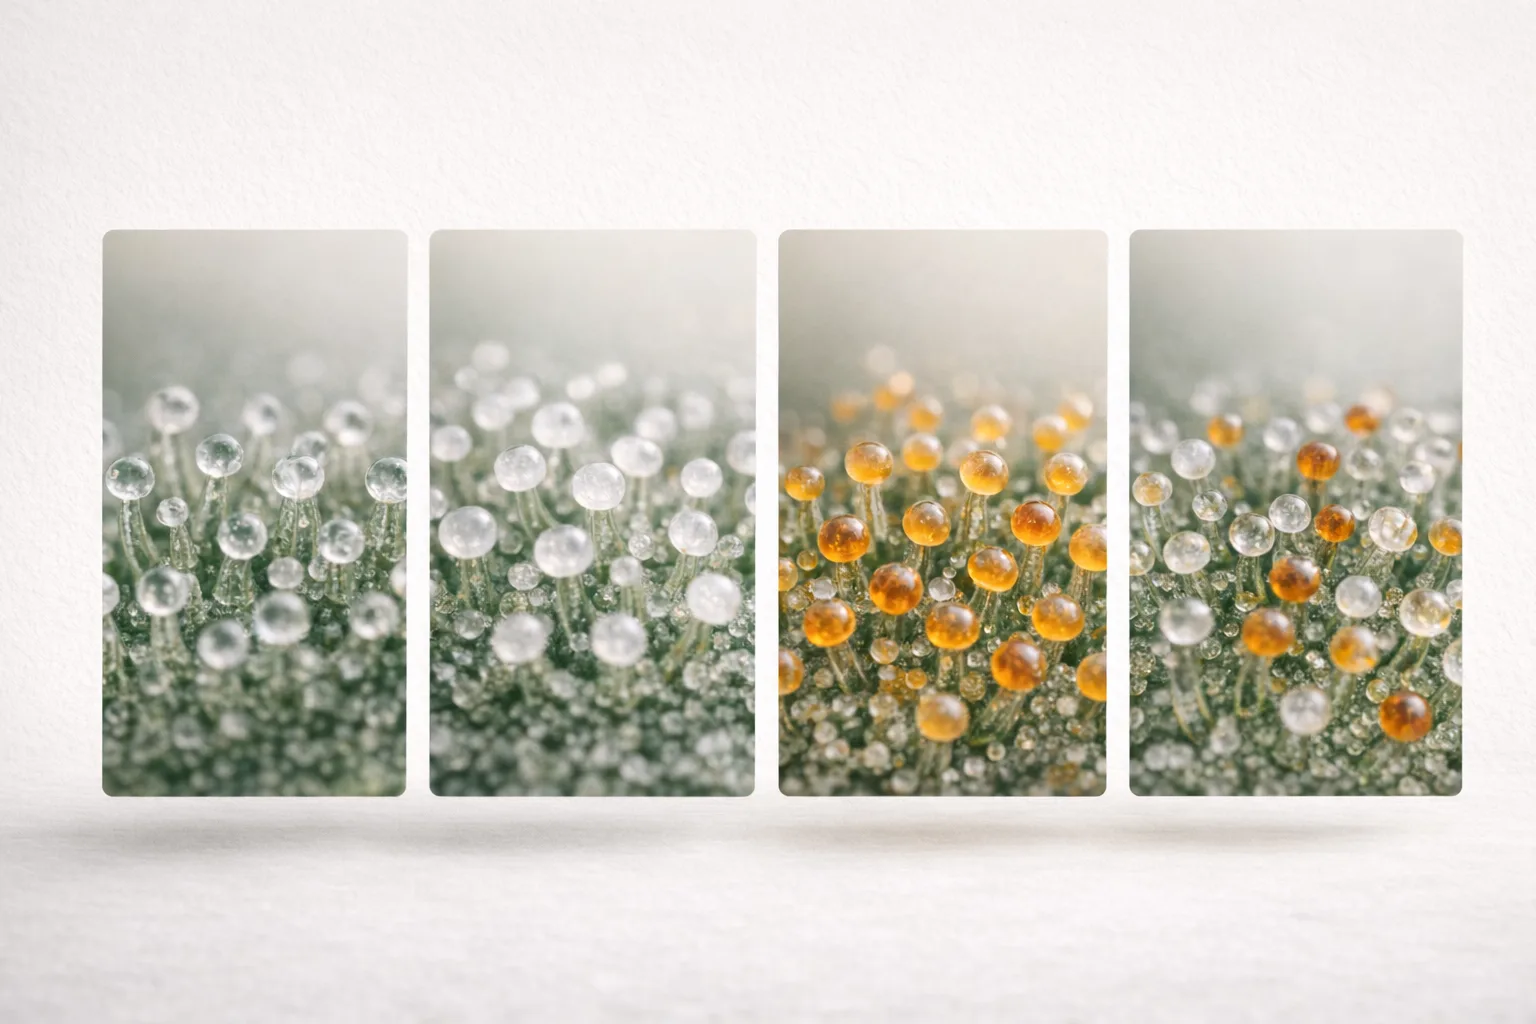
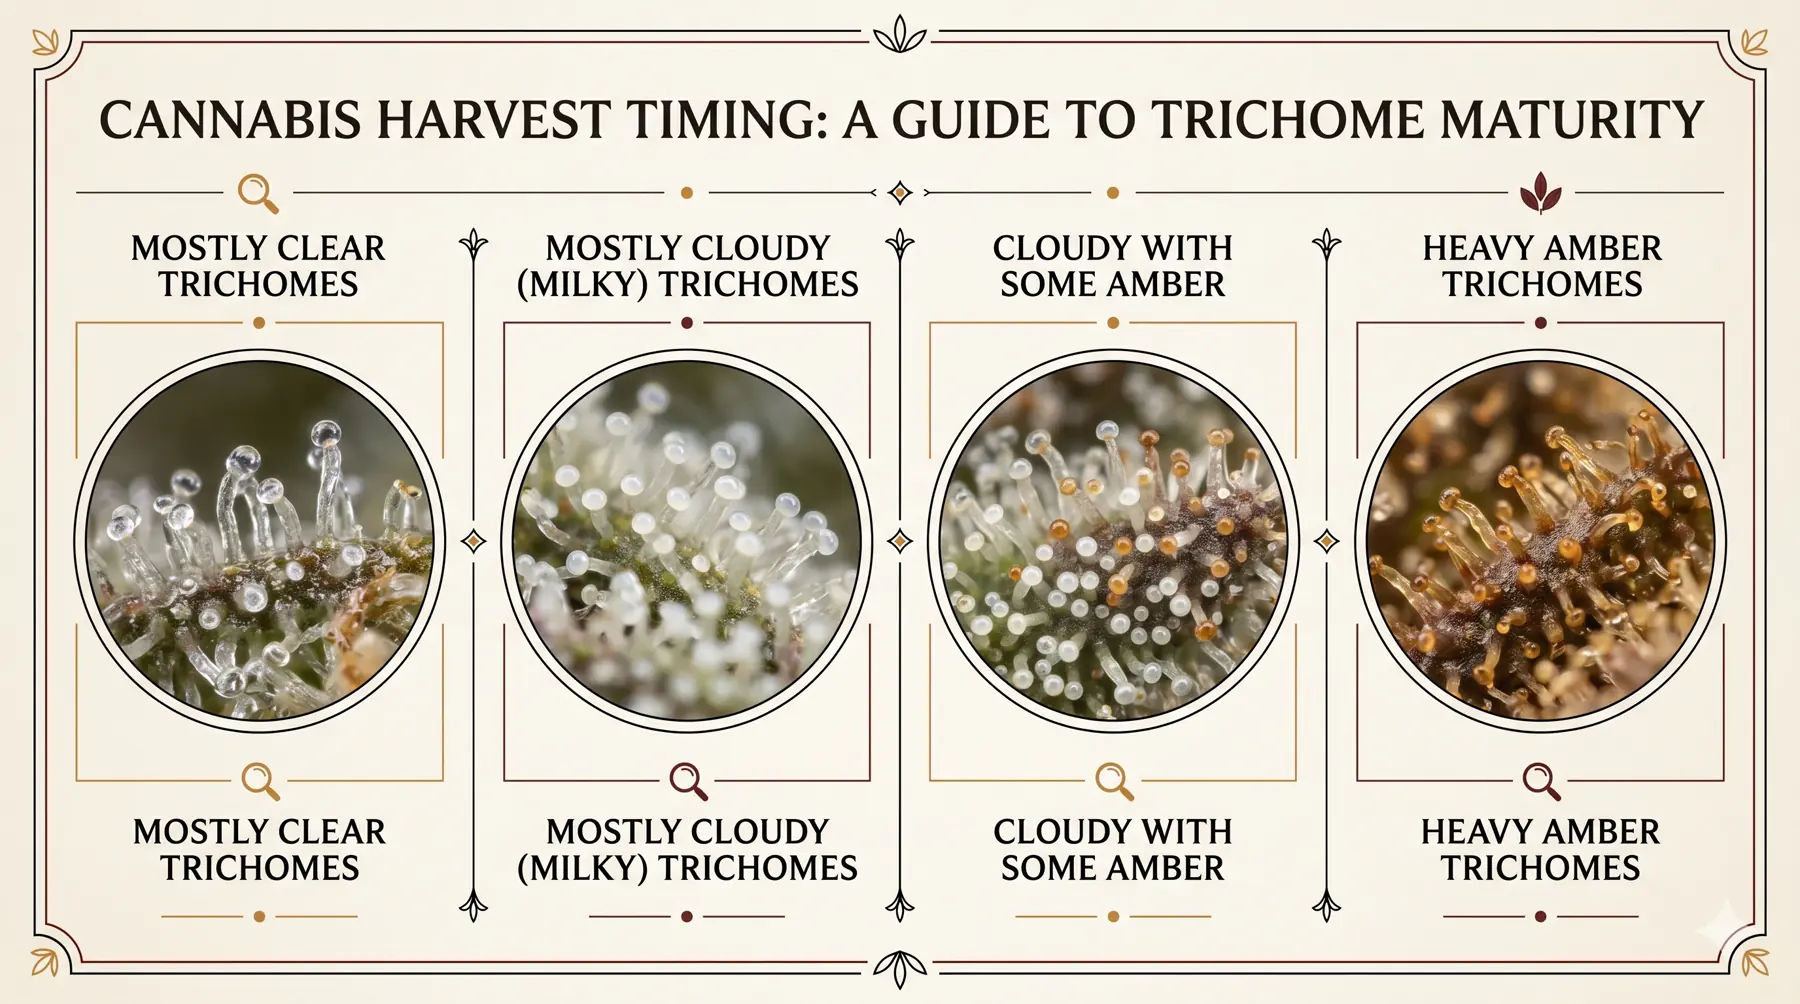
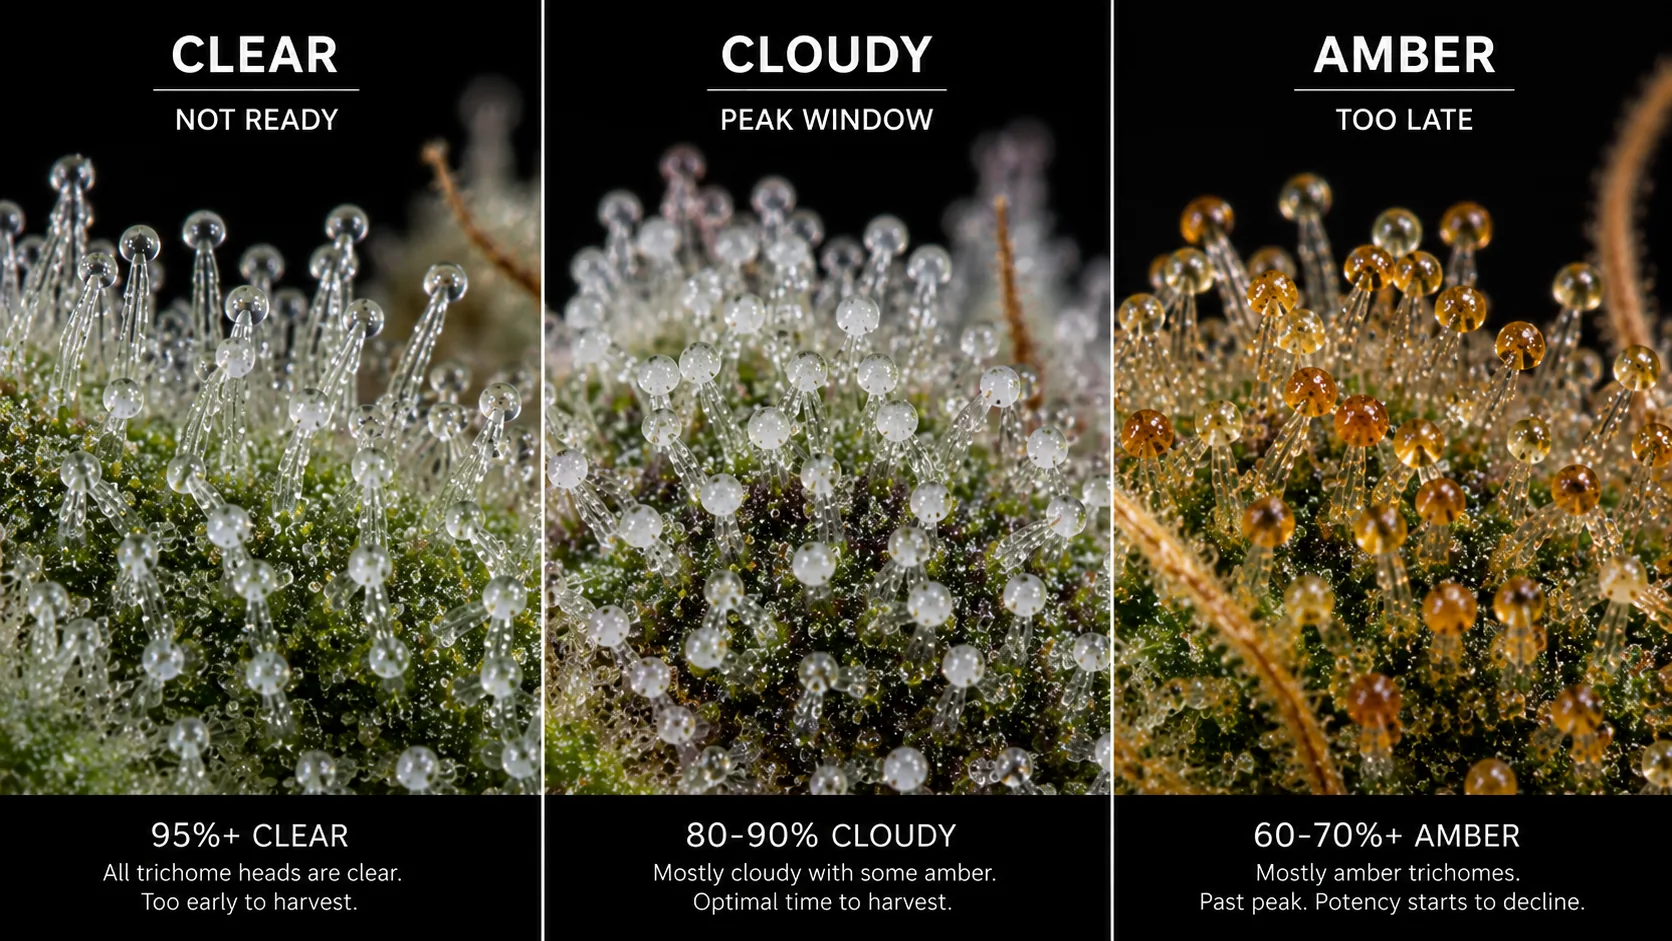
Read the frames here for ratio rather than for individual heads. There is always one gorgeous amber trichome somewhere on a plant that is nowhere near finished, and it is not evidence of anything. What you are matching against is the overall mix across a flower surface: mostly transparent, mostly milky, or milky with a real amber presence. Get in the habit of asking what proportion you are seeing before you ask what colour is present.
Open this page at two moments. The first is early, before you need it, purely to learn what the states look like when nothing is at stake — it is much easier to recognise cloudy when you are not also deciding whether to cut. The second is on inspection day, with the loupe in one hand and the phone in the other, comparing directly. Every tile links back to the guide it came from; the full harvest decision is where the reading turns into a call.
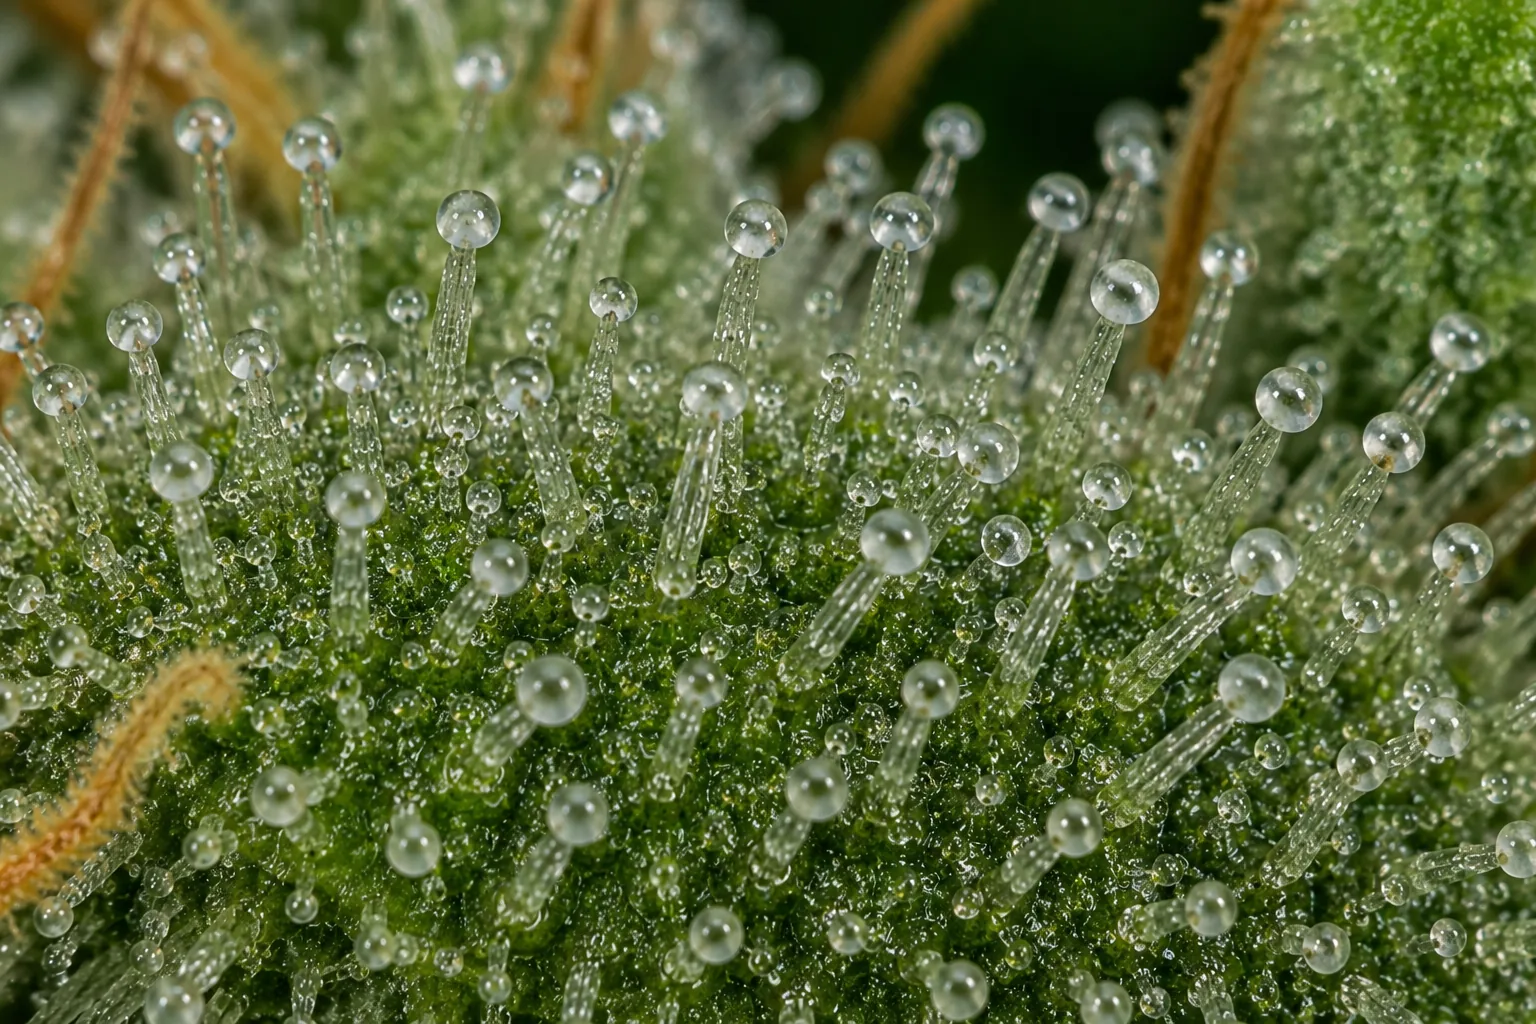
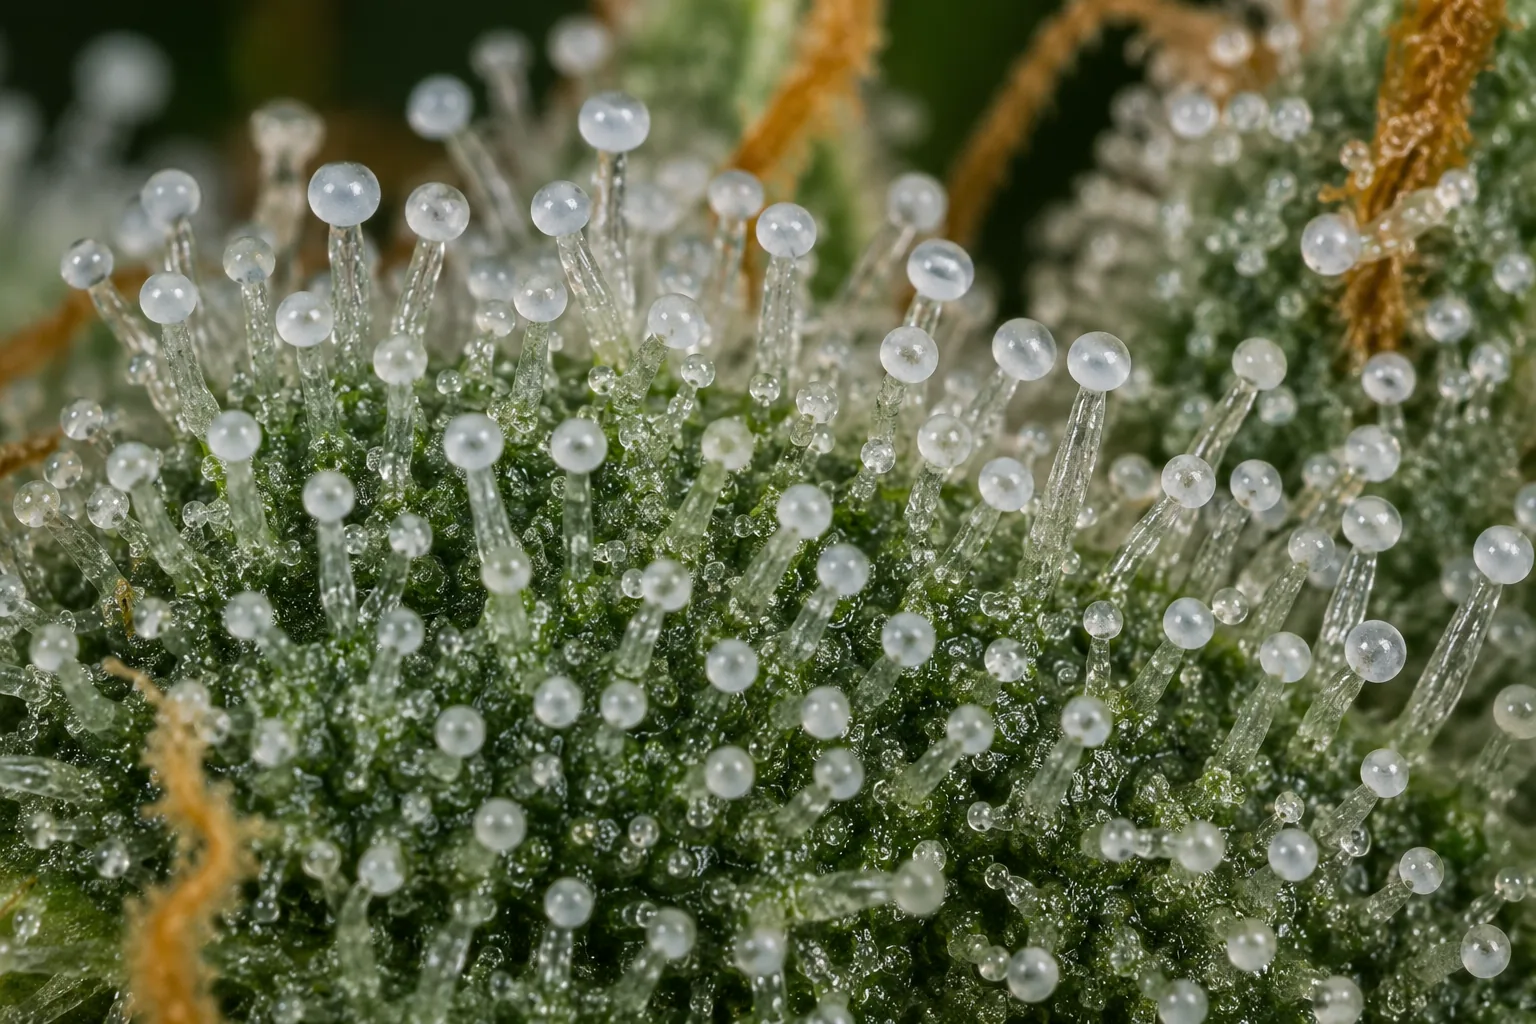
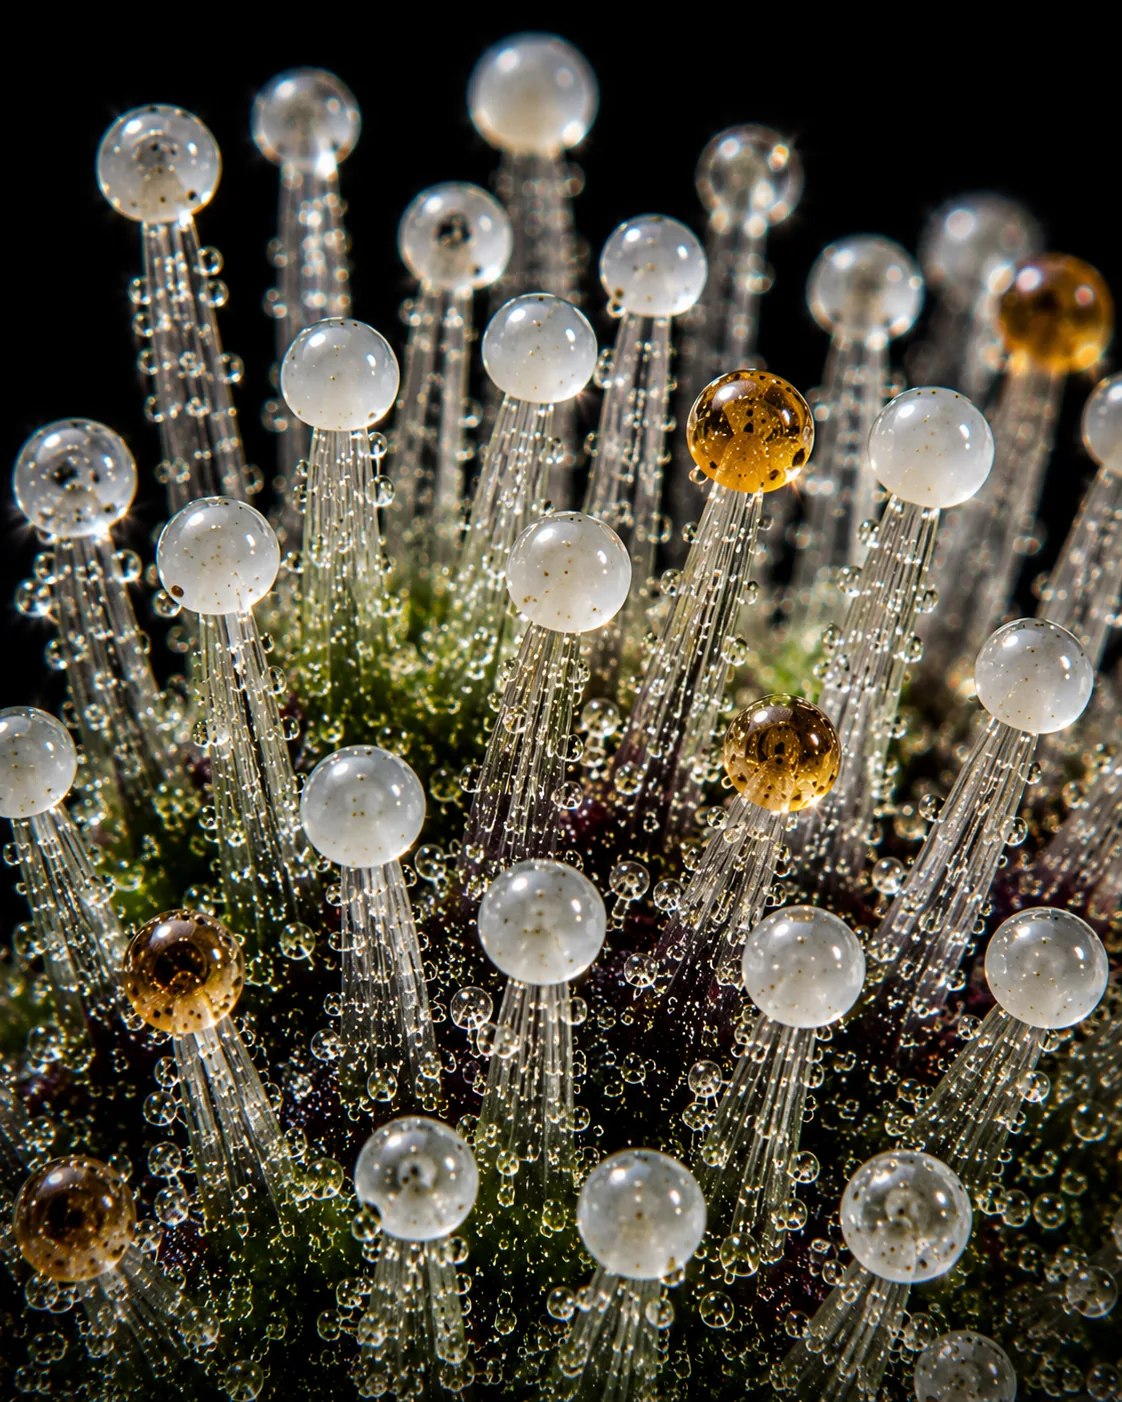
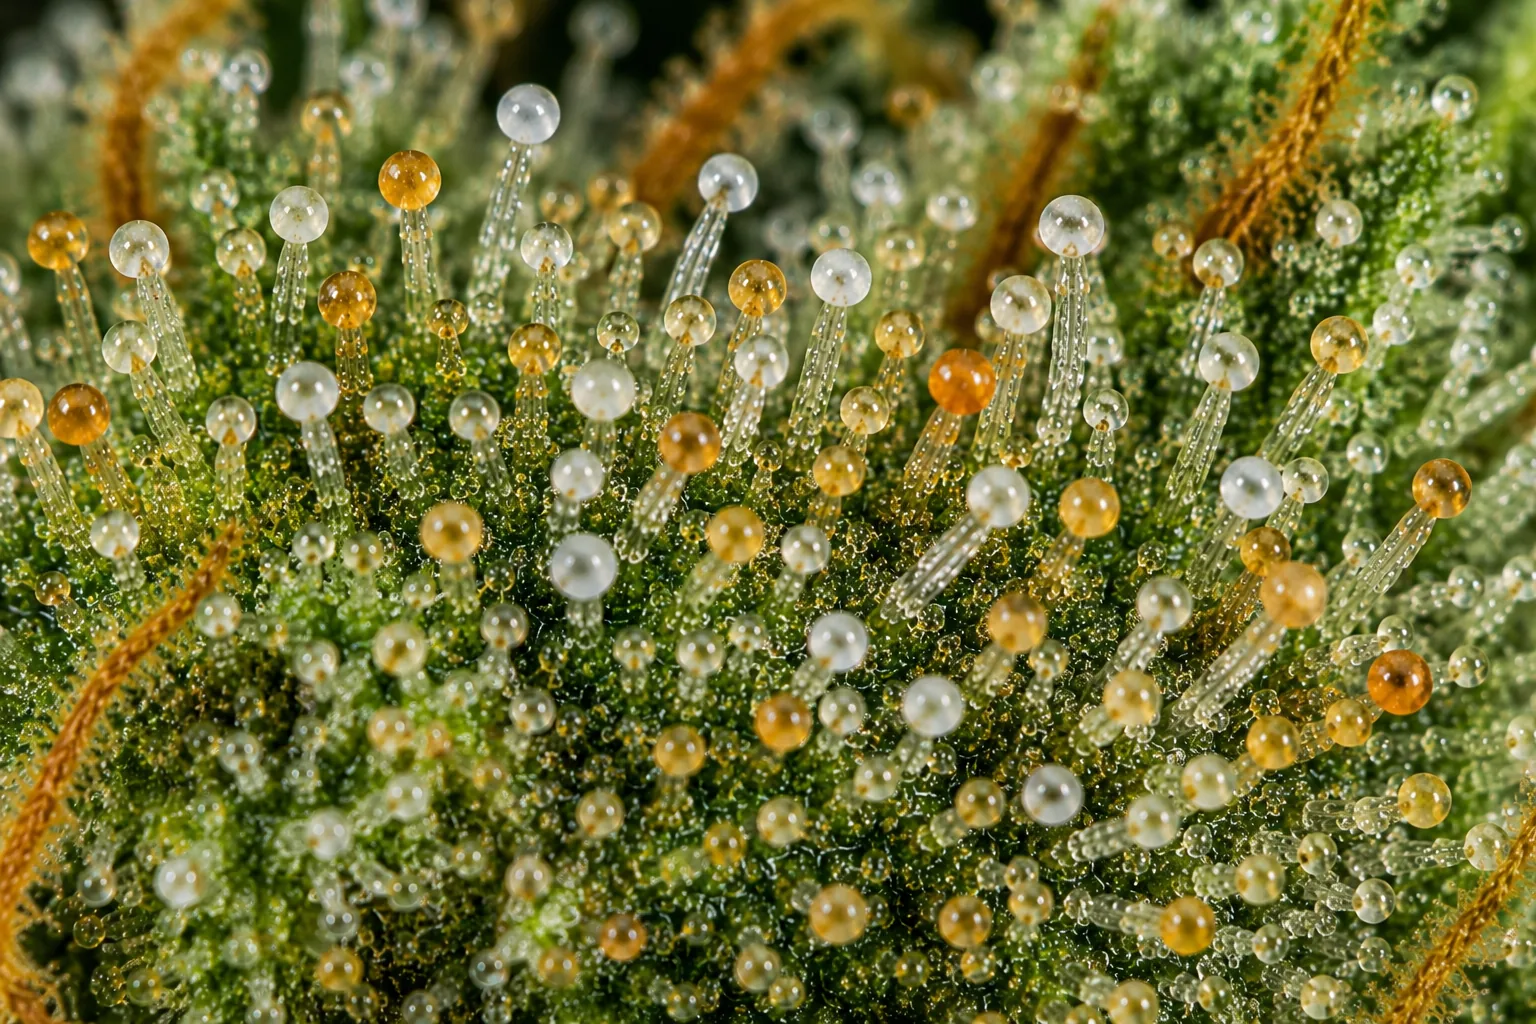
Clear, cloudy, amber, and the magnified views you read under a loupe.
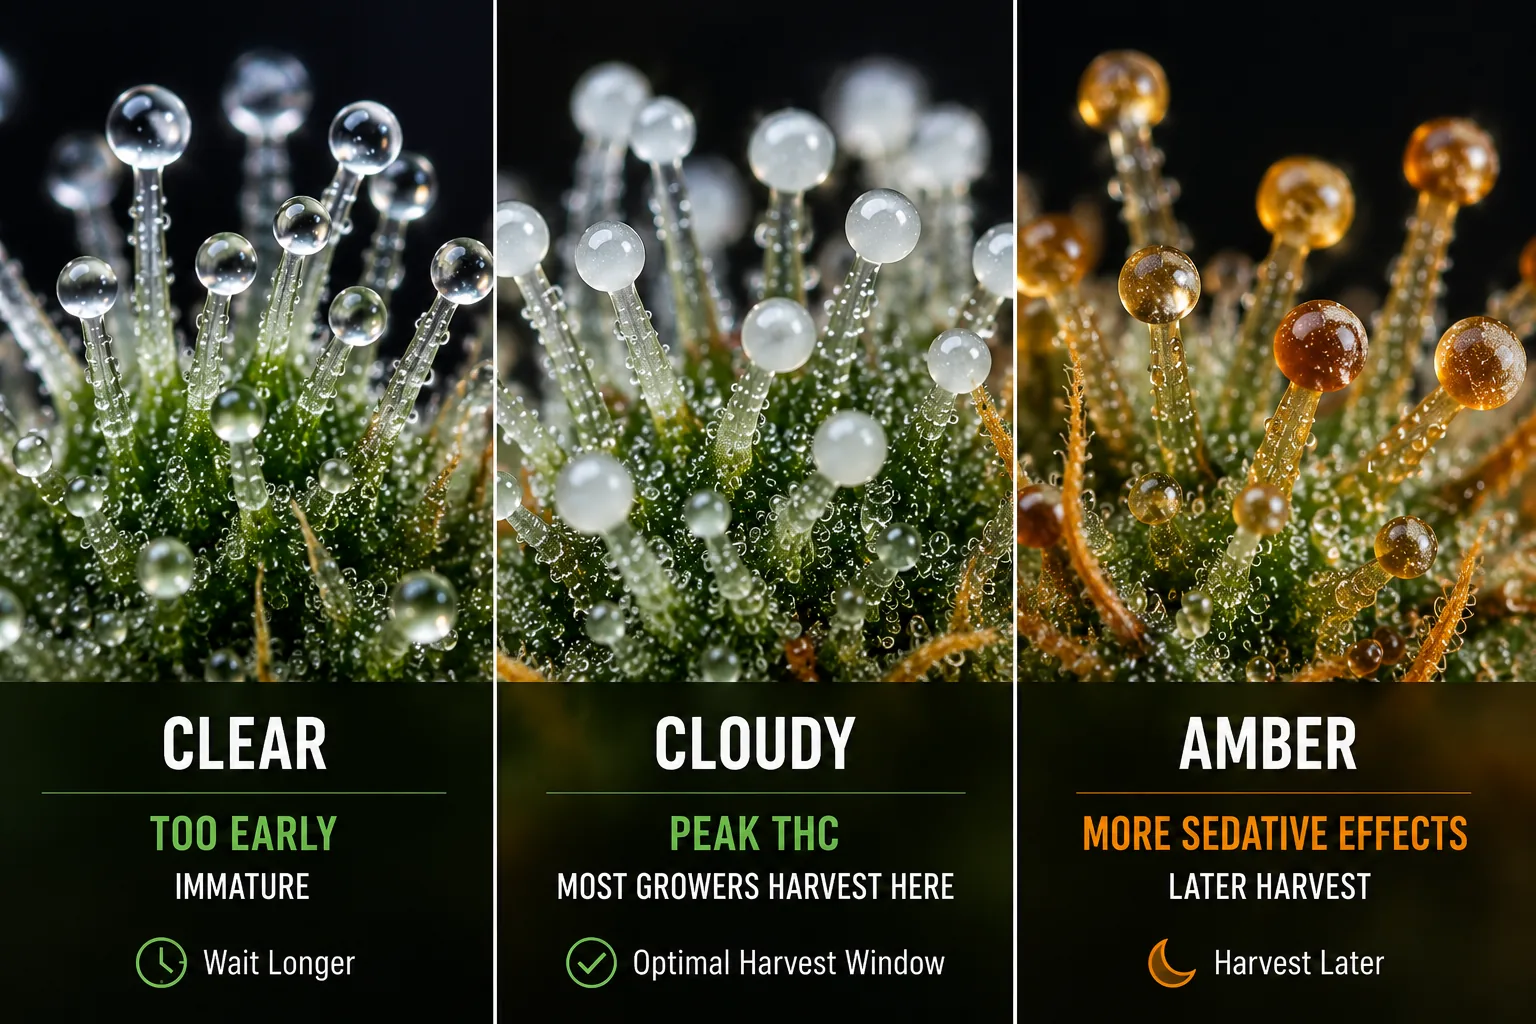
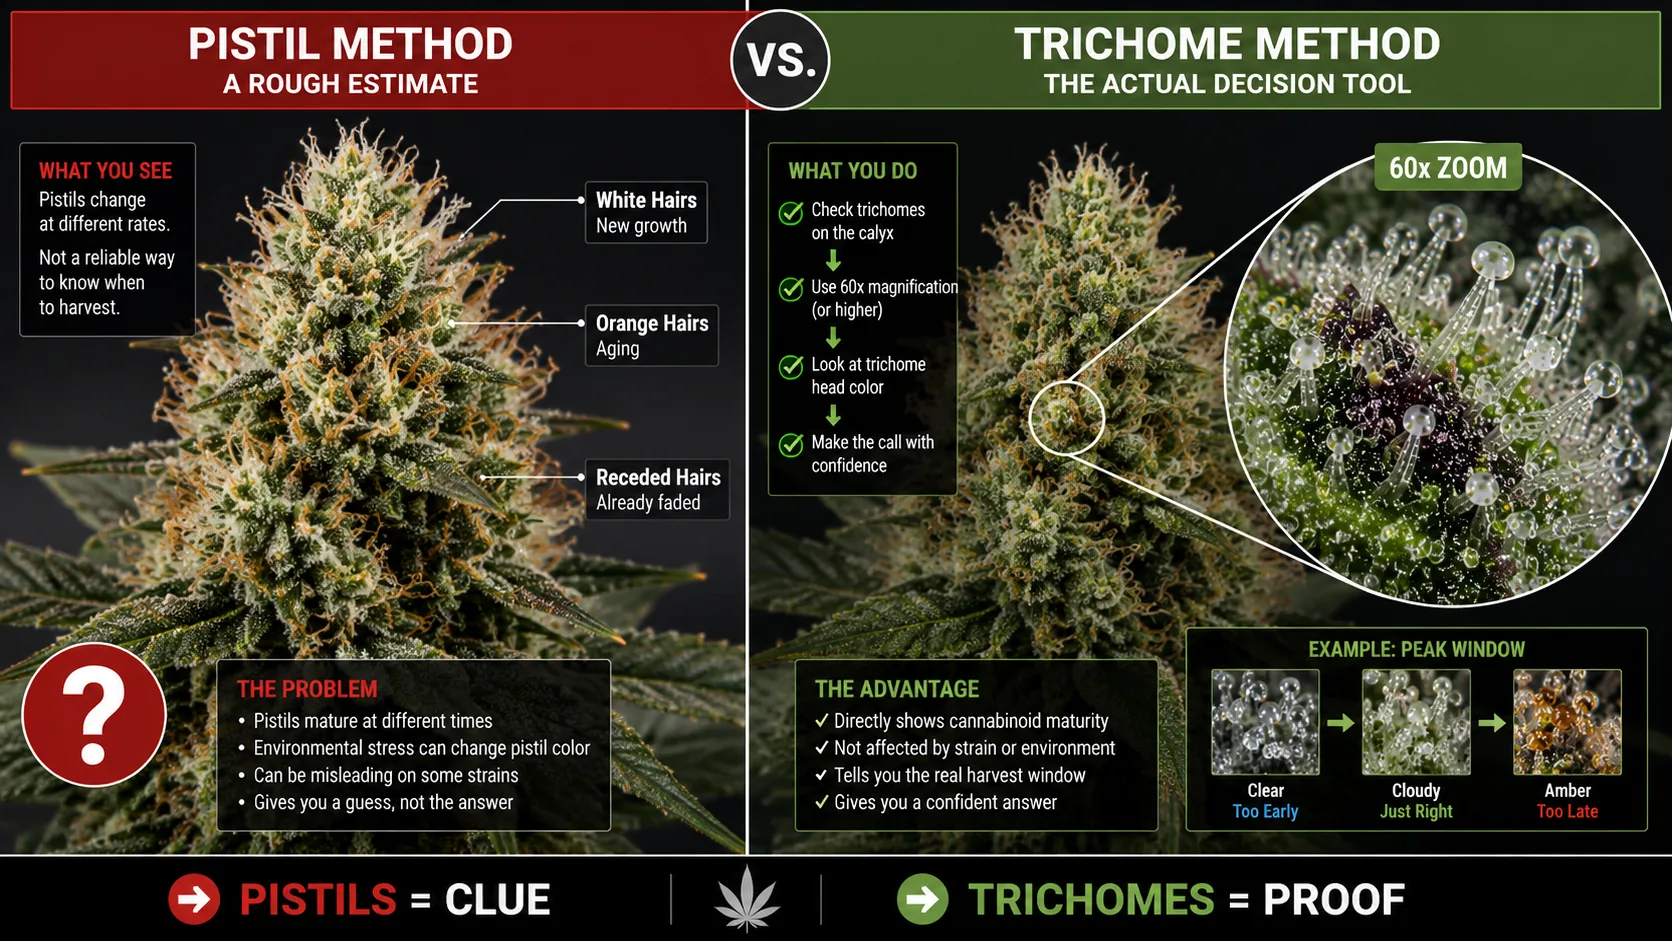
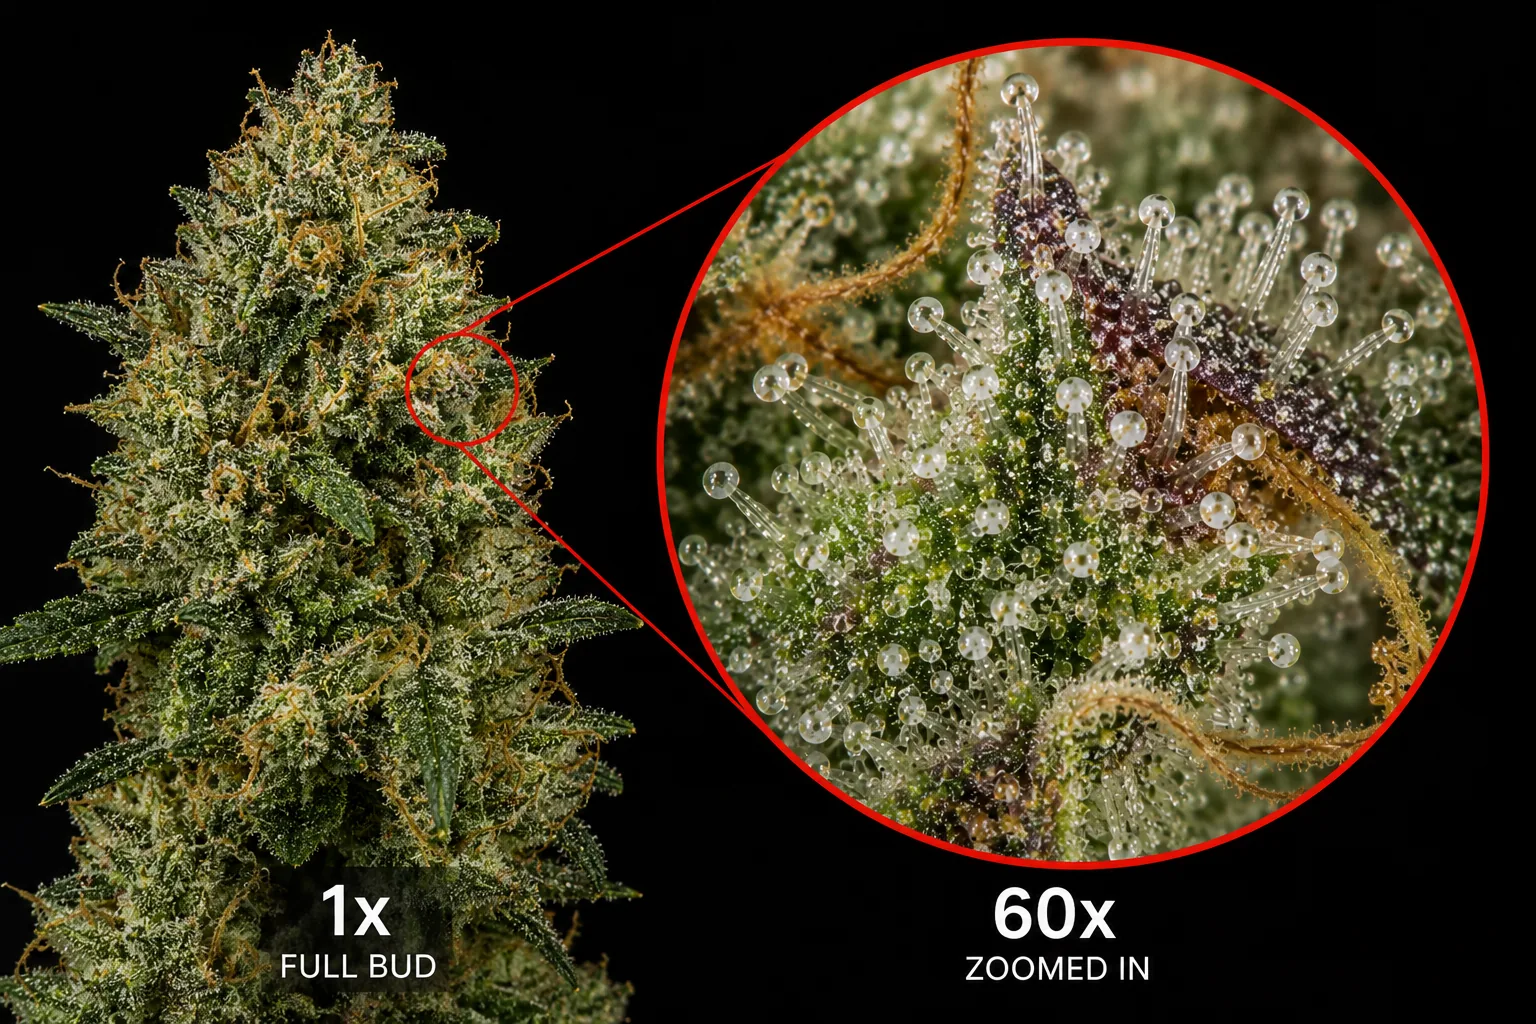
These are the reference states, and the differences between them are smaller in real life than they look side by side here. Clear heads are glassy and transparent, and you can see through them. Cloudy heads are milky and opaque, and the light stops at the surface. Amber heads are golden and honey-toned. The transition from clear to cloudy is the one worth studying hardest, because it is gradual, it happens across a whole flower rather than all at once, and it is the boundary most growers misjudge. The mixed frame — mostly milky with some amber — is what a real ready plant tends to look like, rather than any of the single-state macros above it.
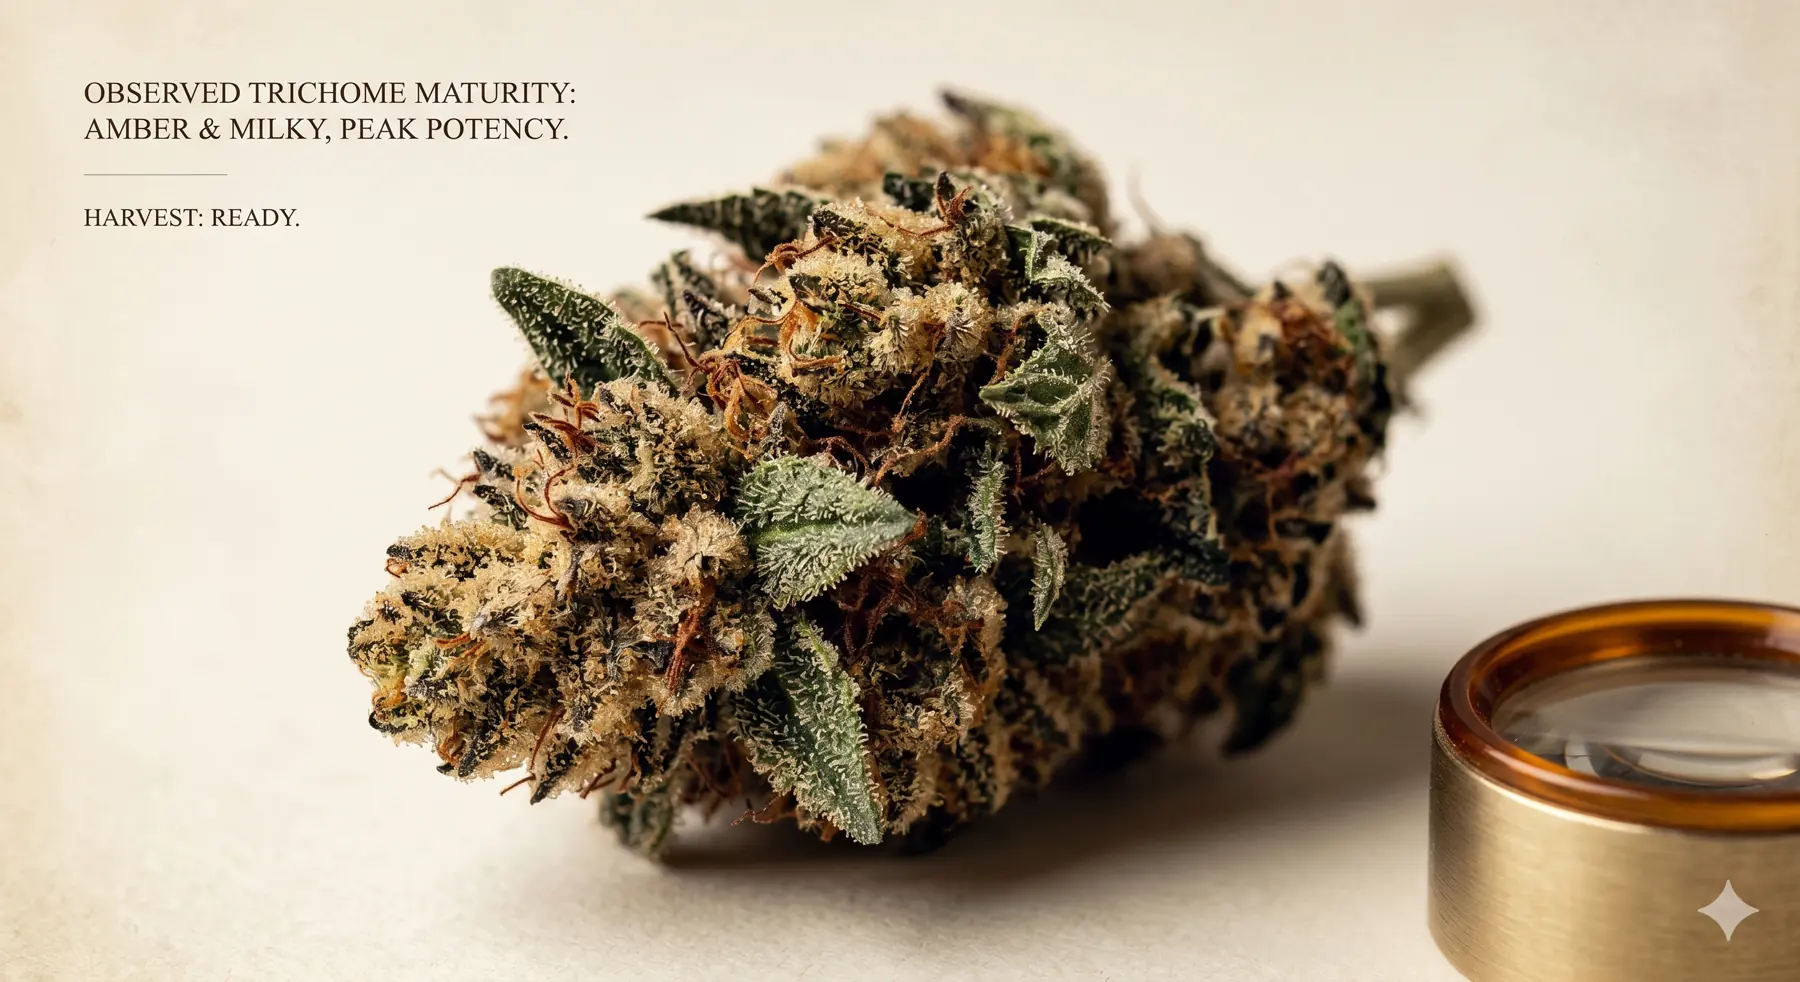
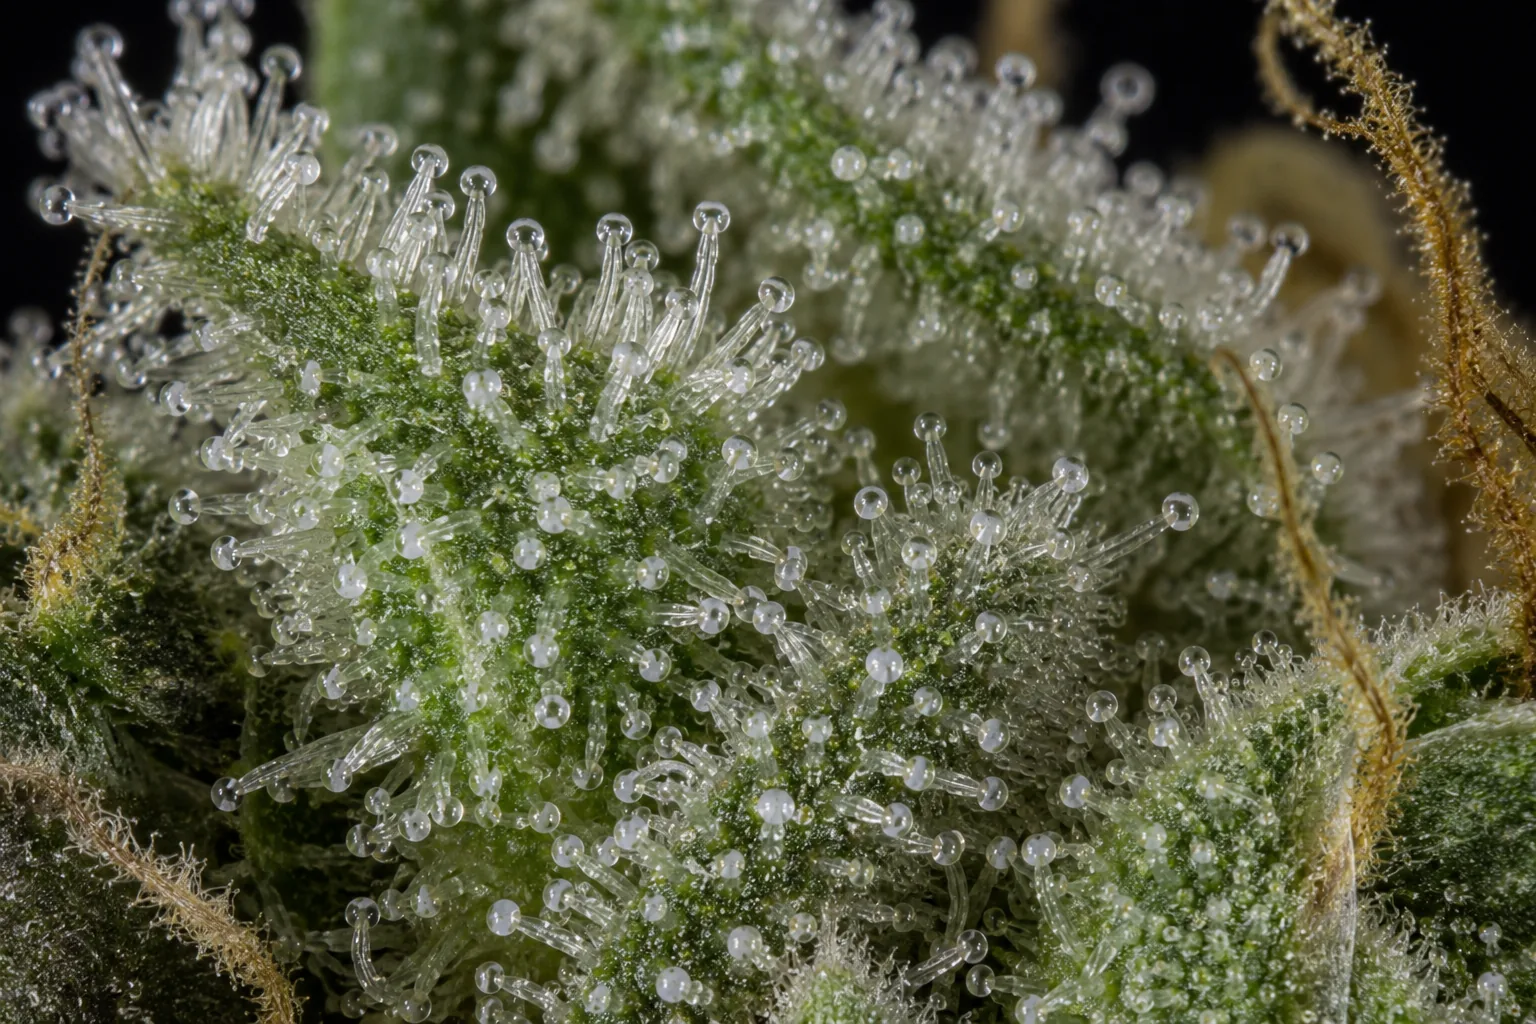
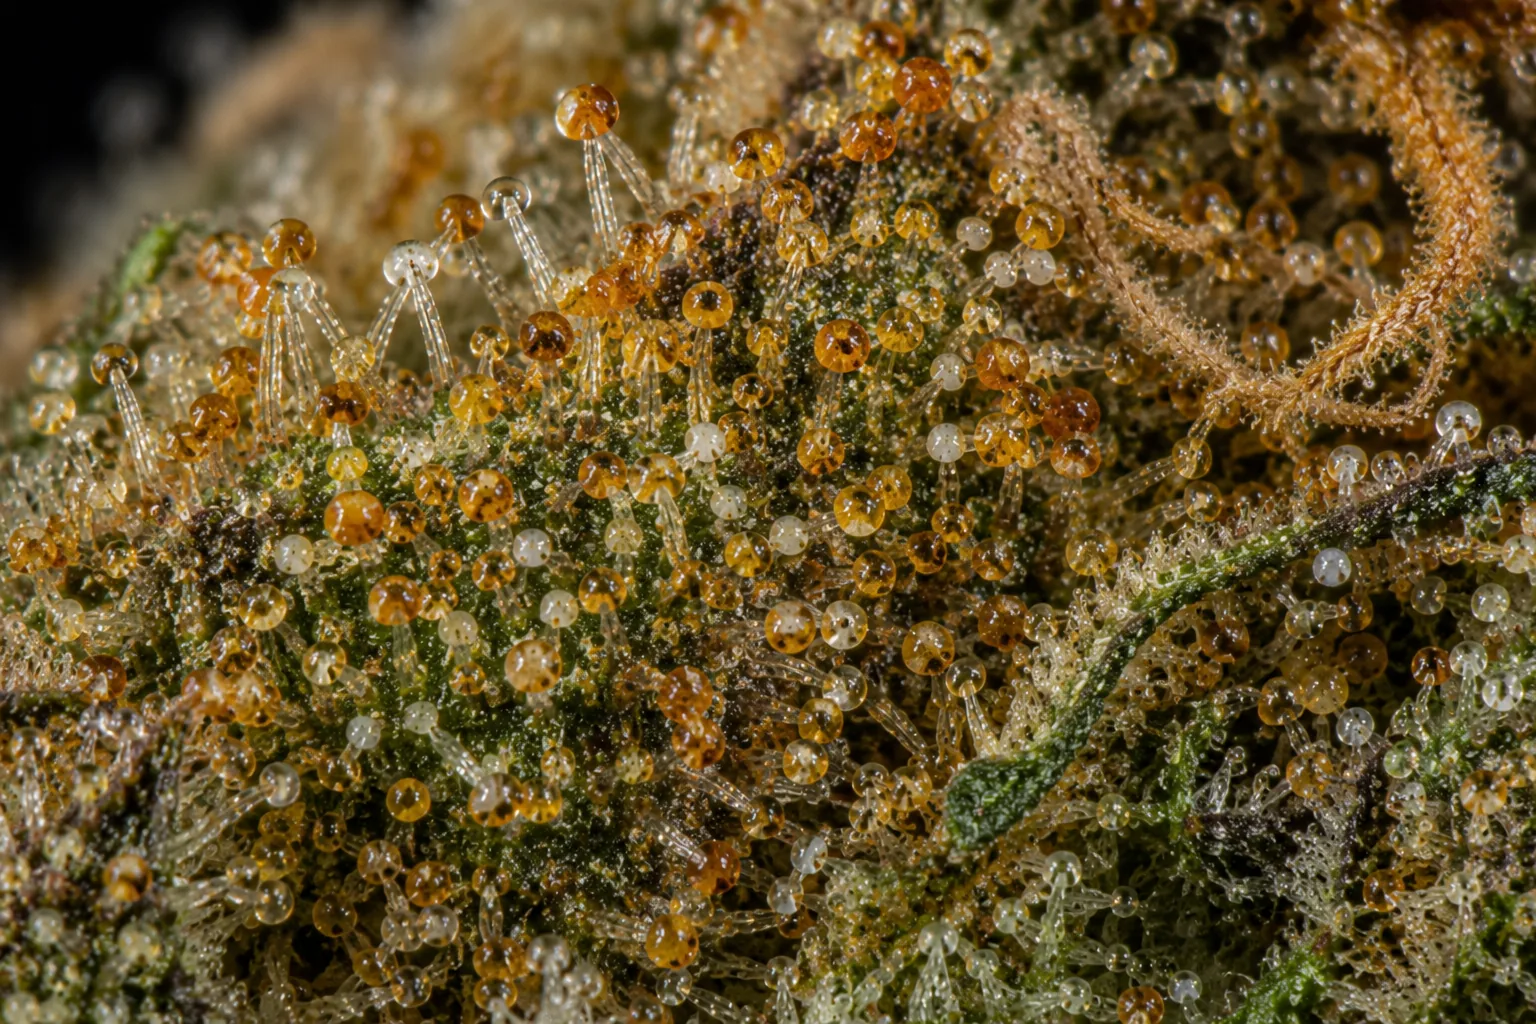
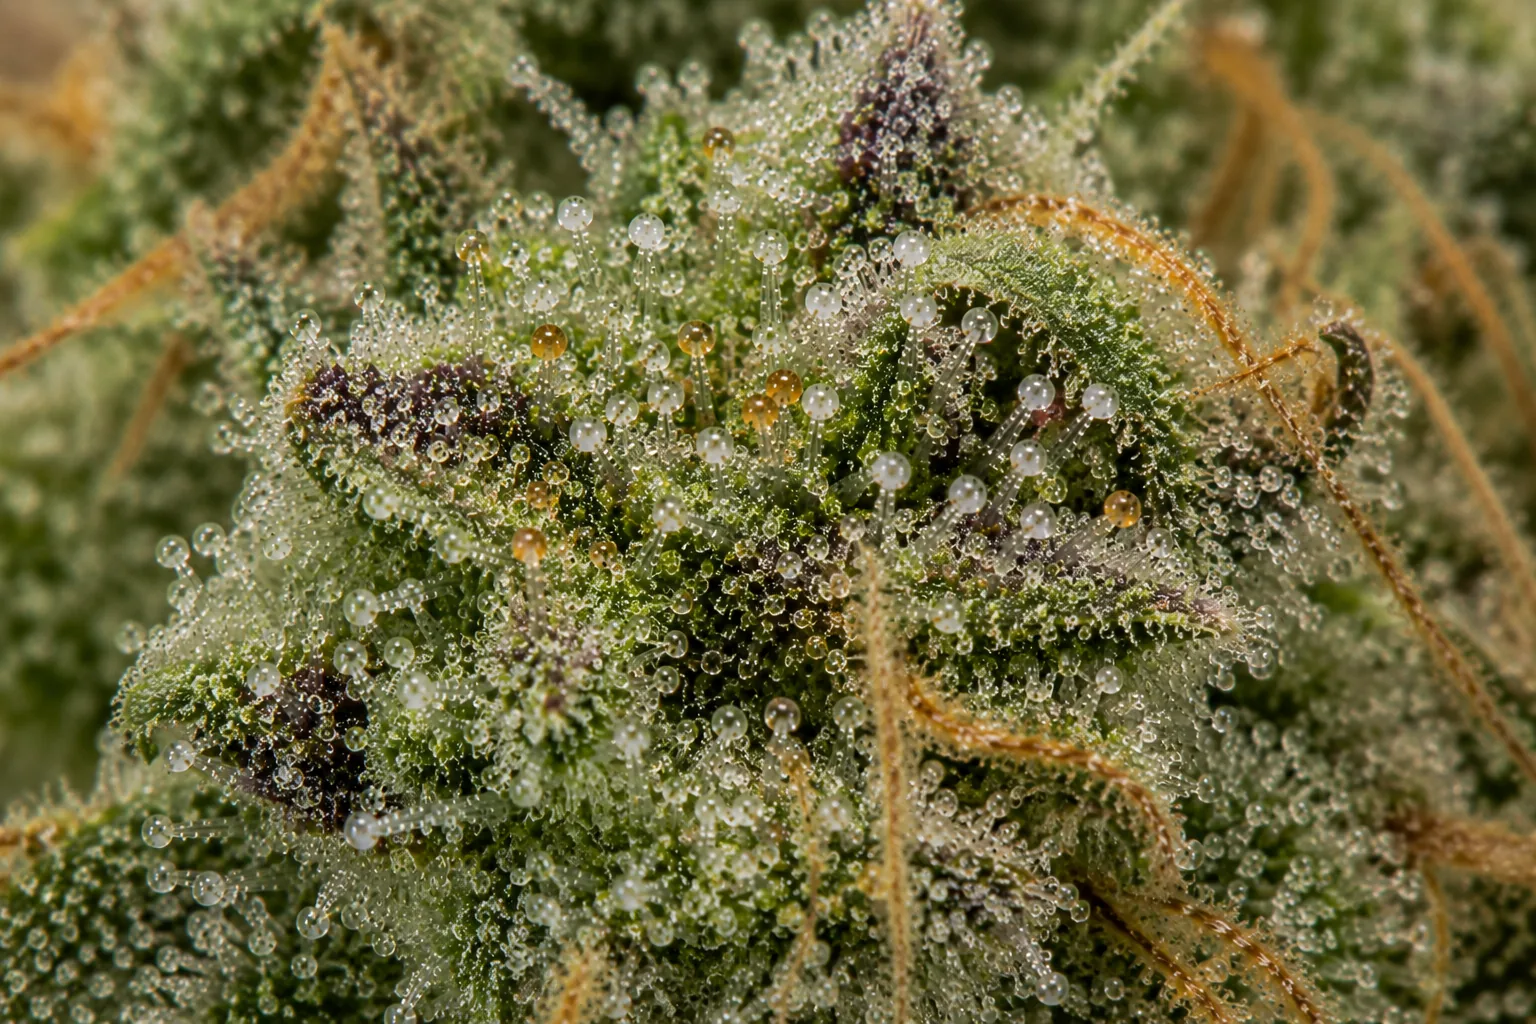
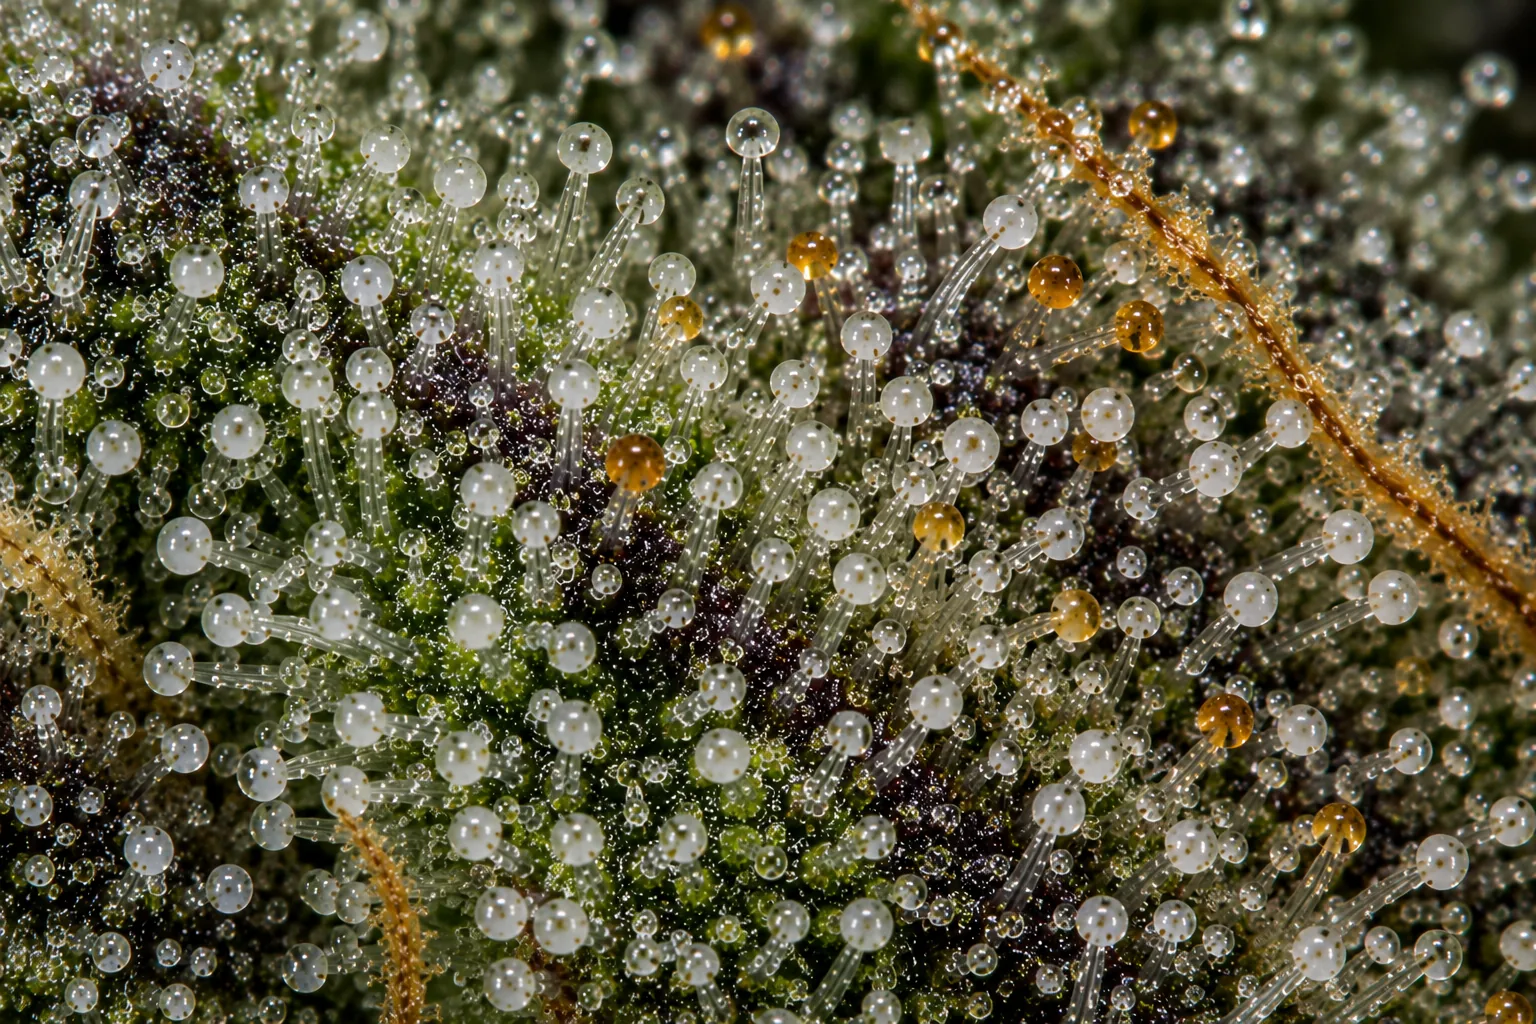
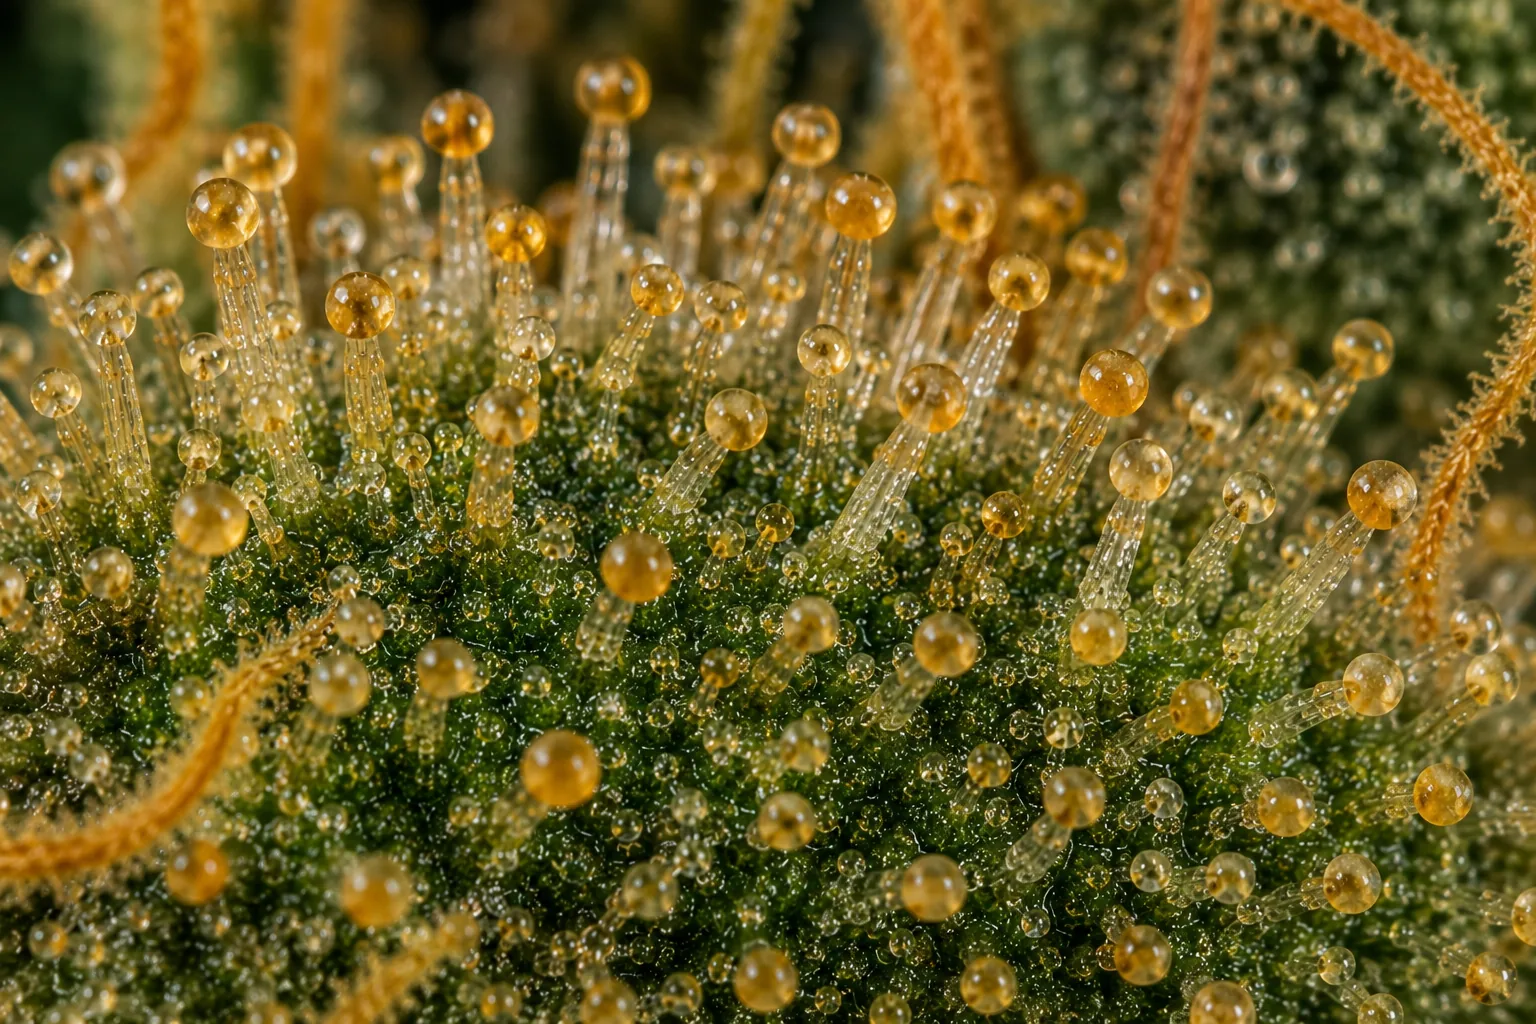
Labeled infographics that turn trichome colour into a harvest decision.
The macros above show you what you are looking at. These boards tell you what to do about it. They collapse the same three states into a decision — mostly clear means wait, mostly cloudy is the active window, and a growing amber share means a later and heavier finish — and several of them lay the stages out in sequence so you can see where your plant sits on the run rather than just naming a state. The vertical card is built for a phone screen and is the one to save if you only save one. Use these to reach a decision, but reach it from what you saw under magnification across several buds, not from the chart alone.
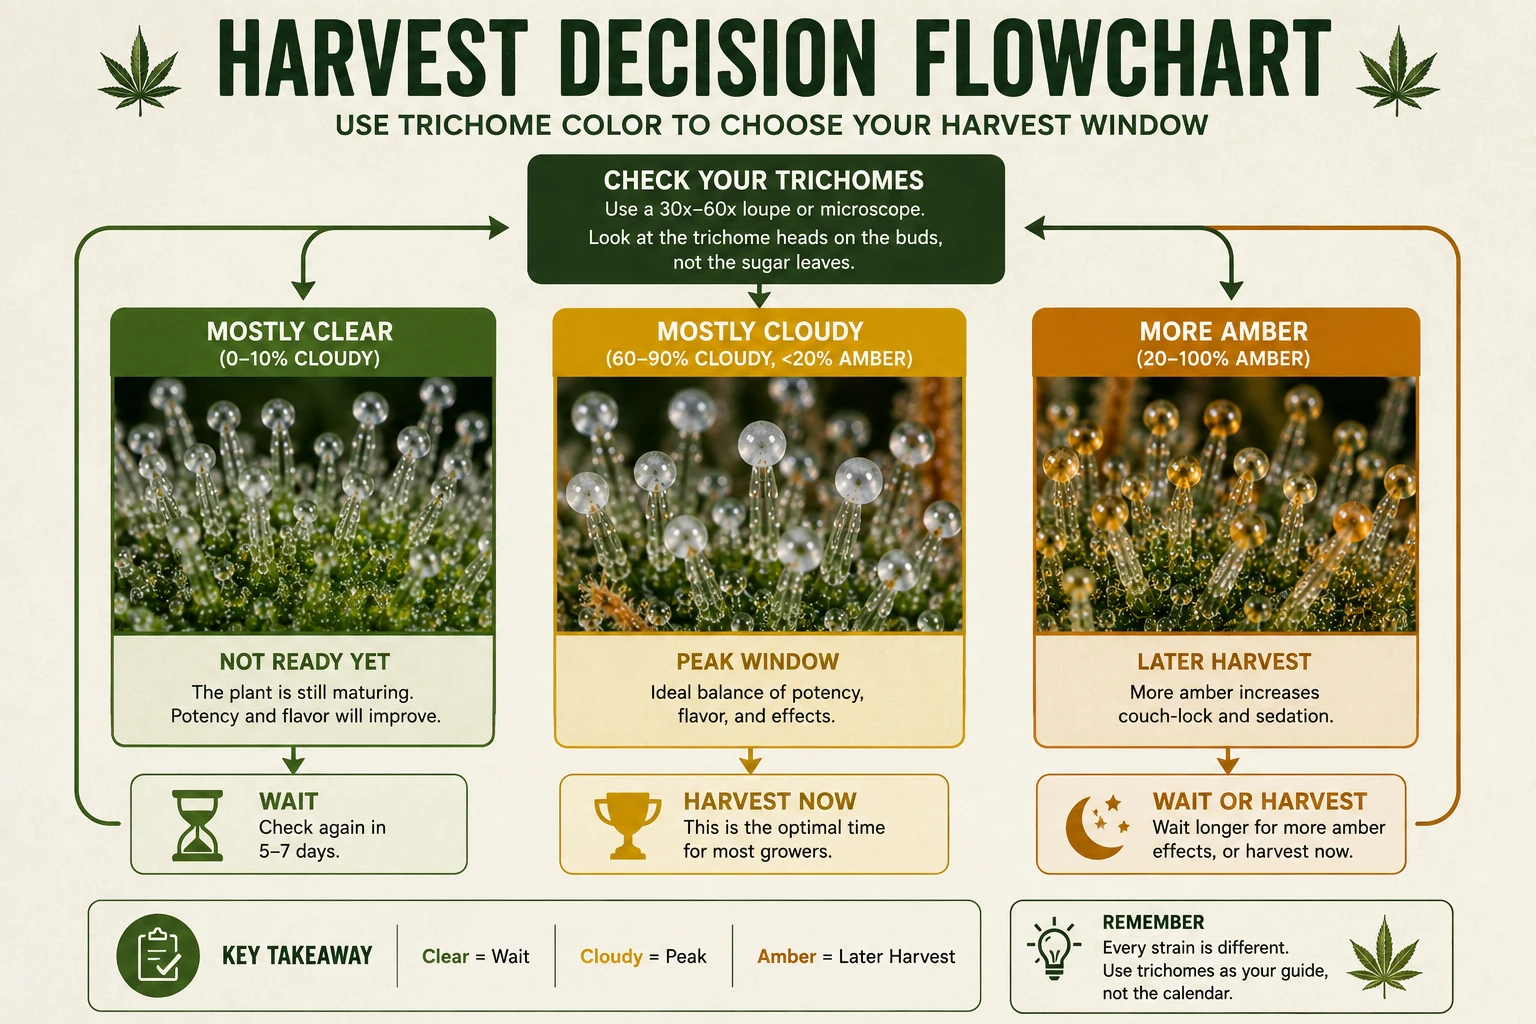
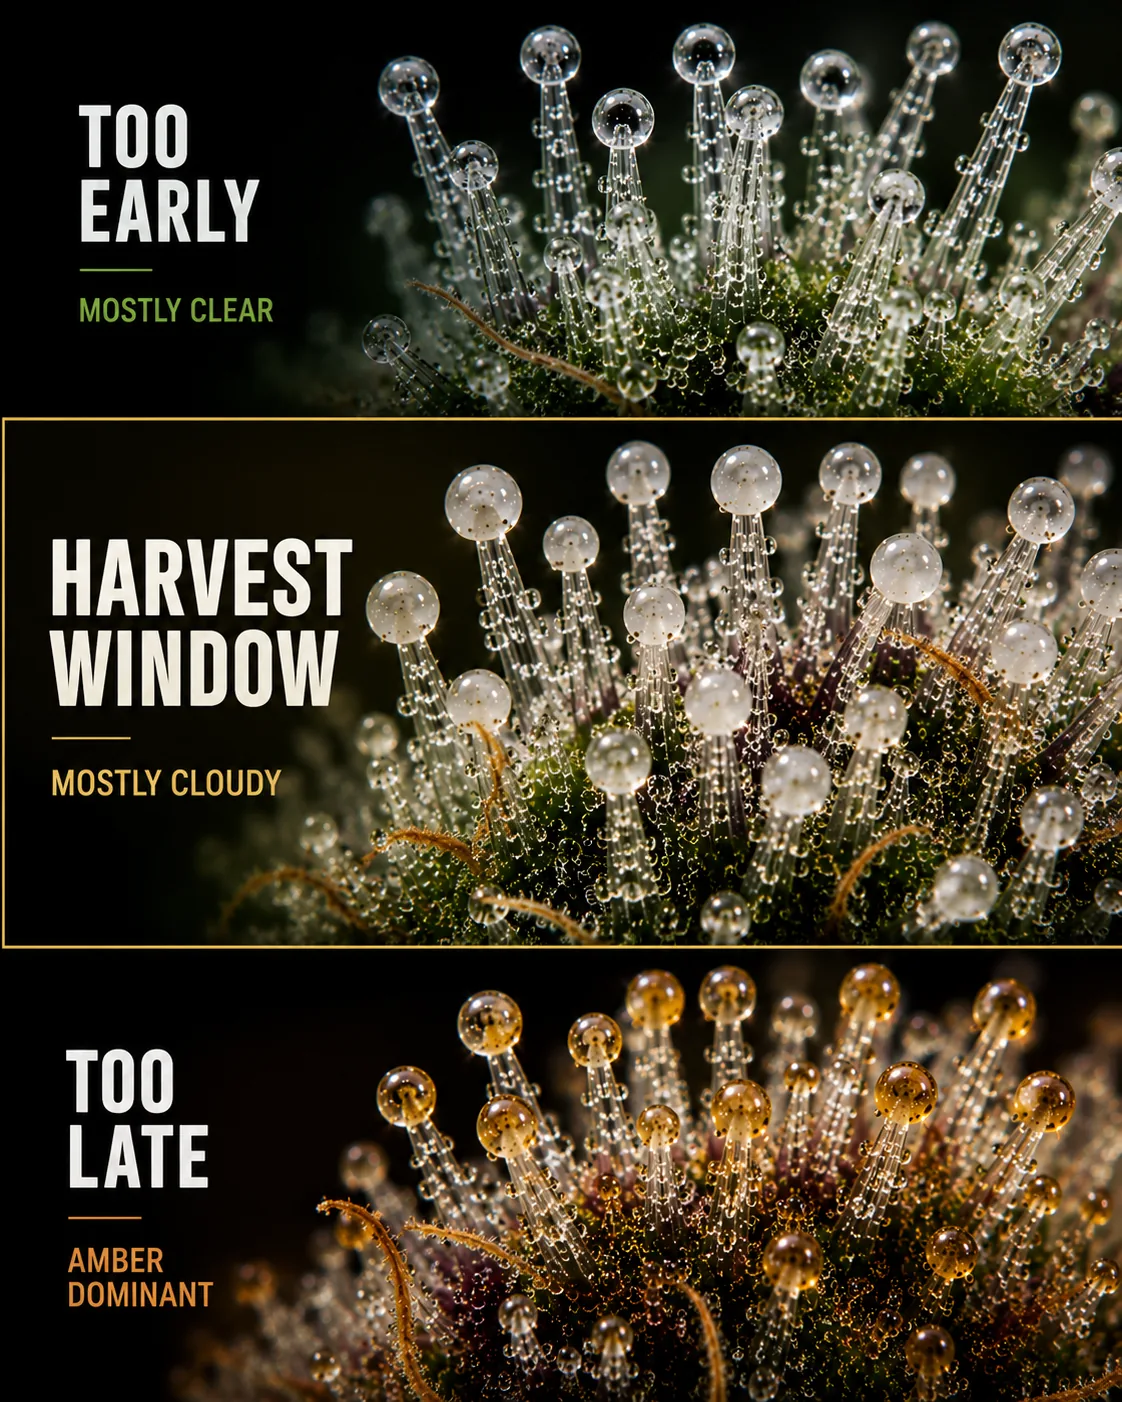
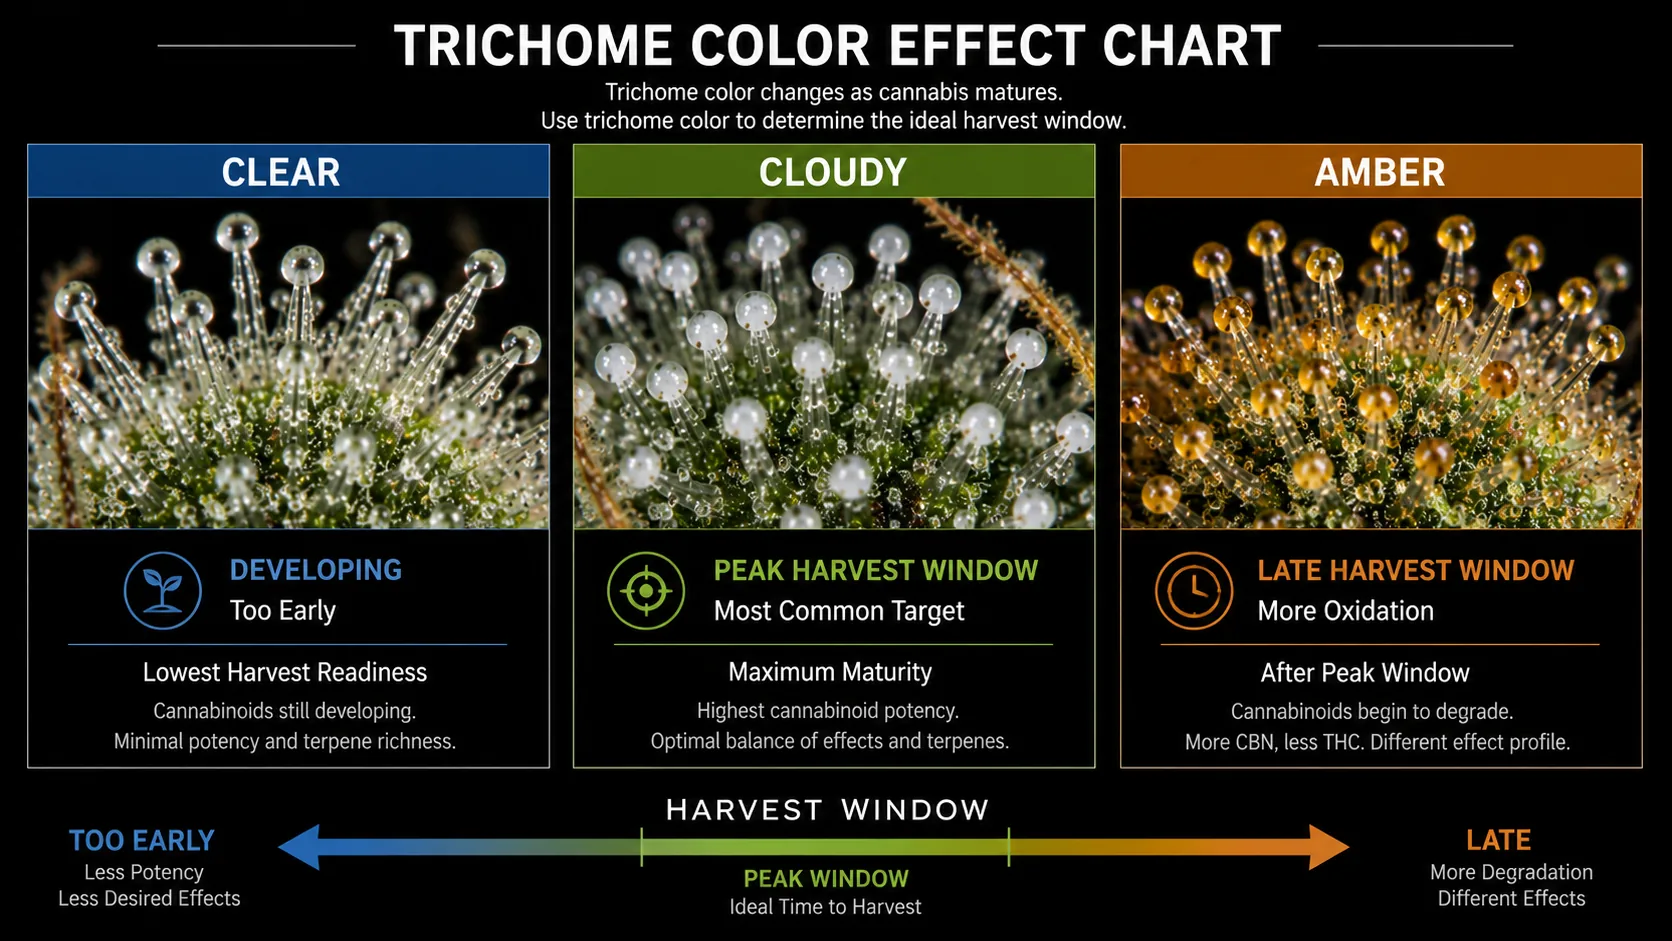
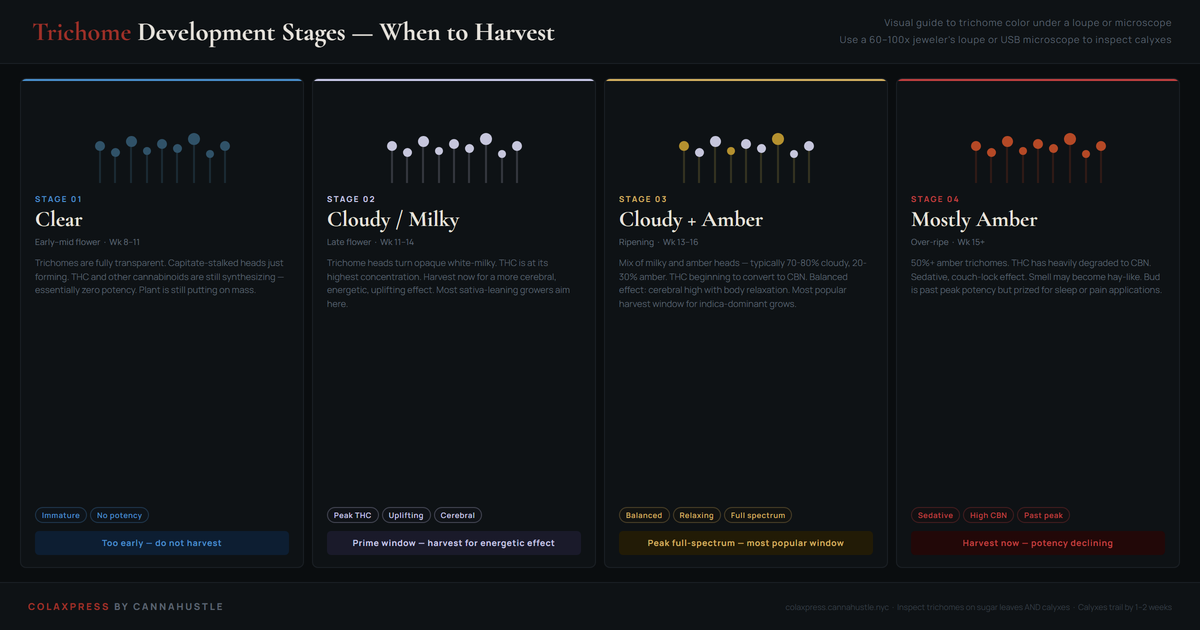
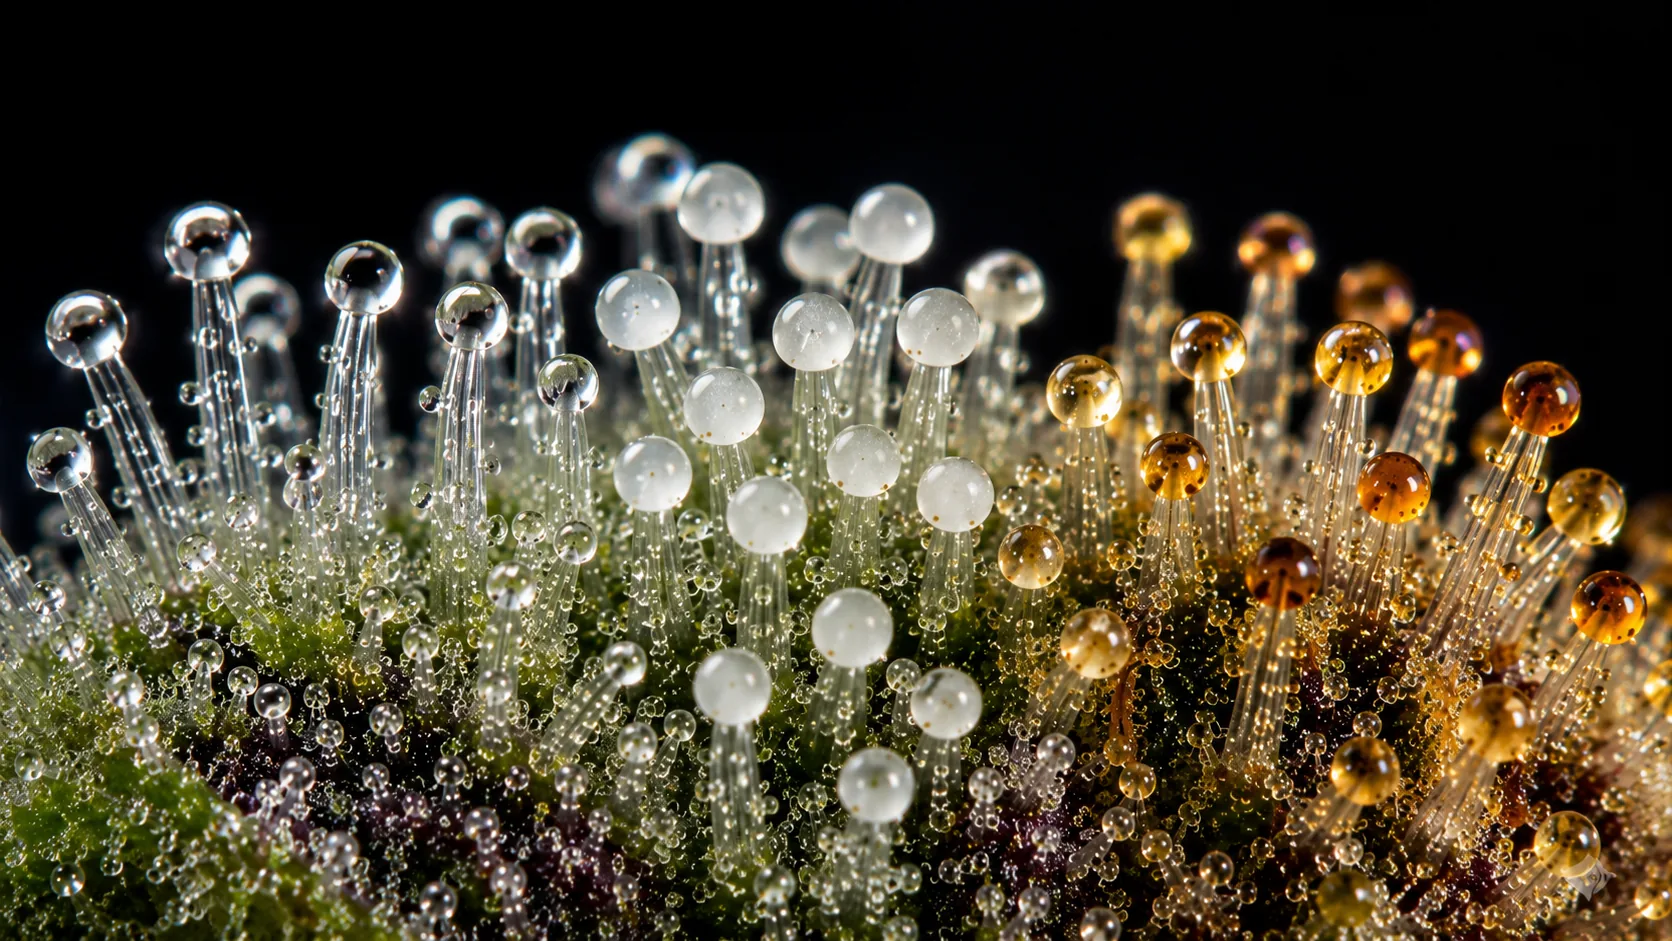
The tools, the magnification, and where on the plant to look.
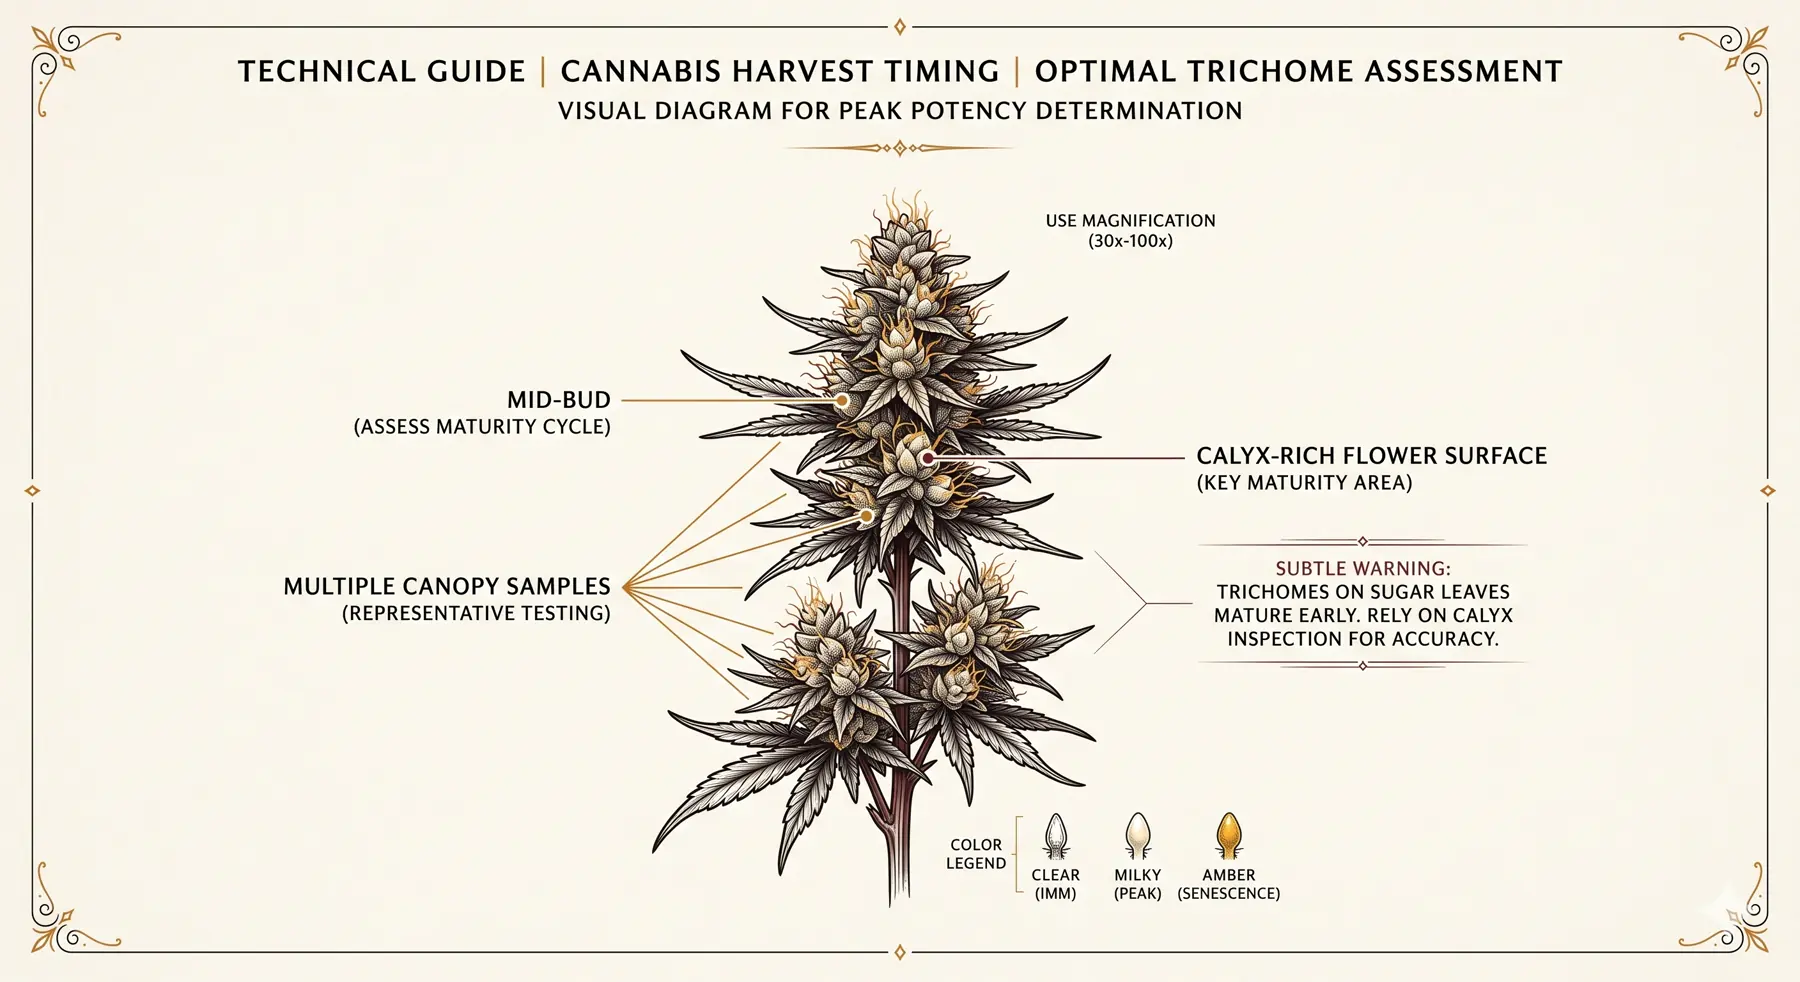
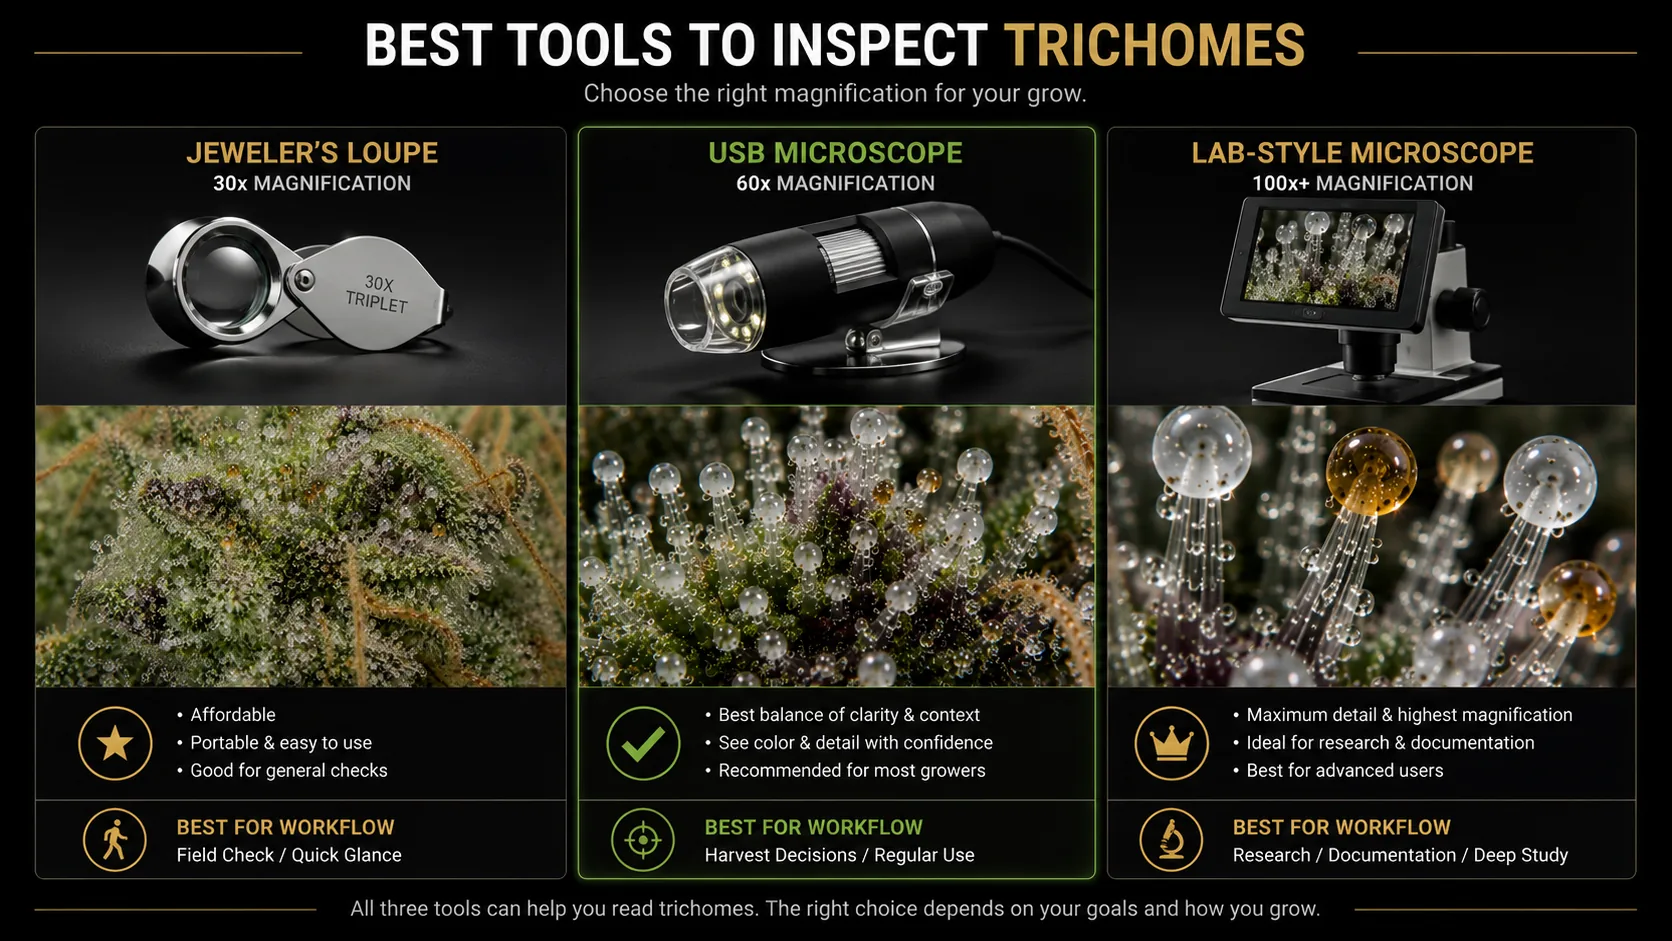
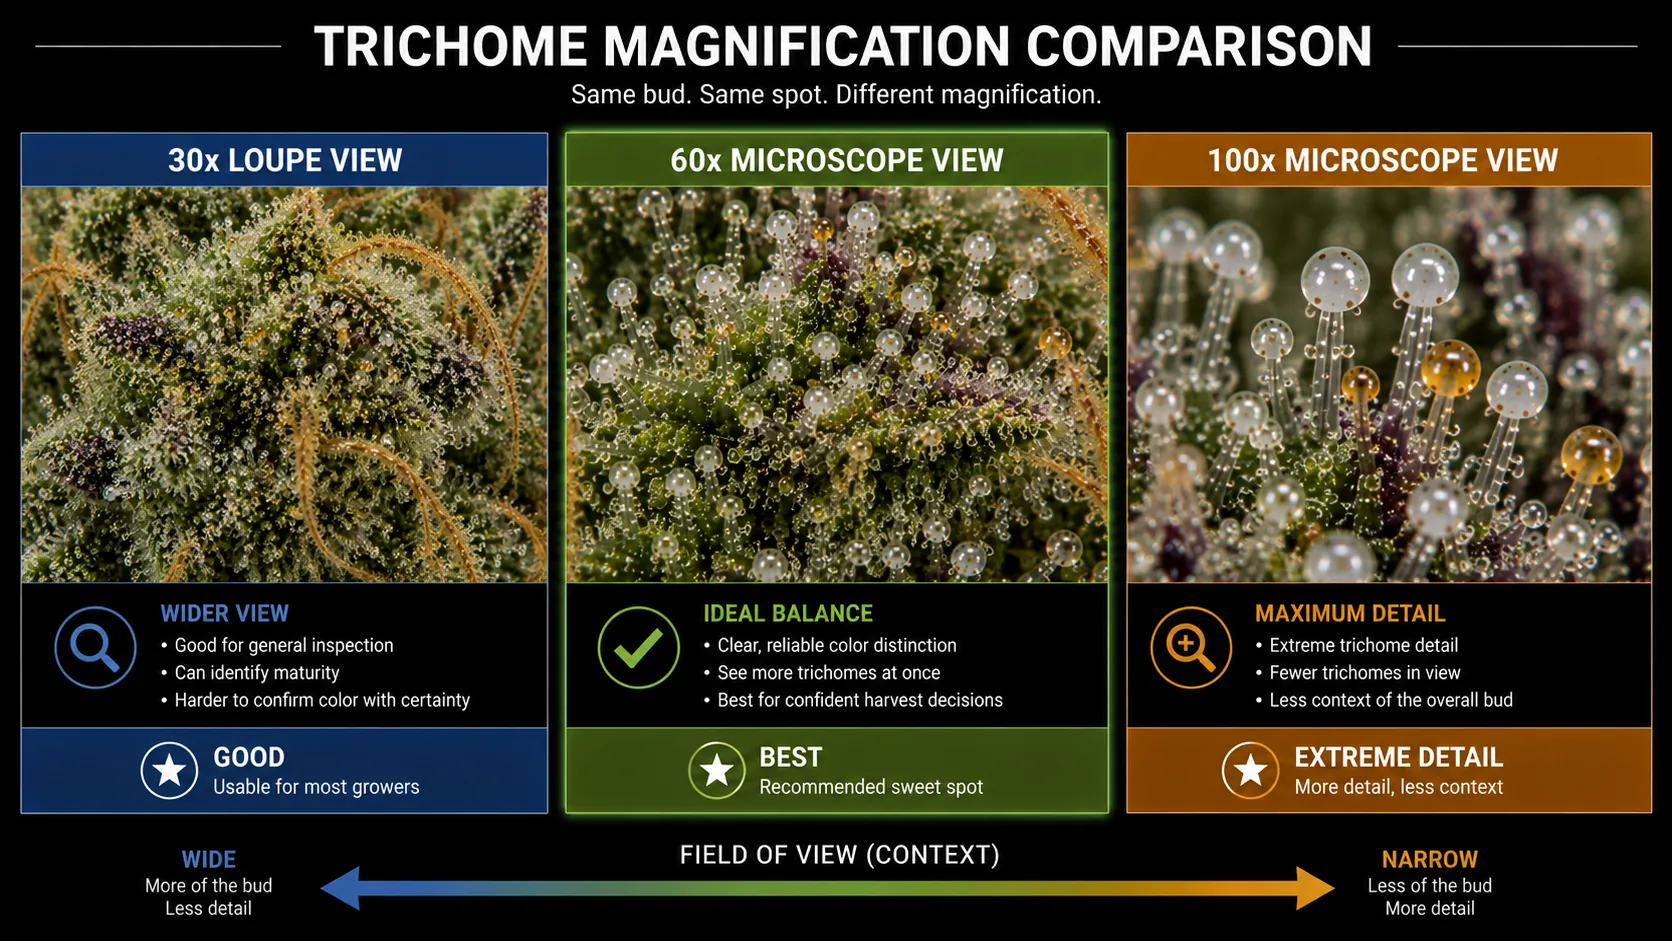
Most disagreements about ripeness are really disagreements about method. Two growers looking at the same plant with different magnification, different lighting and different sample sites will reach different conclusions and both feel certain. These frames fix the method. They cover what magnification actually resolves a trichome head, why neutral light matters more than it sounds like it should, and — the part people skip — where on the plant to look.
That last one is worth dwelling on. Sugar leaves at the edge of the frame tend to run ahead of the flower, so reading them makes the whole plant look more finished than it is. The inspection diagram points you at calyx-rich flower surfaces, somewhere around the middle of the bud rather than only the tip, and at more than one site across the canopy. Tops and lower buds routinely disagree, and a canopy that matures unevenly is normal rather than broken. Sample it as a canopy.

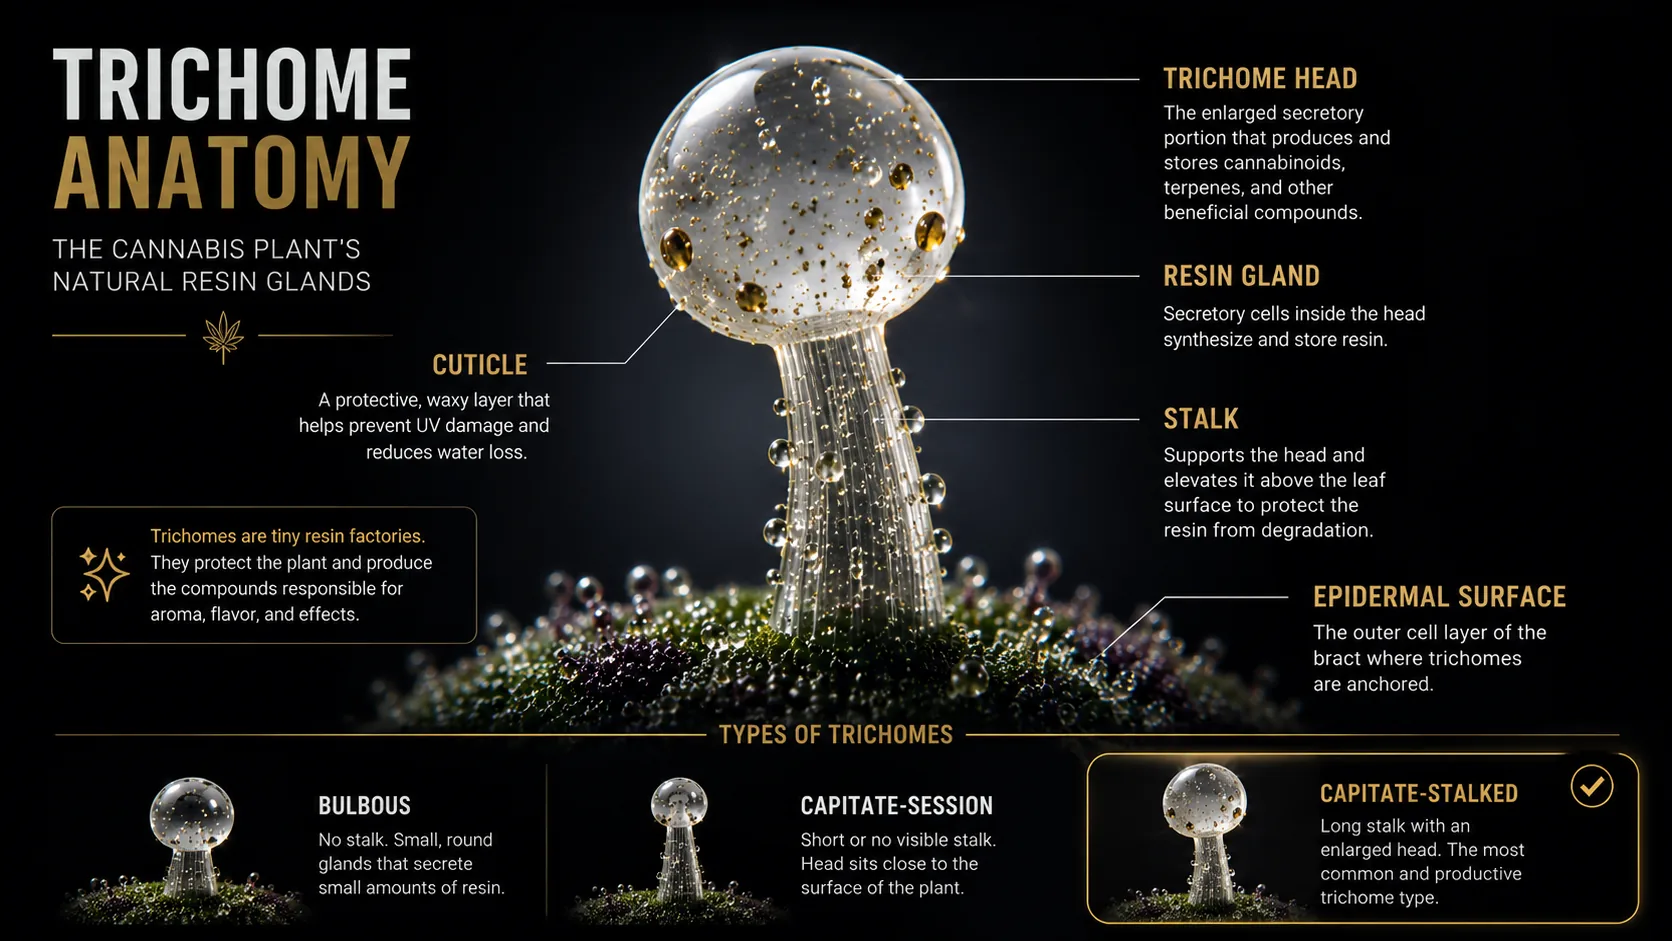
The structure of the resin gland itself.
A short detour into what you are actually looking at through the loupe. Knowing that the head sits on a stalk, and that the head is the part whose appearance changes as the plant matures, makes the colour reading less abstract — you stop seeing frost and start seeing structure. It also helps you tell a genuine head from a broken one or from a stalk with nothing left on top, which is a common source of confusion at high magnification on a plant that has been handled. Useful background rather than a decision tool; the anatomy guide goes further.
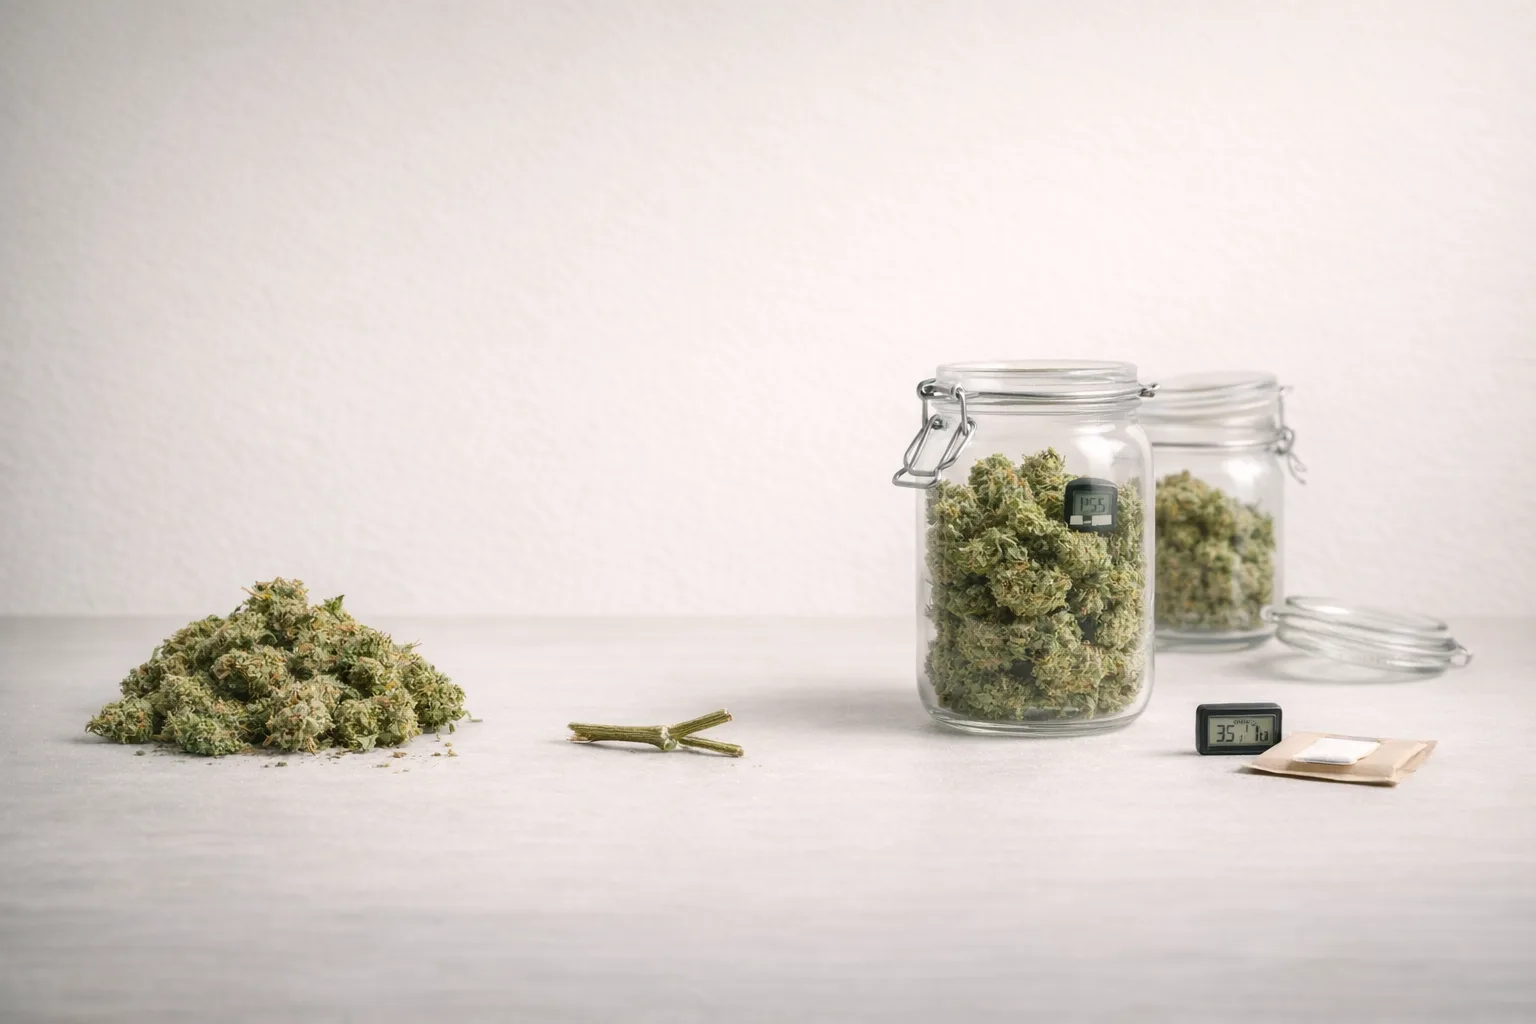
Trimming and the dry-to-jar handoff.
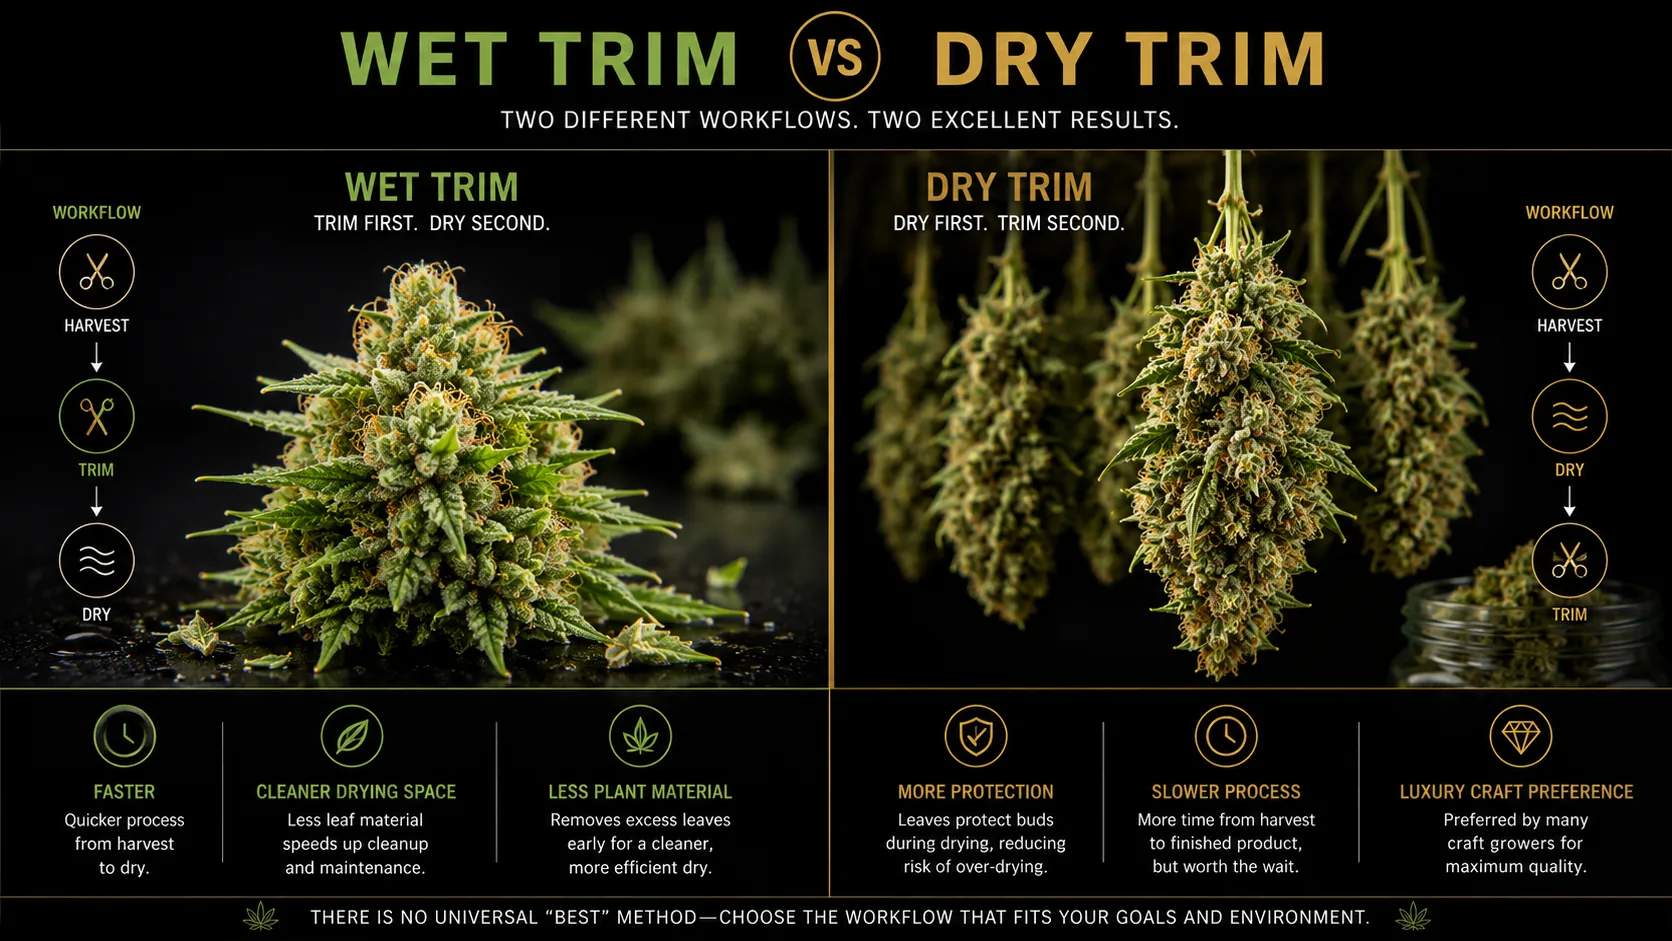
The last frames in the set sit just past the cut, because the harvest call and what follows it are one continuous decision rather than two. Trim timing is the first fork — before drying or after — and the boards here lay out what each choice costs and buys. The dry-to-jar frames cover the second: knowing when the flower is actually ready to be sealed, which is judged by how the stem behaves rather than by how many days have passed. Cutting at the right window makes both of these easier, which is the practical argument for taking the inspection seriously in the first place. Wet trim against dry trim and the jar-readiness test carry the detail.