Drying & Curing: the complete image library
From wet bud to sealed jar — drying targets and the cure that follows. Every image below is a real teaching asset from the drying & curing guides — grouped by topic, captioned, and linked to the article it lives on. Click any image to view it full size.
The stage where most of a harvest is quietly thrown away.
Everything up to the cut is forgiving. Drying and curing are not. A plant that spent months coming together can lose most of its aroma in a fortnight of impatience, and the frustrating part is that it happens invisibly — nothing looks wrong while it is going wrong. By the time the jar smells like hay rather than flower, the decision that caused it was made a week earlier. This library exists to make that stretch visible.
The images divide into two kinds and it helps to know which you are looking at. Some are reference states — this is what a stem does when the flower is ready, this is what it does when it is still too wet, this is what a jar looks like when the cure is on track. Those are for comparing against, directly, with your own bud in the other hand. The rest are explanatory boards that show mechanism: why a stable temperature outperforms a swinging one, what protects aroma and what destroys it. Those are for understanding why the reference states matter, and they are worth reading before harvest rather than during it.
One thread runs through all of it. Almost every failure in this stage comes from rushing, and almost every rushing decision is made because a number on a calendar felt more authoritative than the flower in front of you. The macros here consistently point the other way: judge the dry by what the stem does, judge the cure by what the jar tells you, and treat the timelines as expectations rather than instructions. When those two disagree, the flower is right.
Targets, timing, and the mistakes that ruin a dry.
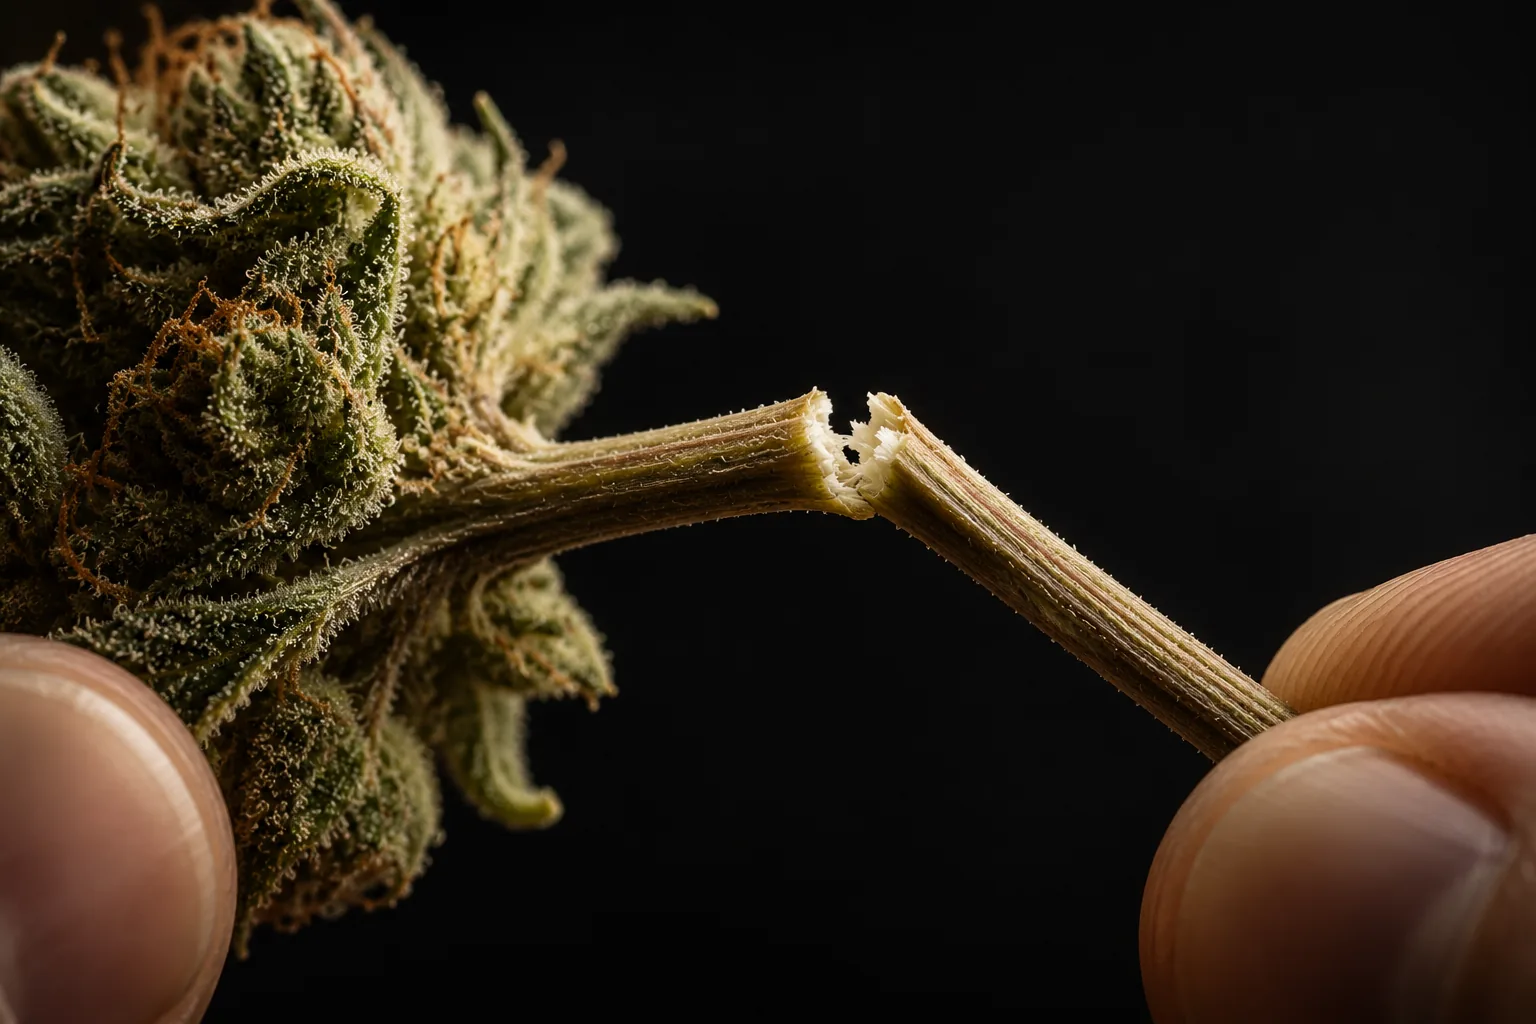
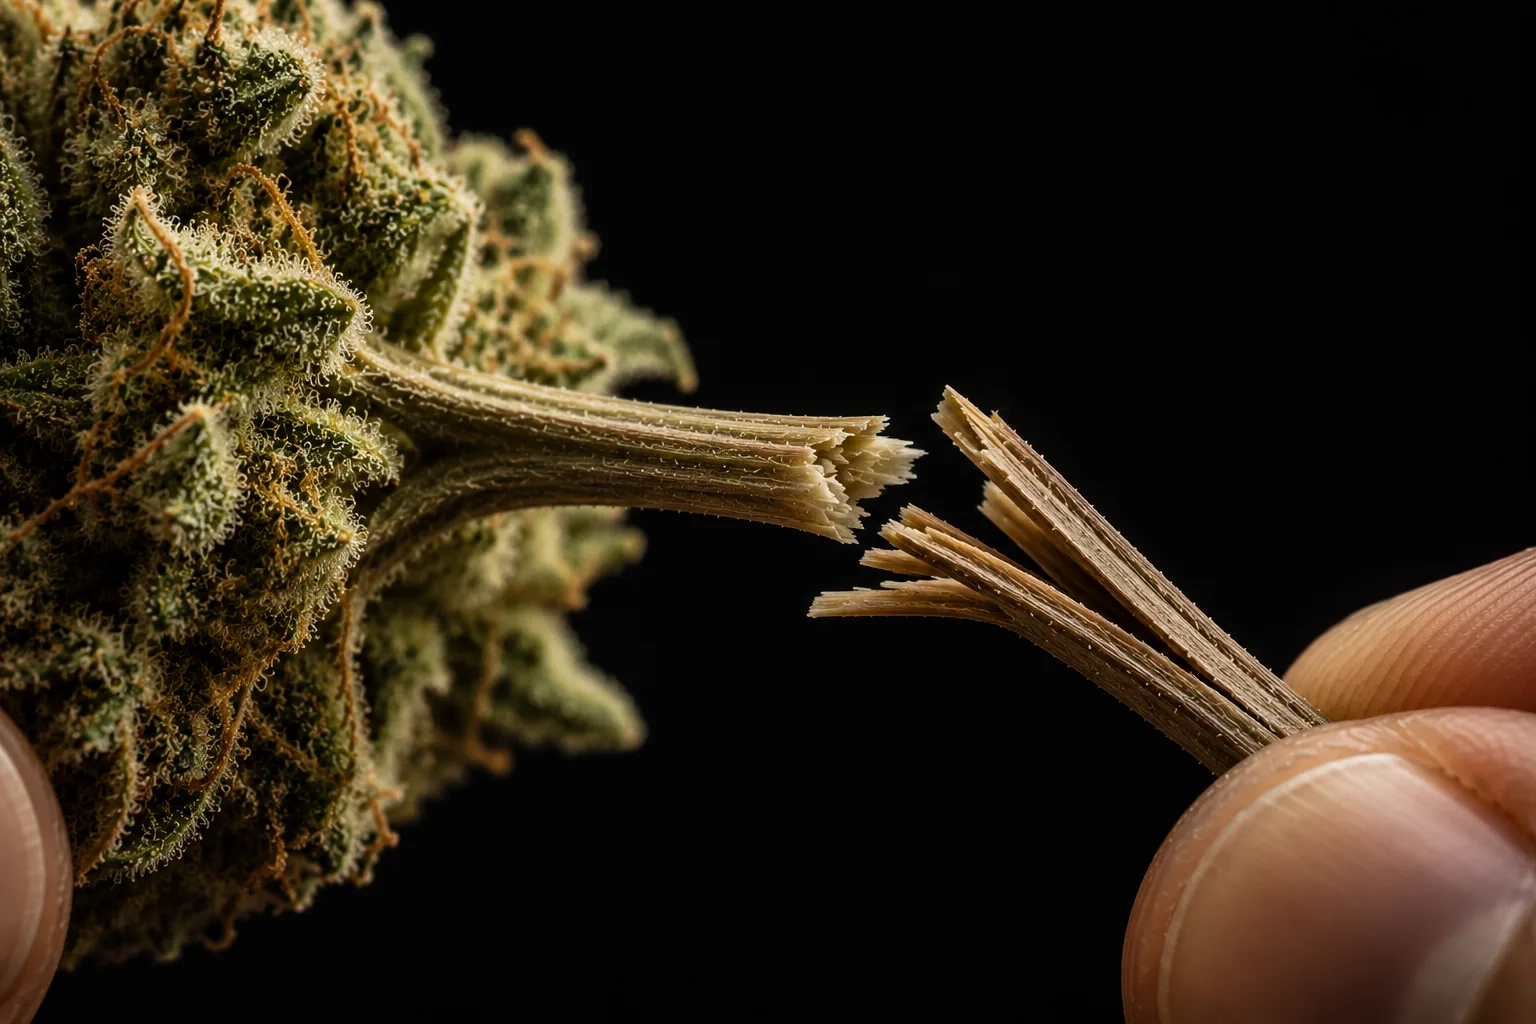
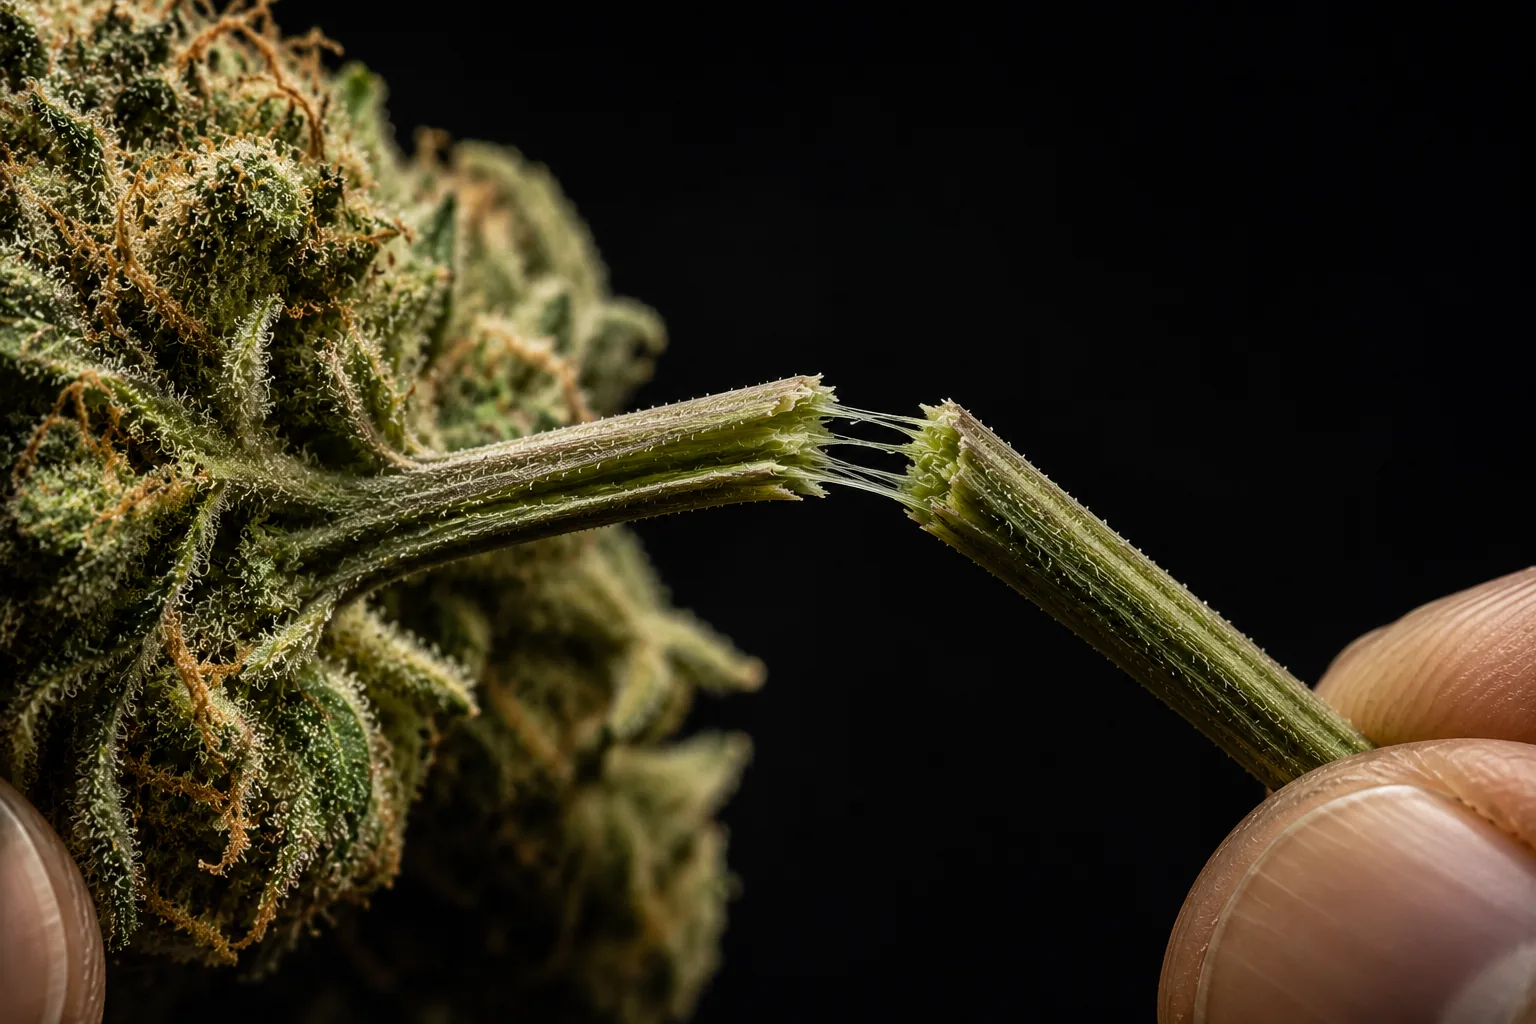
The three stem macros in this group are the most useful images on the page, and they answer the only question a dry really poses: is it finished? The test is mechanical rather than visual. A branch that is ready snaps cleanly. One that is still too wet bends and stretches instead, the fibres holding on. One that has gone too far shatters into brittle splinters. Learn those three behaviours and you will never again need to guess from the outside of a bud, which is unreliable — buds go dry on the surface long before the interior has caught up.
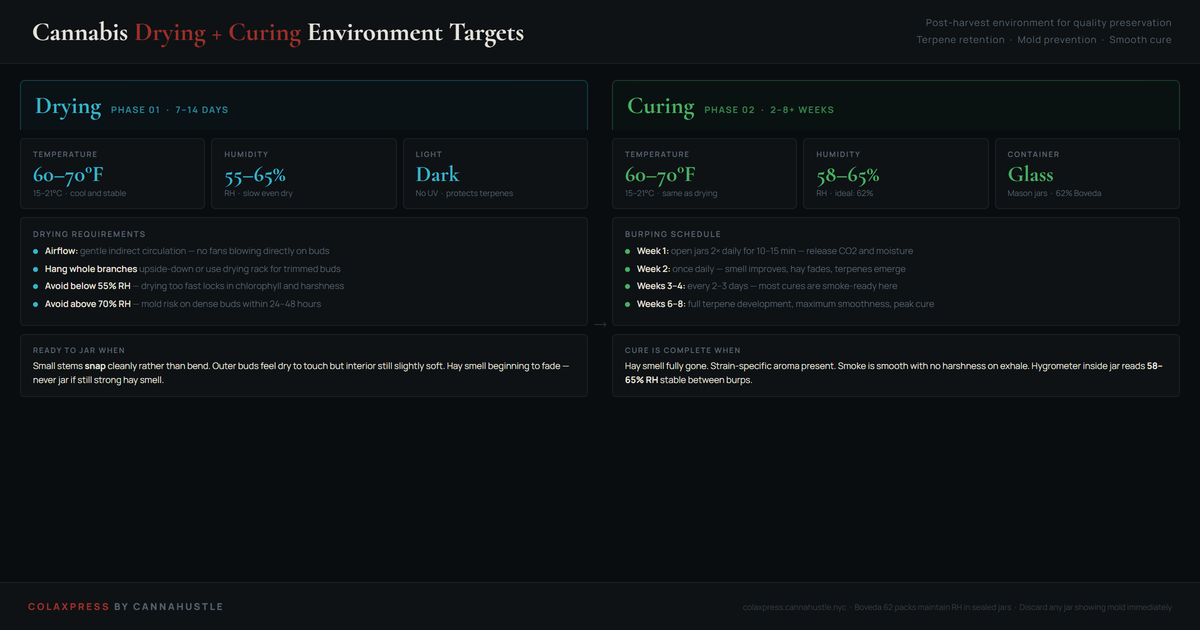
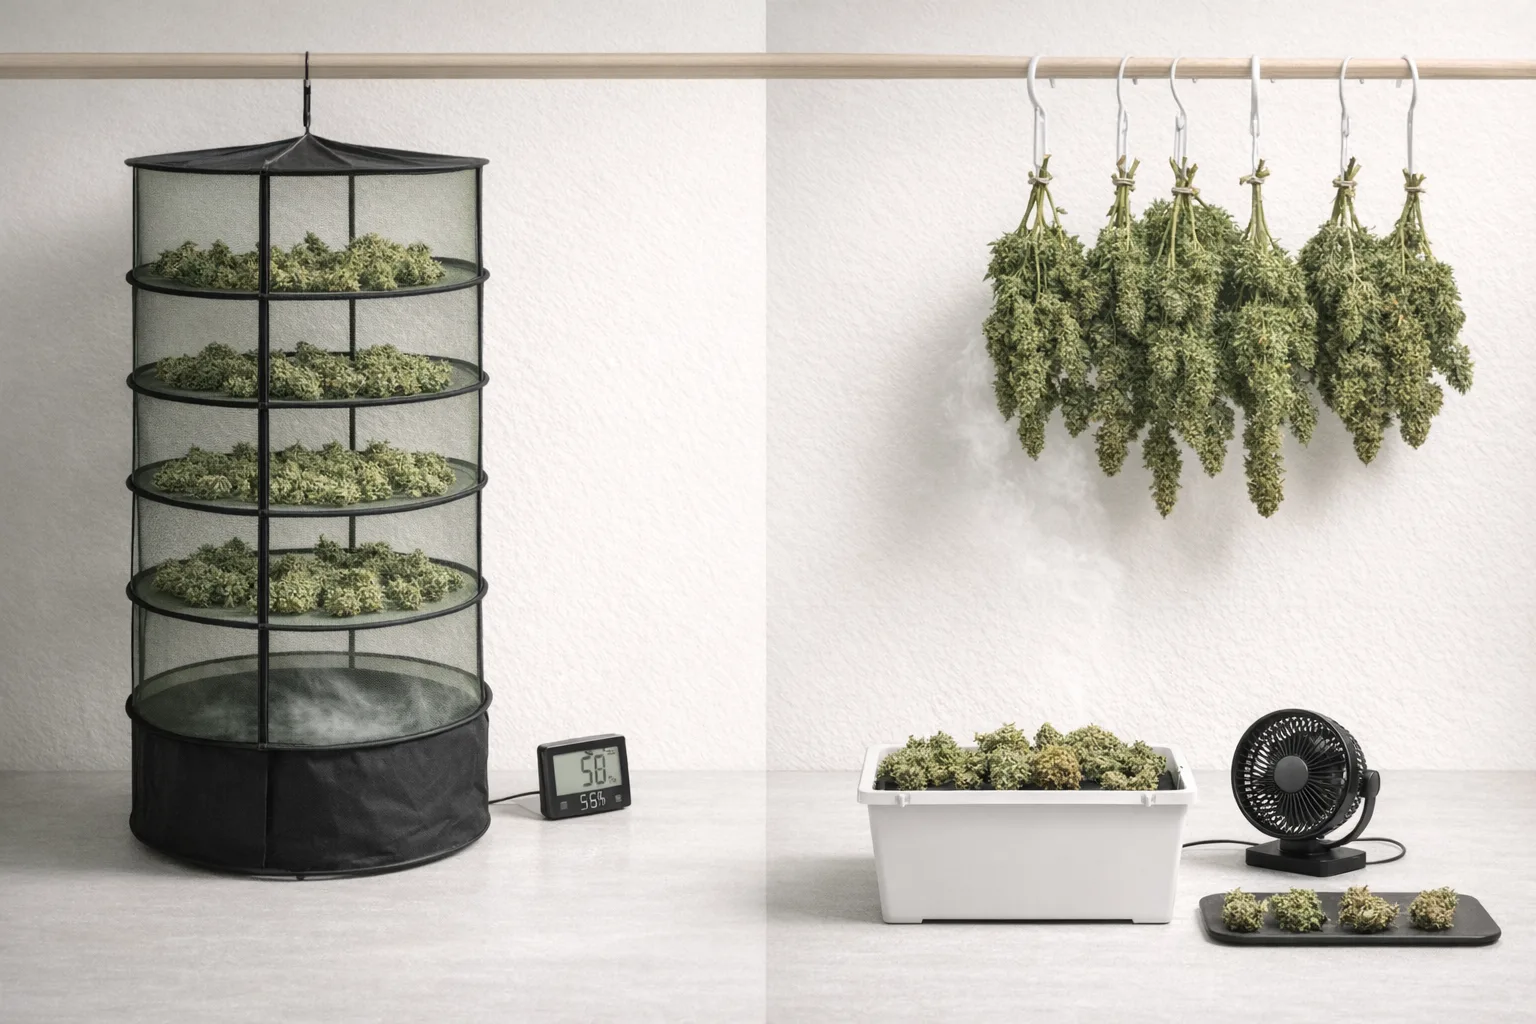
The environment chart and the mistakes board explain what gets you to that clean snap. Note that the mistakes are all forms of hurry: too much airflow, crowded branches with nowhere for moisture to go, and a batch dried unevenly so half of it is ready while the other half is not. Slower and steadier costs you a few days and protects the aroma you spent the whole grow building. The drying mistakes guide works through each one in turn.
Reading the jar, the states a cure moves through, and where it goes wrong.
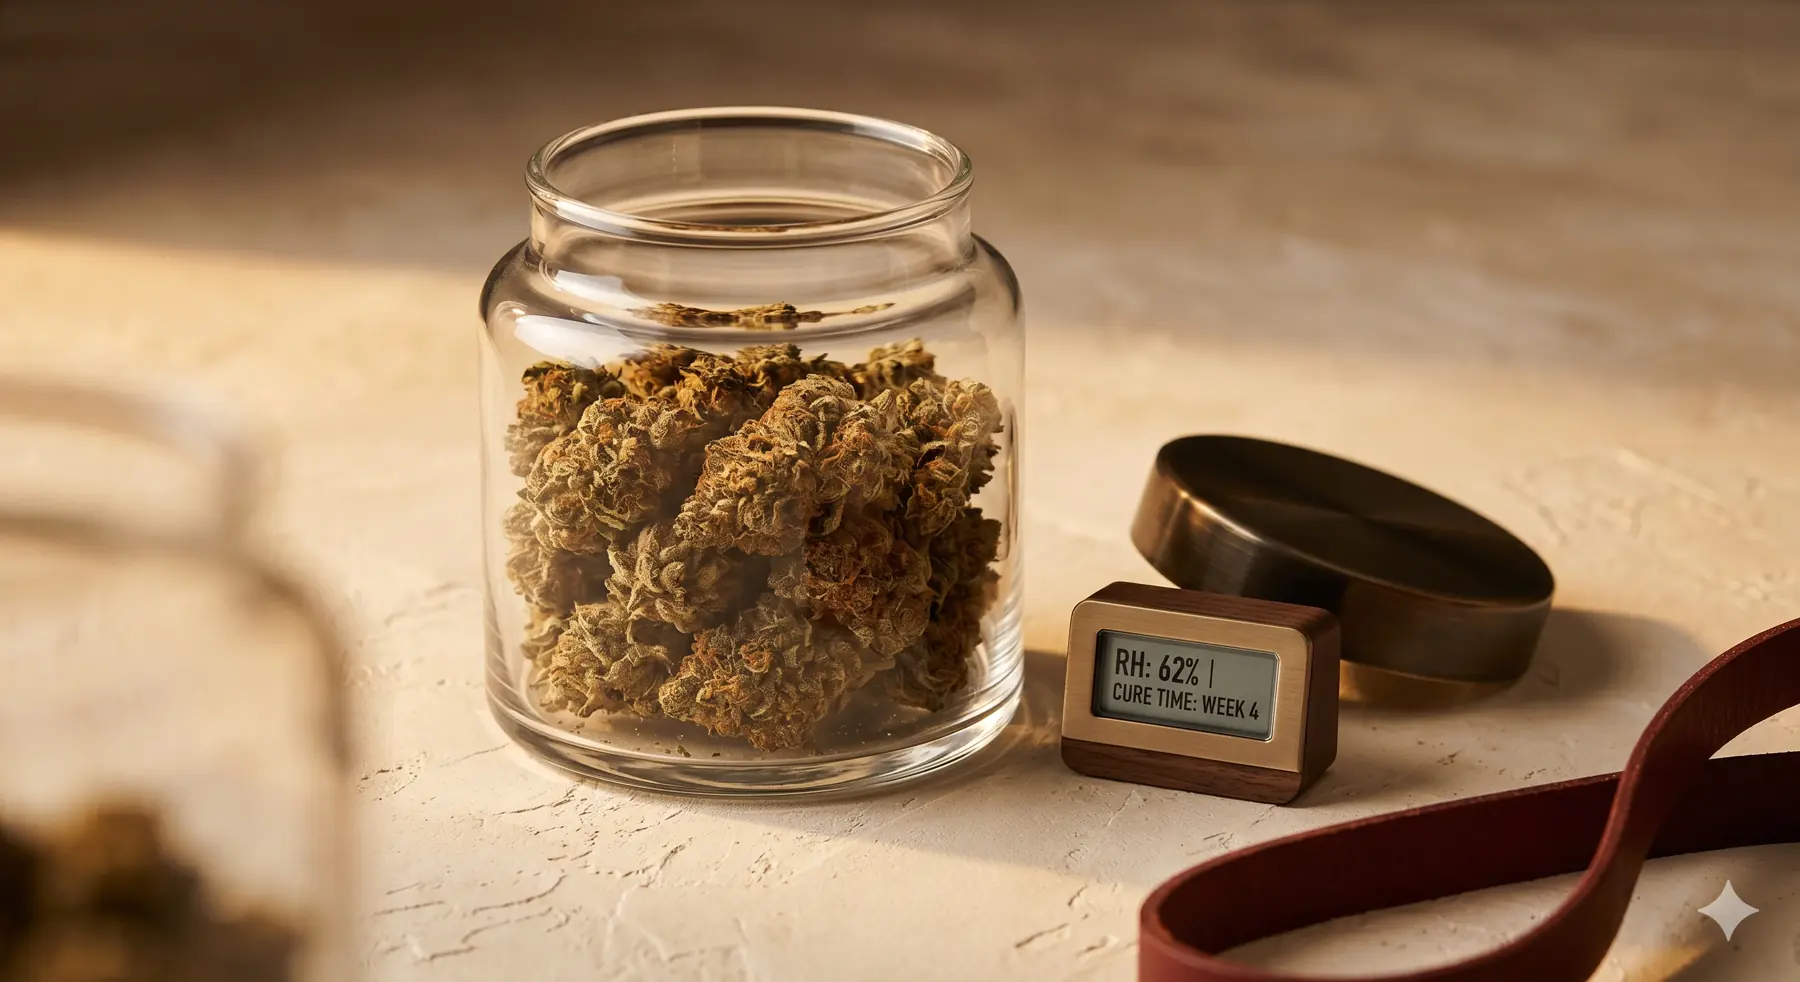
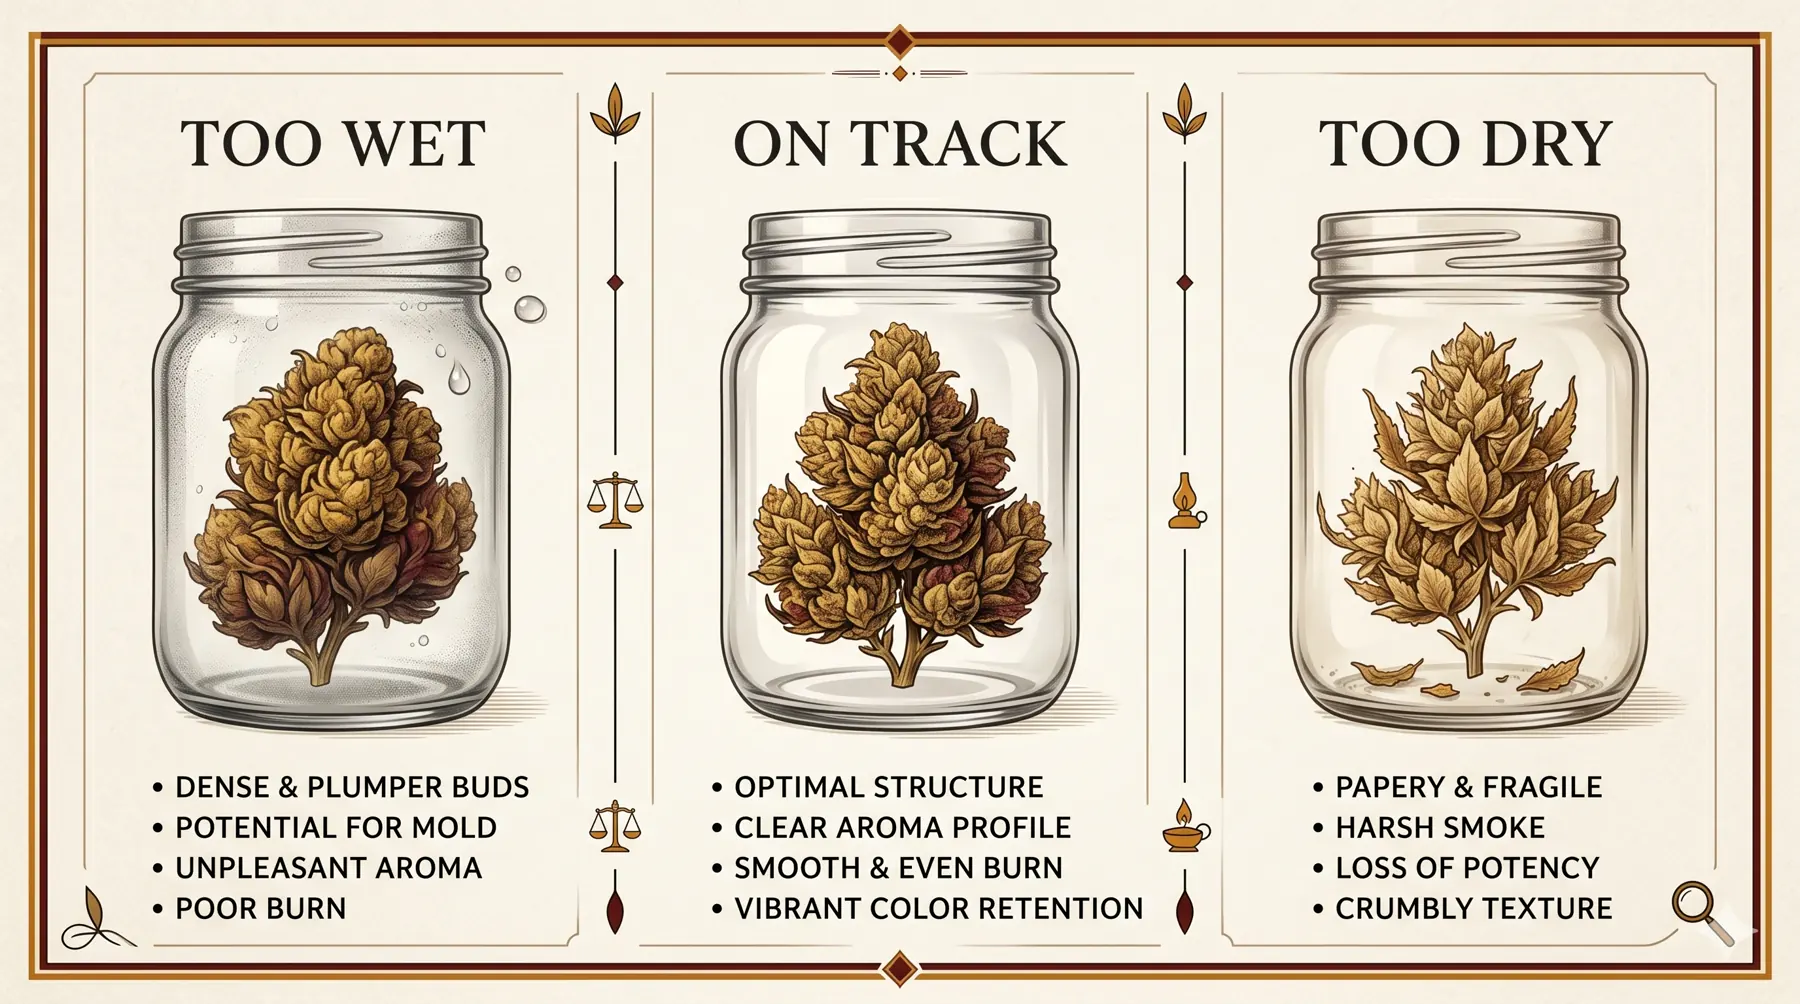
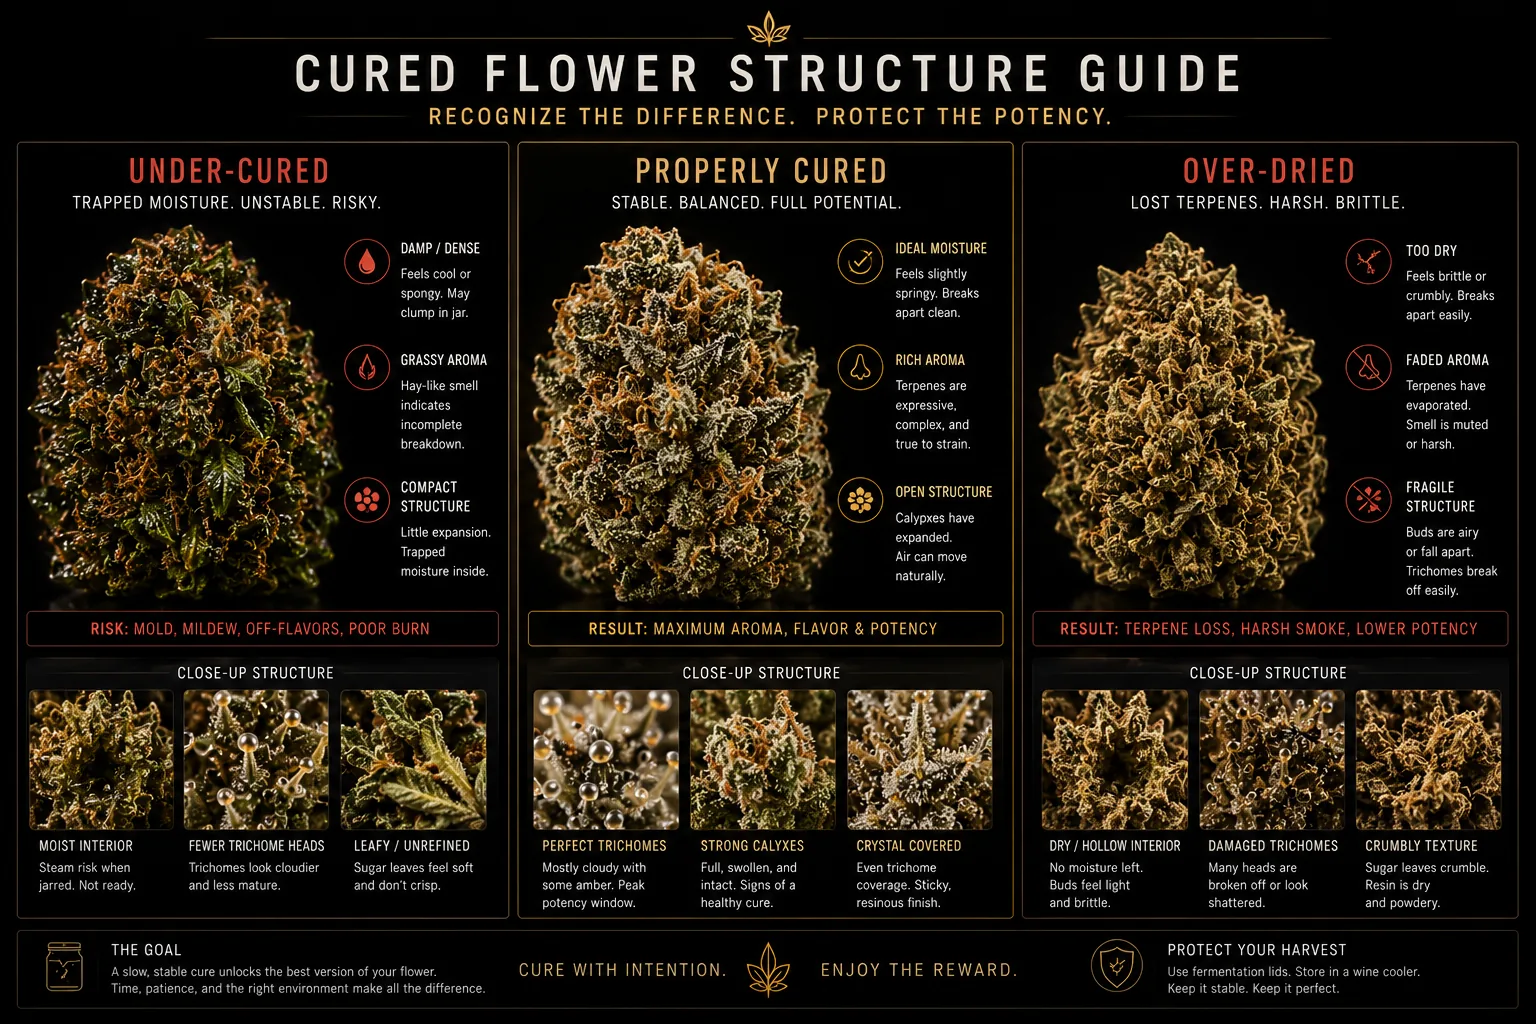
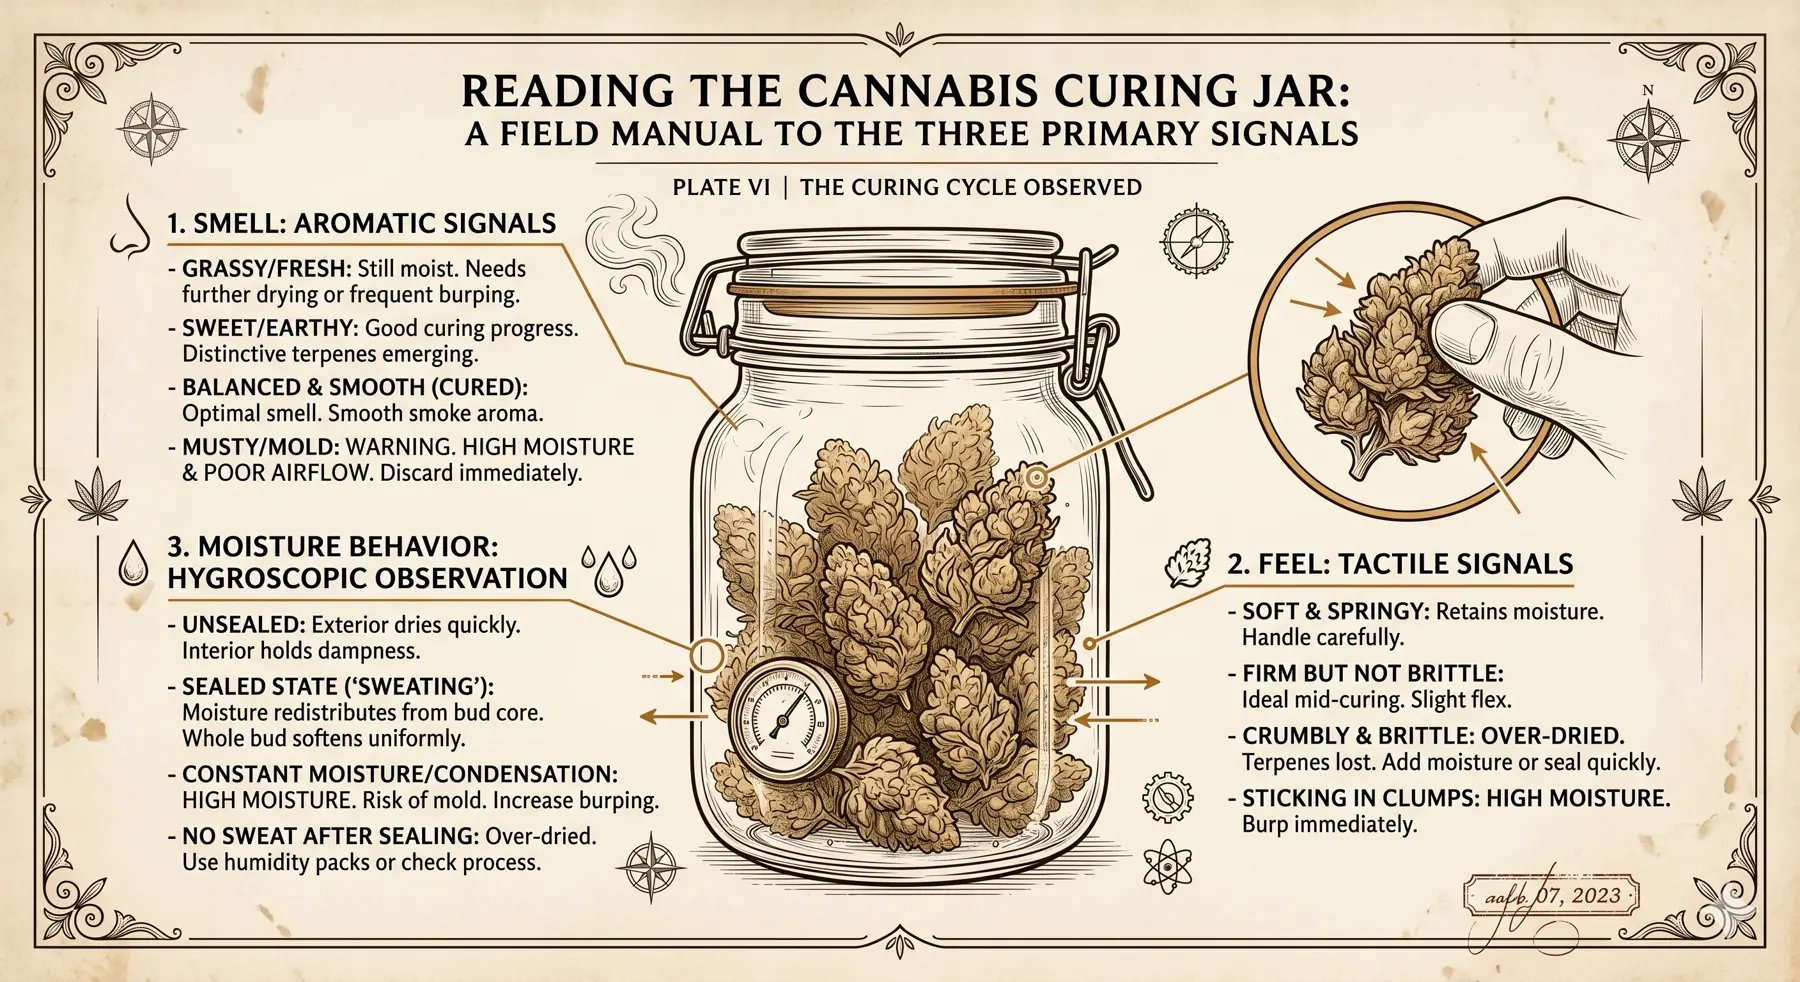
A sealed jar is a slow conversation, and these four frames teach you its vocabulary. Compare the too-wet, on-track and too-dry states against each other rather than looking at any one in isolation — the differences are in how the flower moves and settles, which is only obvious when you have all three in view. The structure board is the long view: under-cured, properly cured and over-dried flower photographed together, so you can see what you are aiming at before you have ever produced it. The warning signs on the mistakes board are the ones to memorise, because a jar going wrong announces itself early and then quietly gets worse.
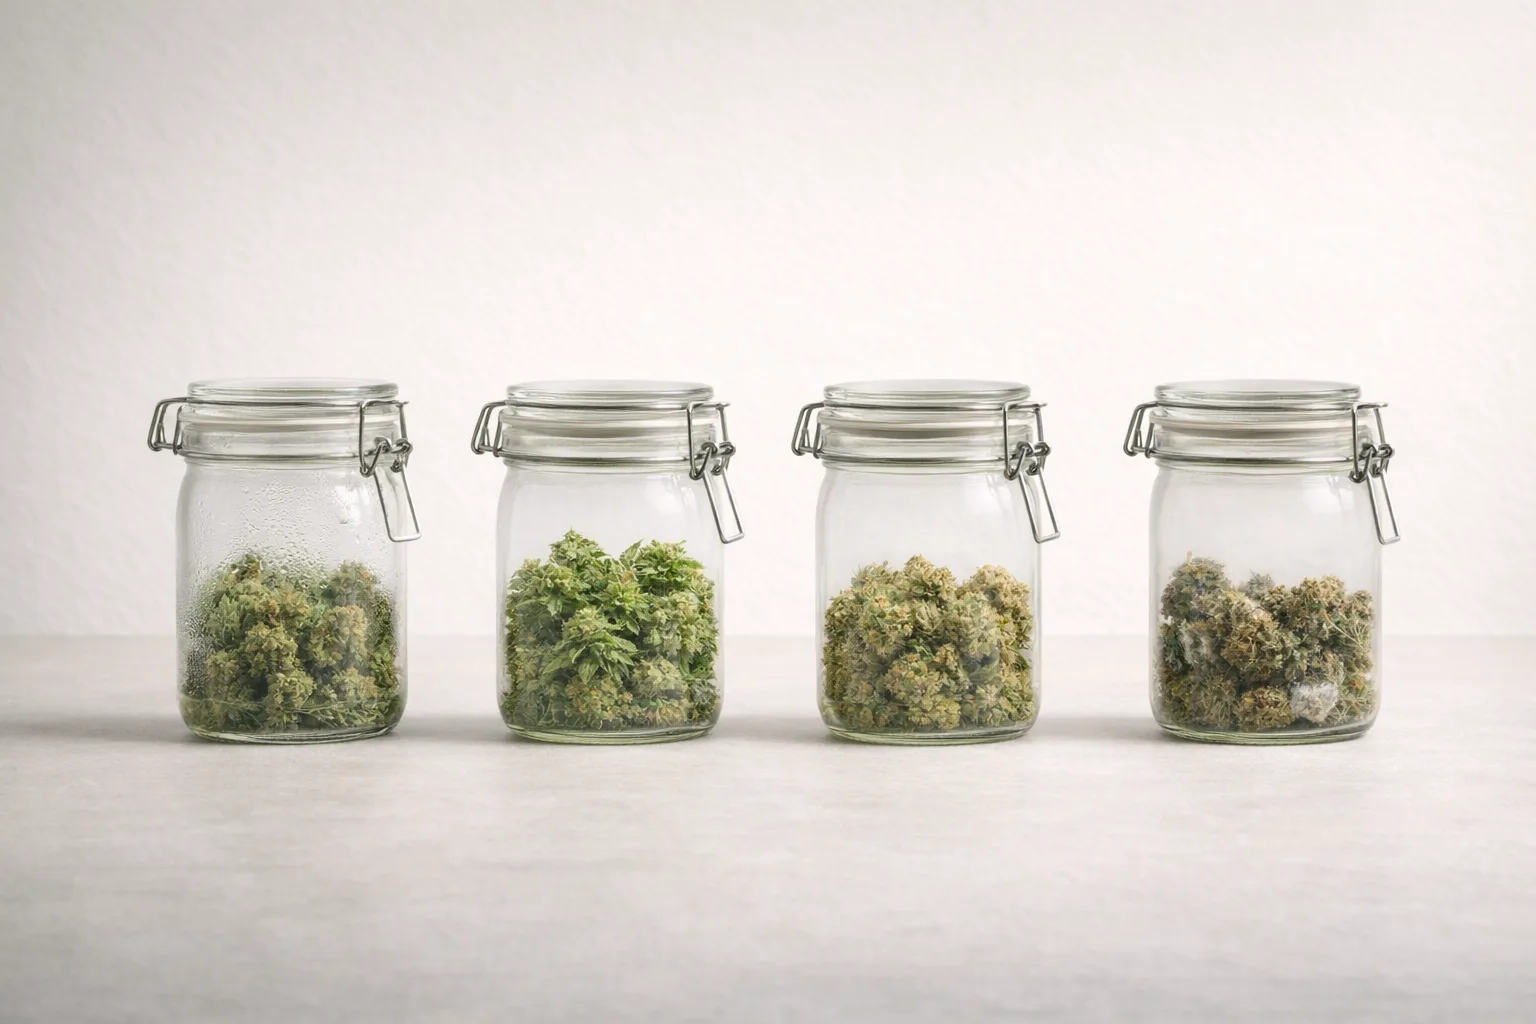
What the cure is protecting, and how you know it worked.
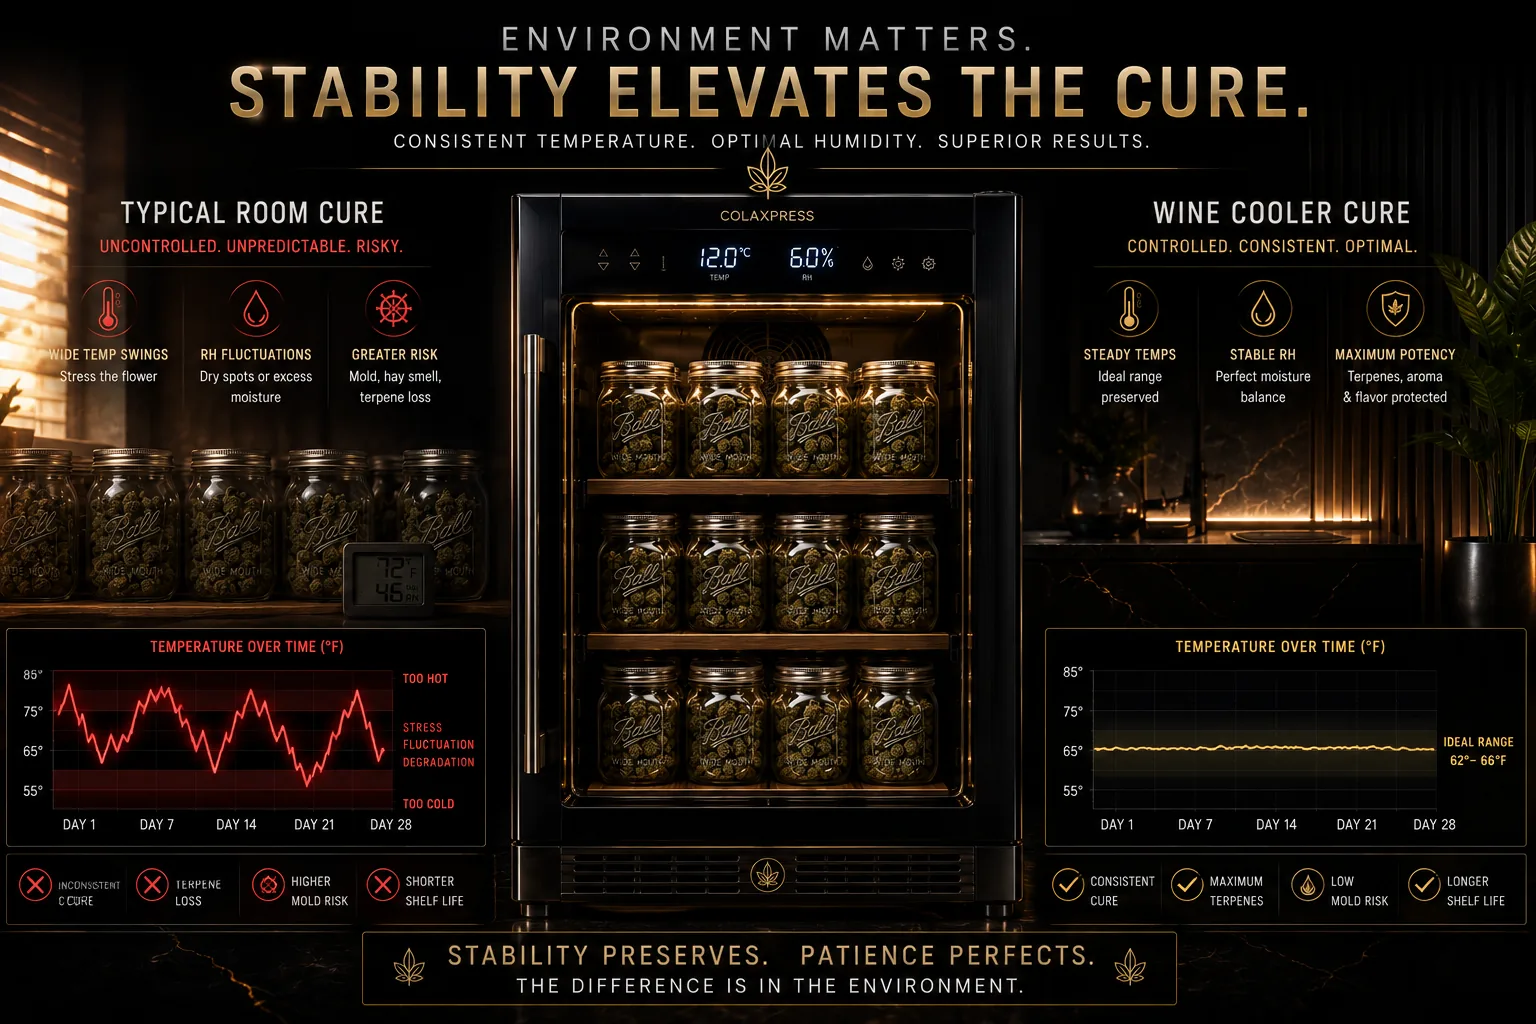
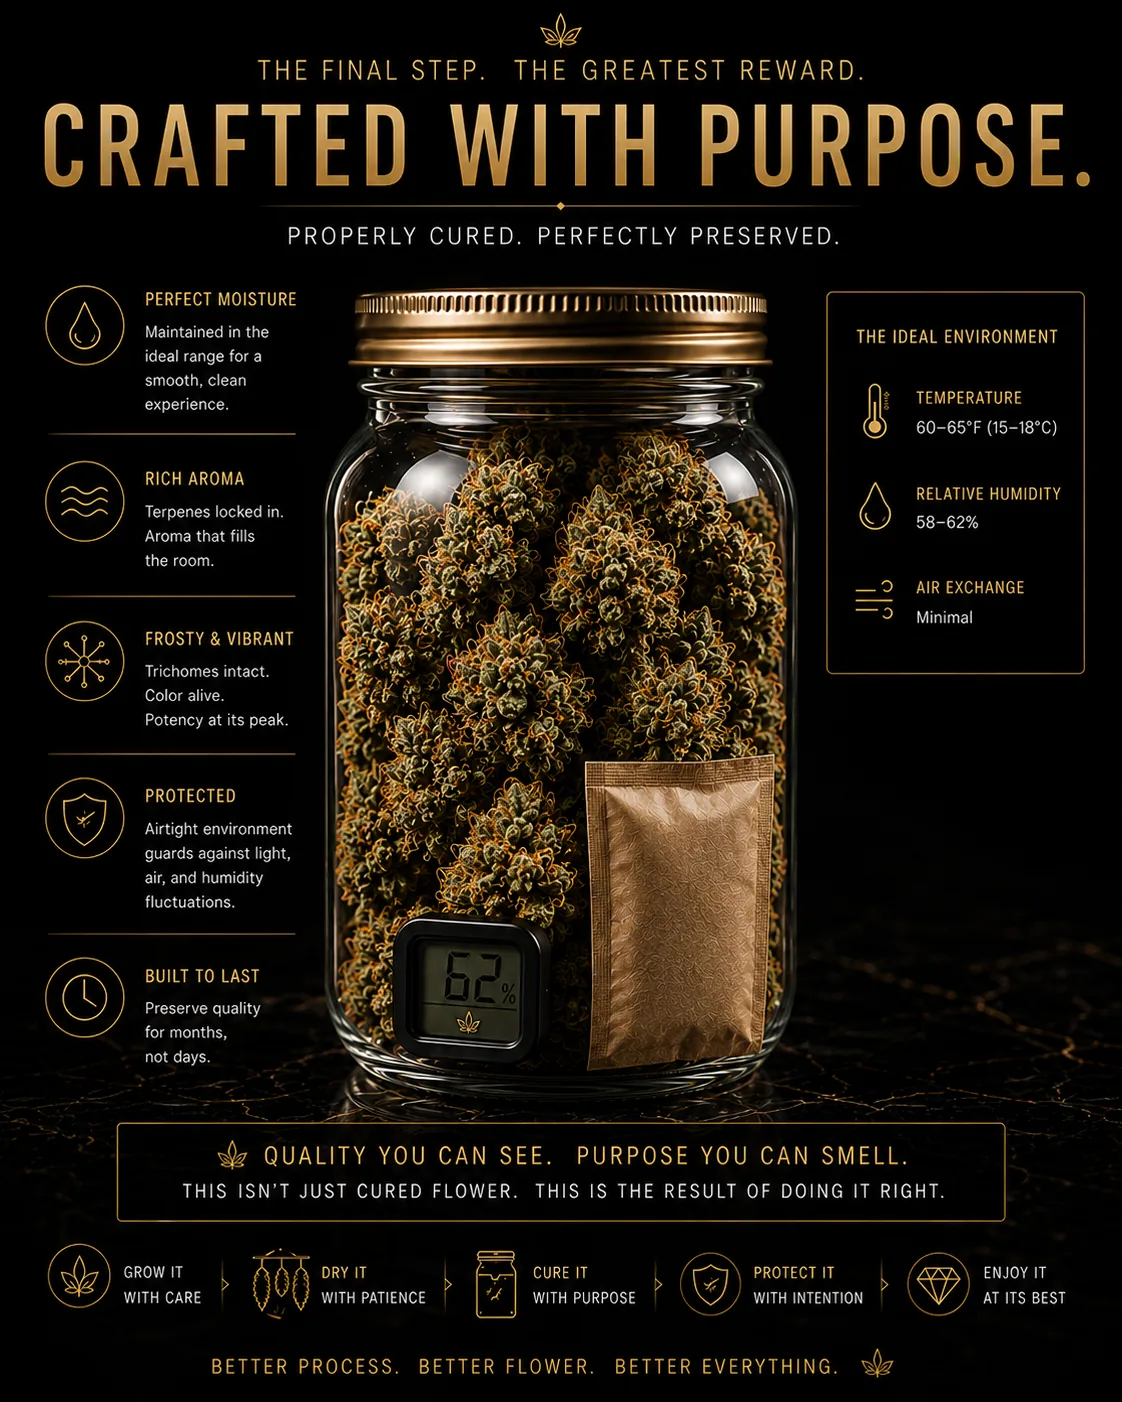
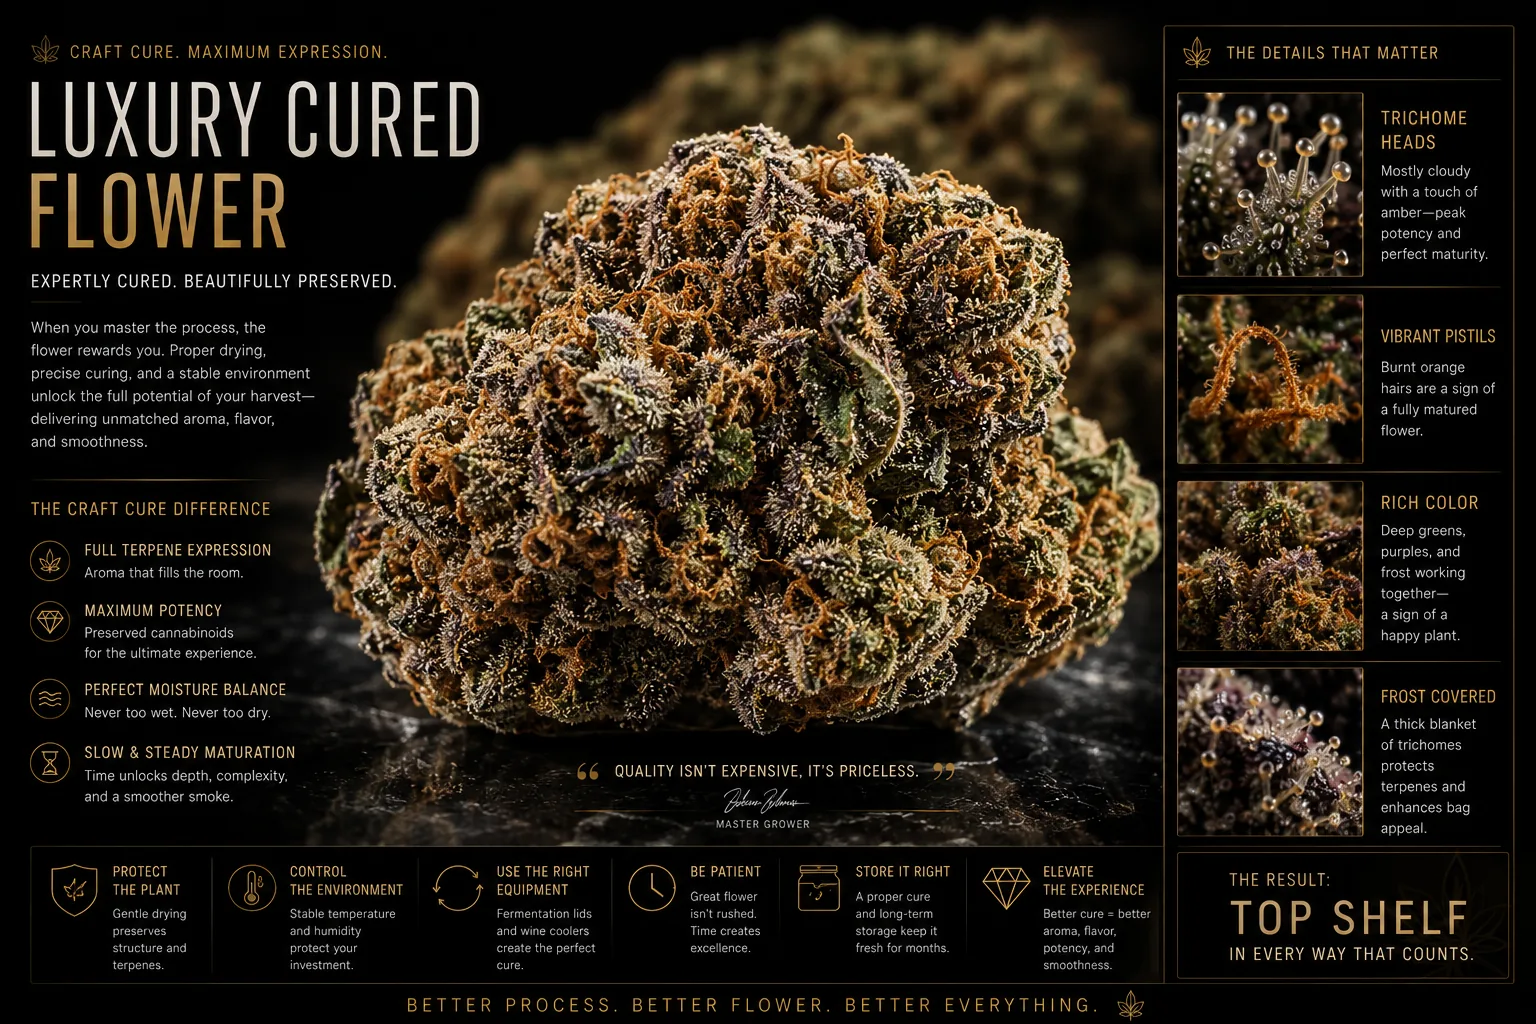
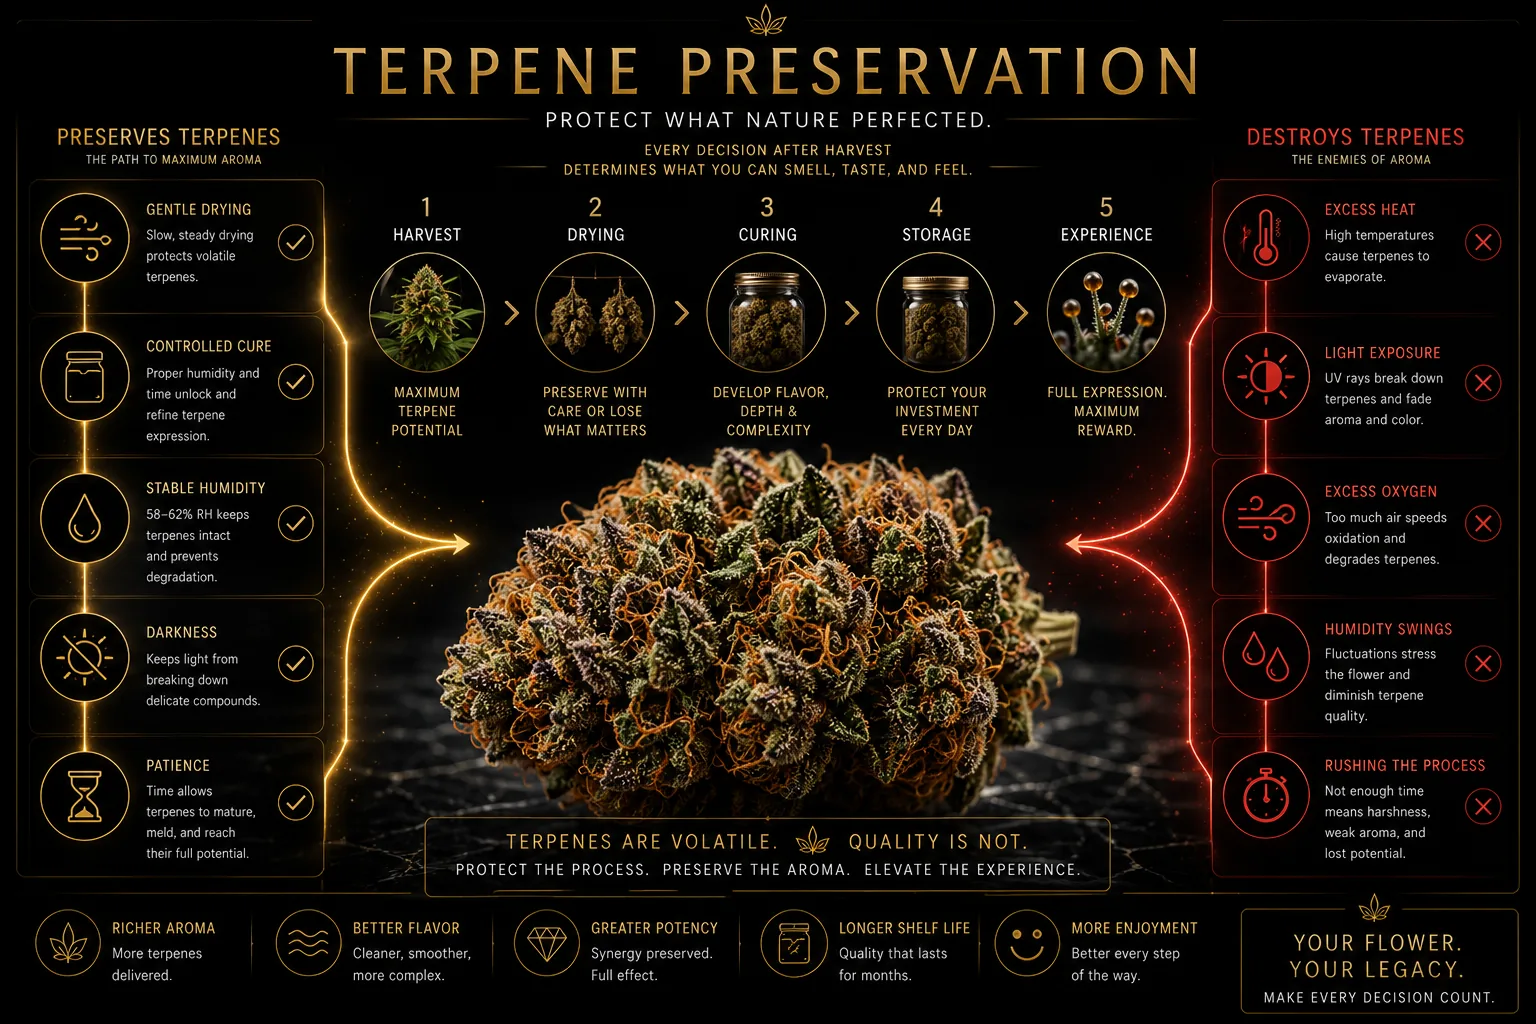
This group answers the question underneath all the procedure: why bother being this patient? The terpene board is the direct answer — gentle drying, a stable cure, darkness and time protect the aroma, while heat, light, oxygen and hurry strip it out. Those are not incidental variables. They are the entire difference between flower that smells like itself and flower that smells like nothing in particular.
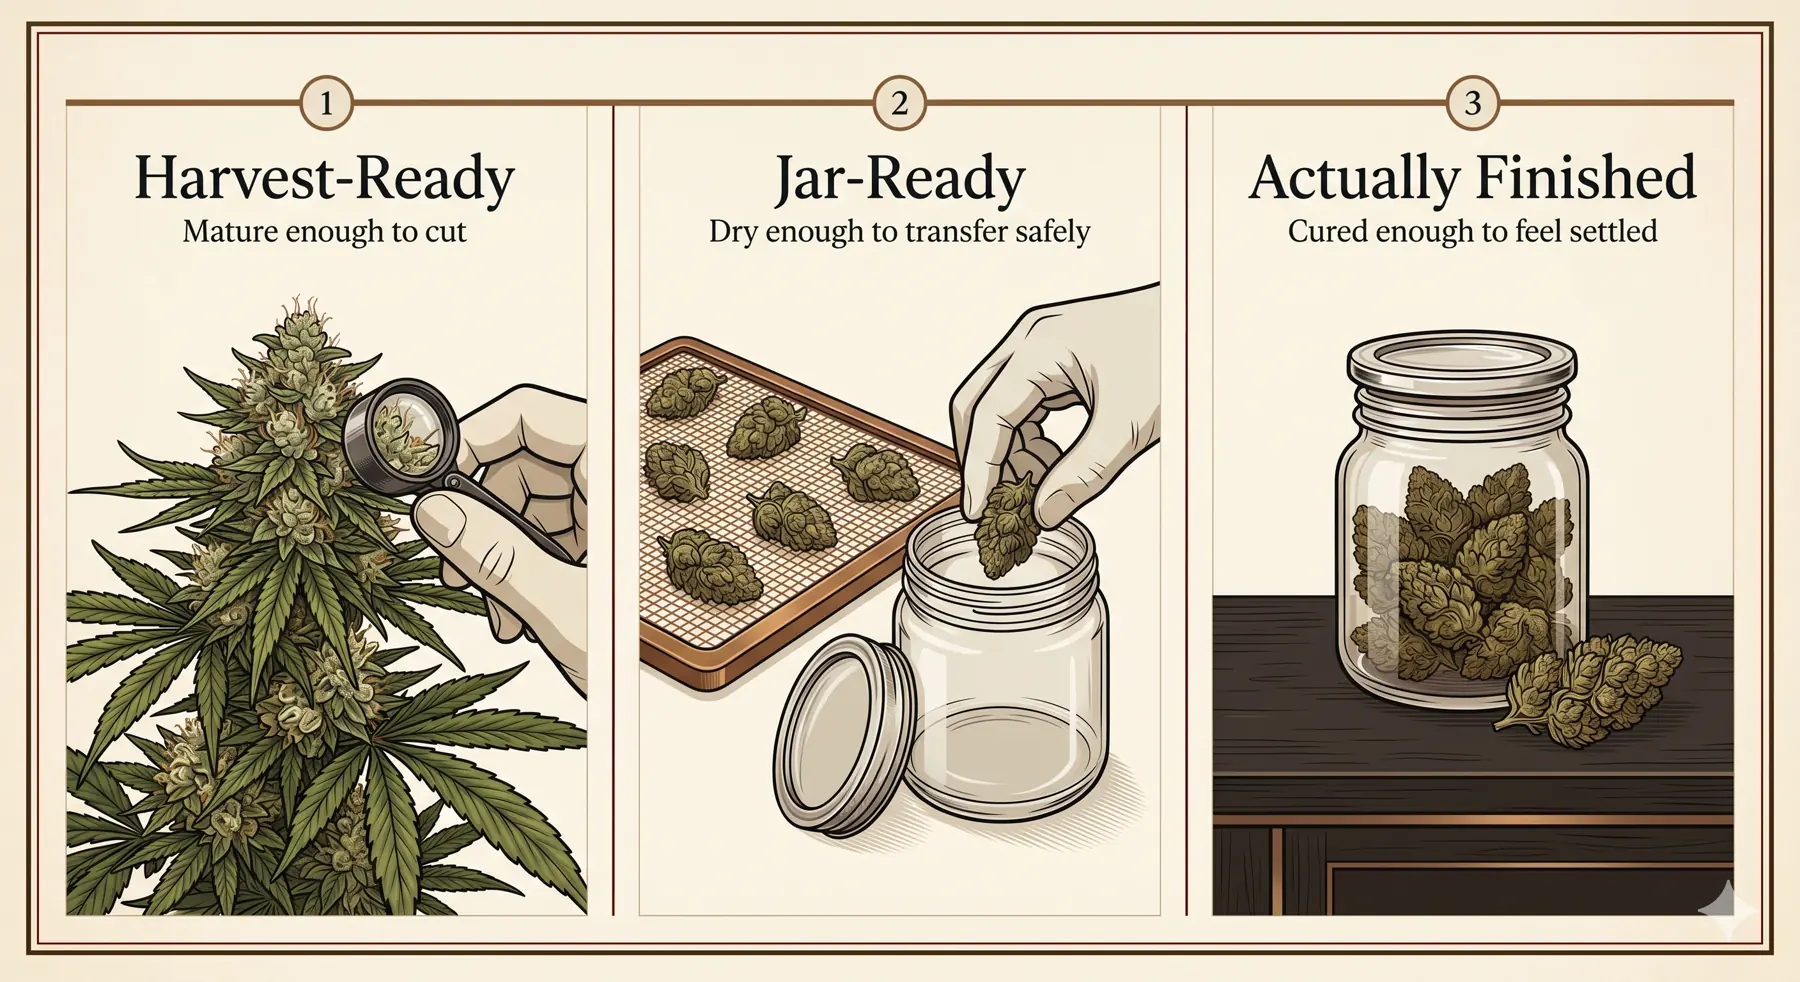
The timeline alongside it separates three things beginners tend to collapse into one: harvest-ready, jar-ready, and actually finished. They are weeks apart, and treating the second as the third is the most common way a decent harvest ends up merely acceptable. The jar-reading panel gives you the sensory checks for the stretch in between — aroma, feel, and how the flower behaves when the jar has been closed for a while. The finished macros at the end are the reference for what you are working toward, worth a look before you start rather than only after.
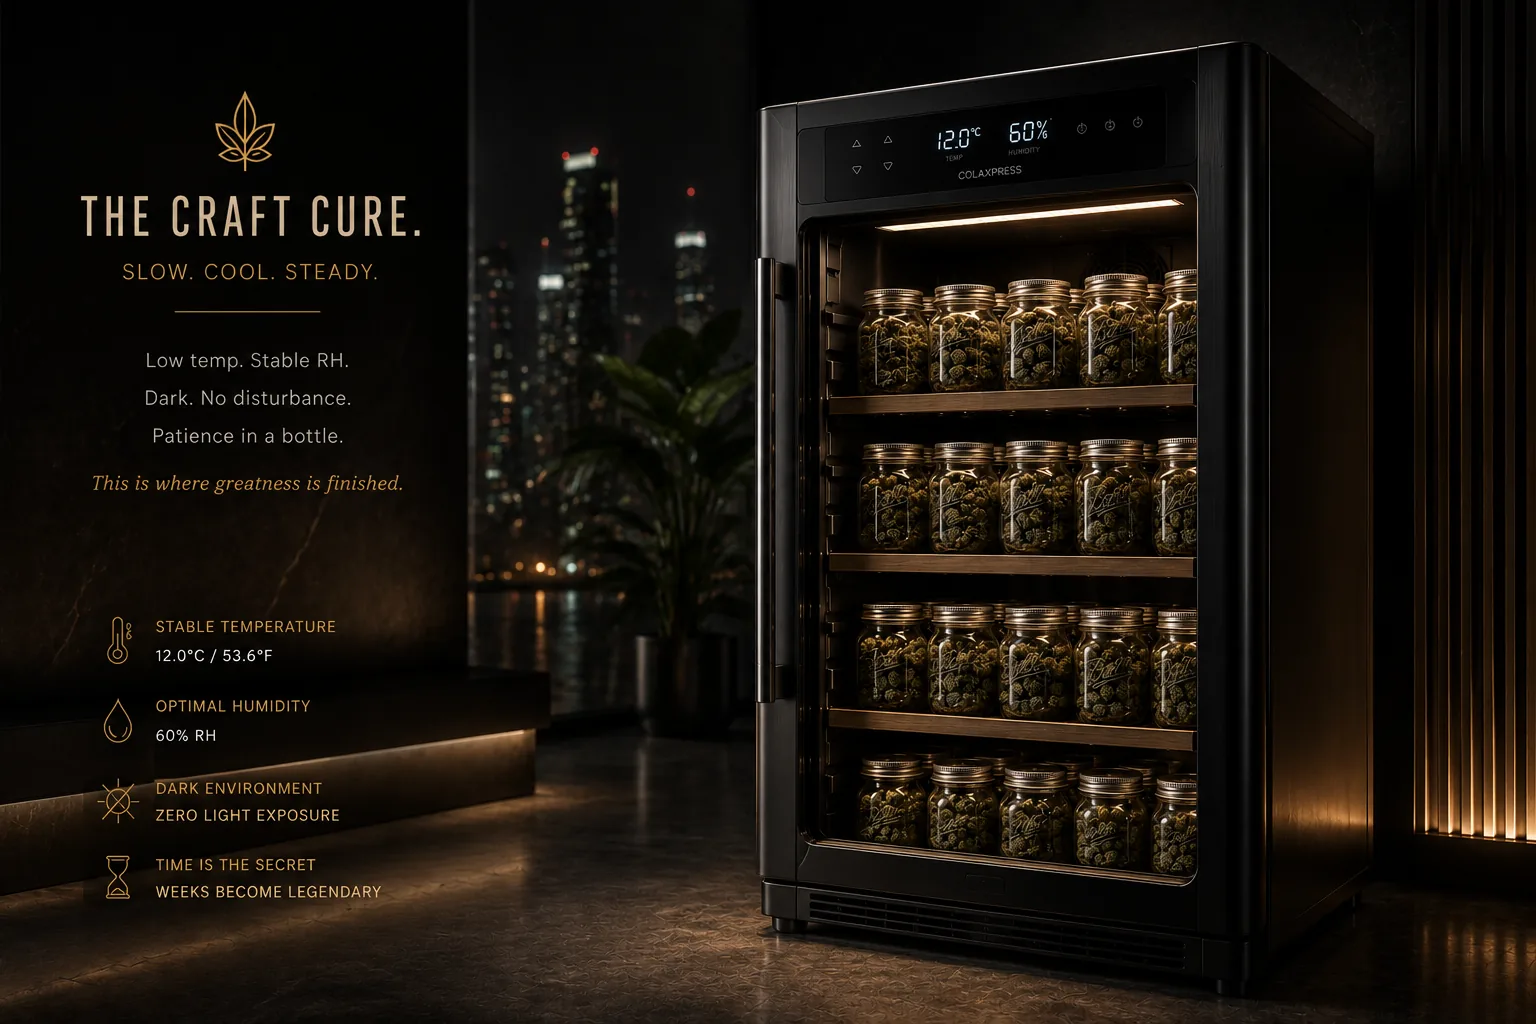
An optional cool, dark home for sealed jars you keep long-term.
If you are keeping flower for months, storage is its own step, separate from the cure. A finished, sealed jar or bag does best somewhere cool, dark, and steady, because cold slows the slow chemistry that eventually dulls aroma and cannabinoids. A compressor wine cooler is one convenient way to hold that environment - steadier than a cupboard that drifts with the room - but it is optional, and it is a storage tool, not an automatic cure.
Two cautions keep it honest: do not treat cold storage as a substitute for curing, and do not chill flower that is still actively curing. And the number that matters is the humidity inside the sealed container, not the cooler's ambient reading. If a cooler is out of reach, the darkest, most temperature-stable spot you have will still protect sealed flower better than an open shelf.