How to Prevent Root Rot in DWC Hydro Systems
Learn how to prevent root rot in DWC with clean water, stable temperatures, strong aeration, and a simple recovery plan for compact cannabis grows at home.
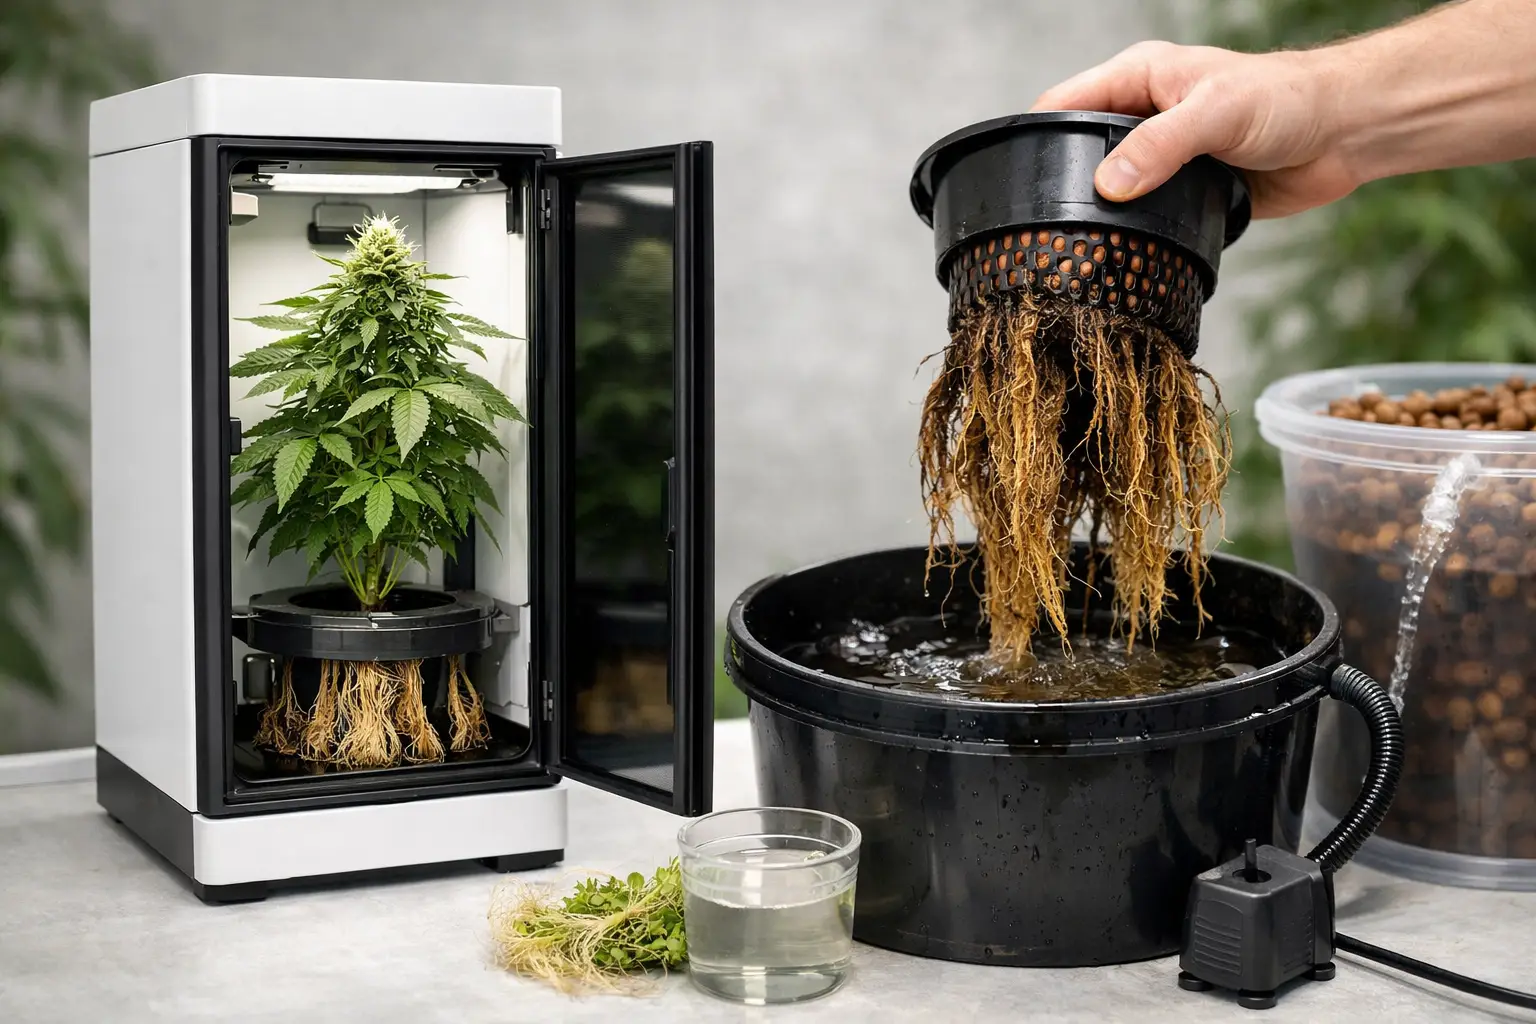
A DWC plant can look fine above the lid right up until it does not. Growth slows, leaves lose their lift, and a reservoir that seemed manageable becomes the source of the problem. To prevent root rot in DWC, stop treating the bucket as a passive container. It is the plant's entire root-zone environment, and it needs the same discipline as your light schedule and drying space.
Root rot is rarely bad luck. In compact cannabis grows, it usually comes from warm nutrient solution, weak aeration, light leaks, dirty equipment, or a grower changing five things at once instead of reading the system. Clarity, not chaos, is what keeps roots white, active, and capable of carrying a plant through flower.
What Root Rot Actually Looks Like in DWC
Healthy DWC roots are generally white to cream-colored, firm, and full of fine branching growth. Nutrients can stain them slightly, especially with darker additives, so color alone is not a verdict. What matters is the combination of appearance, smell, and plant behavior.
Trouble starts when roots turn tan or brown and develop a slick, slimy texture. The reservoir may smell sour, swampy, or rotten instead of clean and mineral-like. Above the lid, the plant may droop even though the bucket is full, show slow new growth, or develop leaf symptoms that look like a feeding problem.
That last point causes plenty of damage. A struggling root system cannot absorb water and nutrients efficiently, so growers often respond by adding more nutrients. That raises solution strength around already compromised roots. The plant needs a cleaner, more oxygen-rich environment, not a stronger bottle mix.
The Conditions That Prevent Root Rot in DWC
DWC works because roots sit in highly oxygenated nutrient solution. Remove enough oxygen, add warmth and organic debris, and pathogens get an opening. The goal is not to make the reservoir complicated. It is to keep a few conditions stable every day.
Keep Reservoir Temperature in Range
For most small DWC cannabis setups, aim to hold nutrient solution around 65 to 70°F. The tighter target is often 66 to 68°F if your room allows it. Cooler water holds more dissolved oxygen and gives harmful microbes less favorable conditions.
Once the reservoir spends long periods above 72°F, the margin for error narrows fast. A cabinet can run warm from the light, a small bucket can heat up quickly, and a black lid does not solve heat transferring through the floor or surrounding air.
Start with environmental control before buying a chiller. Raise the bucket off a warm floor, keep it out of direct light spill, run lights during cooler hours if practical, and manage the cabinet's exhaust. If those steps cannot hold the reservoir under control, a chiller may be justified. In a one-bucket compact grow, however, better room control is often the cleaner solution.
Build Real Aeration, Not Just Bubbles
A few lazy bubbles are not enough. Use an air pump sized for the bucket, quality airline, and an air stone that produces an even field of fine bubbles. Replace stones when they clog or lose output. Check that the airline is not kinked, pinched by the cabinet, or back-siphoning water toward the pump.
More aeration is usually helpful, but placement still matters. Keep the air stone low in the bucket so the rising bubbles circulate the solution. You are trying to oxygenate the water and prevent stagnant zones, not create a violent splash zone that constantly wets the net pot and encourages algae.
Run the air pump continuously. DWC roots do not get a scheduled break from oxygen demand. If power outages are common where you grow, a backup plan is worth more than another nutrient additive.
Block Every Source of Light
Light entering the reservoir feeds algae. Algae is not always the direct cause of root rot, but it creates a mess that competes for oxygen, coats surfaces, and makes the system harder to read. A clean reservoir should be dark inside.
Inspect the lid, net pot openings, unused ports, water-level tubes, and any gap around the stem. Cover exposed hydroton with a light-blocking collar or lid insert if light reaches the nutrient solution. Do not assume a closed cabinet means a closed reservoir. LEDs are bright enough to find small gaps.
Keep the Waterline Below the Net Pot After Establishment
During early rooting, a higher water level can help the seedling reach the solution. Once roots are hanging into the bucket, lower the level so there is a humid air gap between the net pot and the nutrient solution. The bubbles will keep that zone moist while allowing the upper roots to breathe.
Constantly soaking the base of the net pot can leave young roots in a warm, wet, low-oxygen pocket. In a compact cabinet, that is an avoidable weak point. Let the established root mass grow down into the aerated solution.
Choose One Root-Zone Strategy
Pick a sterile approach or a beneficial-microbe approach. Do not casually blend them because a forum post made each product sound useful.
A sterile system relies on clean equipment, cool water, strong aeration, and a compatible sanitizer used at a controlled rate. This approach can be easier for a beginner because the goal is straightforward: keep the reservoir clean and do not feed microbial growth. It also demands consistency. A neglected warm reservoir will still become a problem.
A beneficial approach uses selected microbes to occupy the root zone and compete with pathogens. It can work well, but it is less forgiving of random inputs. Sanitizers will kill the biology you are trying to maintain, and heavy organic products can create buildup in a small bucket.
For a first compact DWC run, the sterile route is often easier to troubleshoot. That is not because beneficial systems are inferior. It is because a beginner benefits from fewer moving parts and a reservoir that is easy to inspect.
Clean the System Before It Needs a Rescue
Most root problems begin in residue, not in fresh water. Between runs, scrub the bucket, lid, net pot, airline, air stone, and any tubing that contacts nutrient solution. Rinse thoroughly after cleaning. If a component stays slimy or stained after proper cleaning, replace it. Air stones and cheap airline are consumable items, not heirlooms.
During the grow, keep top-offs measured and simple. Use clean water, mix nutrients completely before they enter the bucket when possible, and avoid pouring powders or concentrates directly onto roots. Check pH and solution strength with calibrated meters. A drifting pH is not root rot by itself, but it can disguise a root-zone issue as a nutrient deficiency.
A full reservoir change every 7 to 10 days is a solid baseline for a small DWC bucket, especially for newer growers. Some stable systems can run longer, but stretching intervals to save a few minutes is max-yield thinking in the wrong place. A predictable reset makes the reservoir readable.
Your Five-Minute Daily DWC Check
A disciplined daily check catches root rot before it becomes an emergency. Look at the water temperature, confirm the pump is pushing strong bubbles, and inspect for light leaks or falling water level. Then use your nose. A clean reservoir has little odor. If you notice a sour smell, do not wait three days for a scheduled maintenance day.
Every few days, lift the lid enough to inspect accessible roots. Do this carefully and keep the plant supported. You are looking for change, not perfection. A little nutrient staining is different from spreading slime and decaying tissue.
Keep brief notes on reservoir temperature, pH, EC or PPM, water use, and any change in root appearance. Numbers give you context. If the plant suddenly drinks less while the reservoir warms and the roots darken, you have a pattern, not a mystery.
What to Do at the First Sign of Trouble
When you suspect root rot, act in sequence. First, verify the air pump and temperature. Then remove the plant from the bucket carefully, drain the reservoir, and clean the bucket, lid, air stone, and tubing. Replace the air stone if it is dirty or weak.
Refill with fresh, properly mixed nutrient solution at a conservative strength. Restore strong aeration, block all light, and stabilize temperature before adding any recovery products. If you use a sterile treatment, use only one that fits your chosen approach and follow its label rate precisely. More treatment is not more control.
Do not prune large amounts of root mass unless tissue is clearly dead, loose, and rotting. Healthy roots are the plant's recovery engine. Remove only what is undeniably decayed, then give the system several days of stable conditions. The goal is to stop the slide, not force explosive growth overnight.
A clean DWC reservoir is not glamorous equipment. It is craft. Keep the water cool, the air constant, the light out, and your maintenance routine boring. Boring roots grow plants you can finish well.