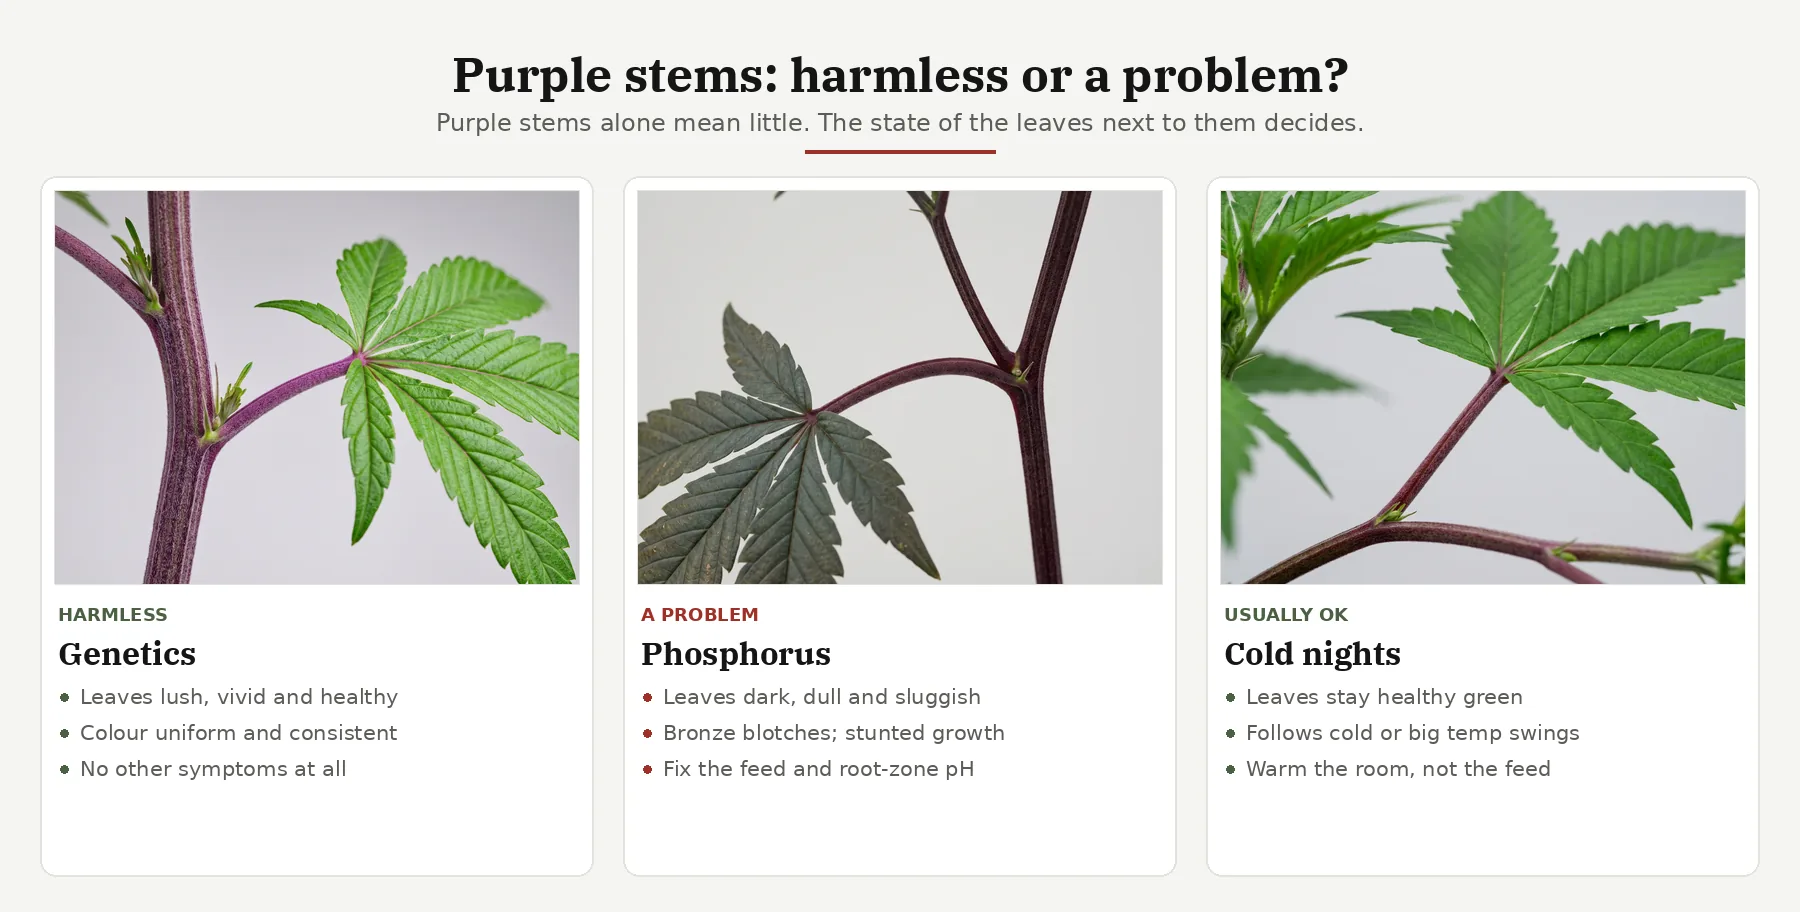
Troubleshooting: the complete image library
Spot it, name it, fix it — visual diagnosis for sick plants and post-harvest problems. Every image below is a real teaching asset from the troubleshooting guides — grouped by topic, captioned, and linked to the article it lives on. Click any image to view it full size.
Match your plant to a known frame instead of trusting your memory of one.
Diagnosis by recall is unreliable. You remember a yellow leaf; you do not remember whether the yellowing sat between the veins or covered them, whether it started at the bottom of the plant or the top, or whether the margins were involved. Those details are the whole diagnosis, and they are exactly what a side-by-side comparison protects. This page exists so you can hold your plant next to a labelled reference and check the specifics rather than reconstruct them.
Every frame here is shot the same way on purpose — consistent framing, consistent light, the symptom filling the frame. That consistency is what makes comparison honest: when two macros differ, the difference is the symptom and not the camera. Read each one for three things before you decide it matches. Where on the plant the damage sits, because old-growth and new-growth problems have entirely different causes. What pattern it follows, because interveinal yellowing, margin burn and scattered spots point in different directions even at the same colour. And what the surface is doing, because a flat colour change is a feeding or environment problem while stippling, powder, webbing or scarring means something is living on the plant.
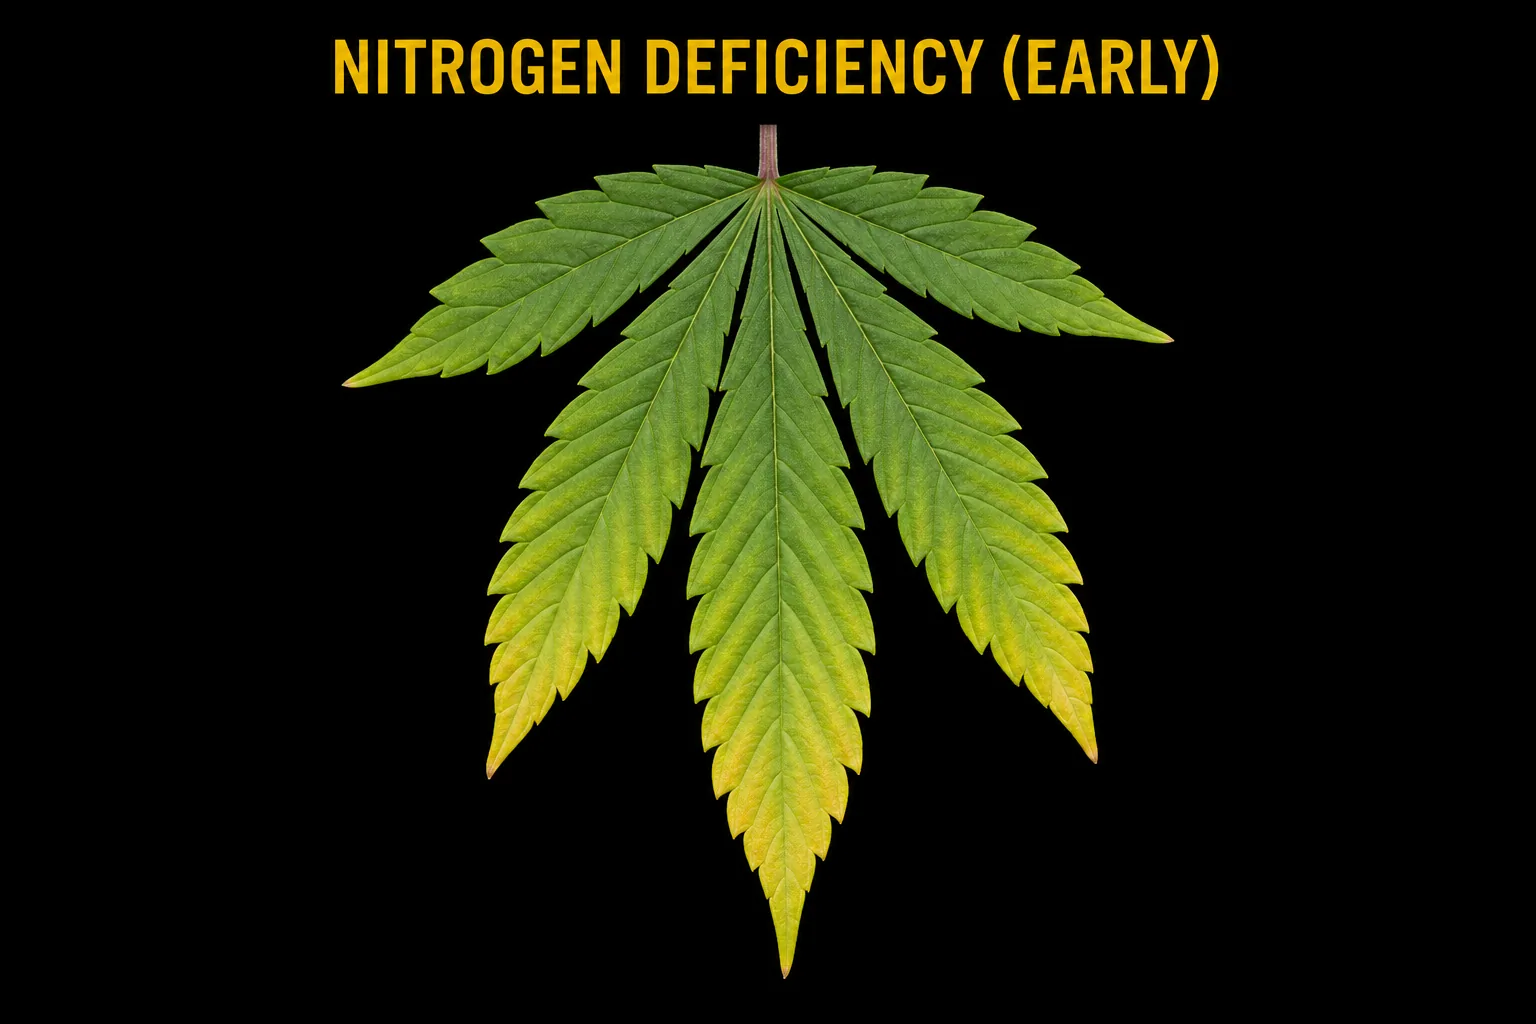
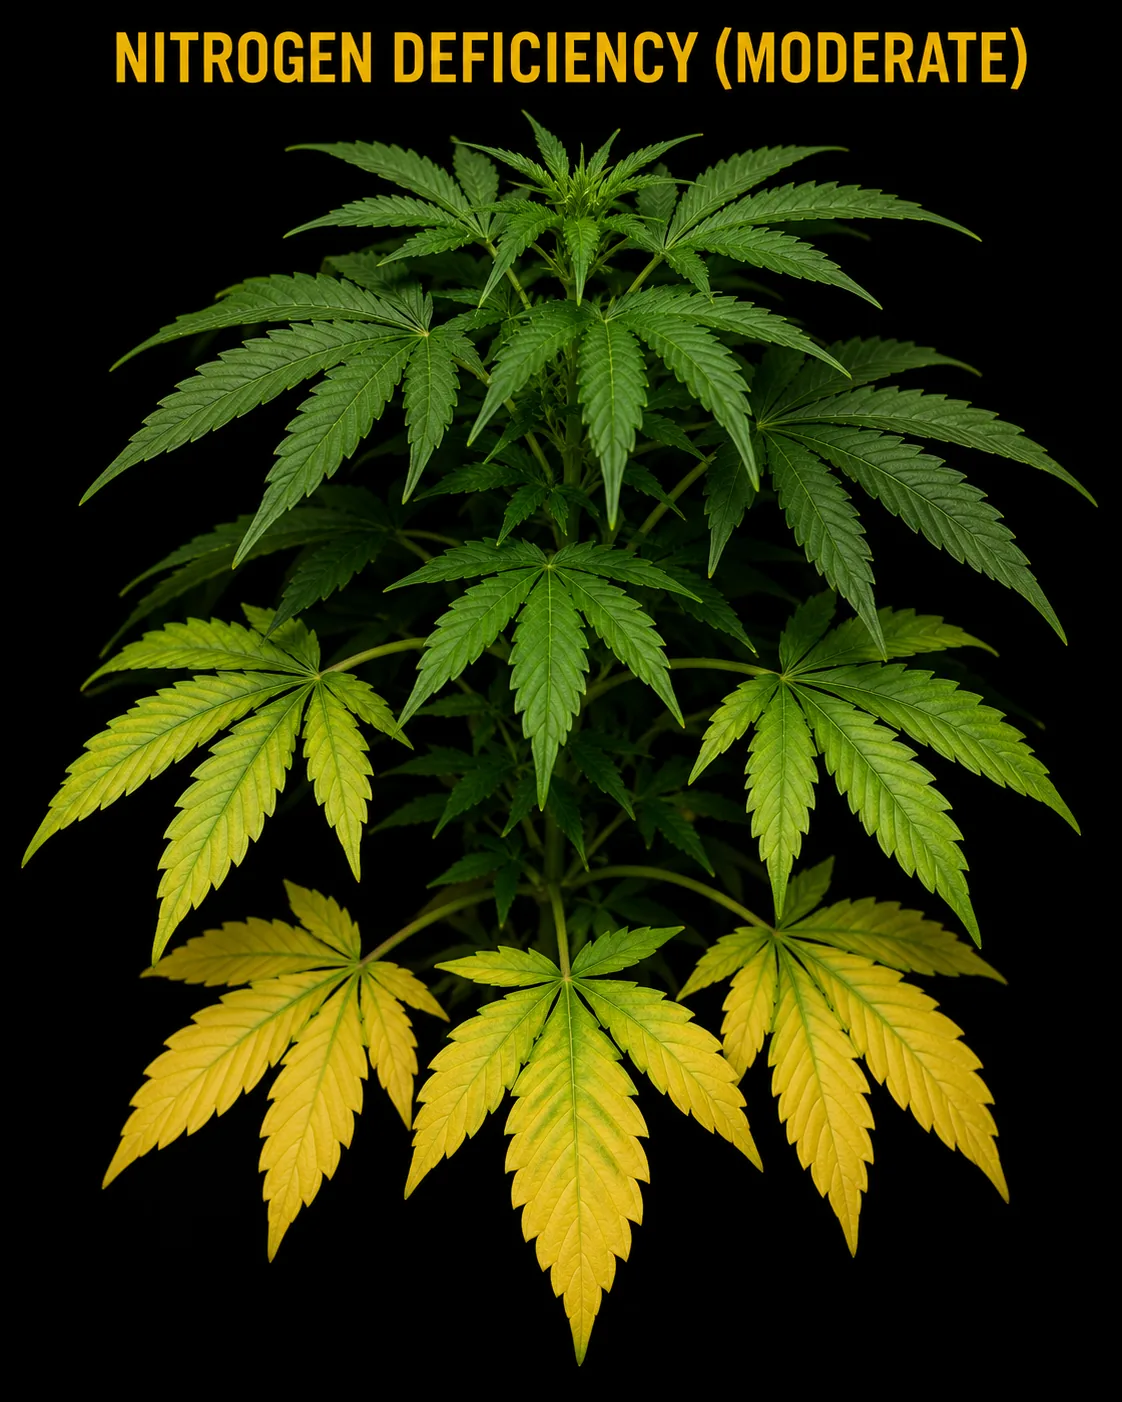
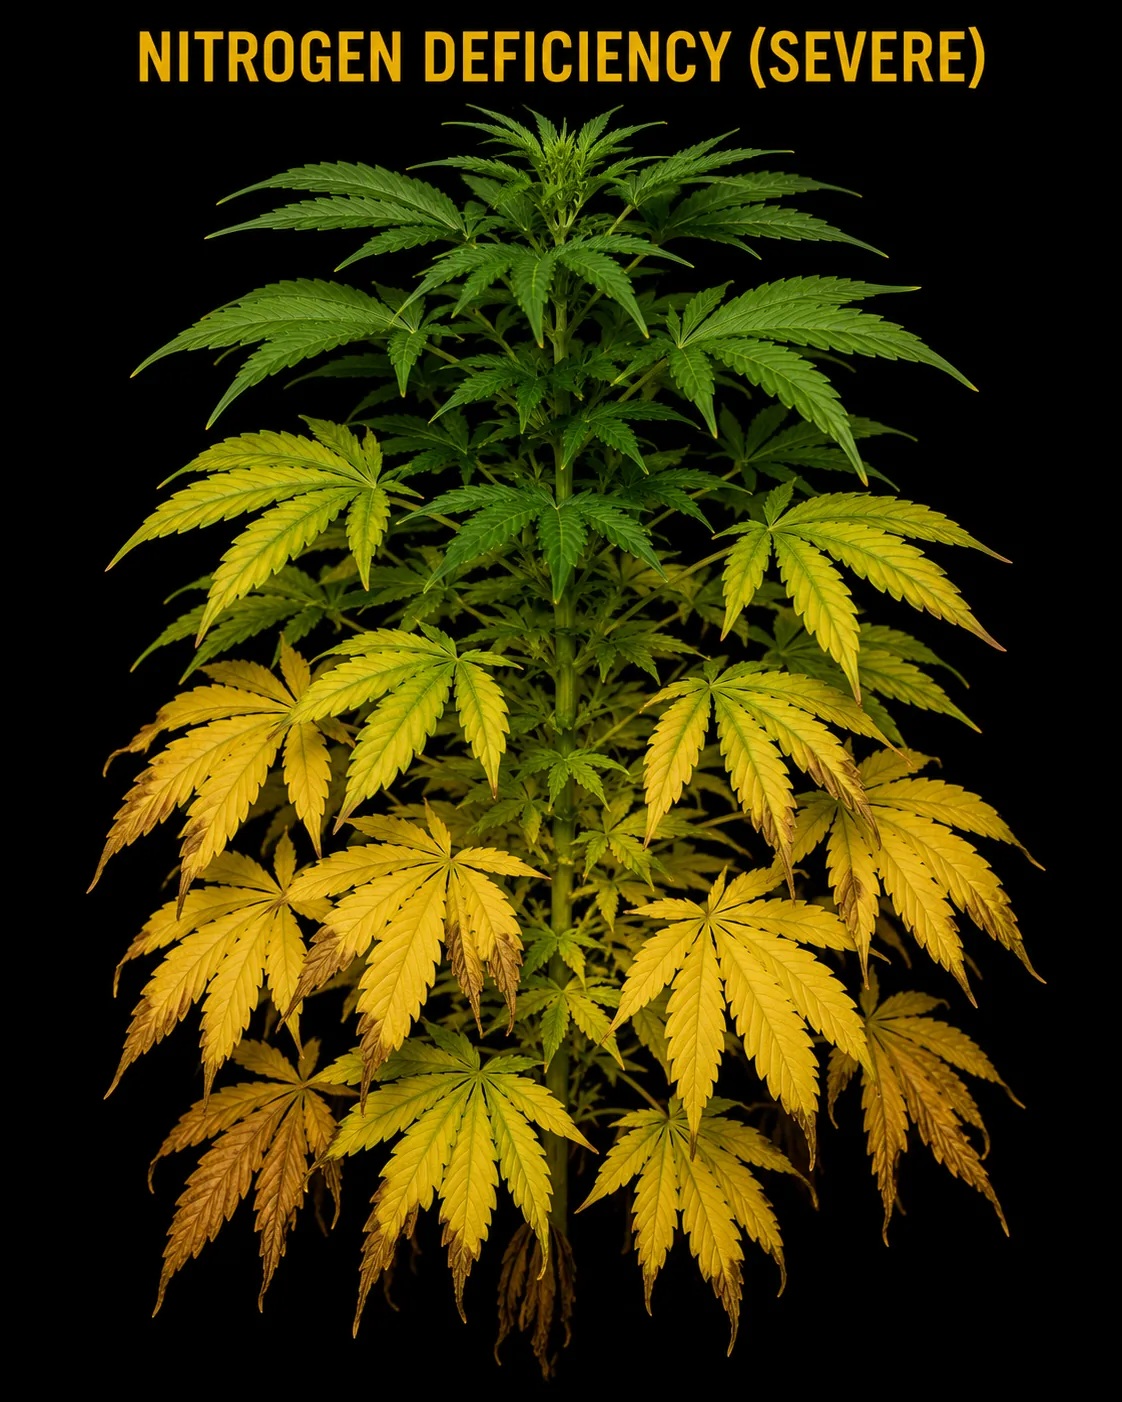
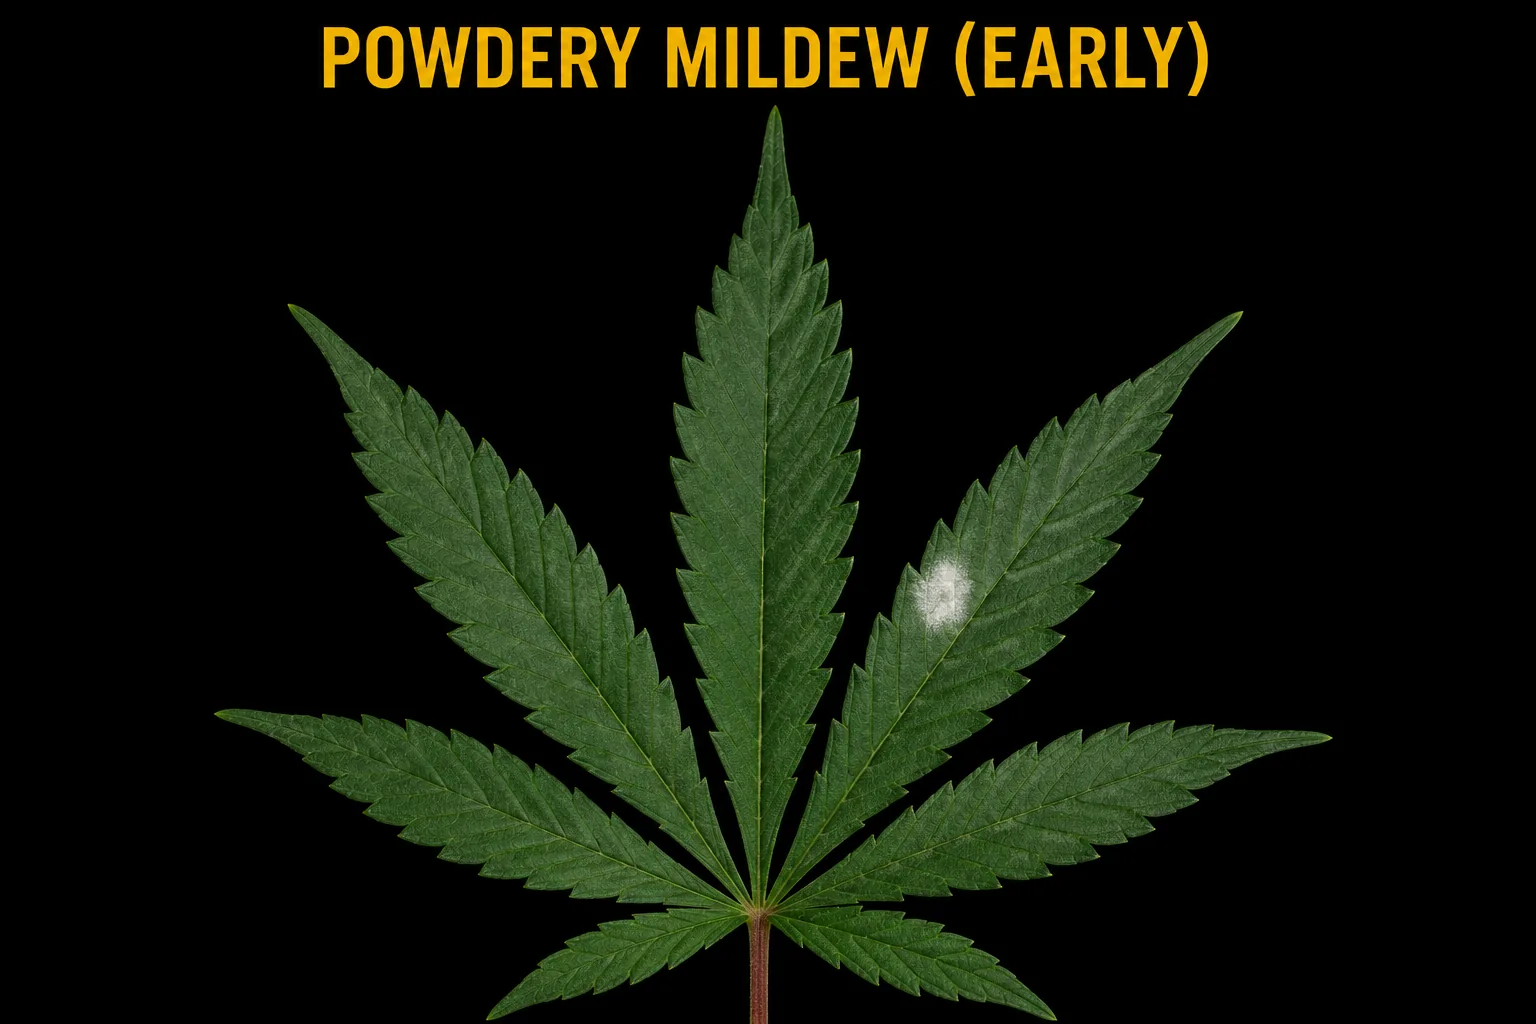
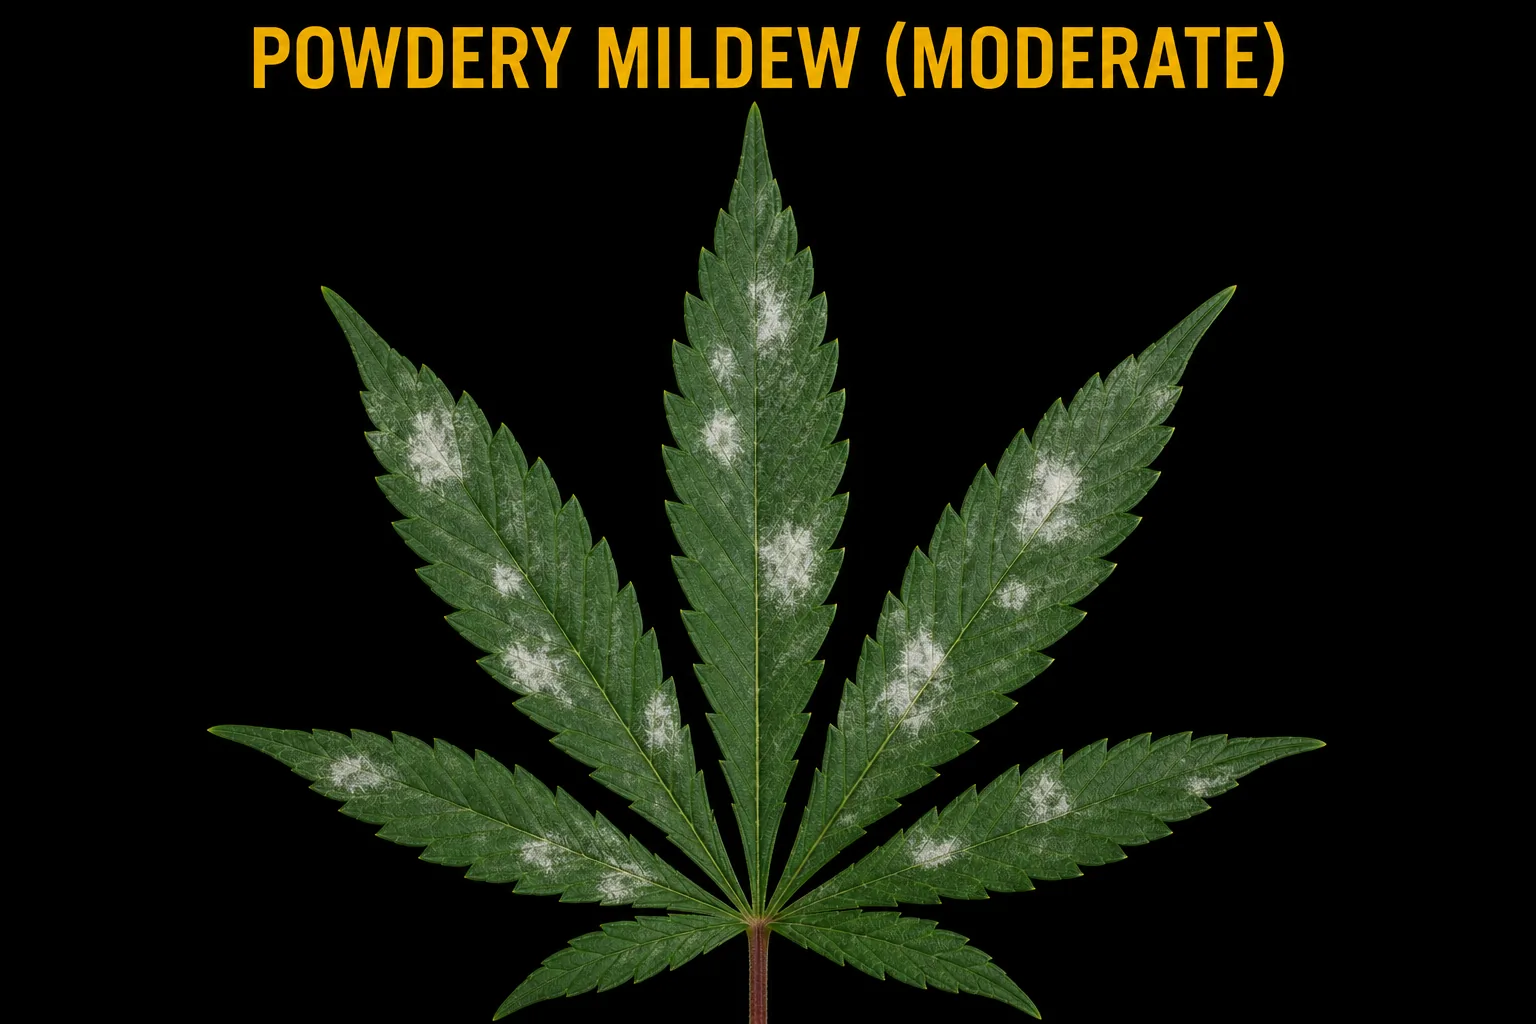
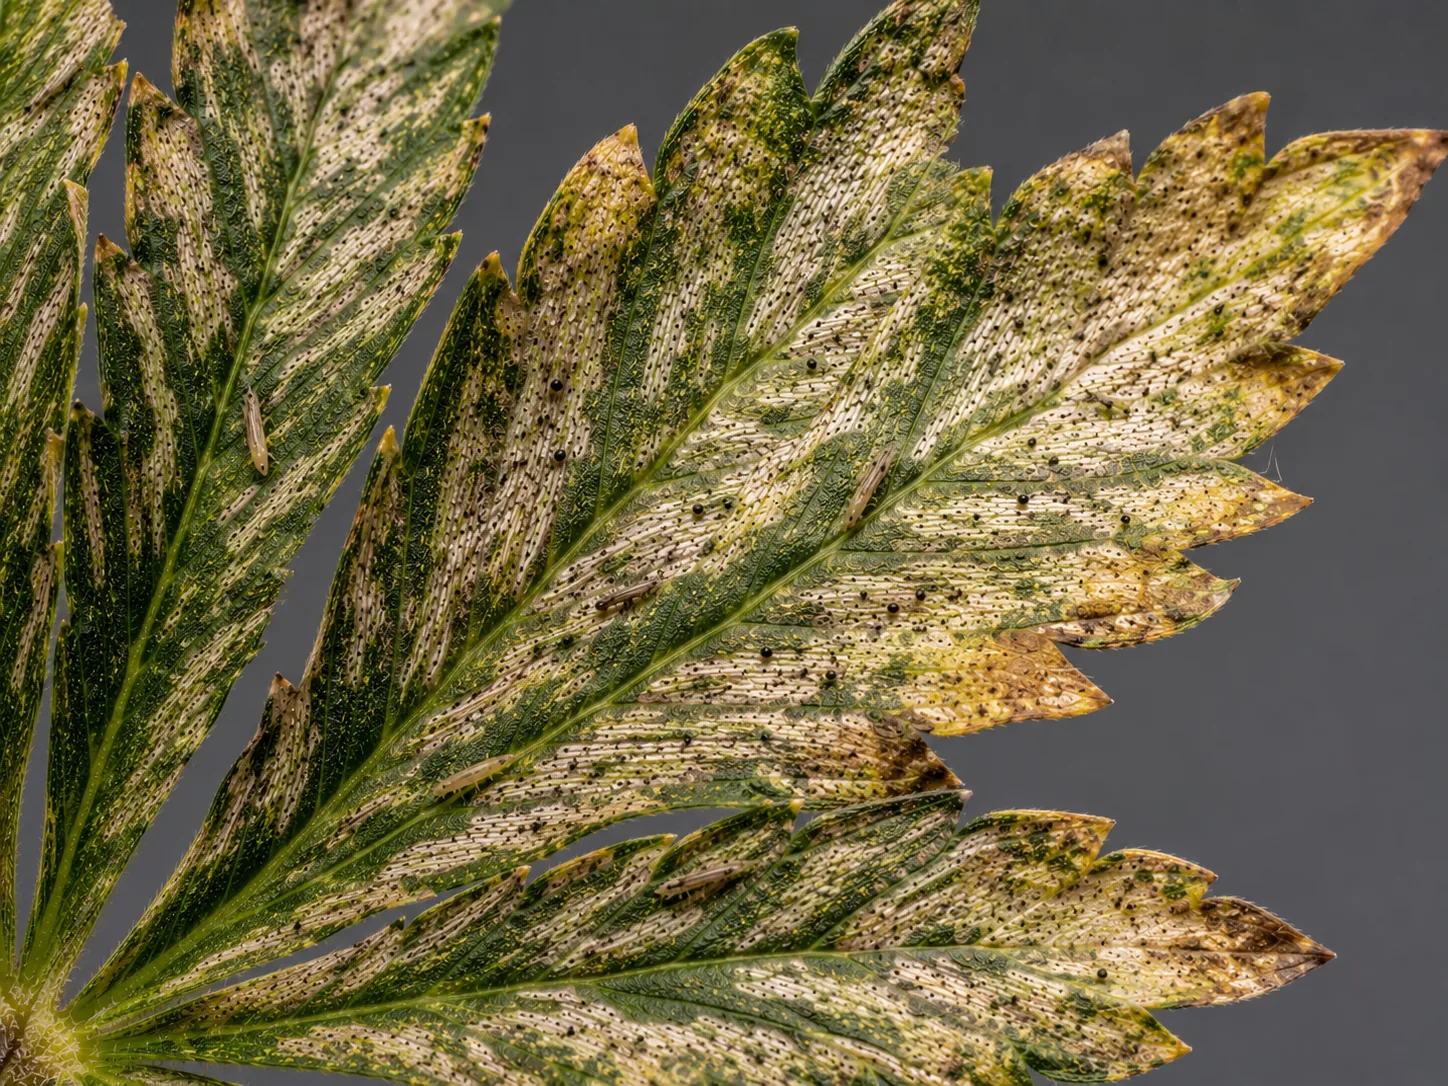
Where a symptom has stages, the sets run early, moderate, severe in that order. Compare against all three rather than the worst one — catching a problem at the early frame is the difference between a small correction and a lost lower canopy. Nothing here is a fix on its own; each tile links back to the guide it came from, and that guide is where the response lives. If you would rather start from the symptom in words, the diagnostic entry point sorts the same ground by what you can see.
The natural moments to open this page are the ones where something has changed and you cannot name it yet: a leaf that looked different this morning, a droop that arrived overnight, a patch of discolouration you have been telling yourself is nothing for three days. It is also worth a slow scroll before your first run, purely so the shapes are already familiar when one of them turns up in your own cabinet.
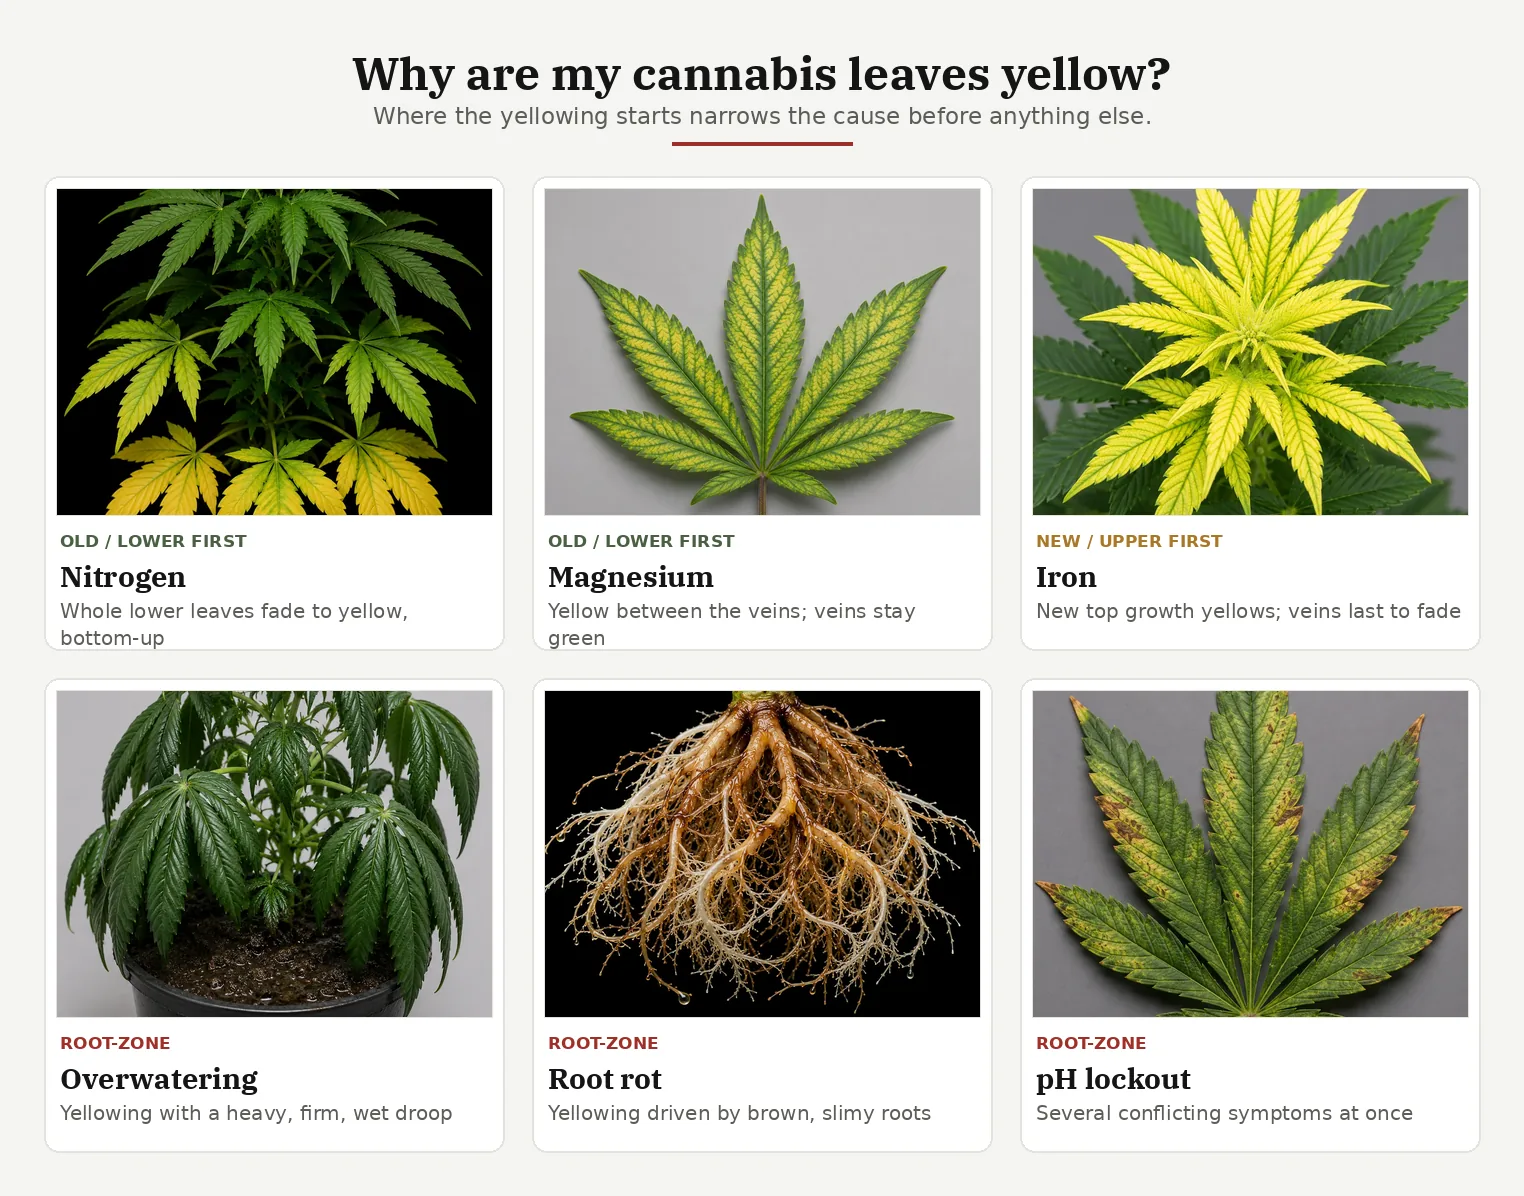
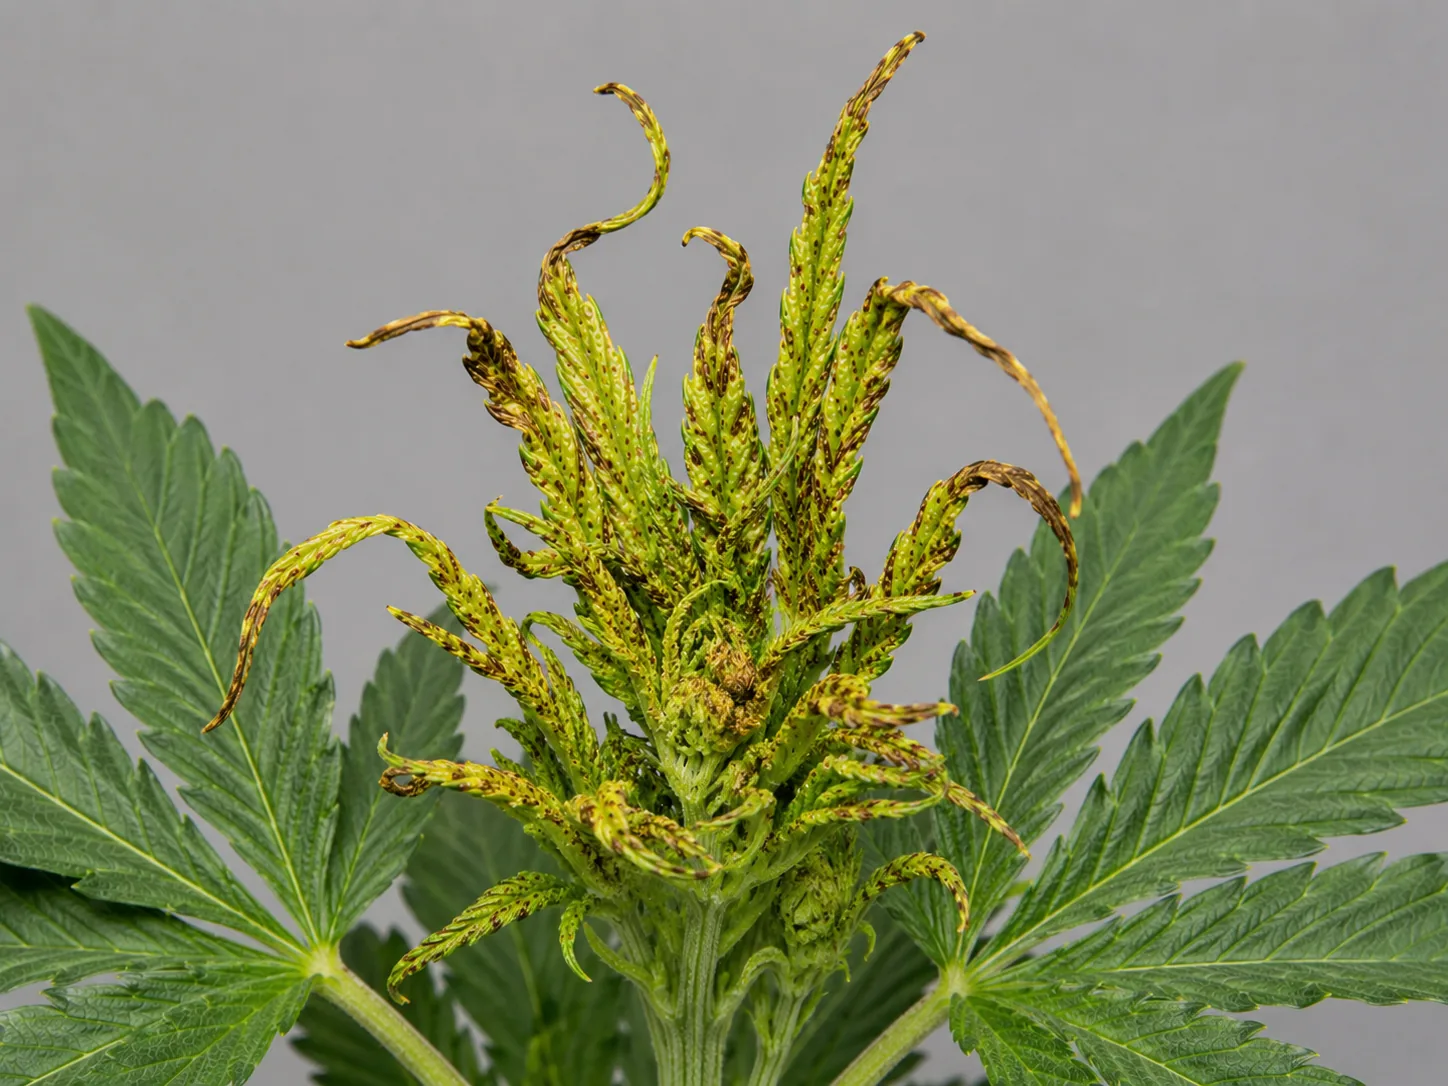
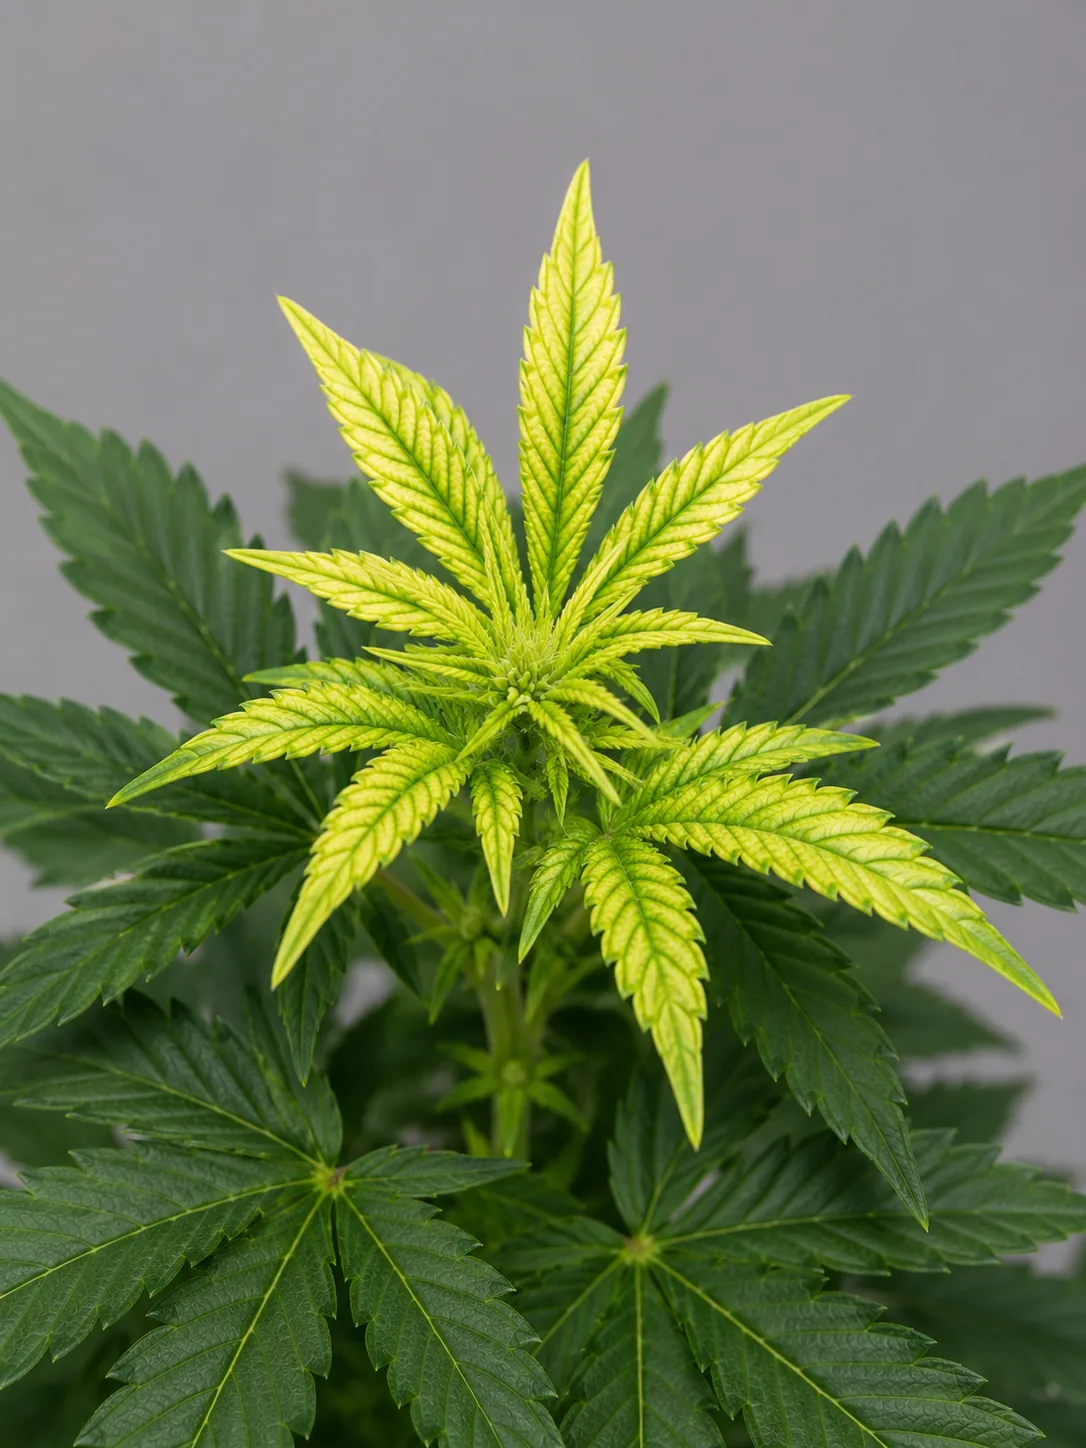
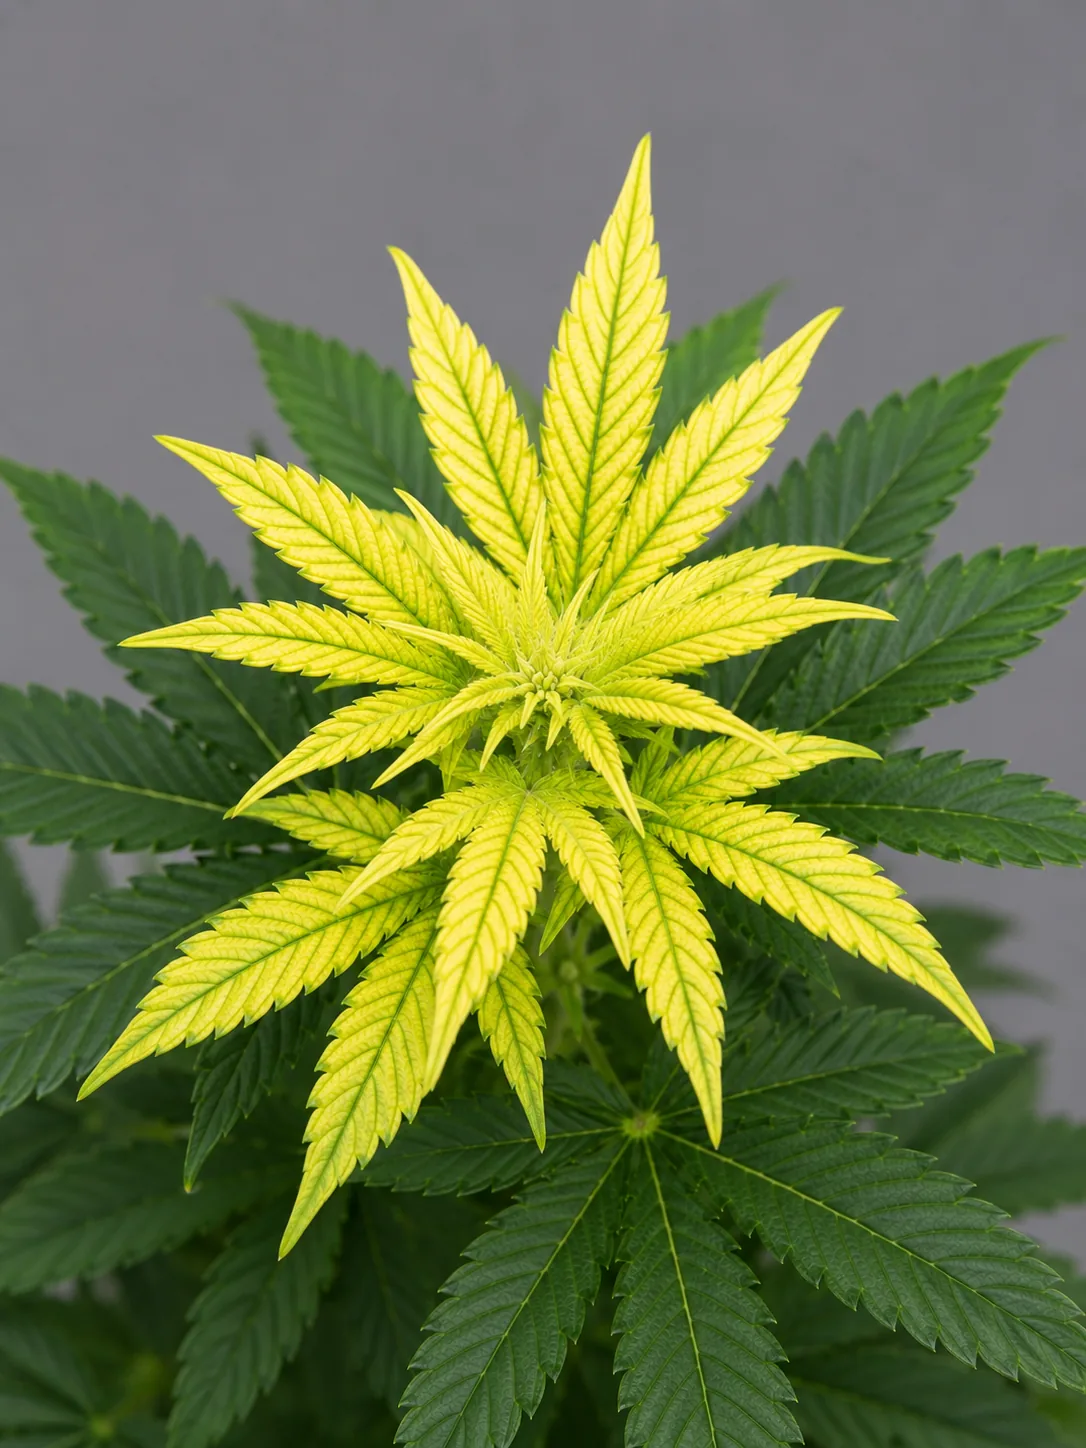
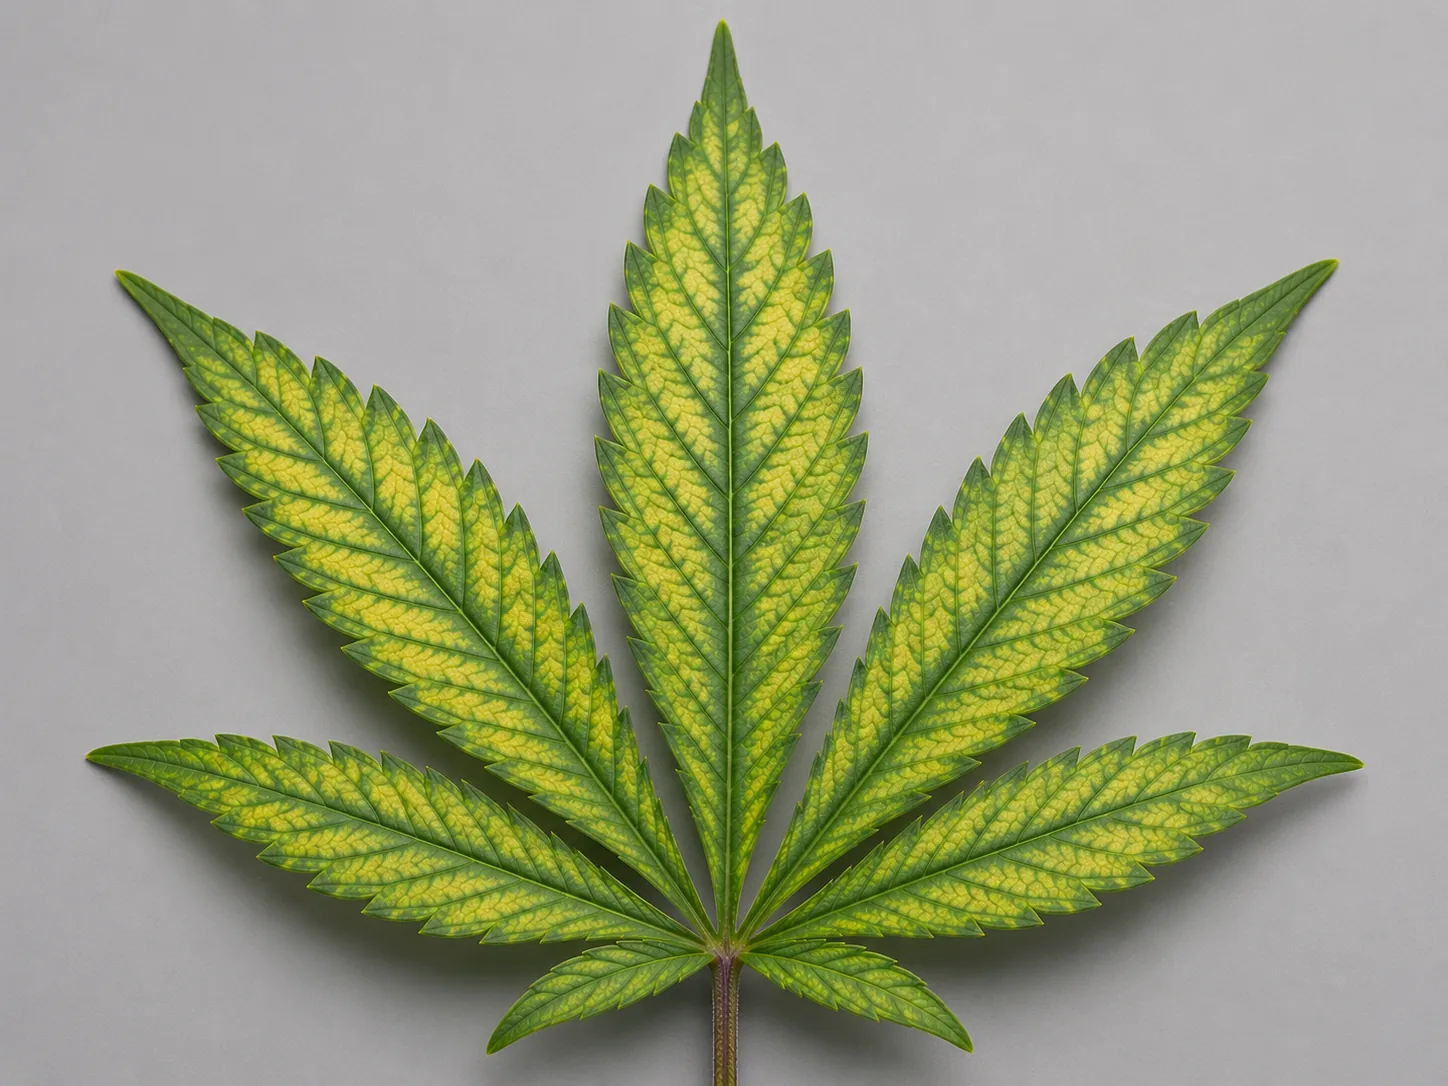
Yellowing, spotting, lockout — what the leaf is telling you.
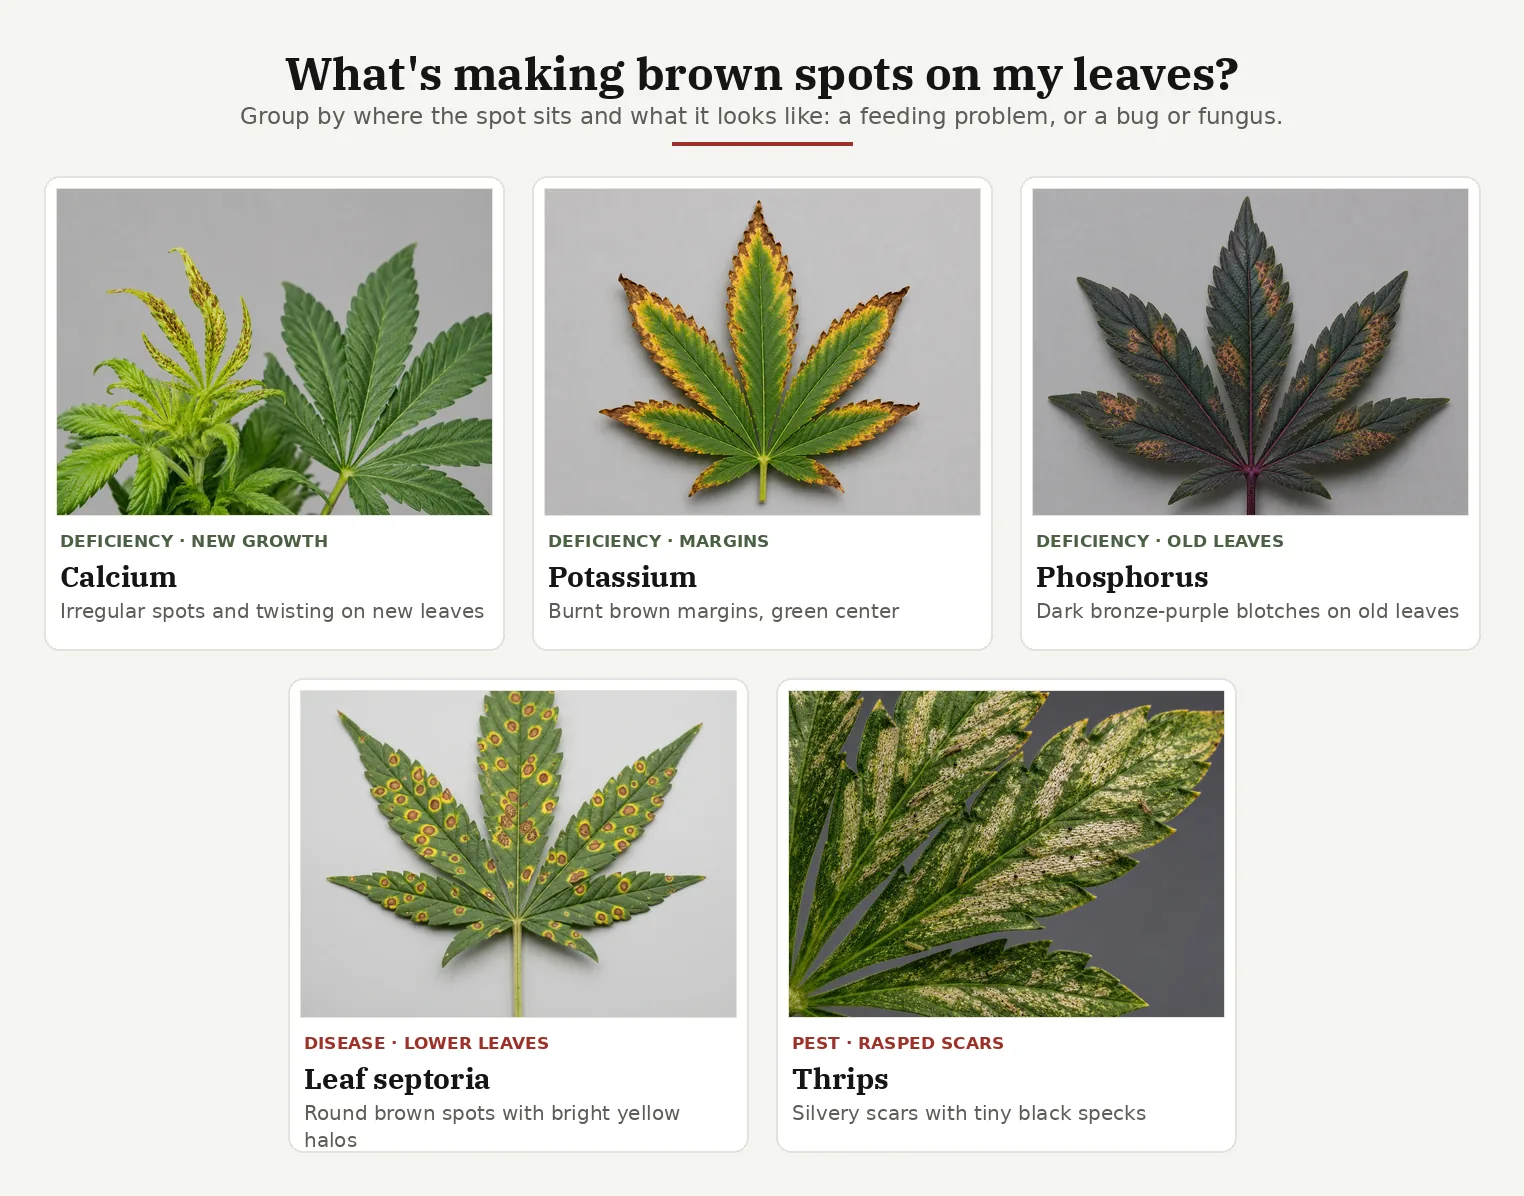
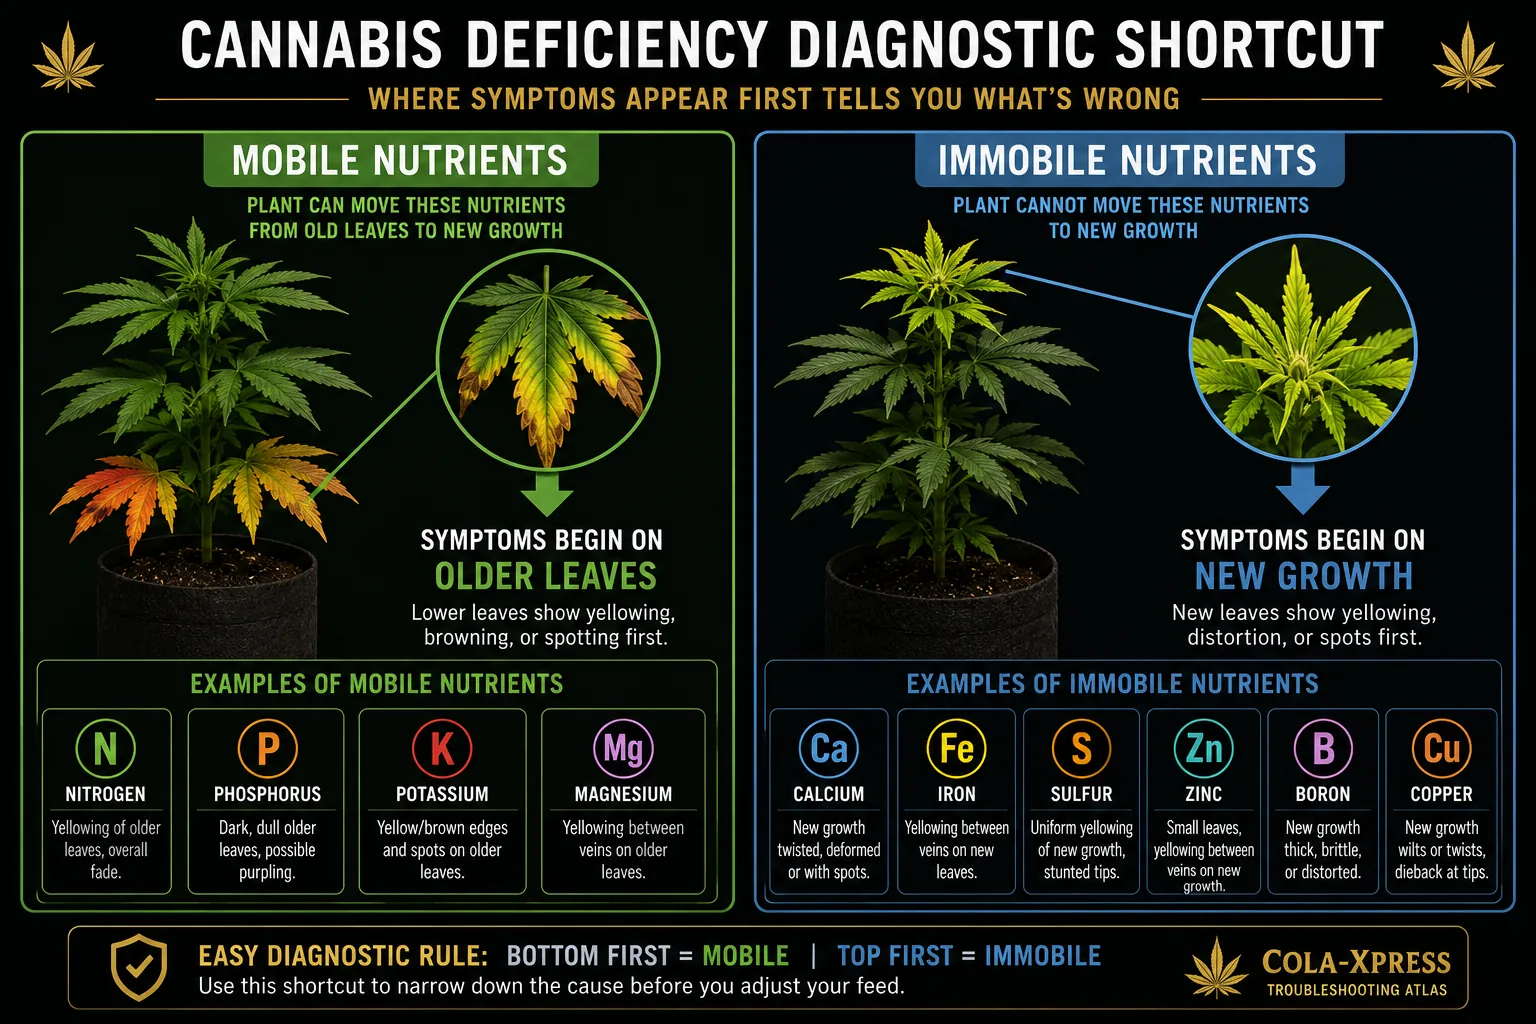
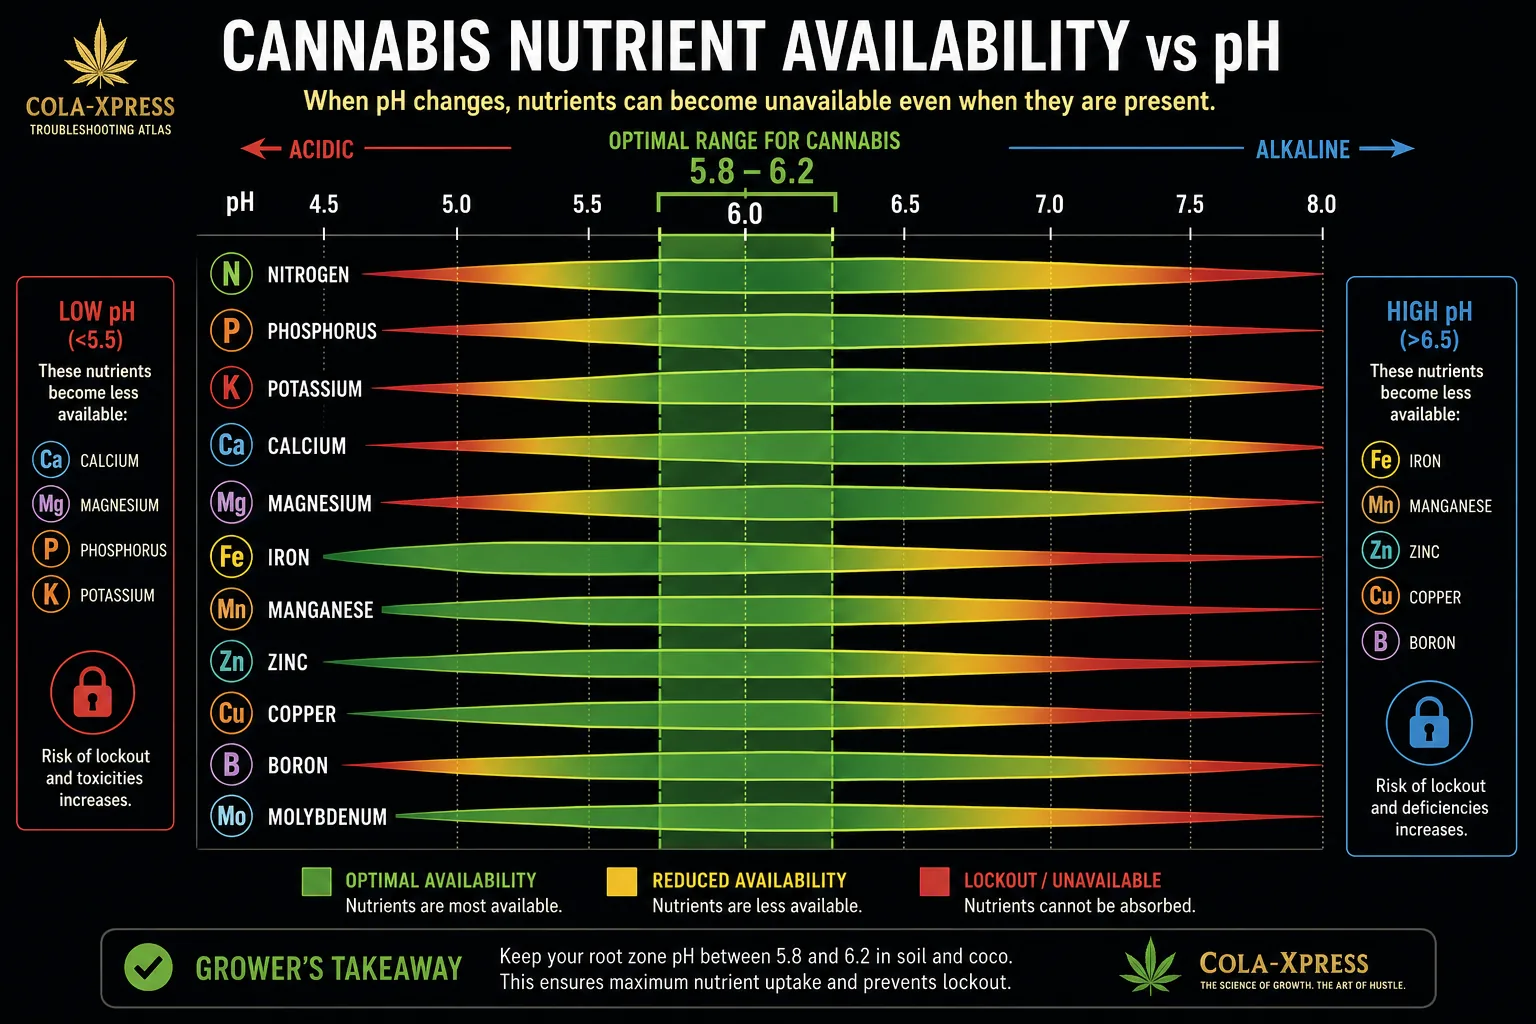
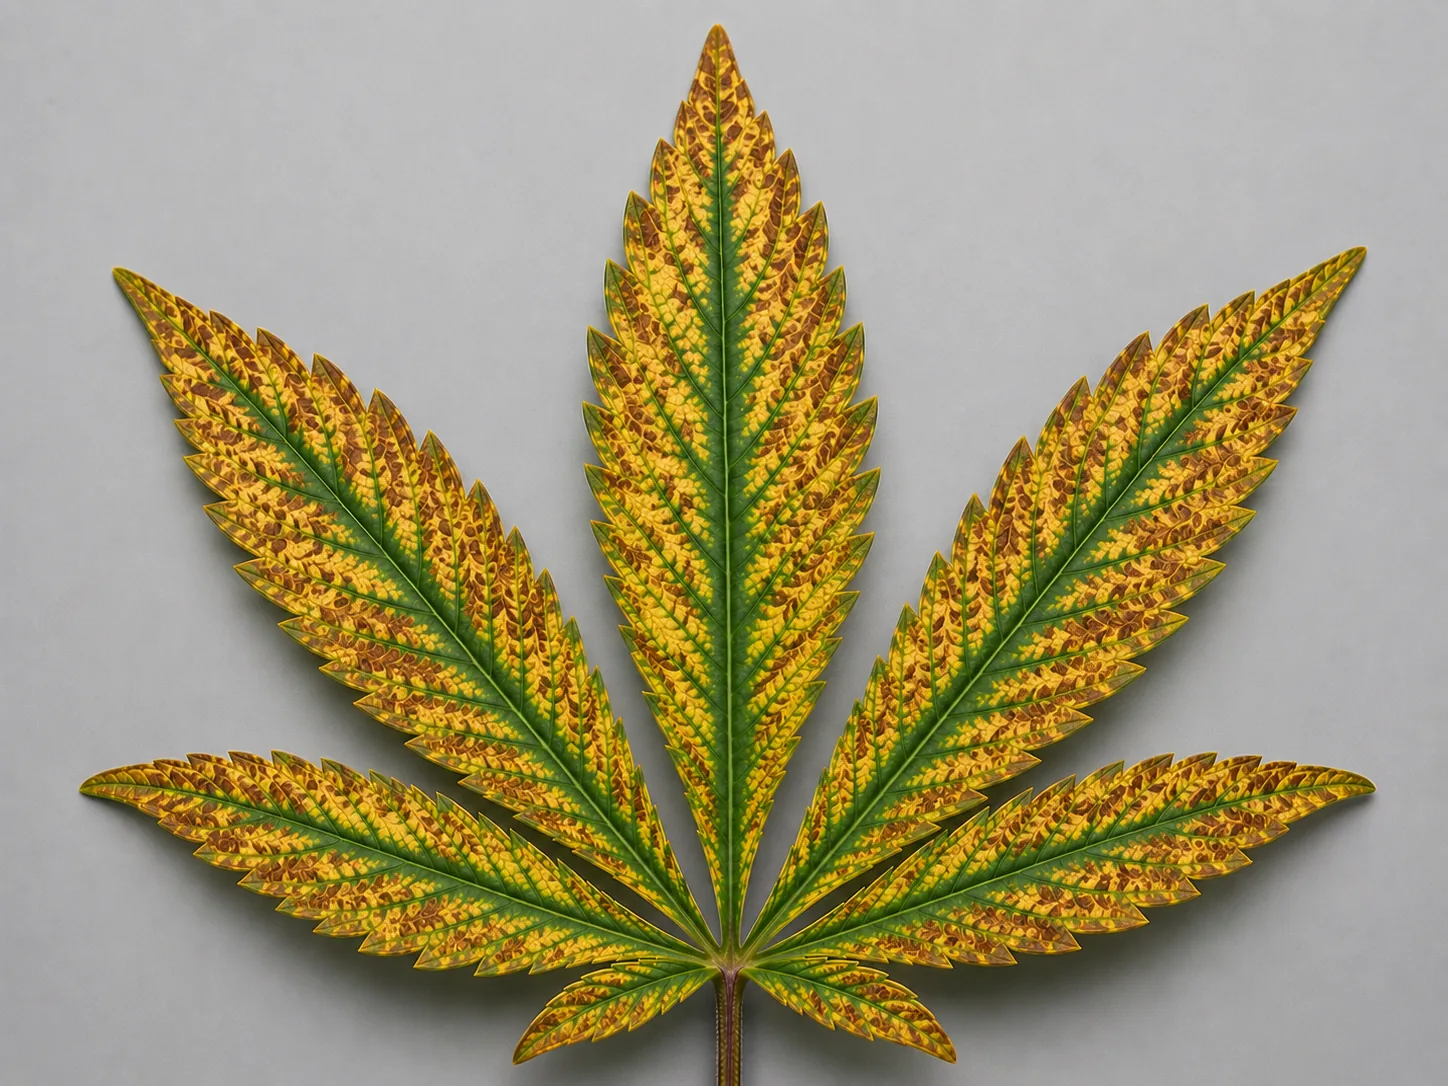
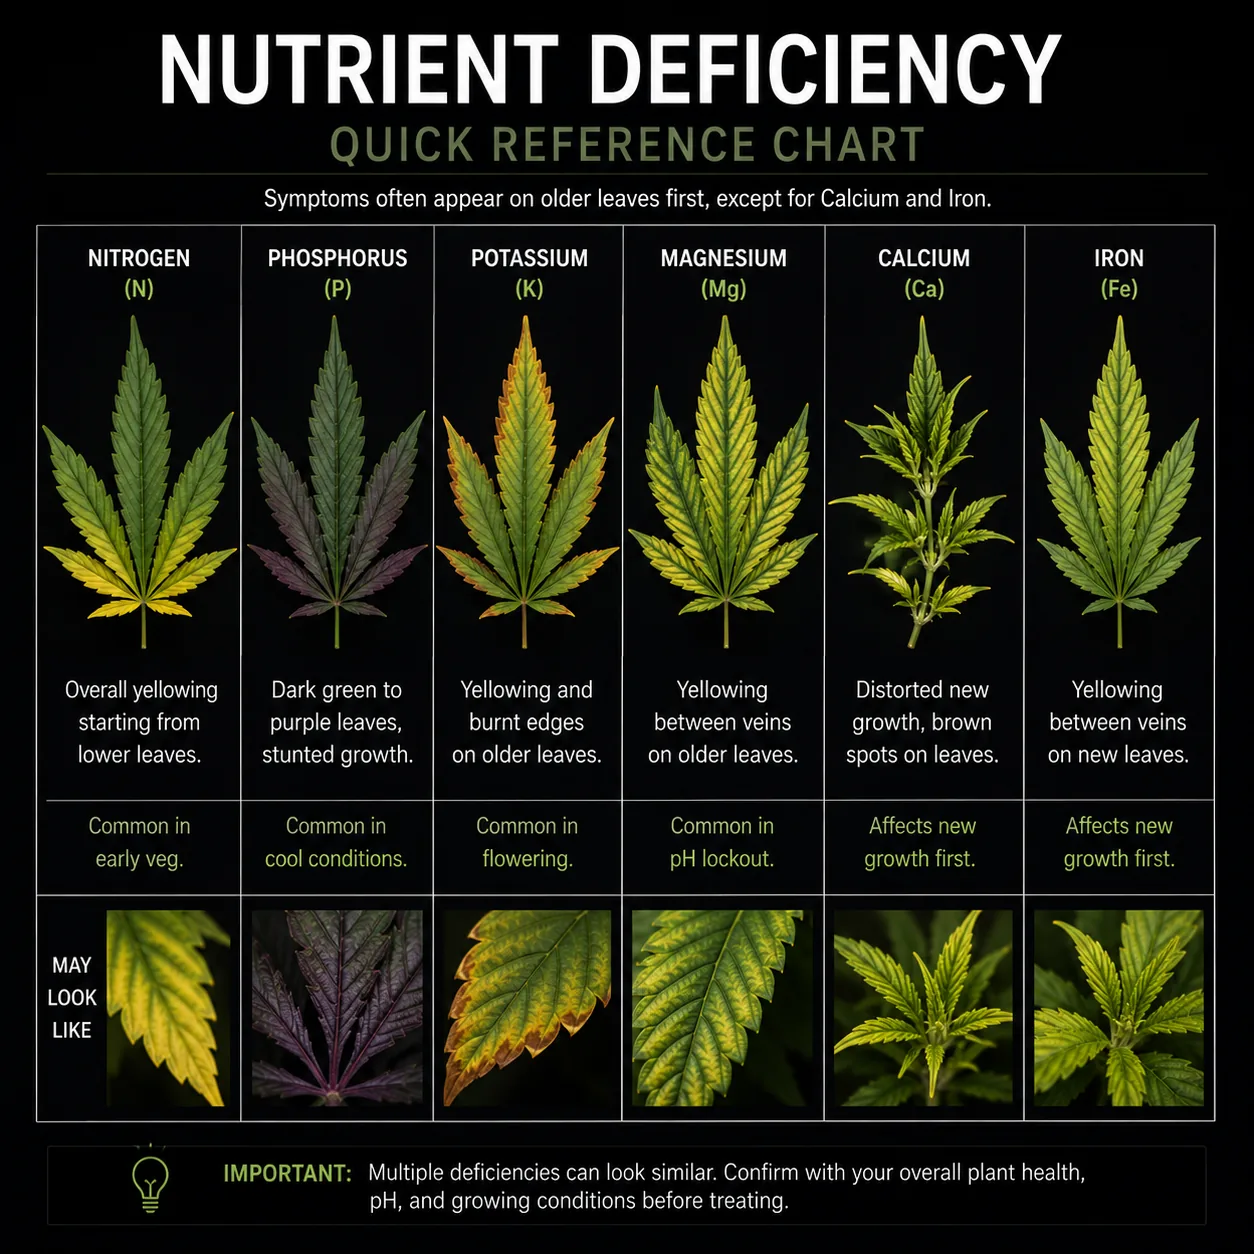
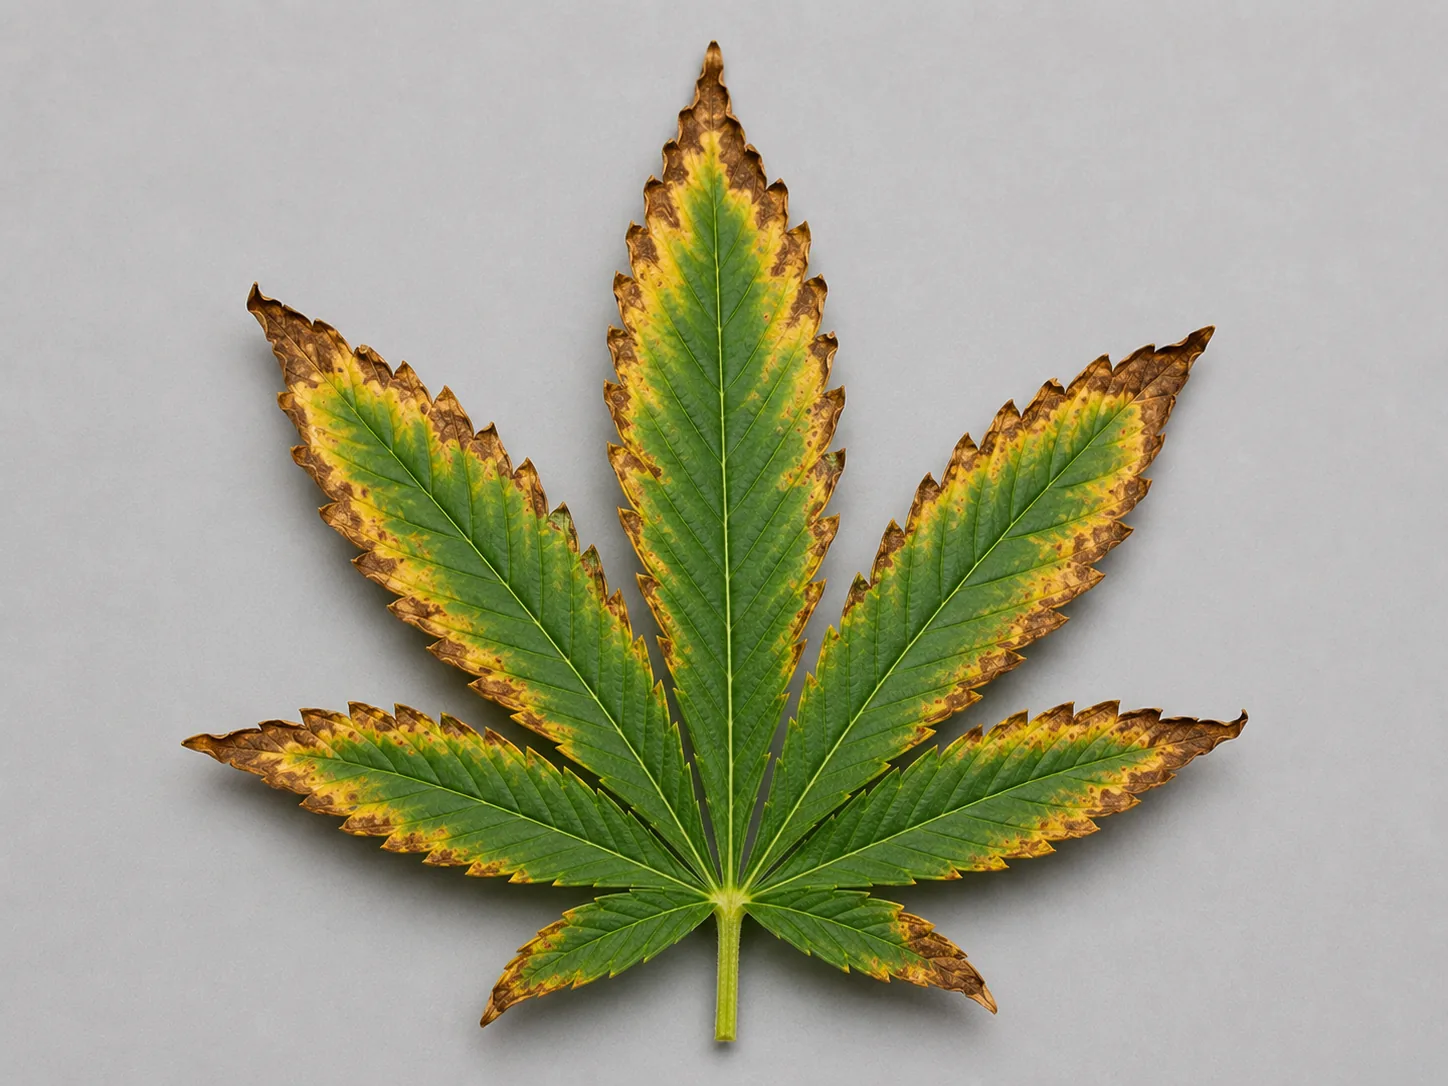
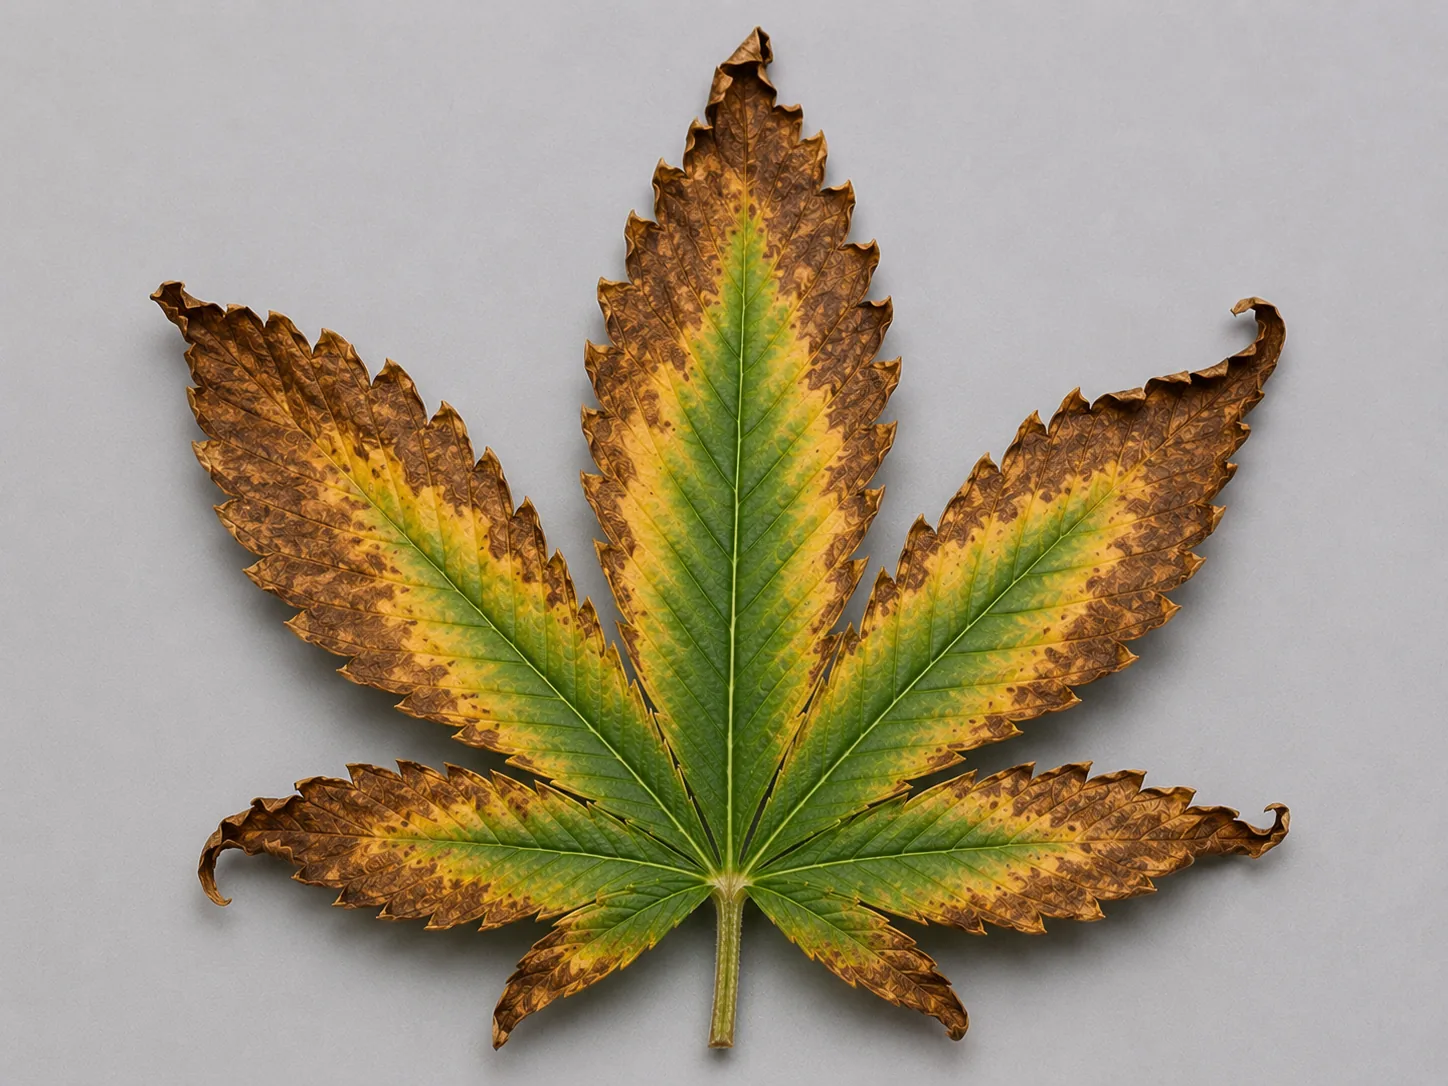
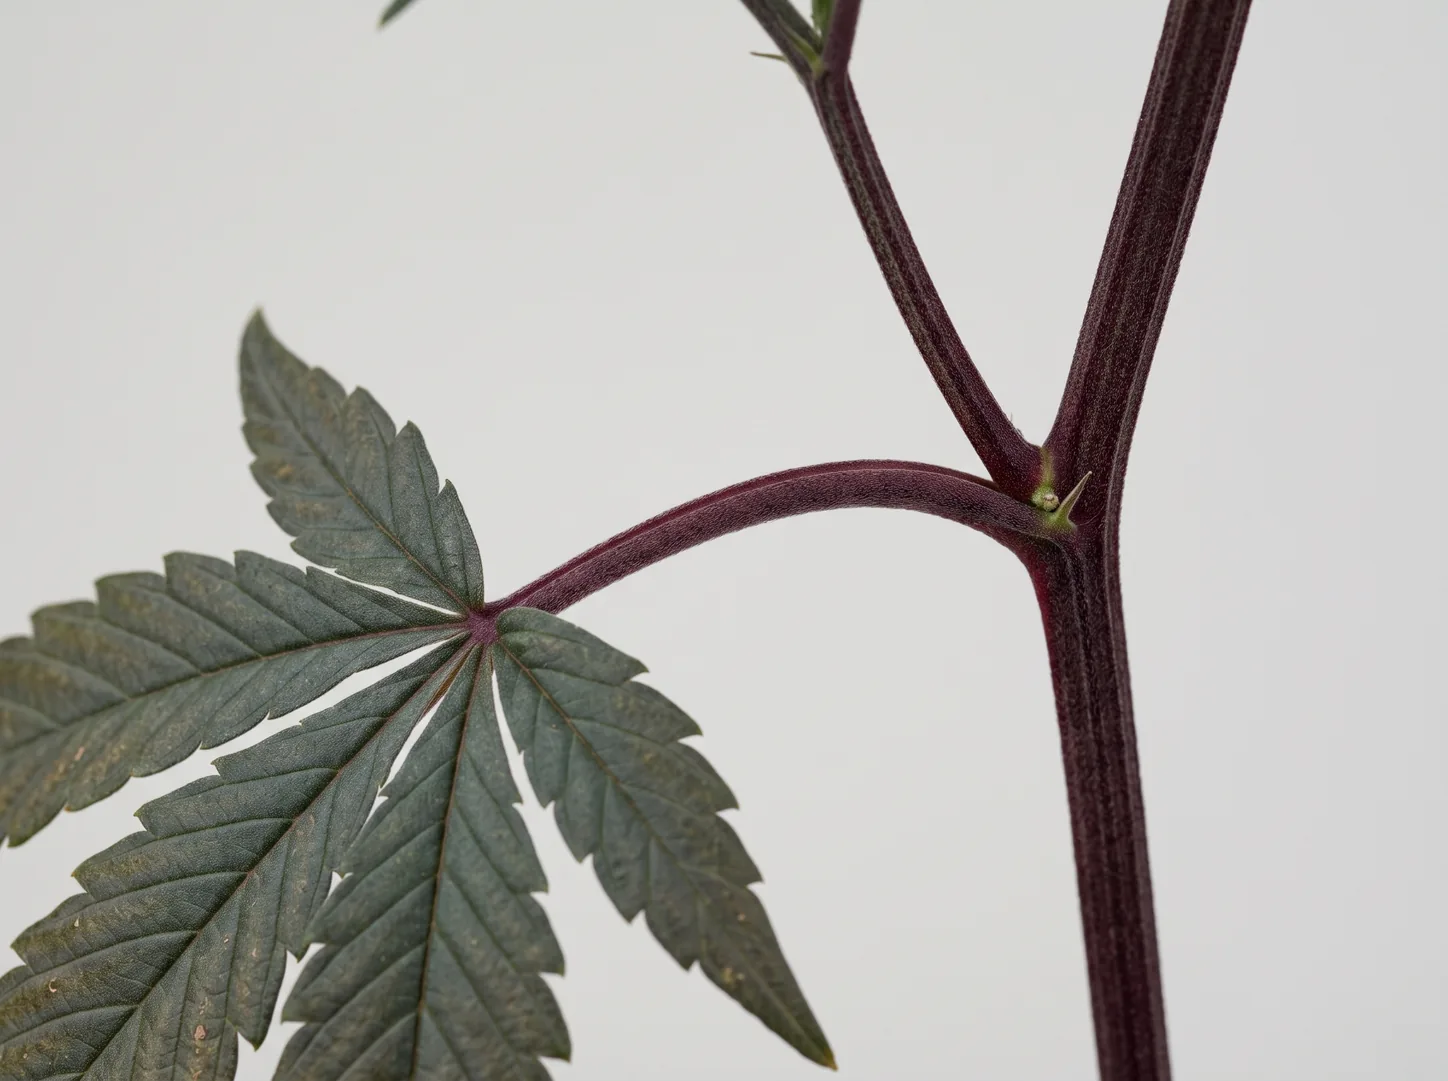
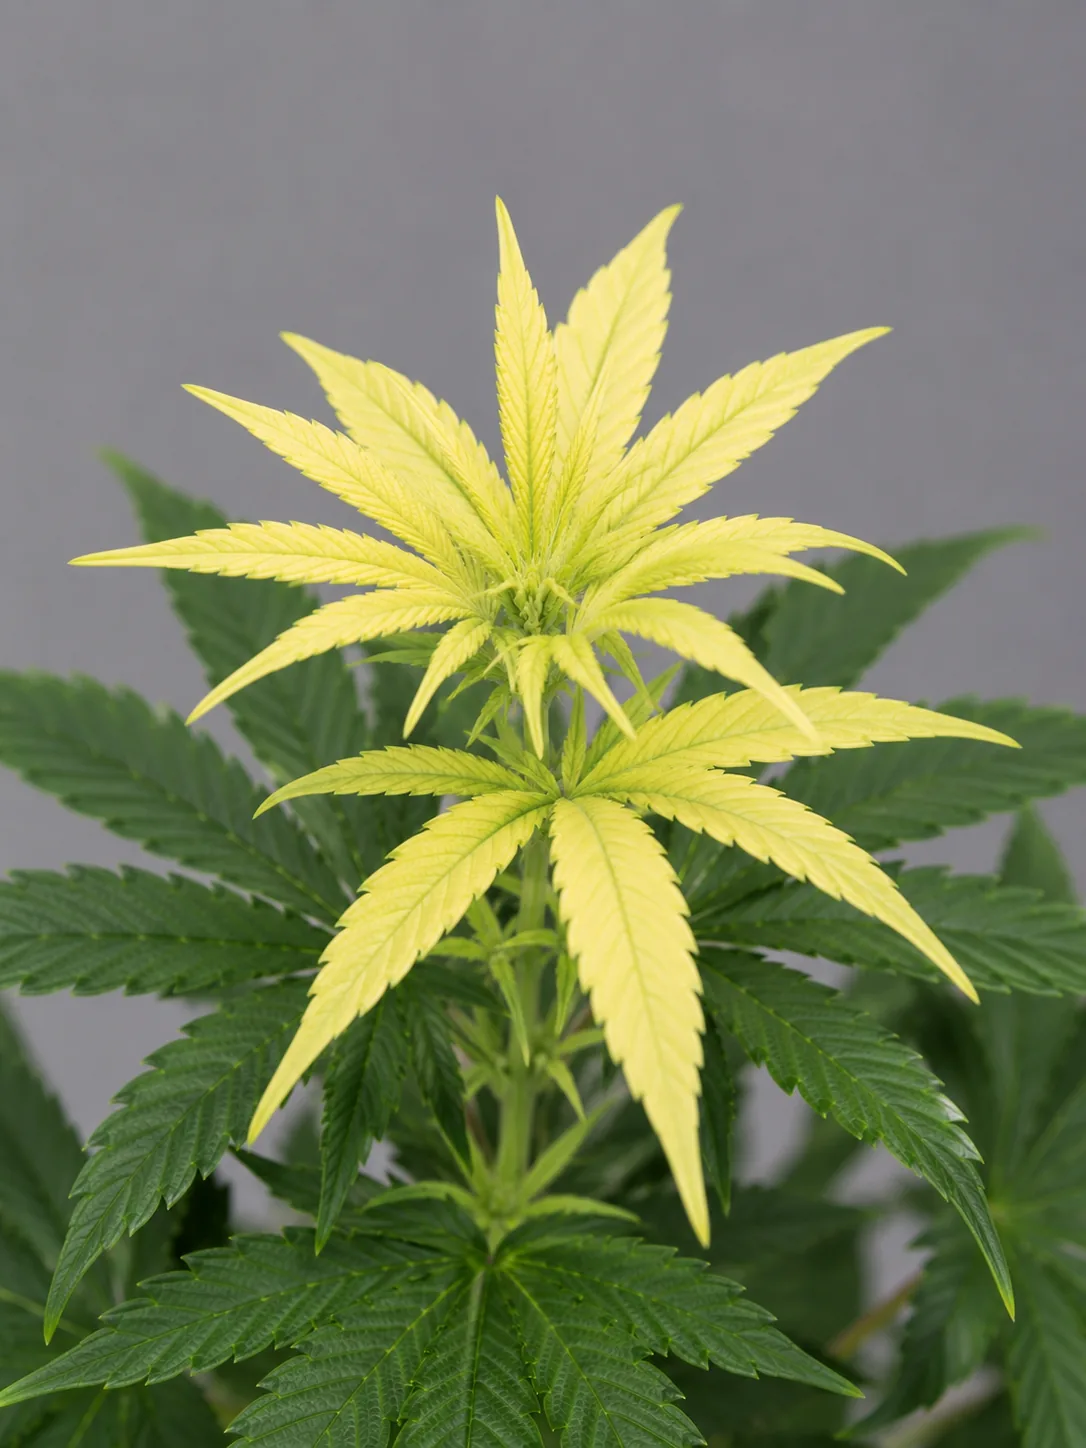
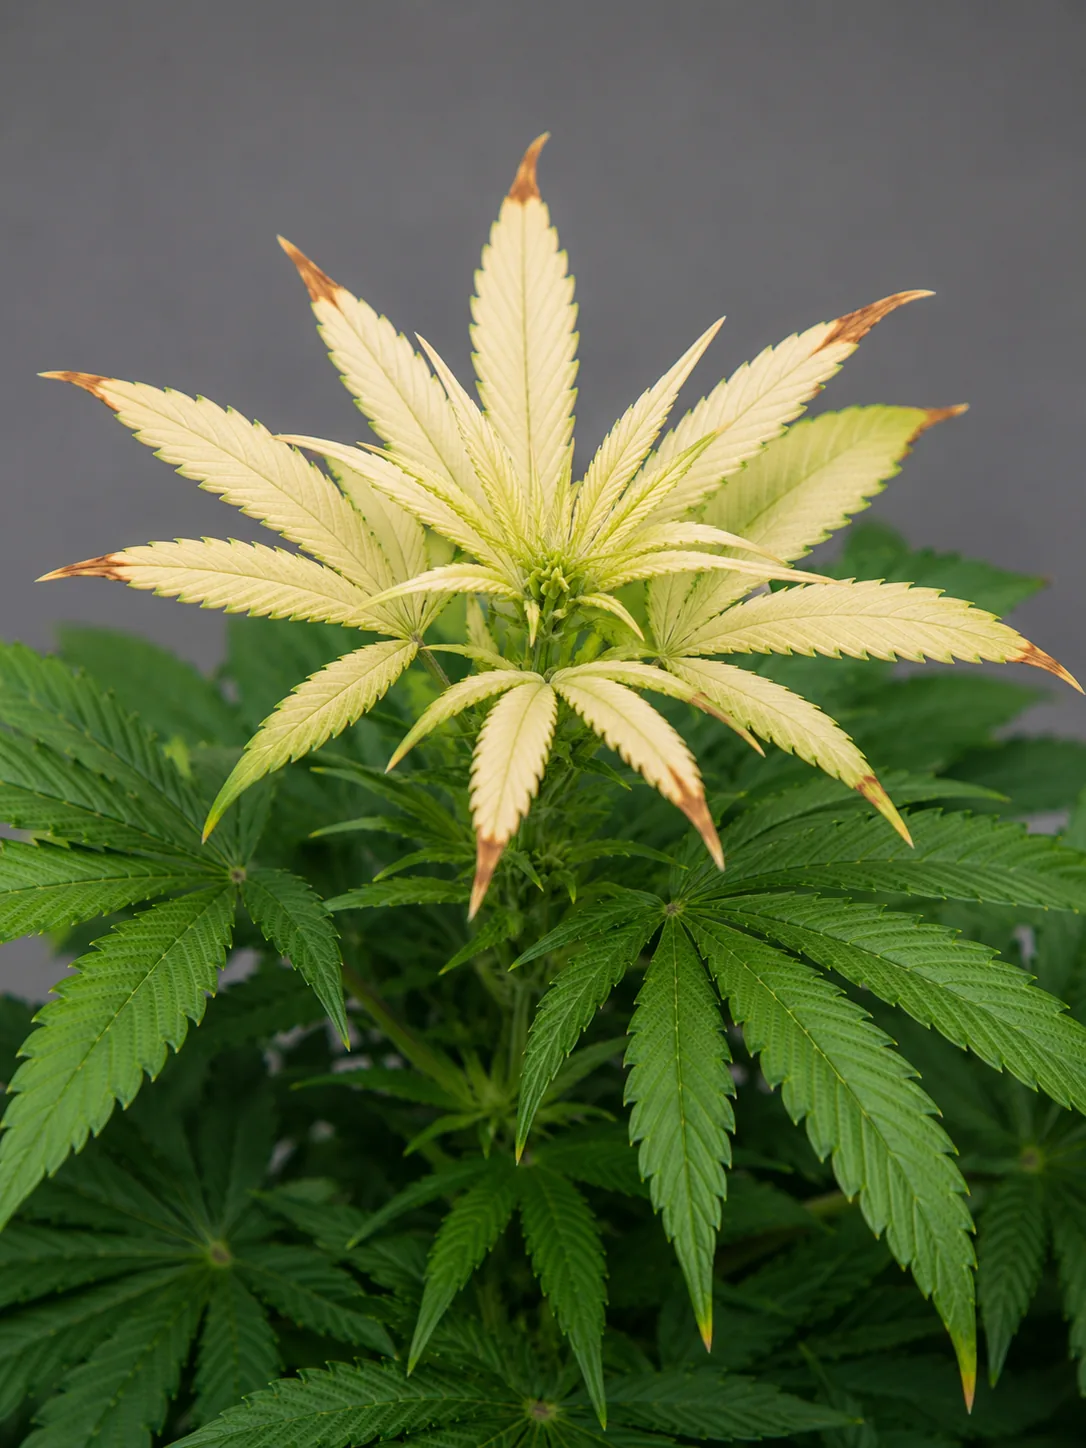
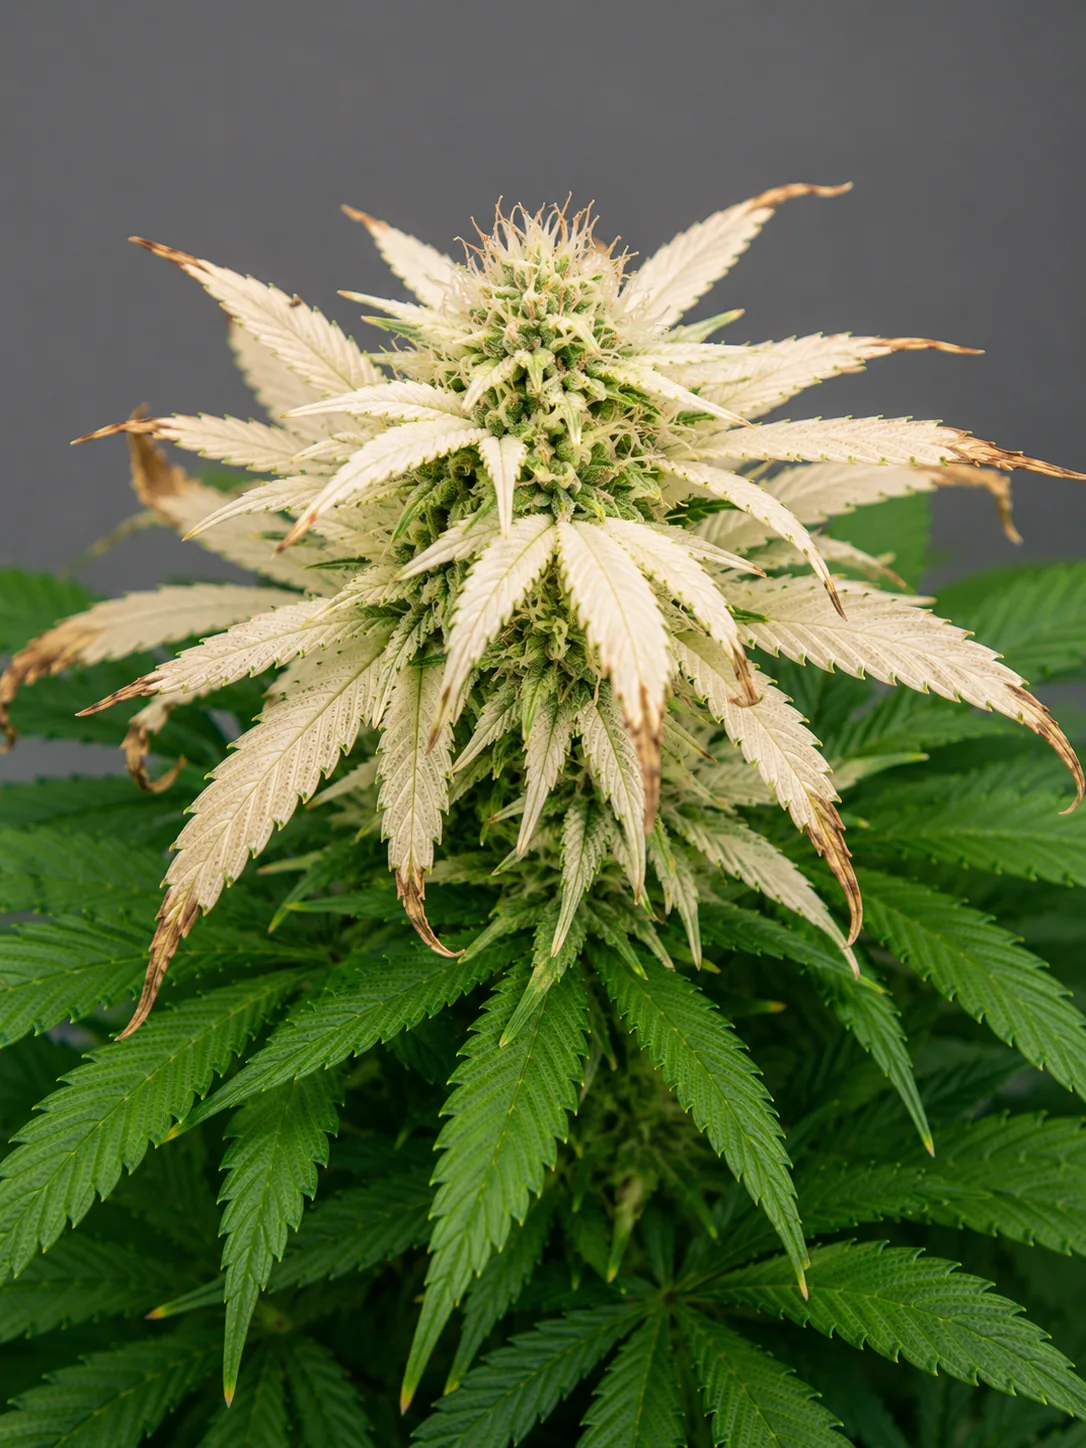
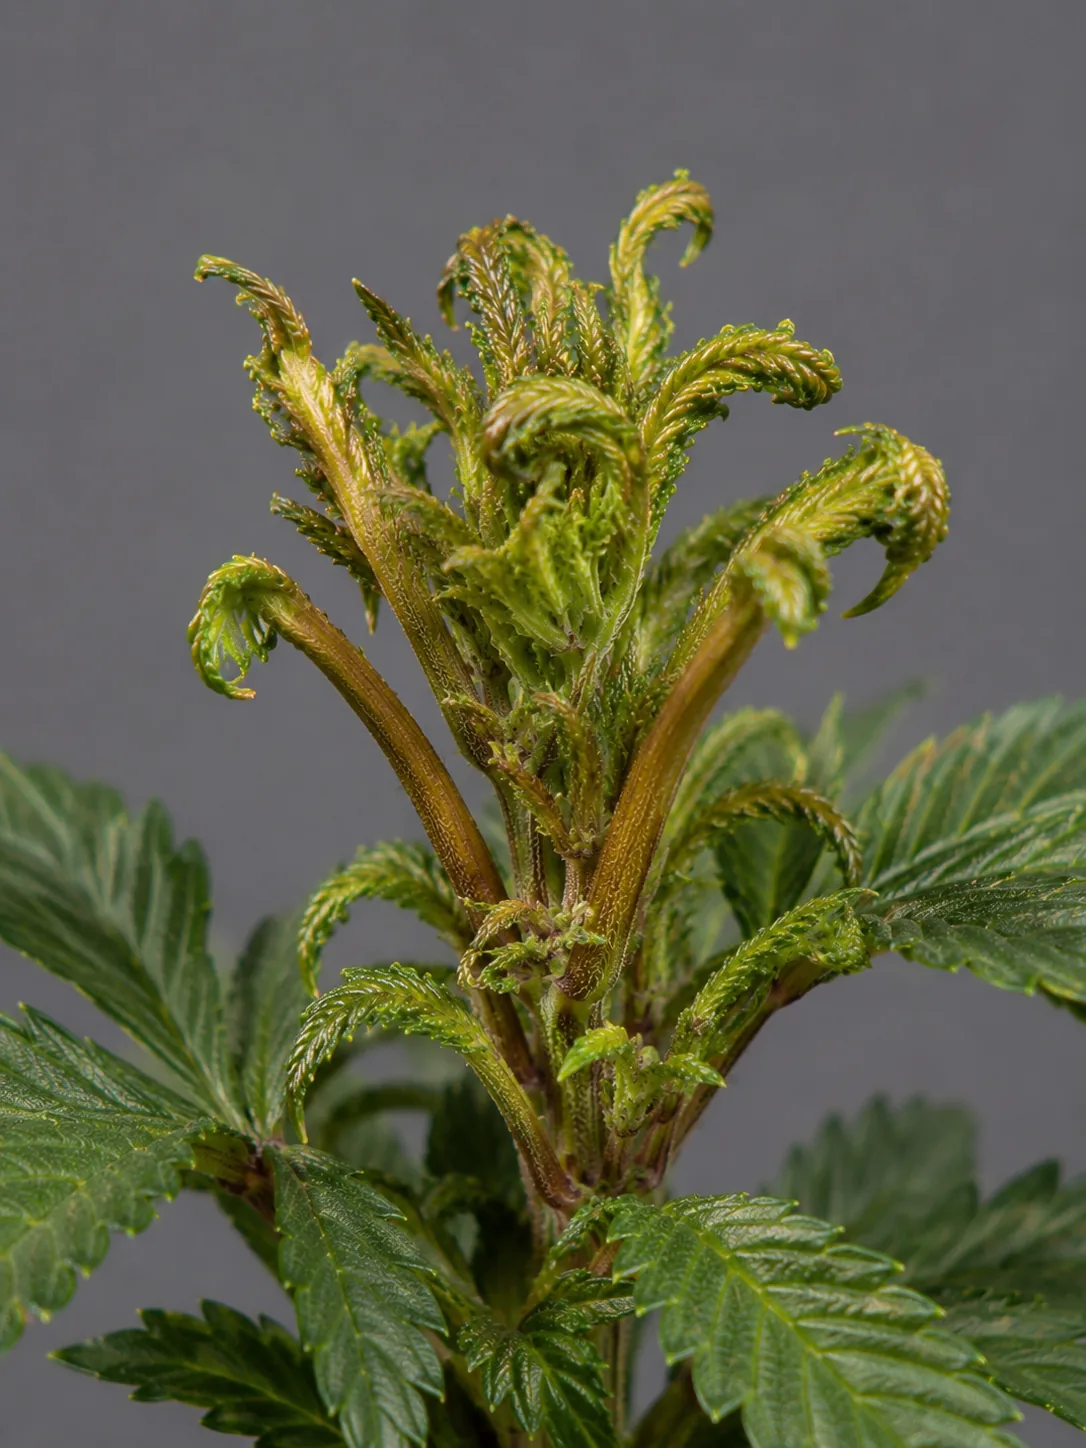
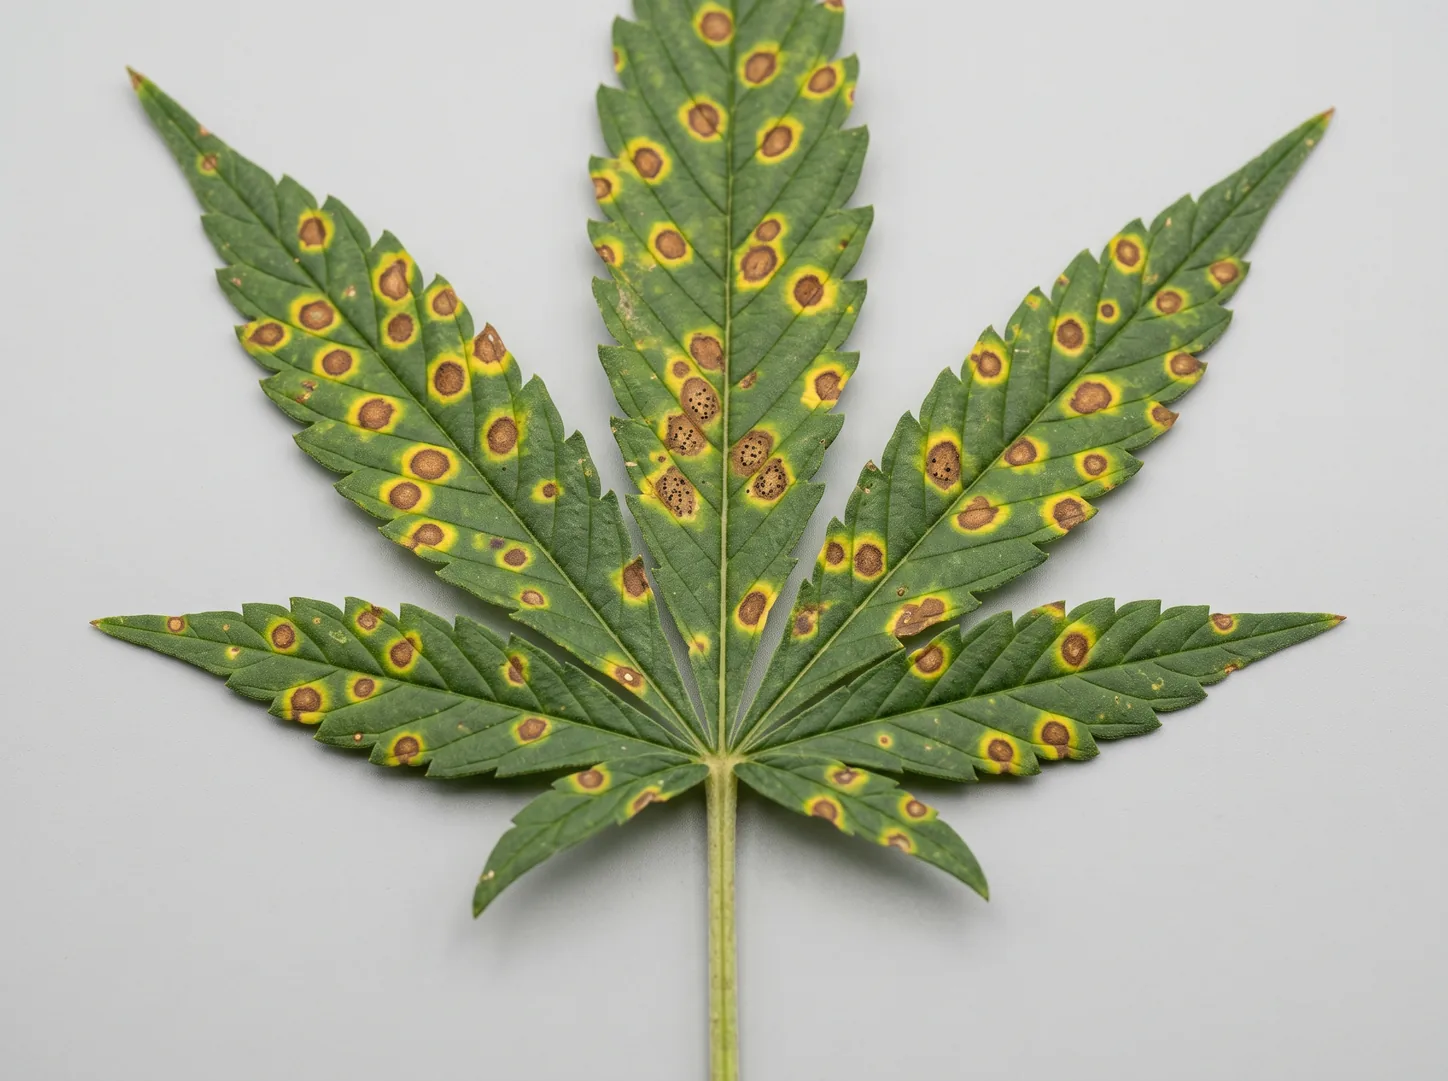
Read these by location first. The mobile nutrients — nitrogen, magnesium, potassium, phosphorus — get pulled out of the oldest leaves to feed new growth, so their damage starts at the bottom and climbs. The immobile ones — calcium, iron, sulfur — cannot be moved, so their damage appears on the new upper growth while the old canopy stays green. Once you have settled which end of the plant is affected, the pattern separates the rest: nitrogen fades the whole leaf, magnesium yellows between veins that stay green, potassium attacks the margins and works inward, and calcium brings brown spots together with hooked, twisted young leaves. The lockout frames are the odd ones out — when a plant shows several contradictory symptoms at once, the pH is usually the story rather than any single missing nutrient.
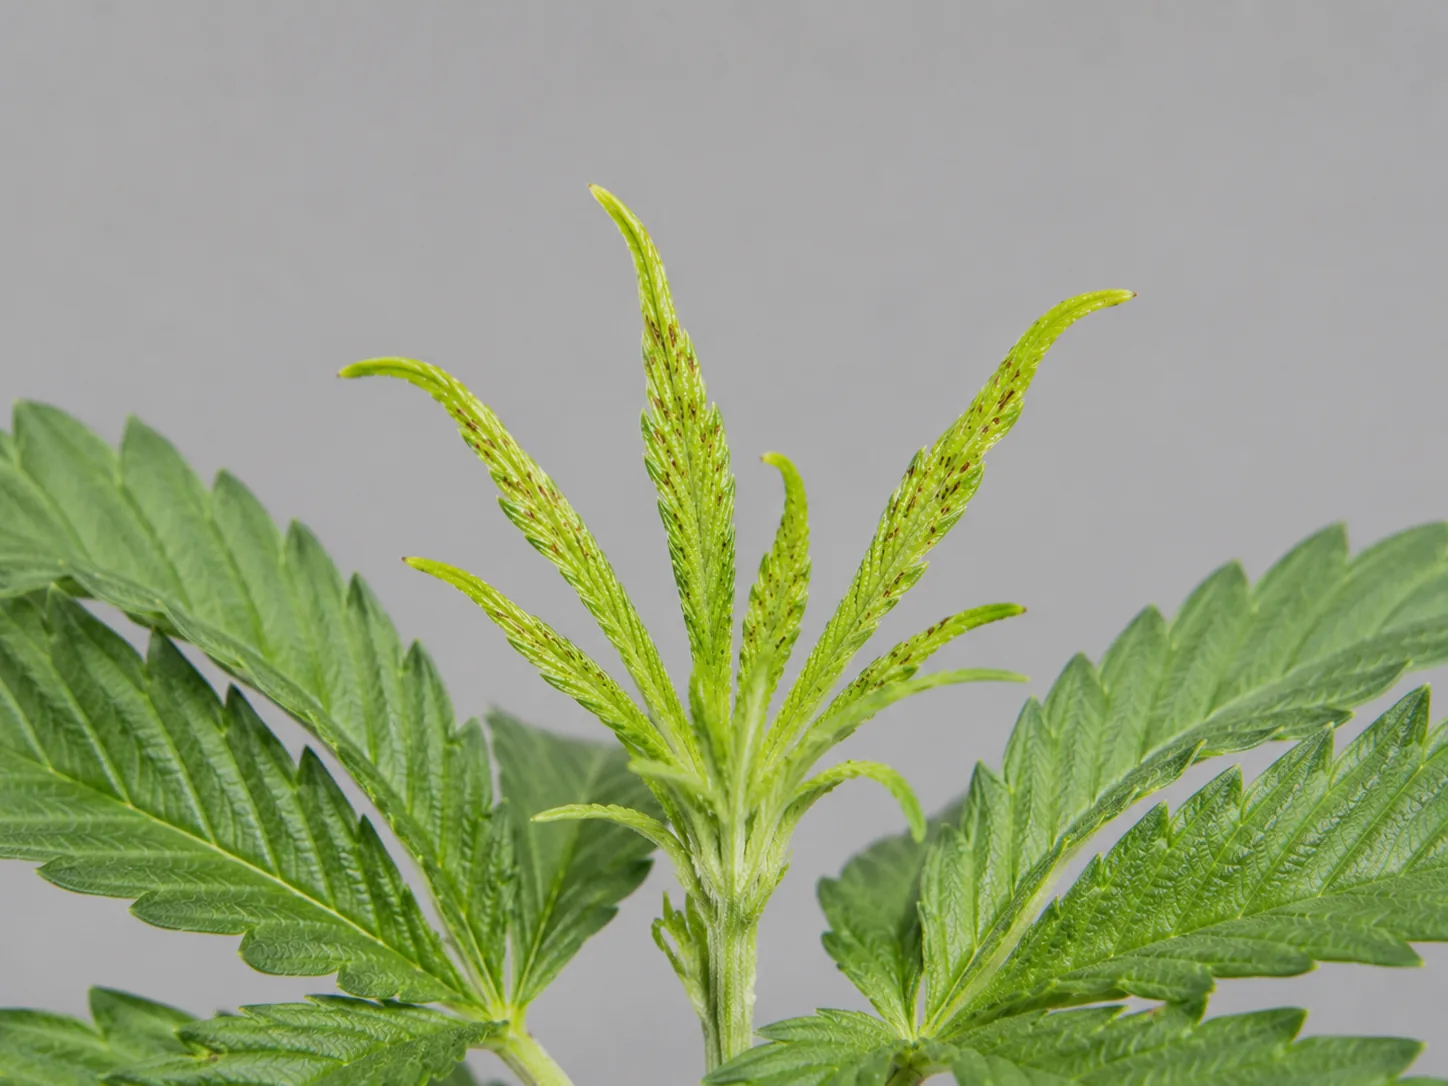
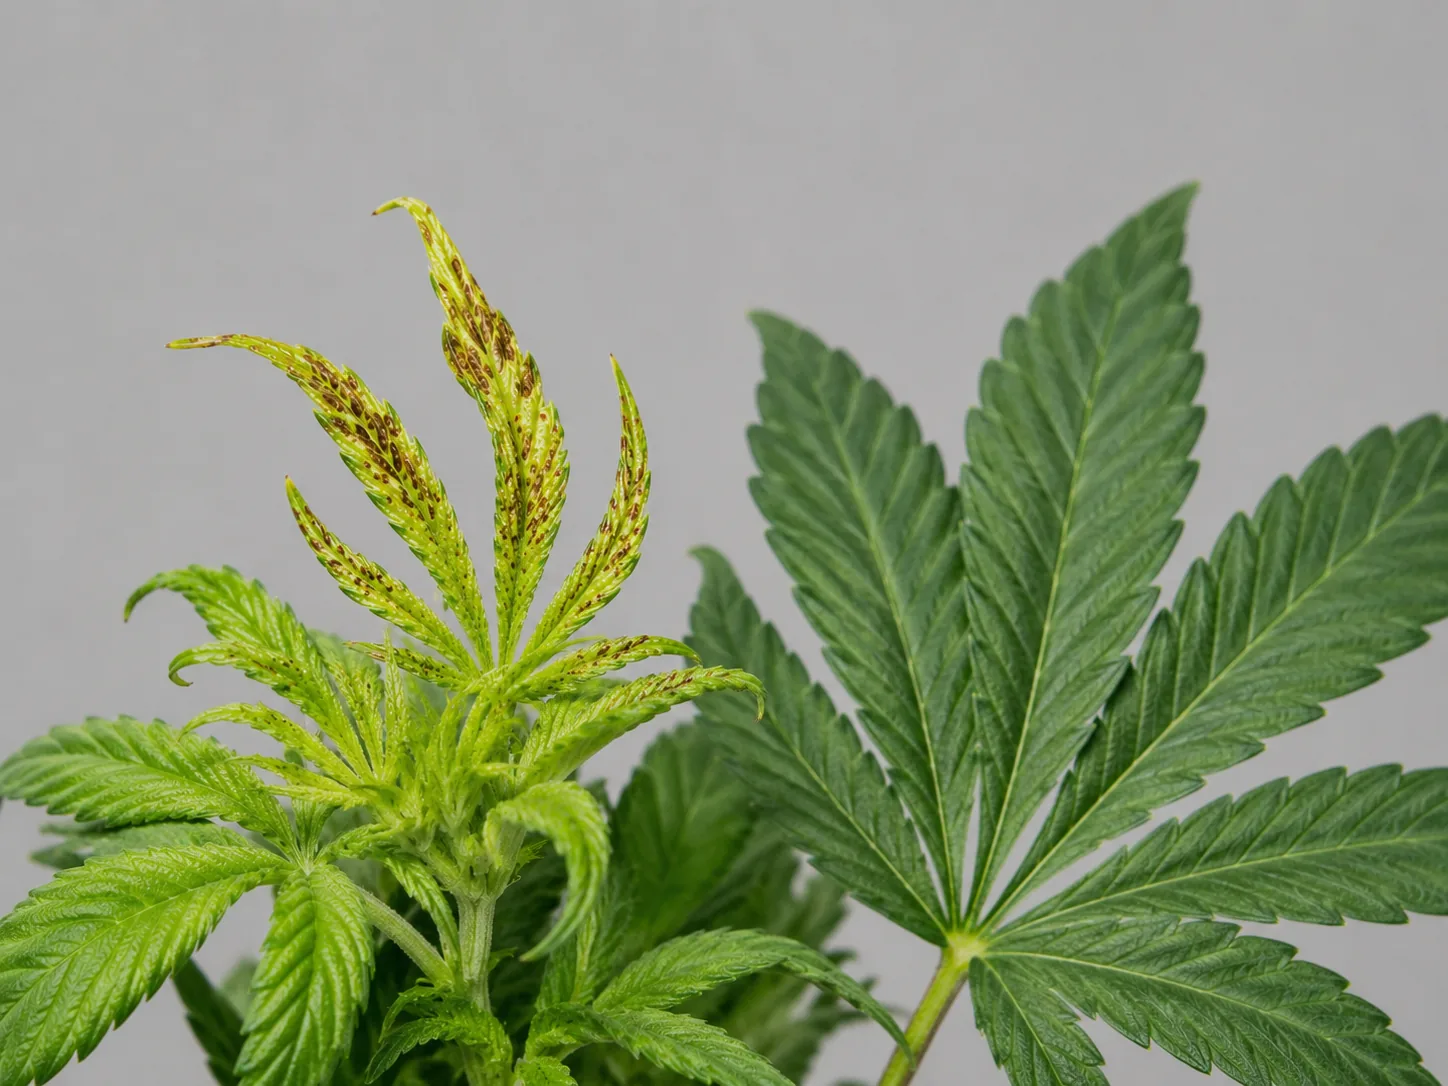


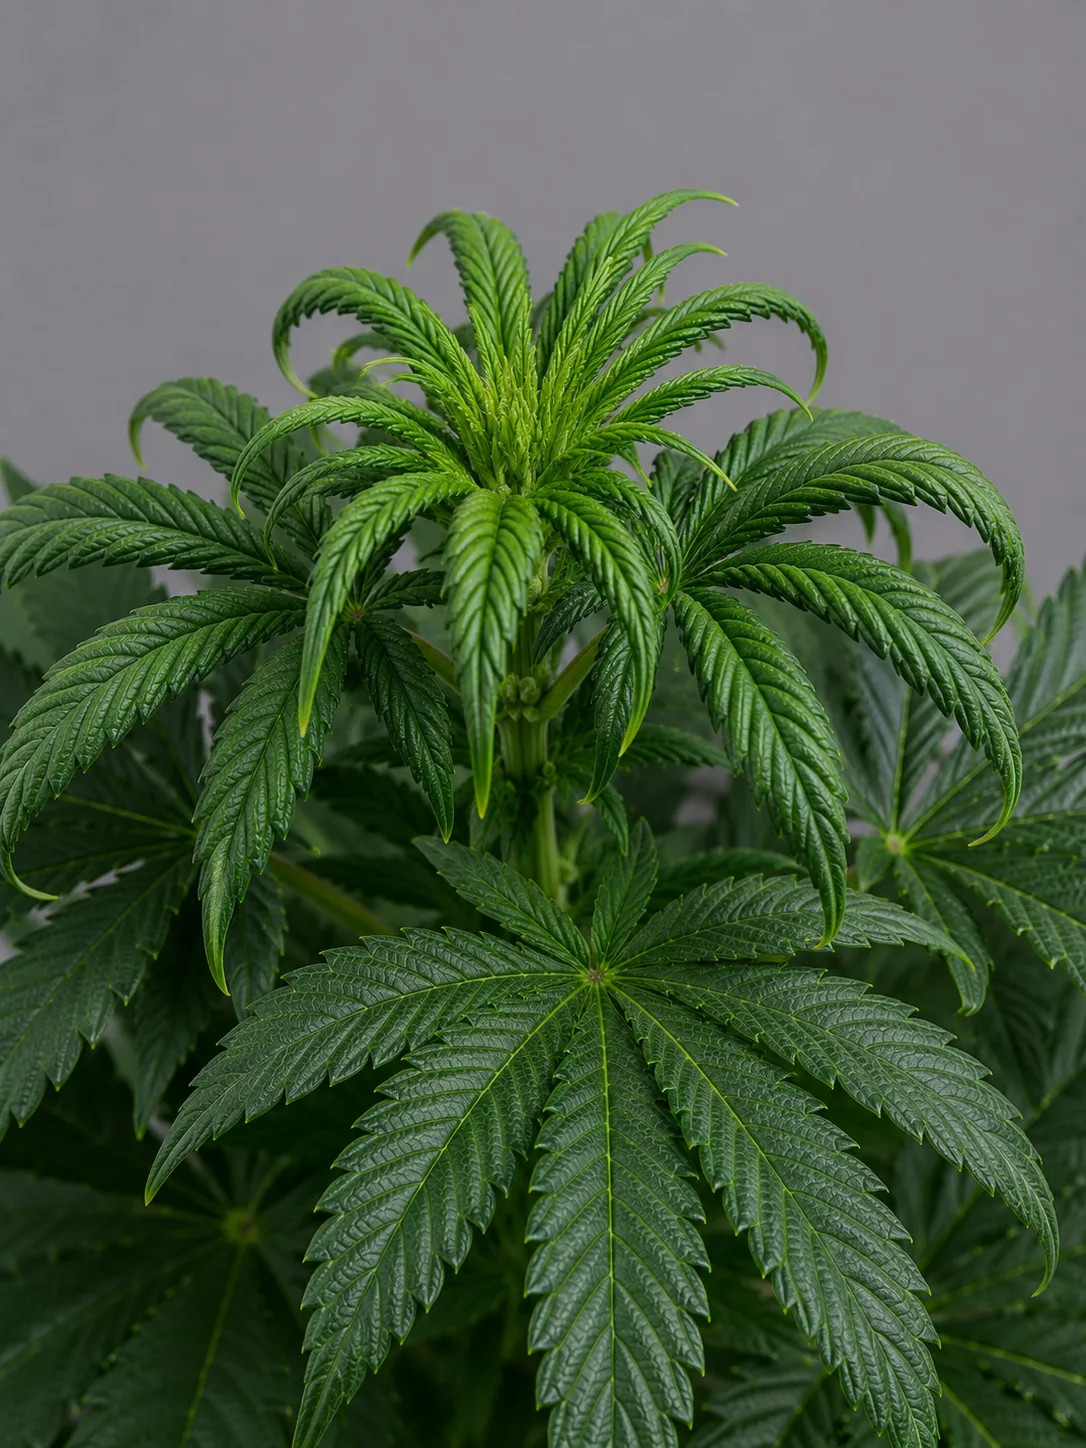
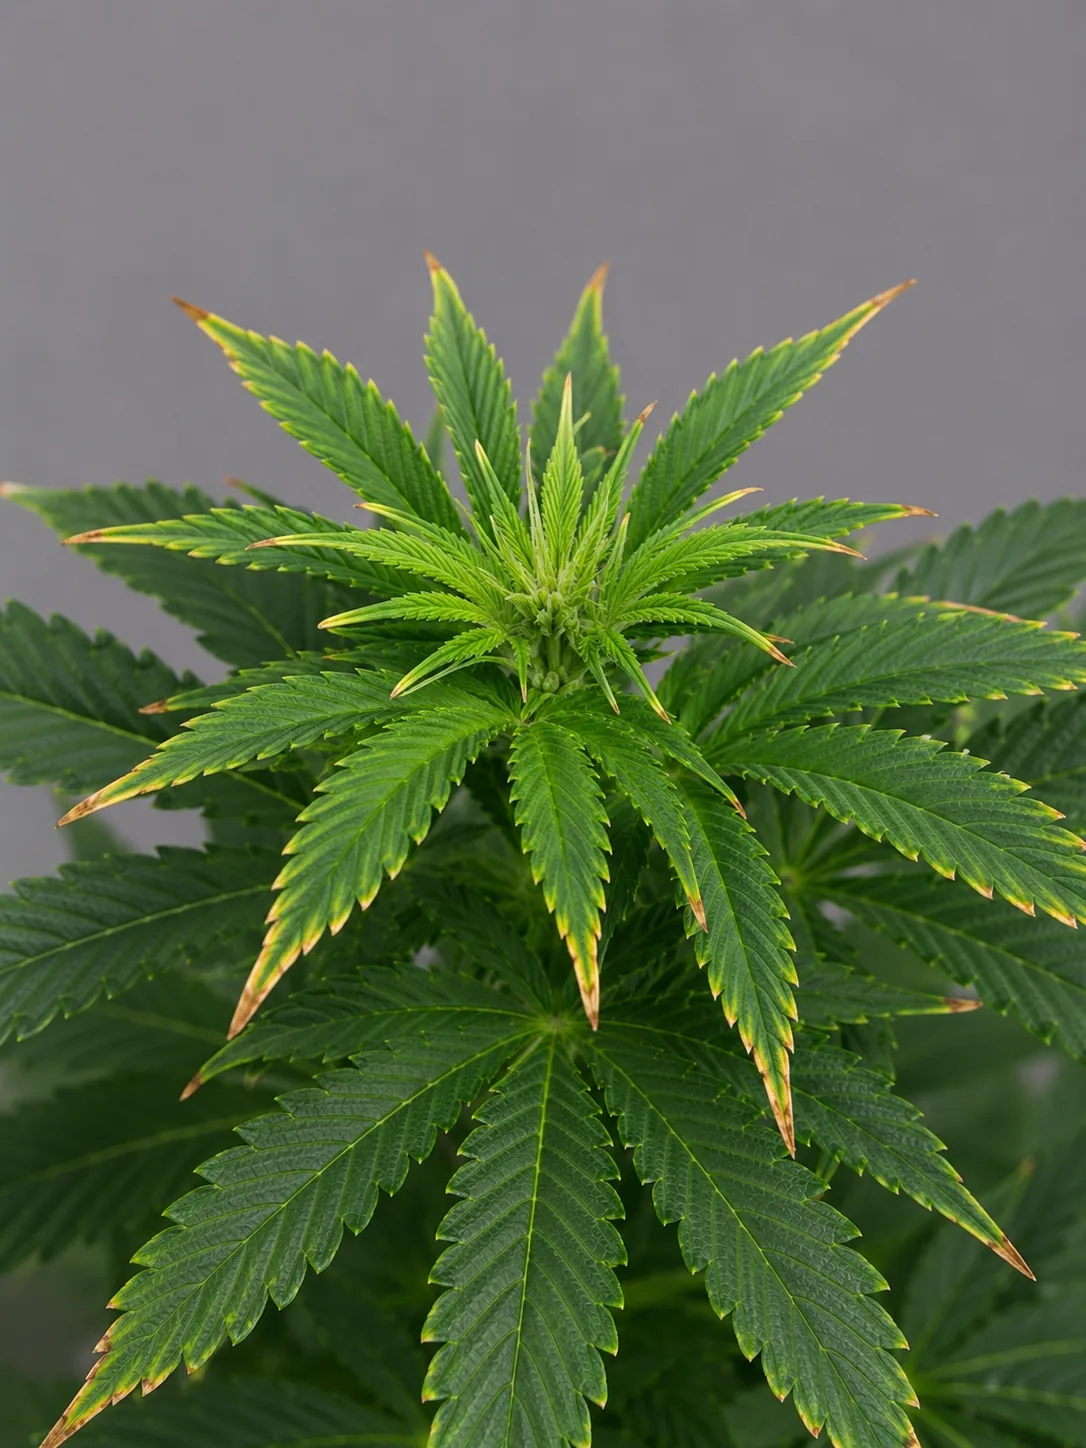
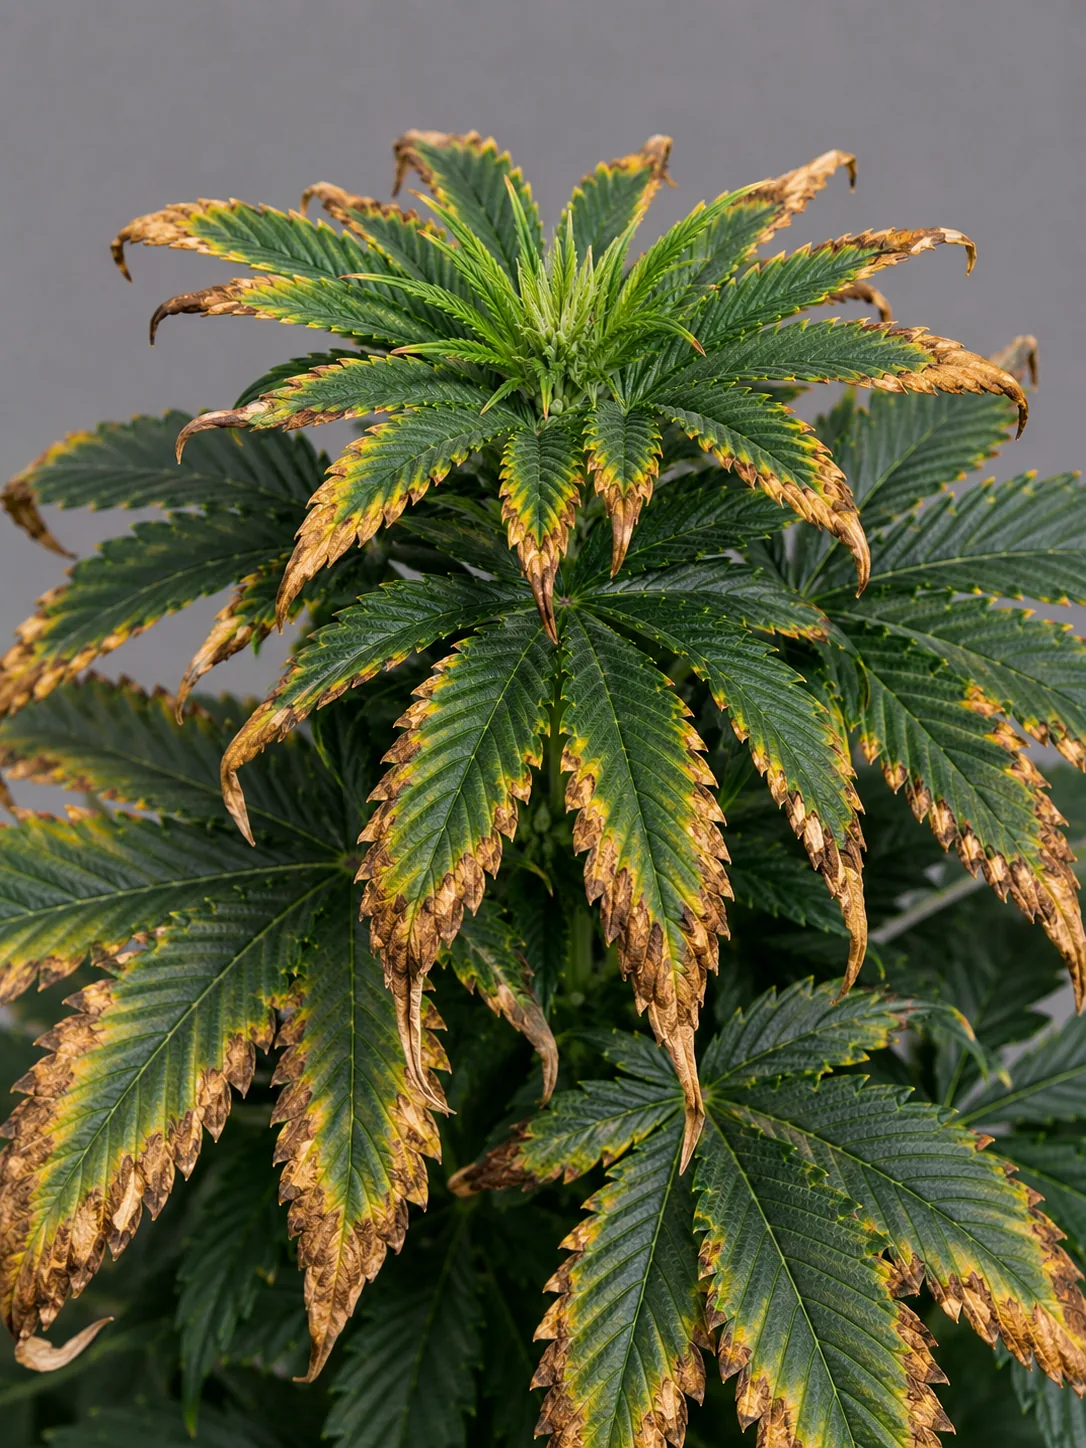
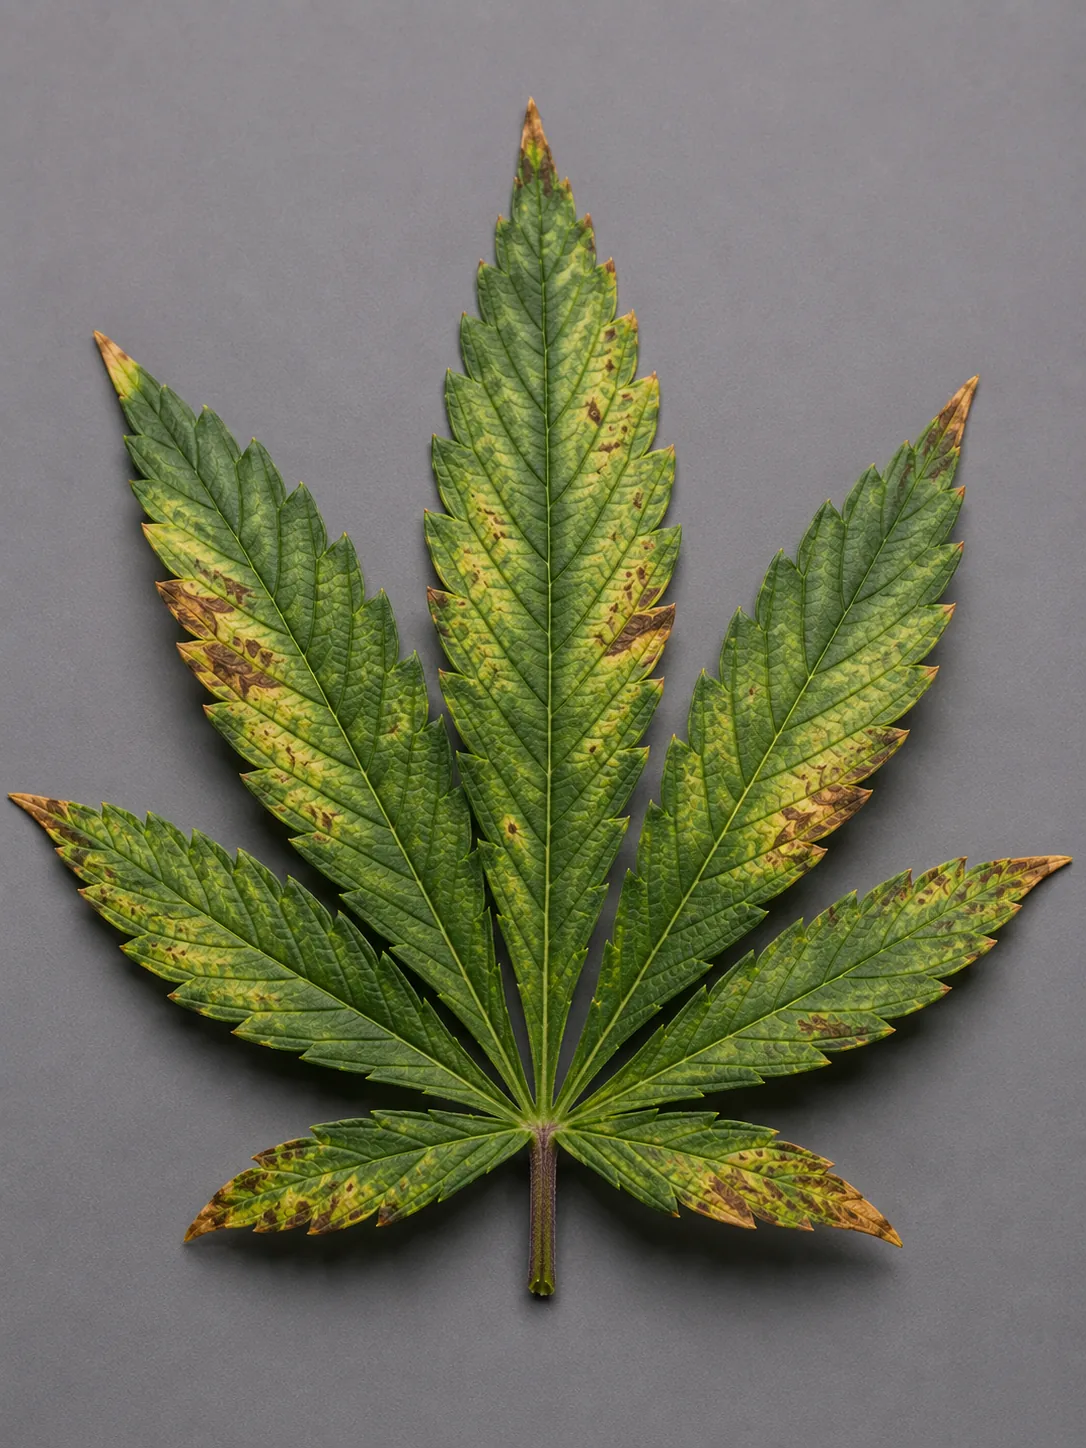
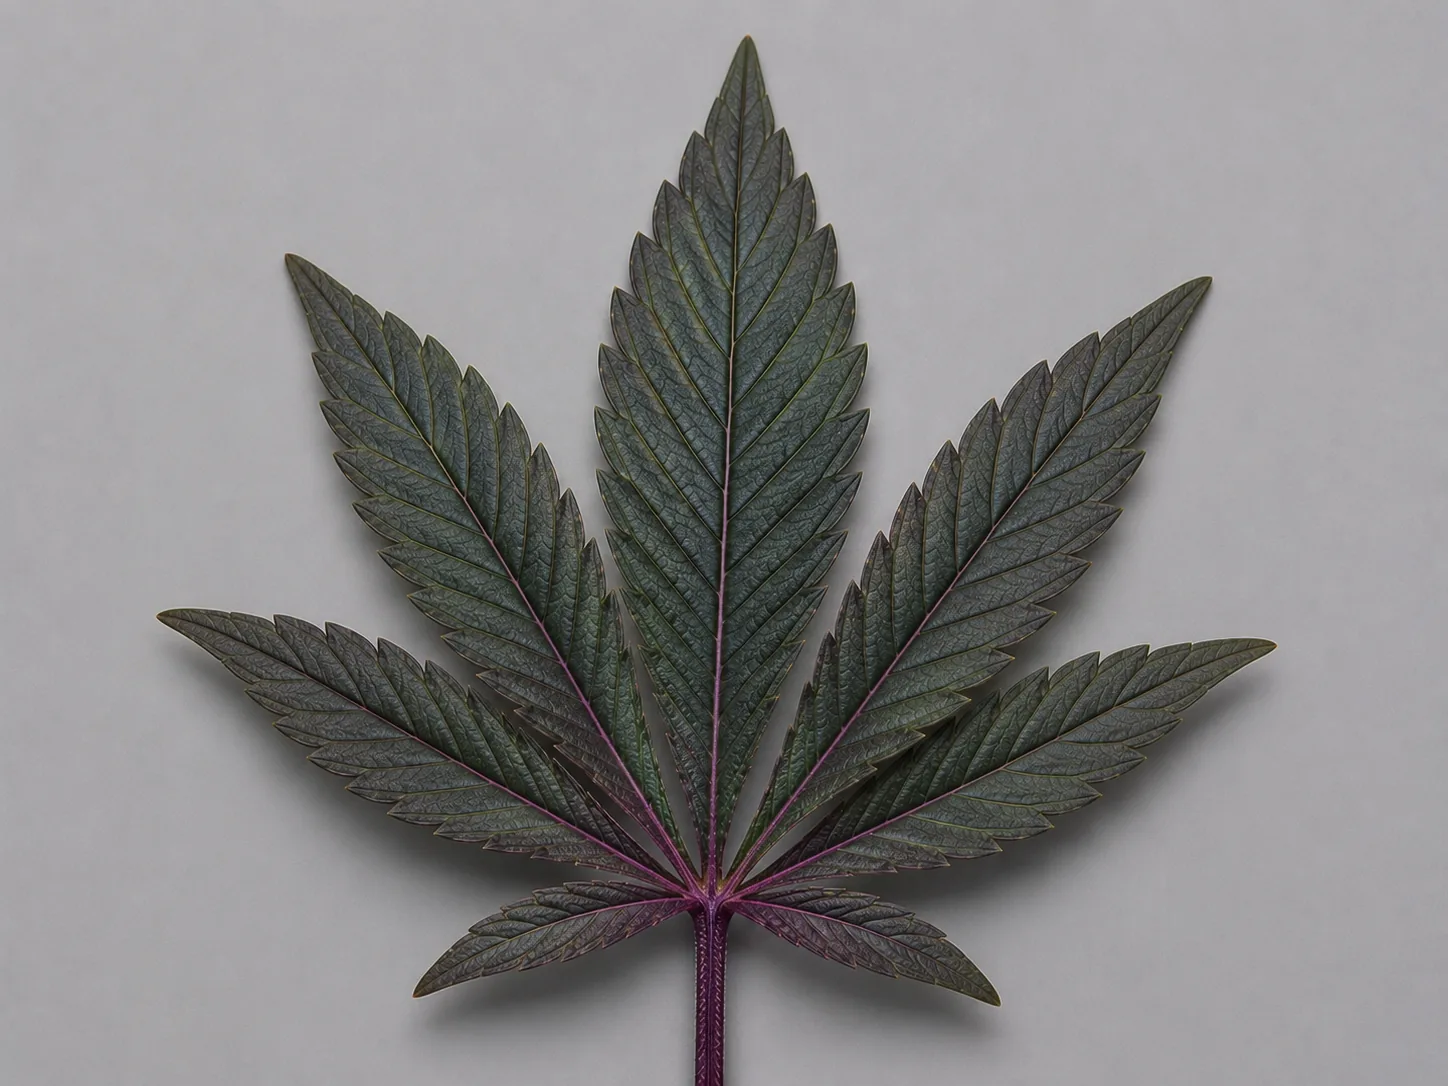
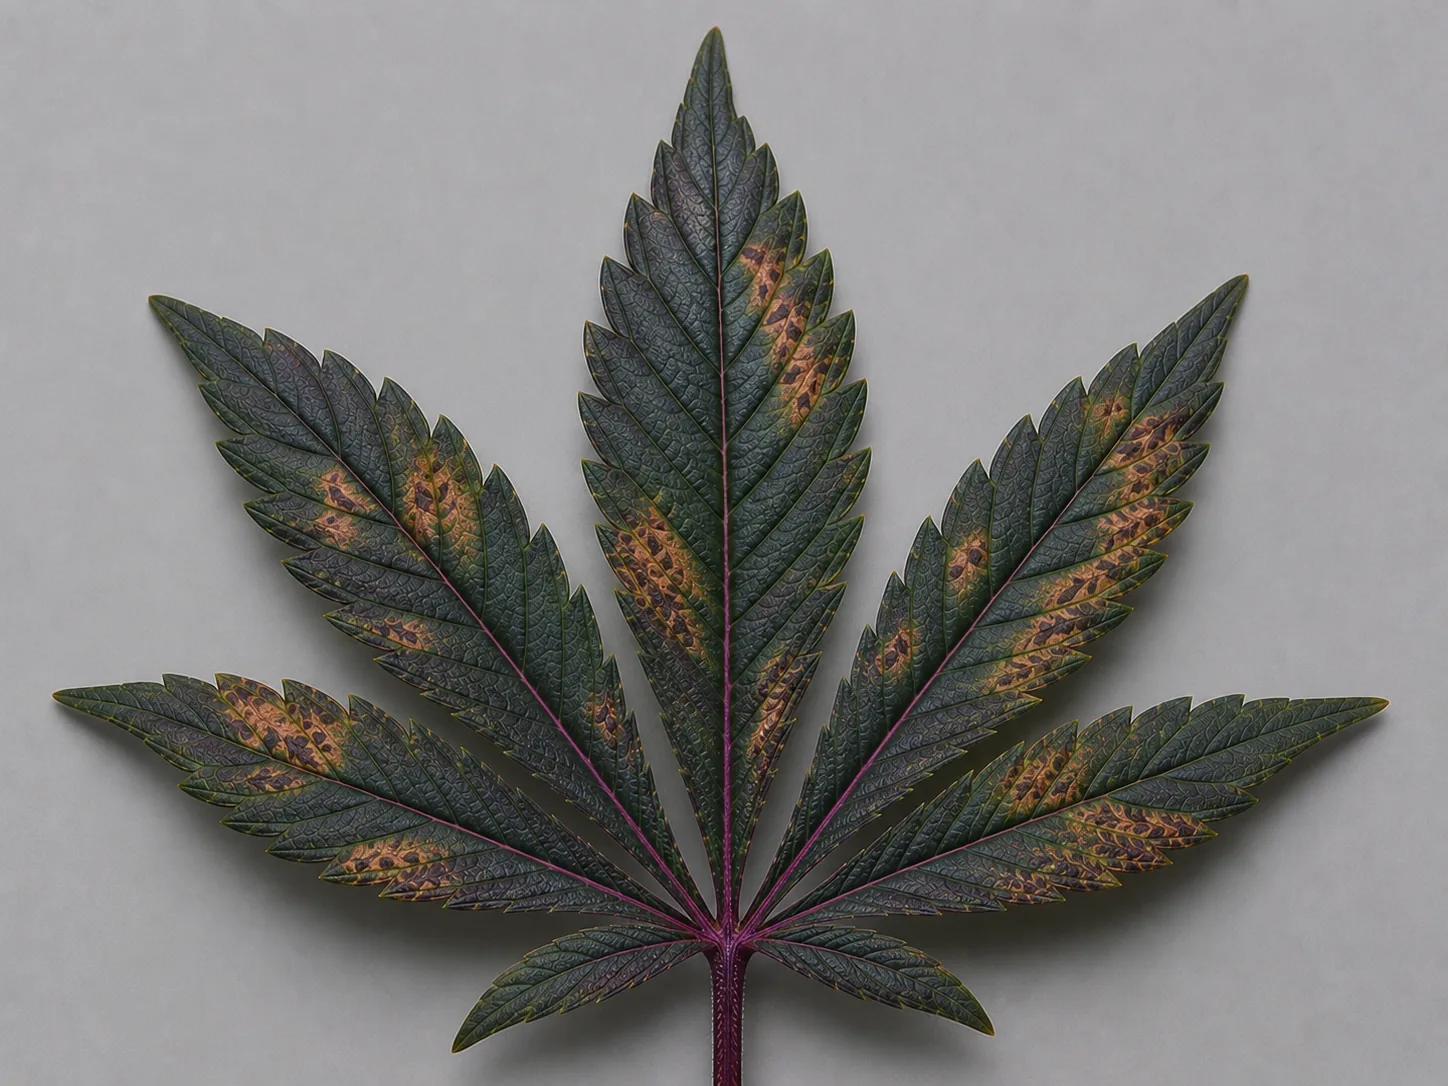
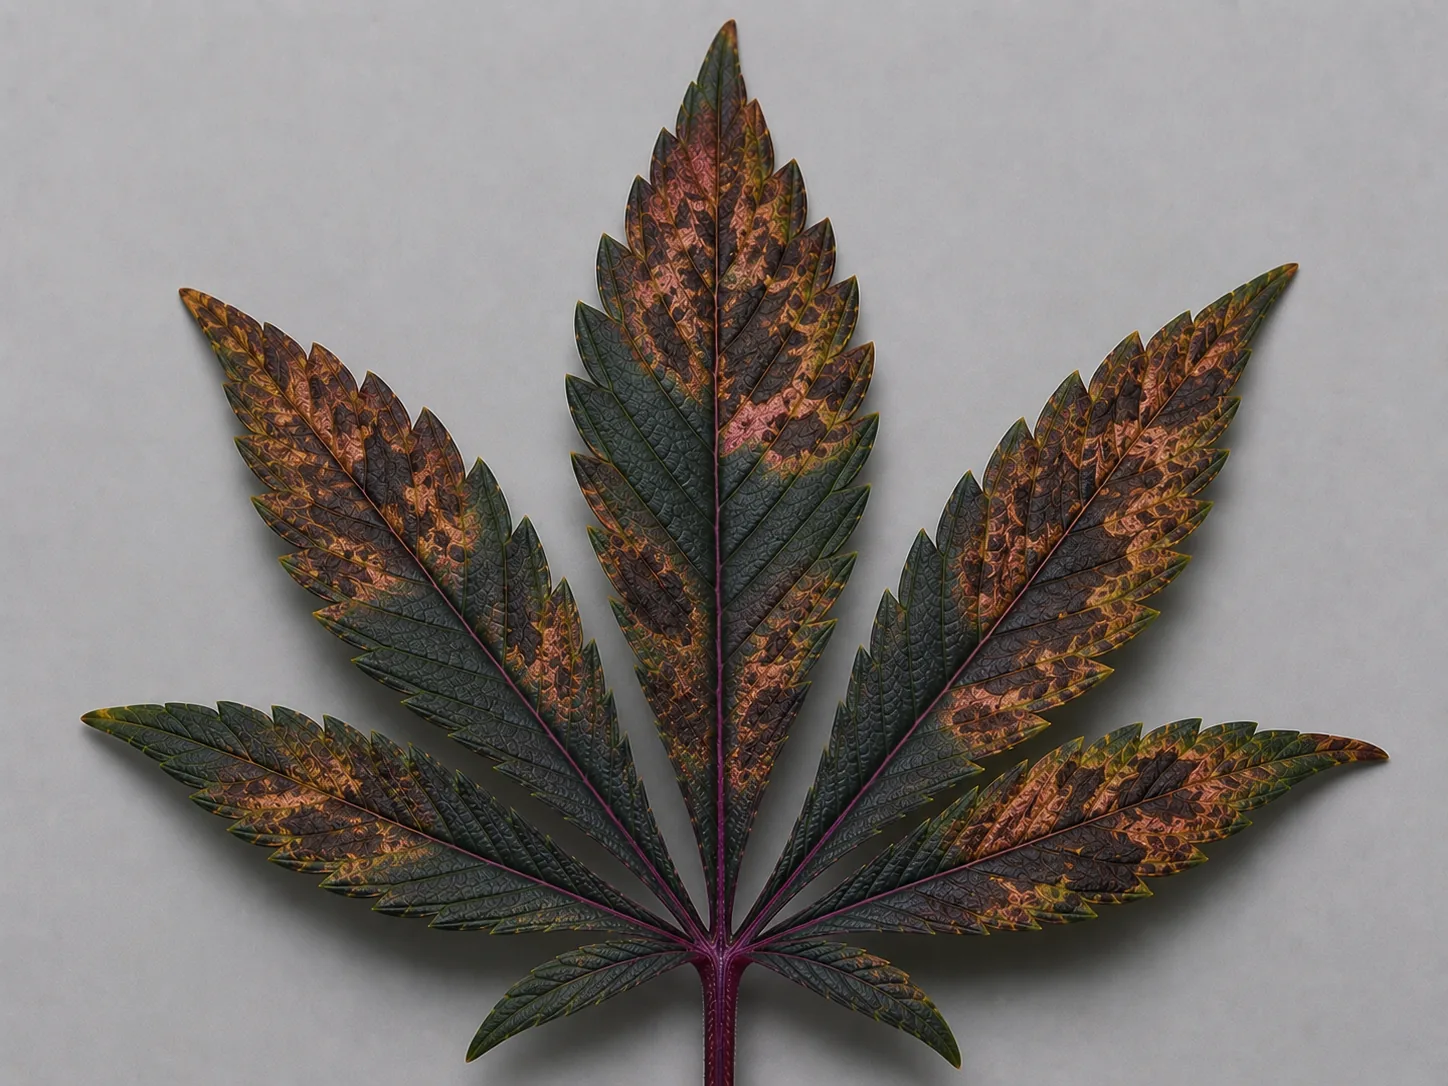

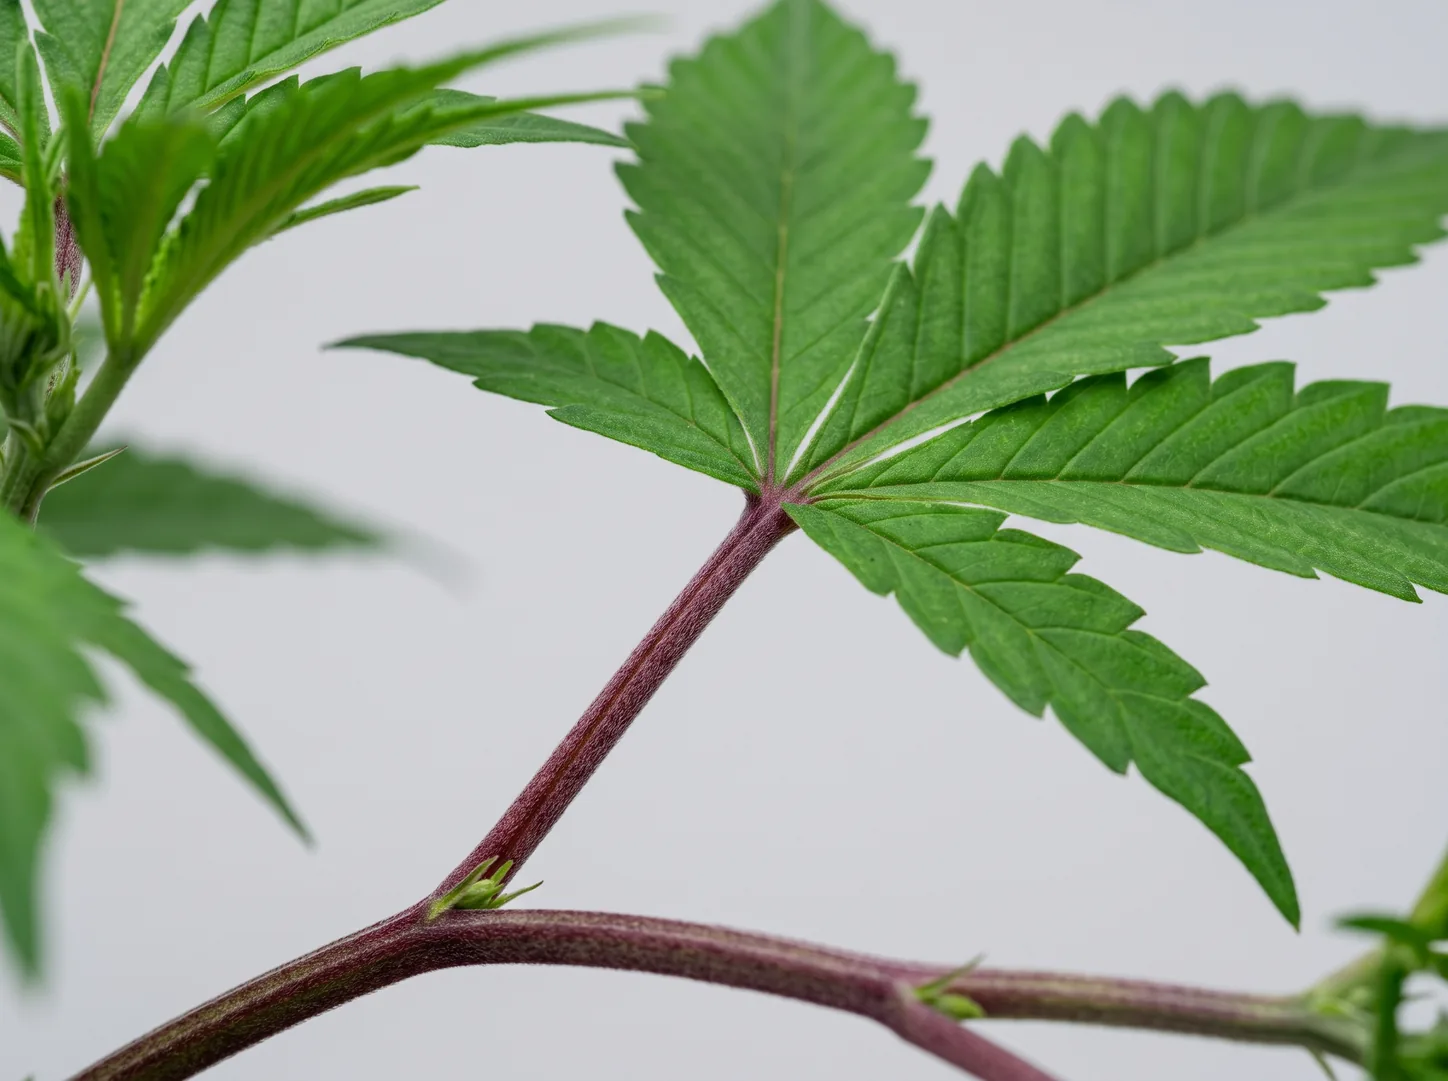
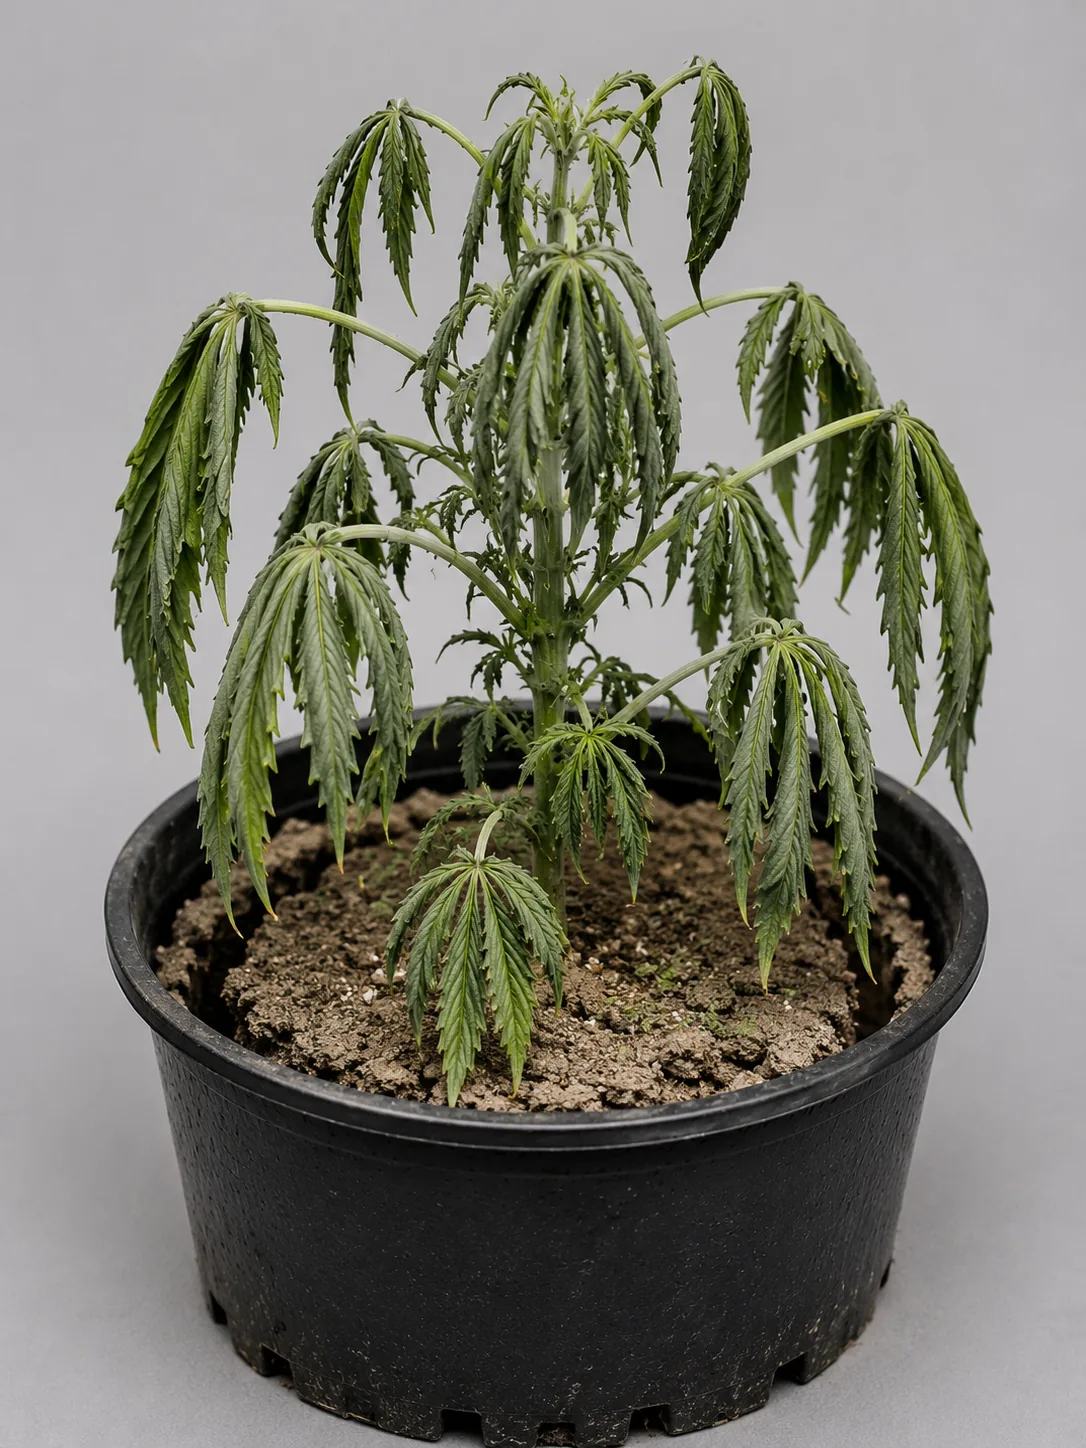
Burn, taco-leaf, droop versus wilt — environmental damage.
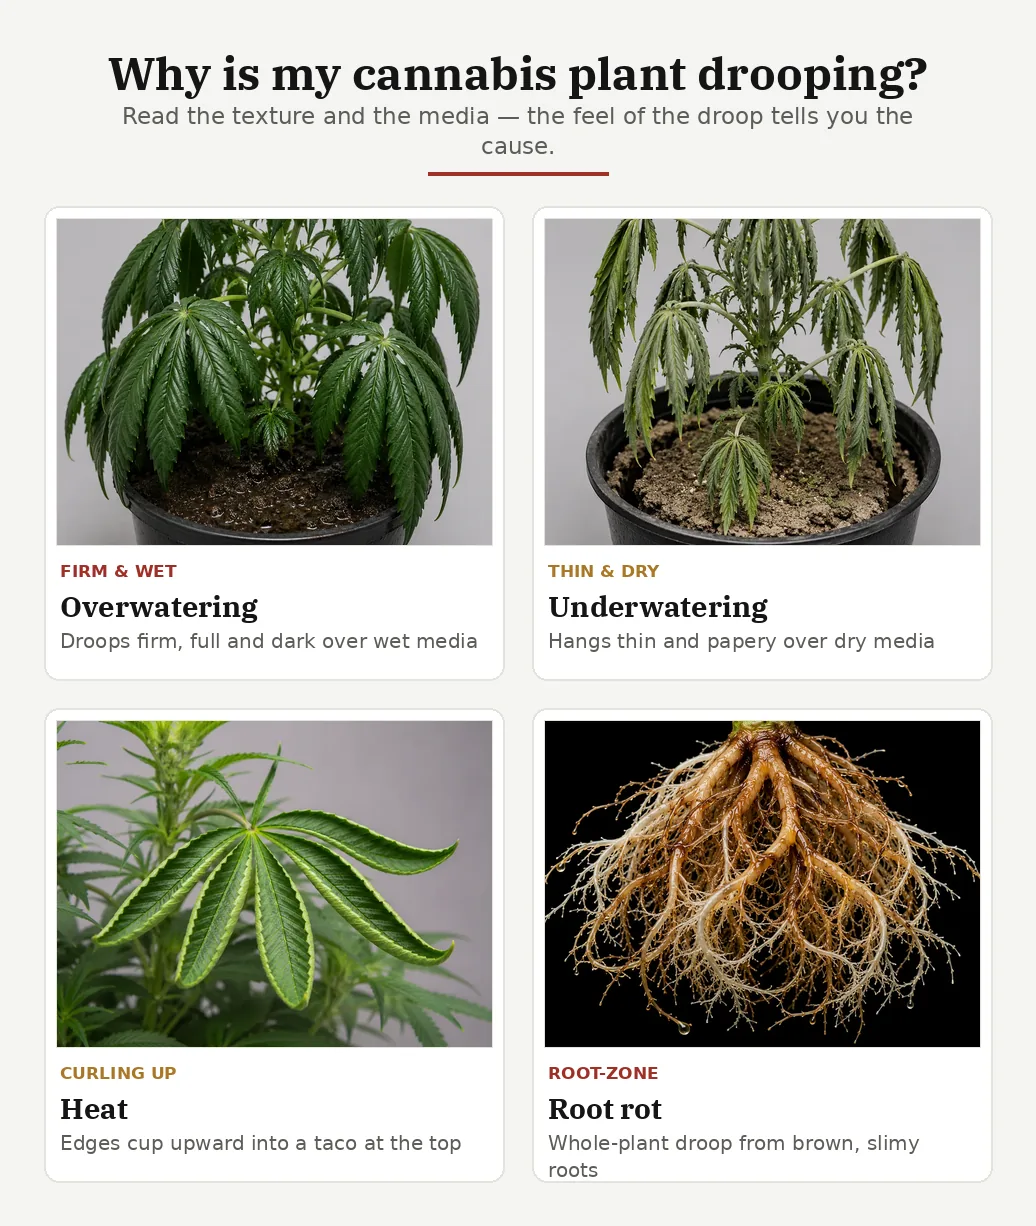
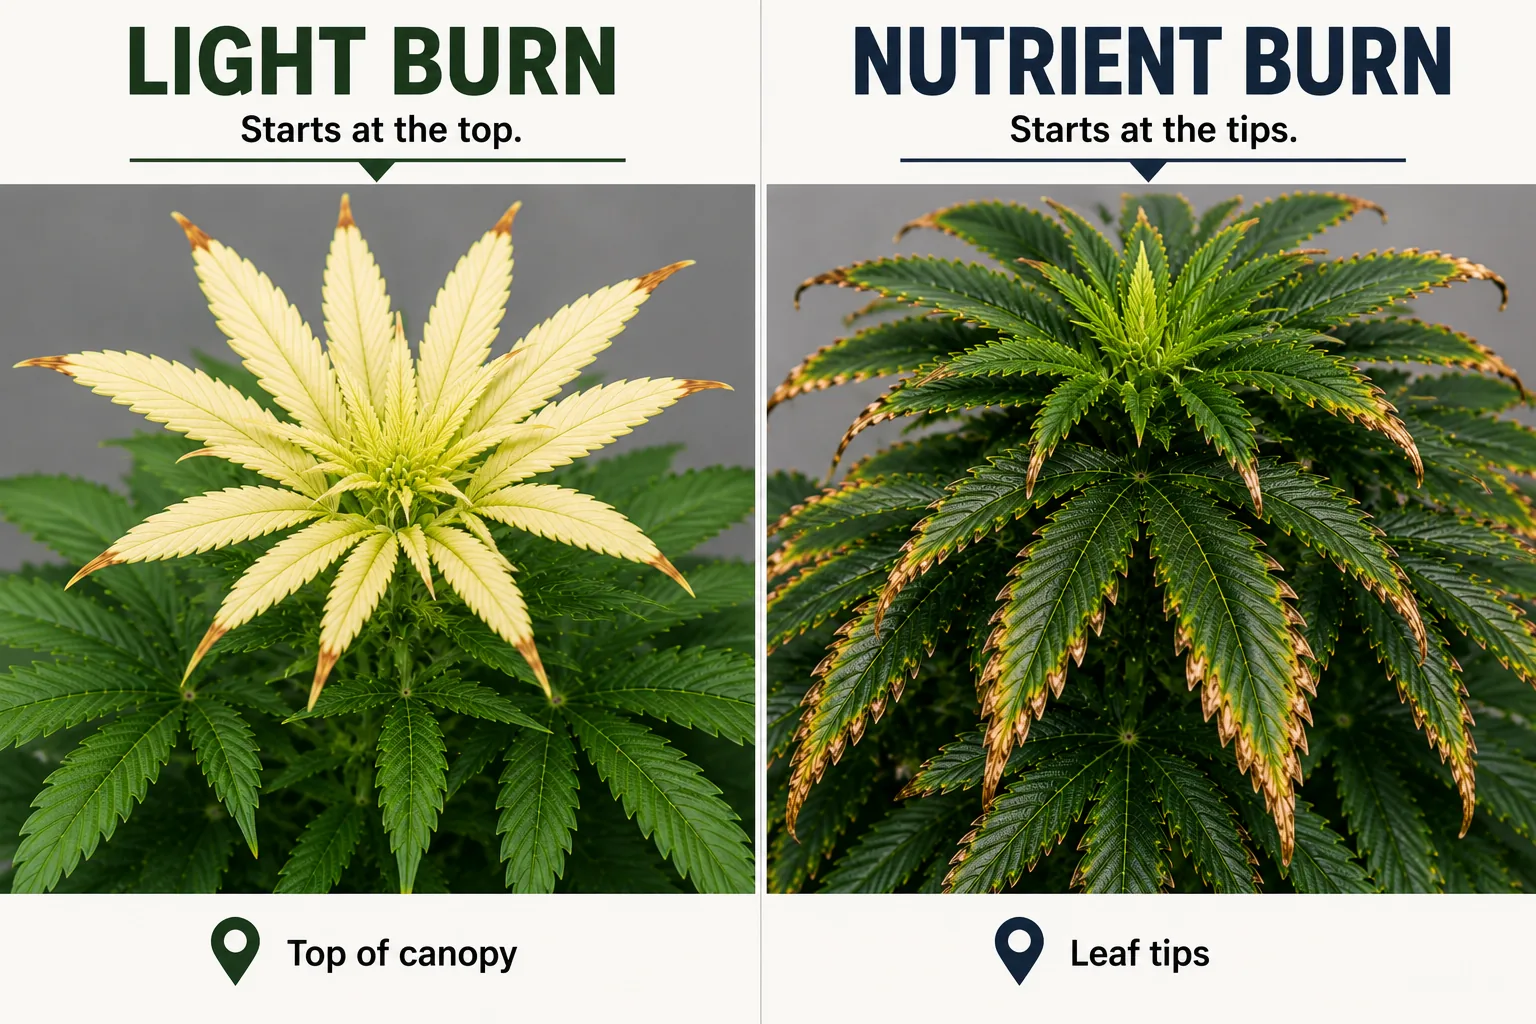
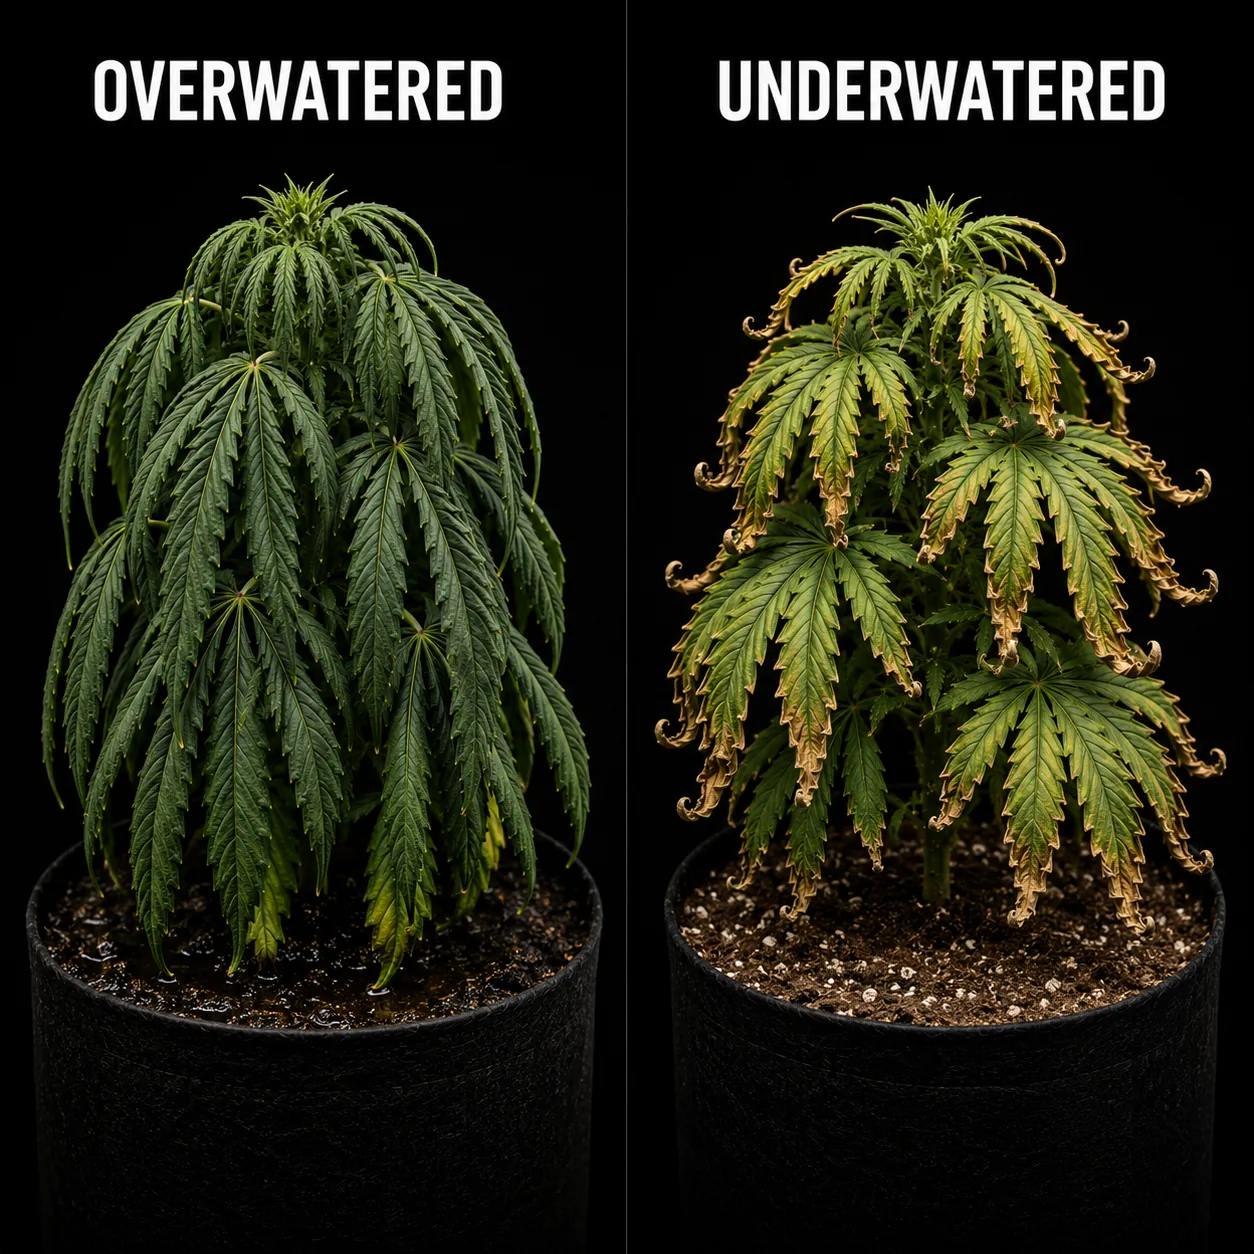
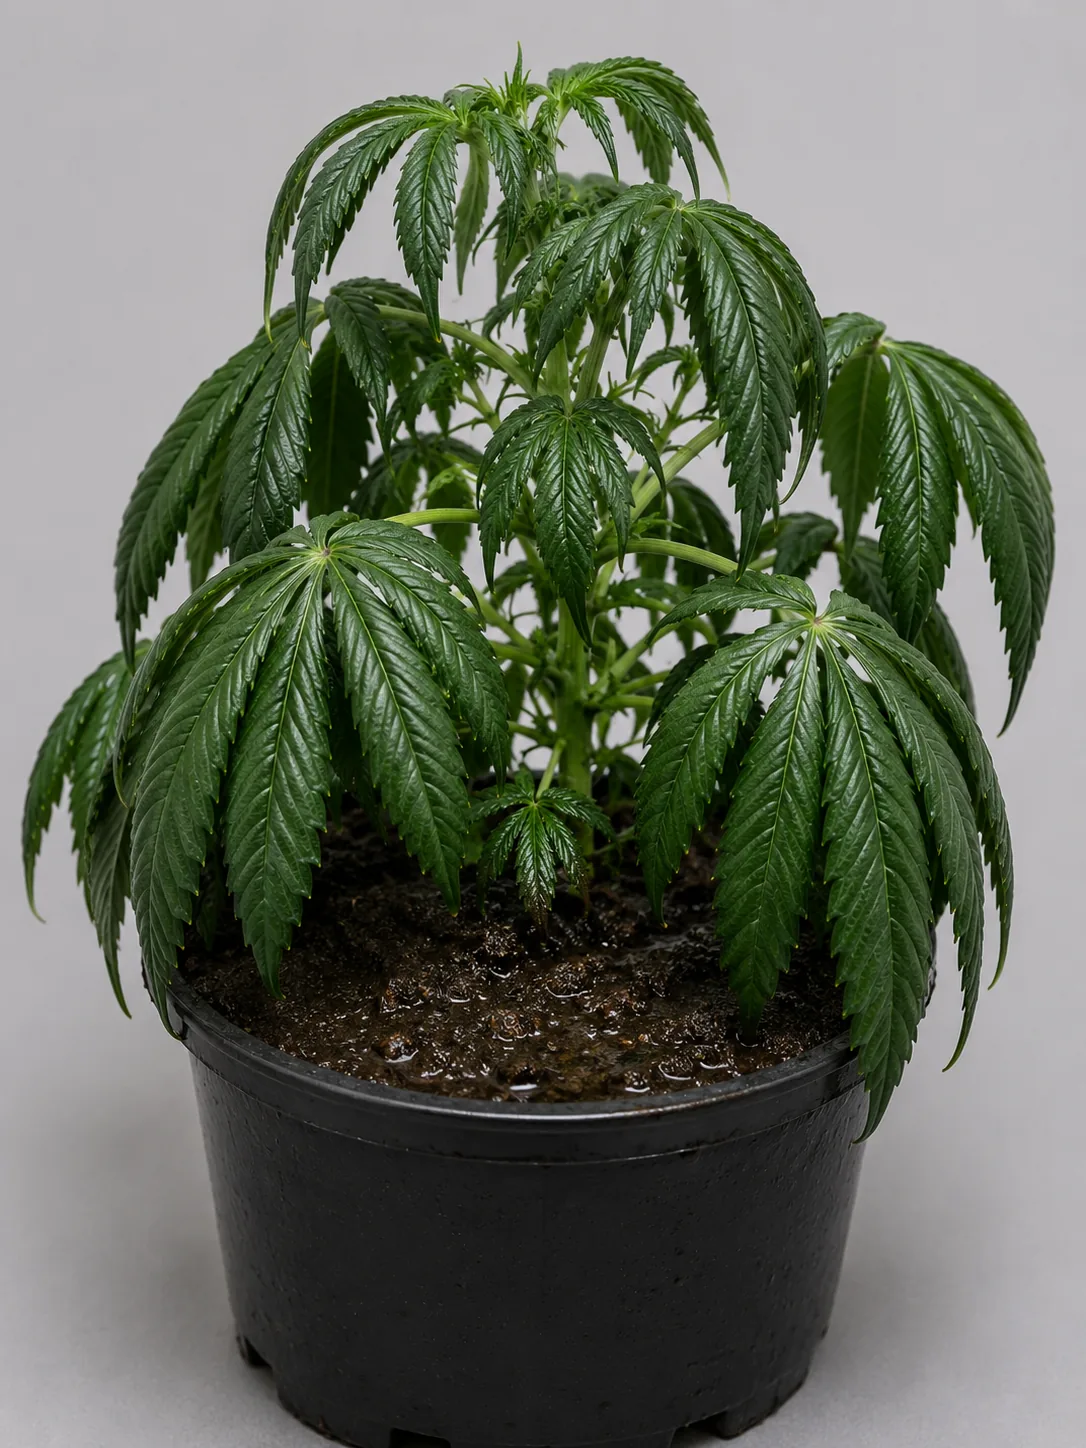
These frames are the antidote to diagnosing every sick plant as hungry. Environmental damage sits wherever the heat, light, wind or water physically reached the plant, which means it respects the geography of your space rather than the anatomy of the leaf. Watch for that as you compare: light burn stops dead at a canopy line with green immediately below it, heat cups the leaves upward at the hottest top zone, wind burn claws only the leaves sitting in the fan's path, and water droops the entire plant at once. The two droop macros are the most useful pair on this page — the same posture from opposite causes, told apart by whether the leaves feel firm and heavy over wet media or thin and papery over dry.
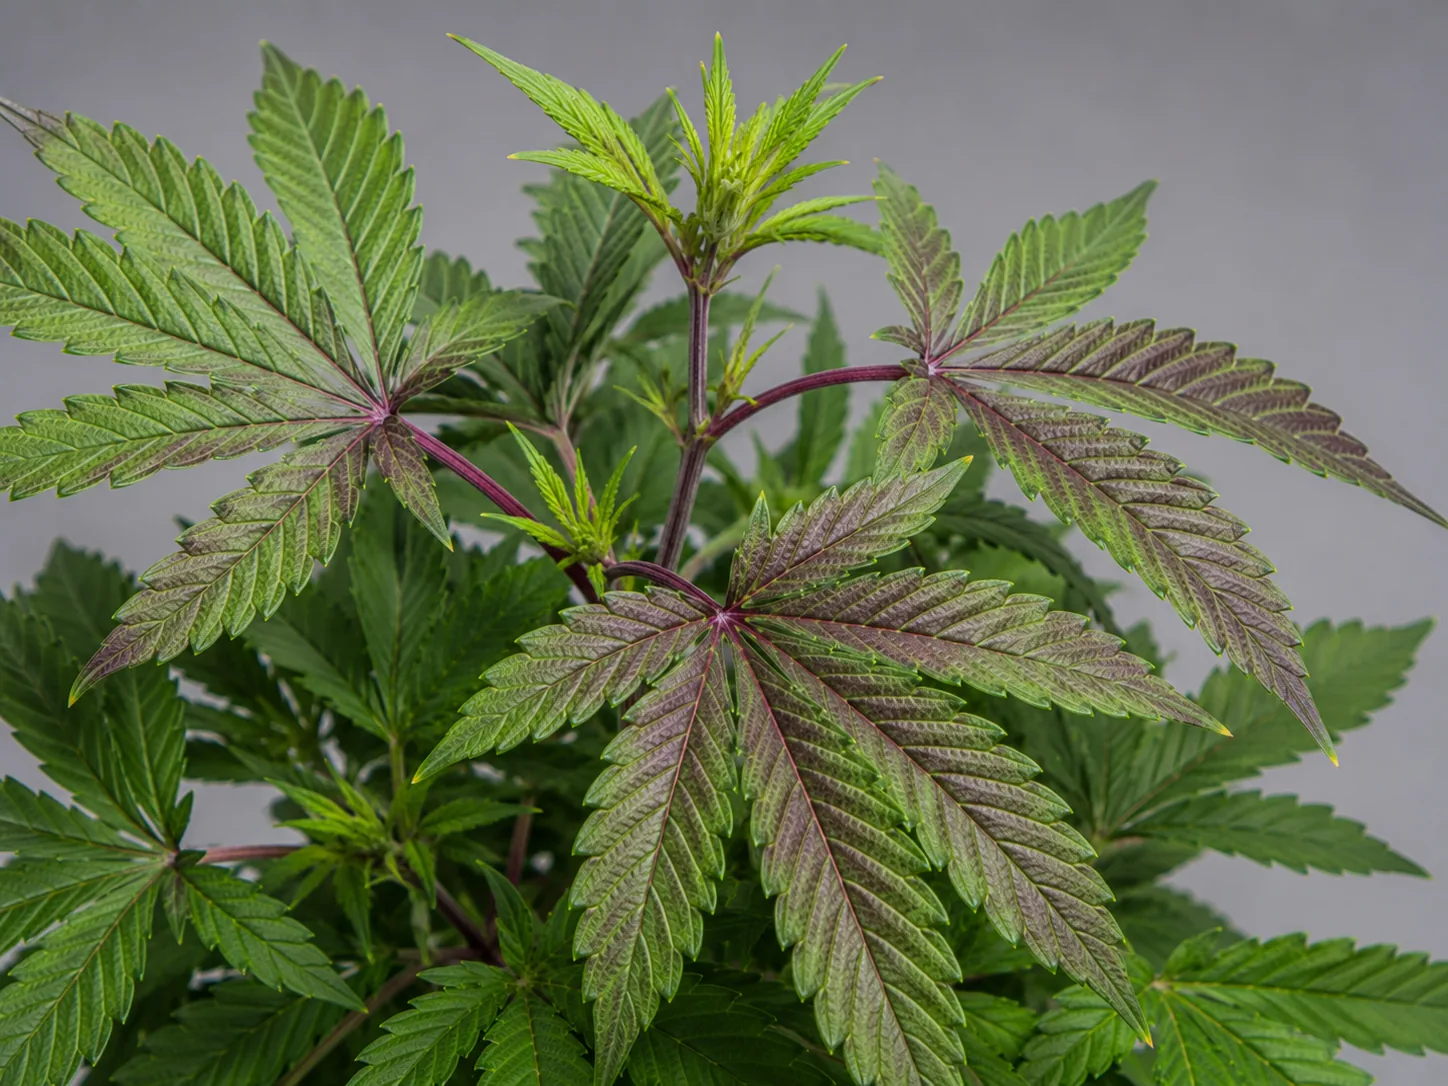
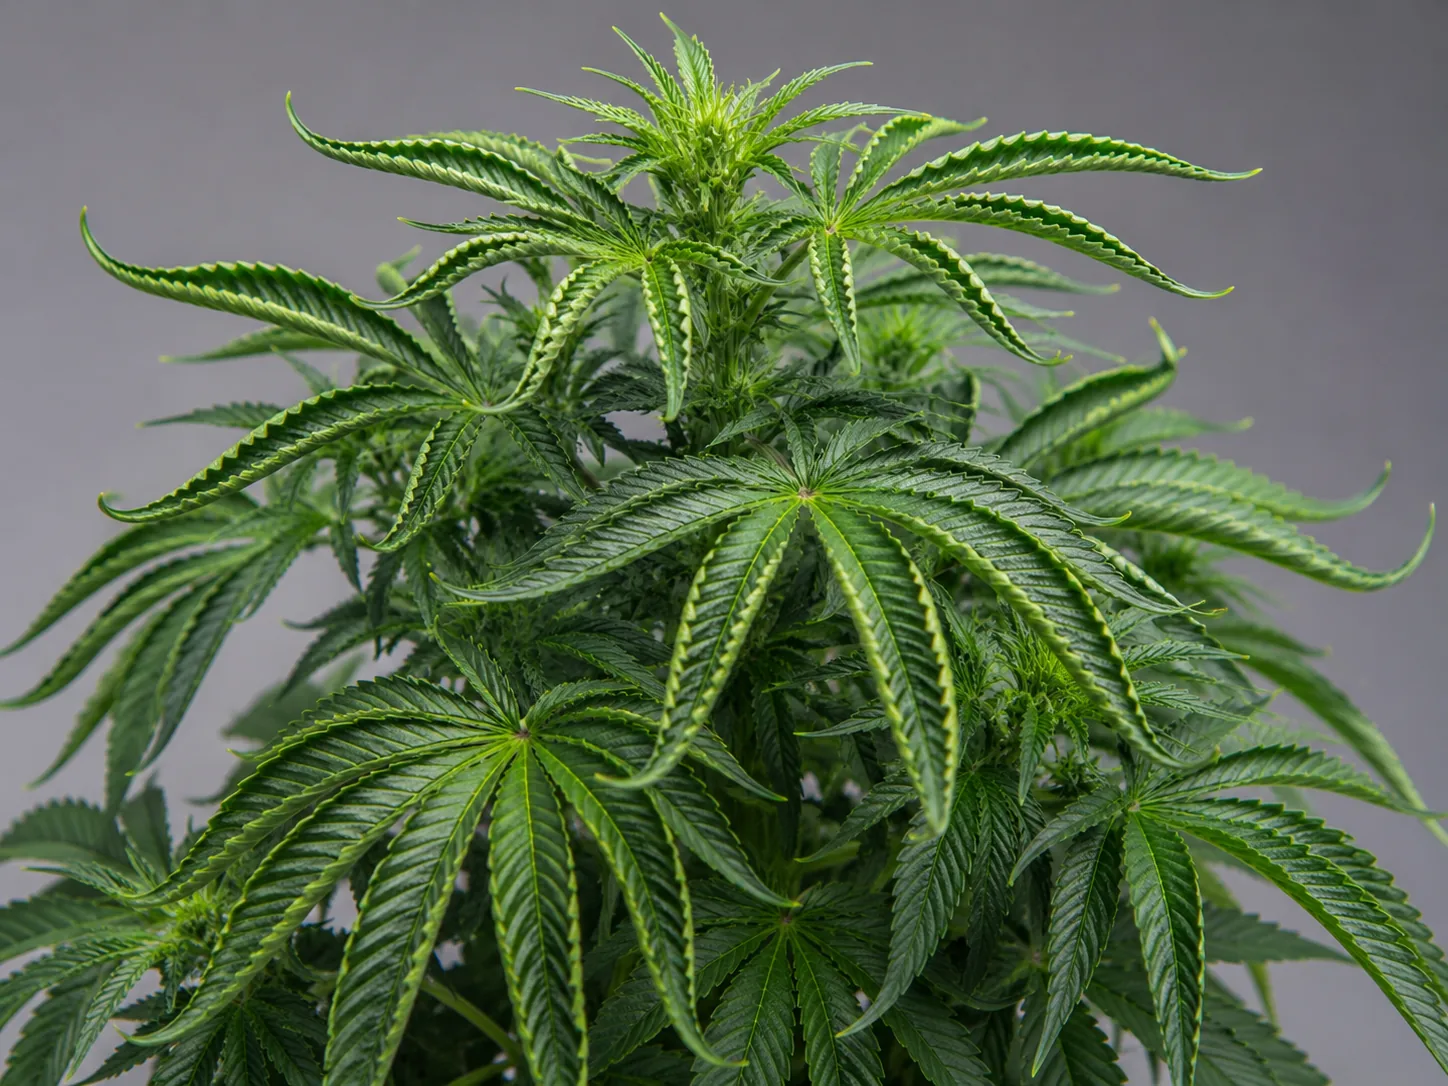
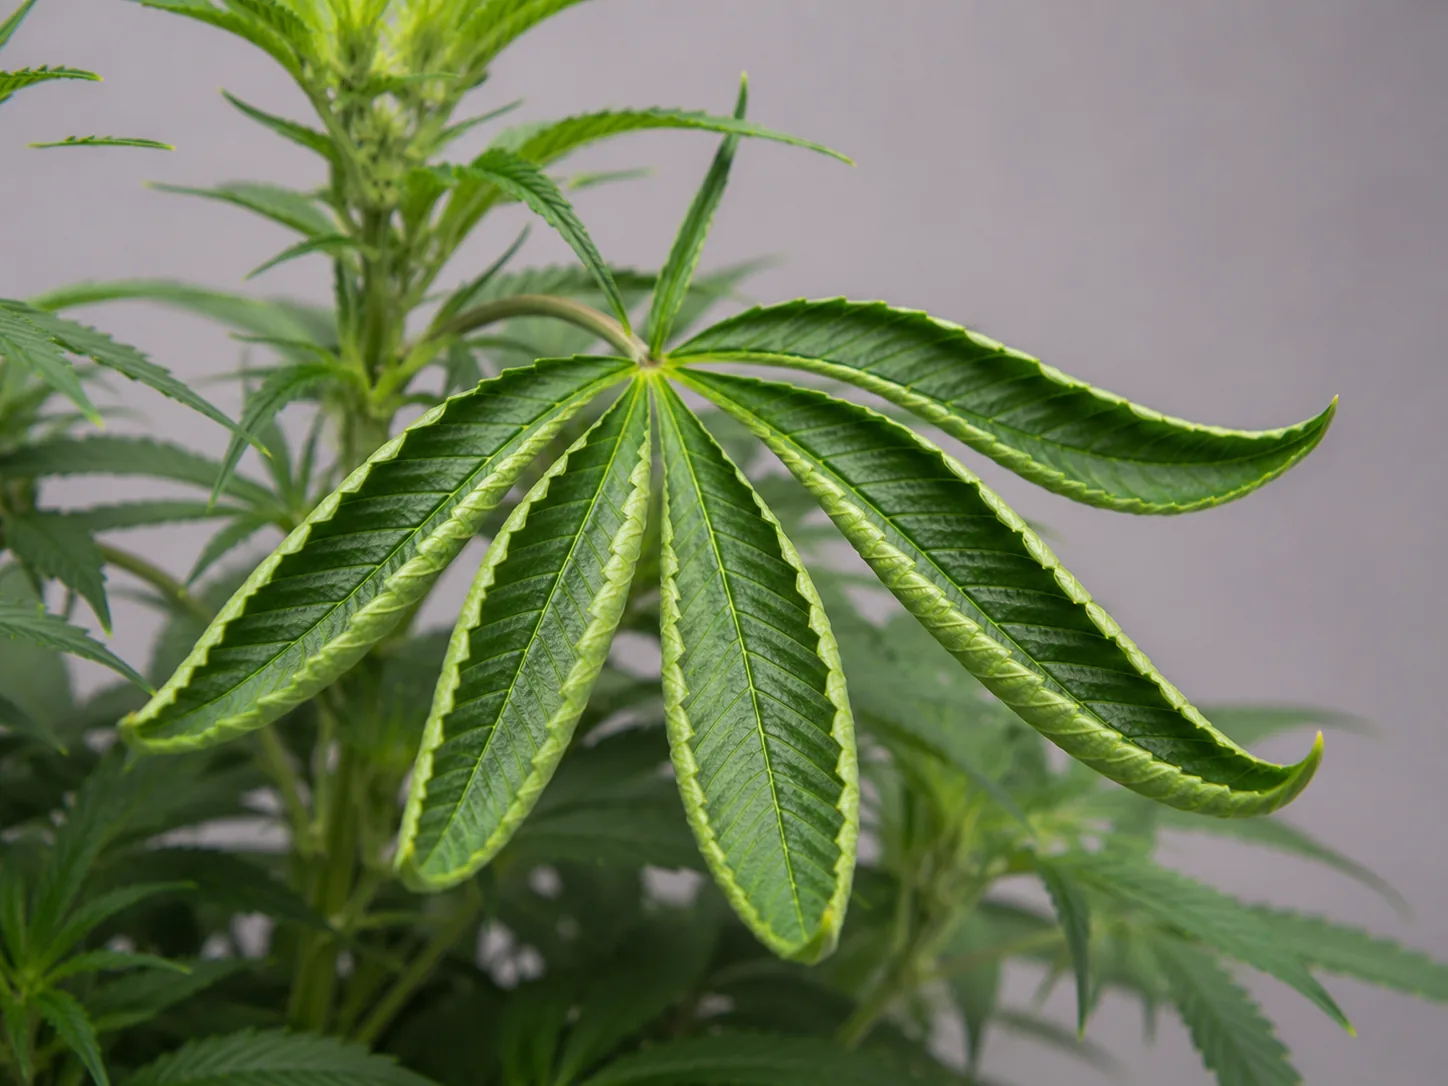
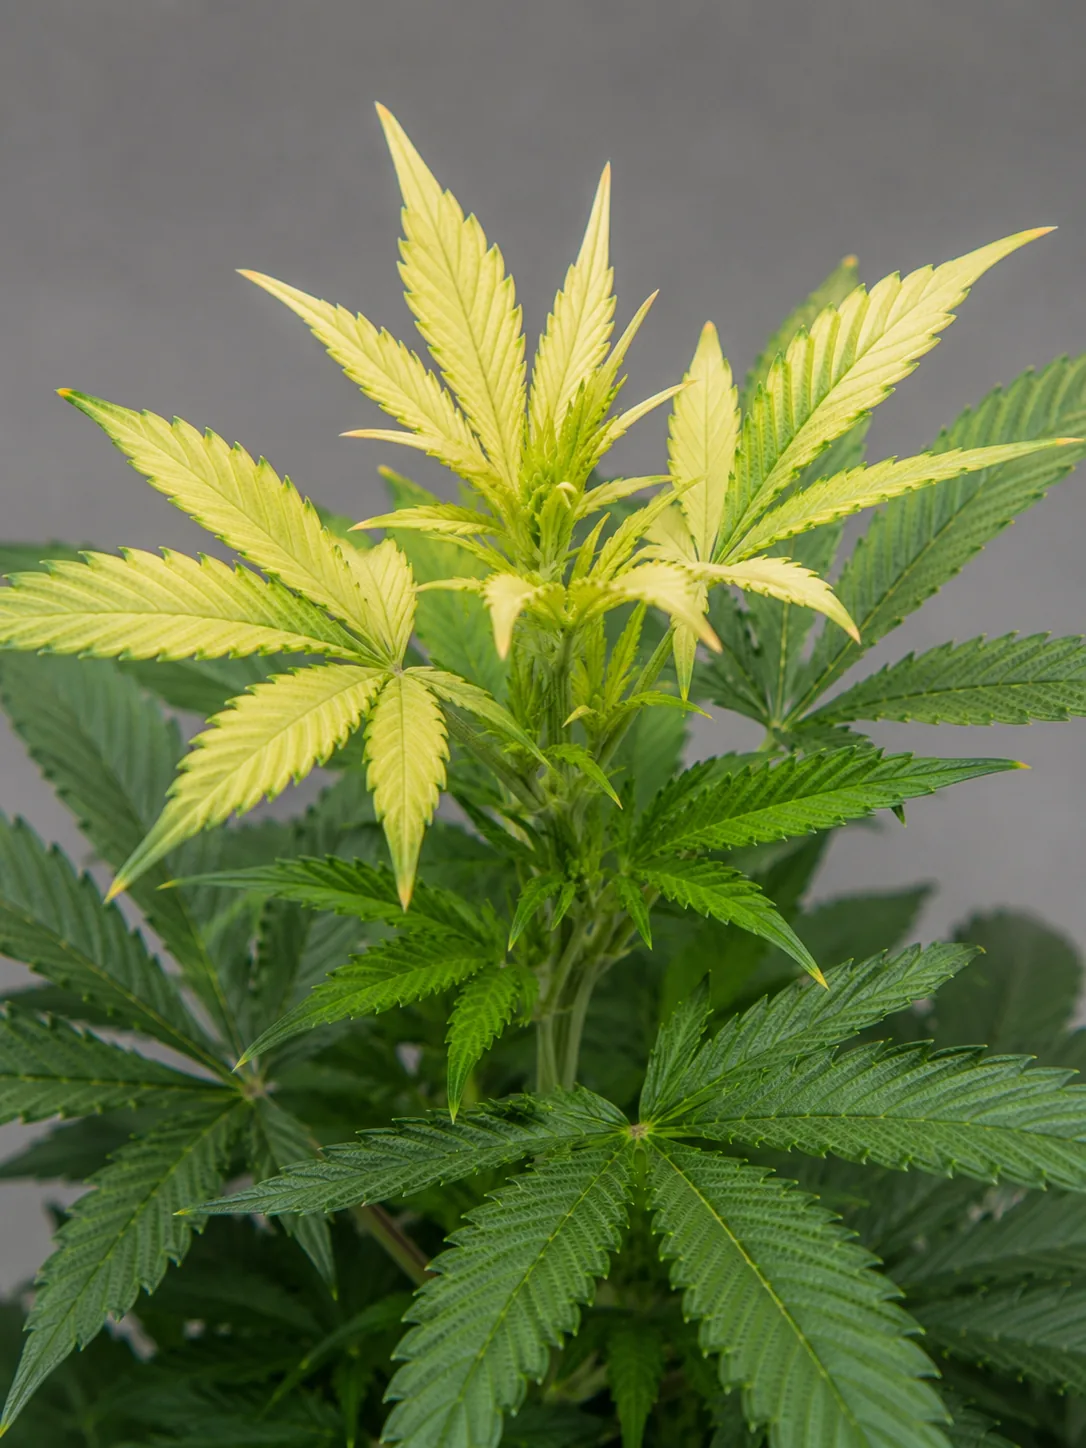

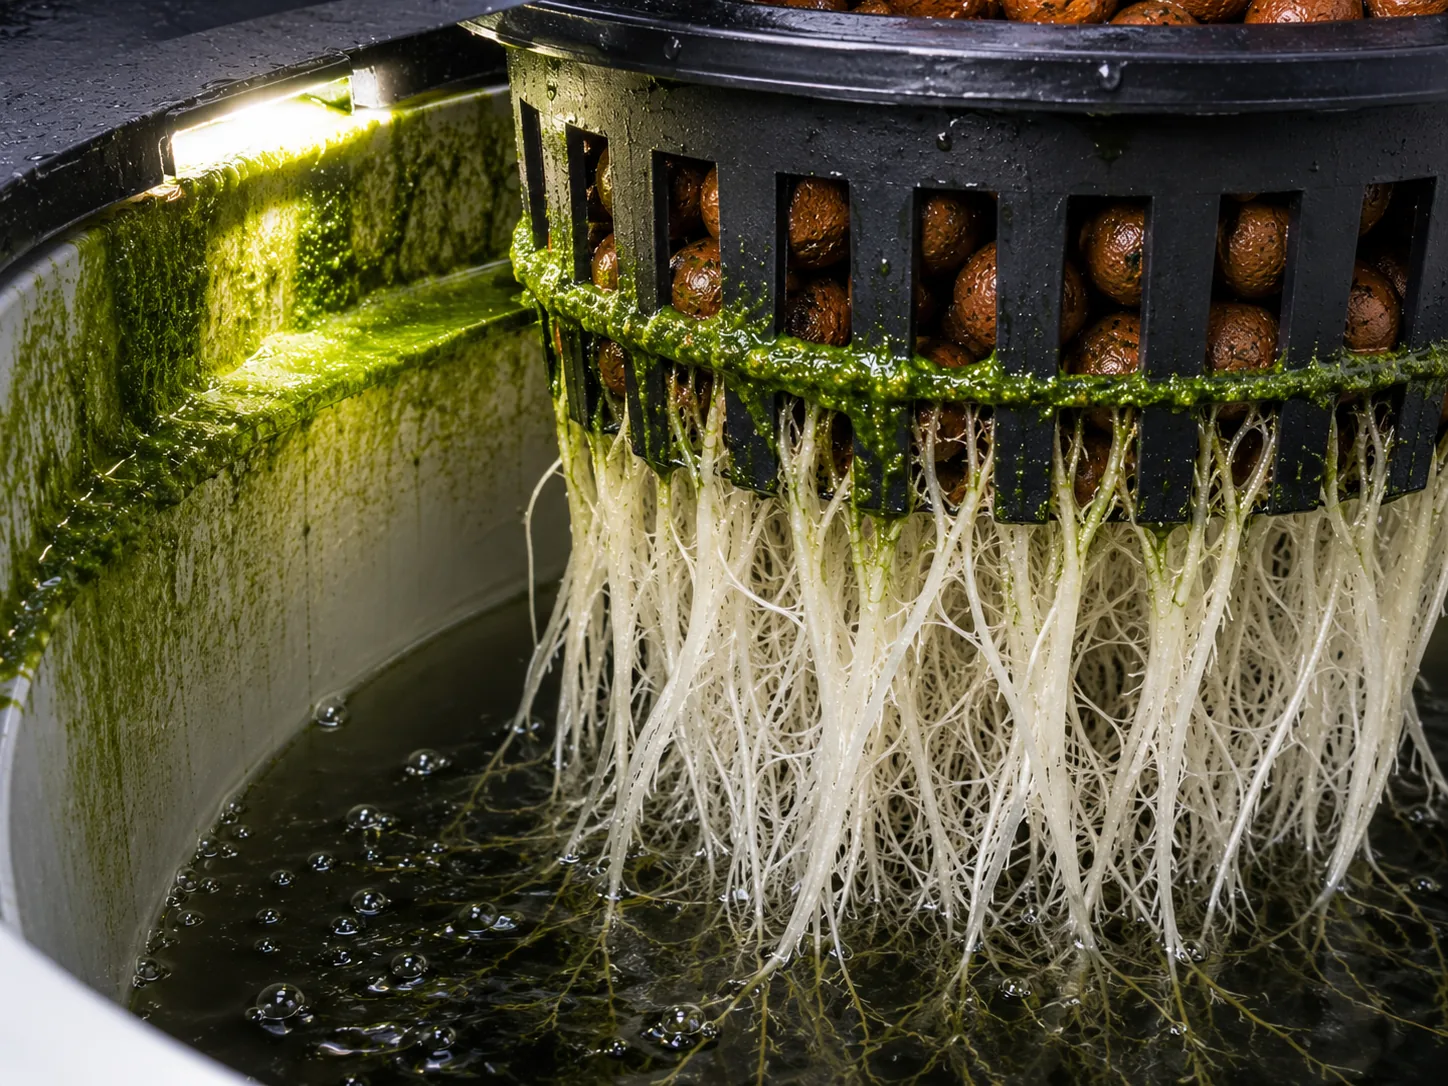
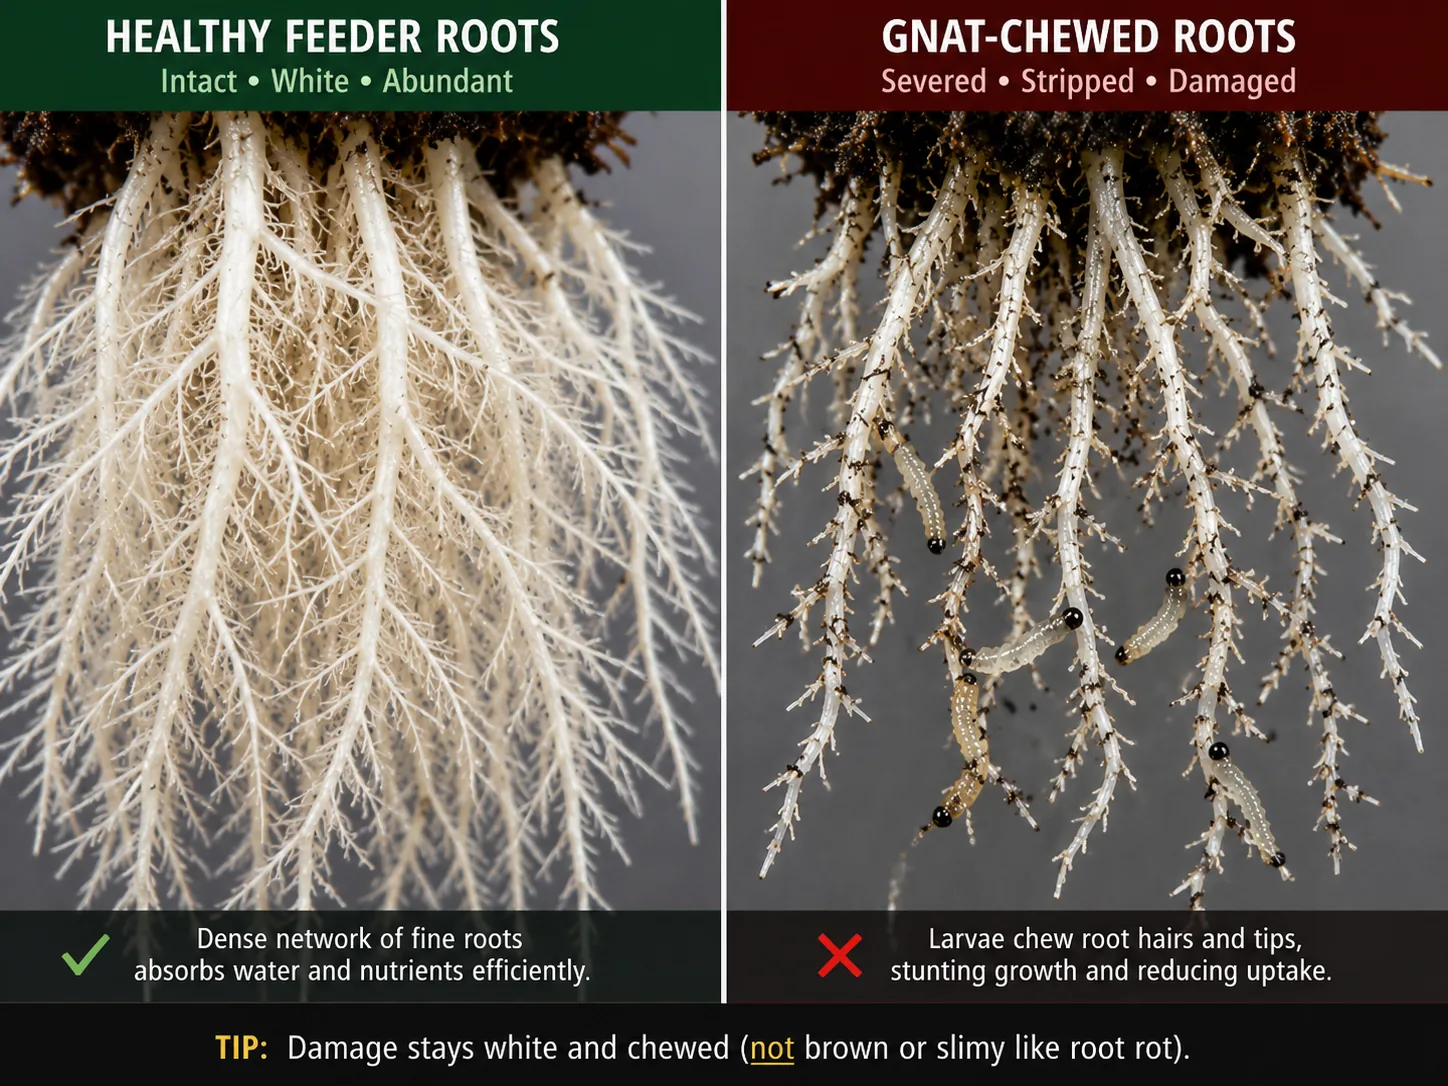
Root rot and DWC failures, healthy versus failing roots.
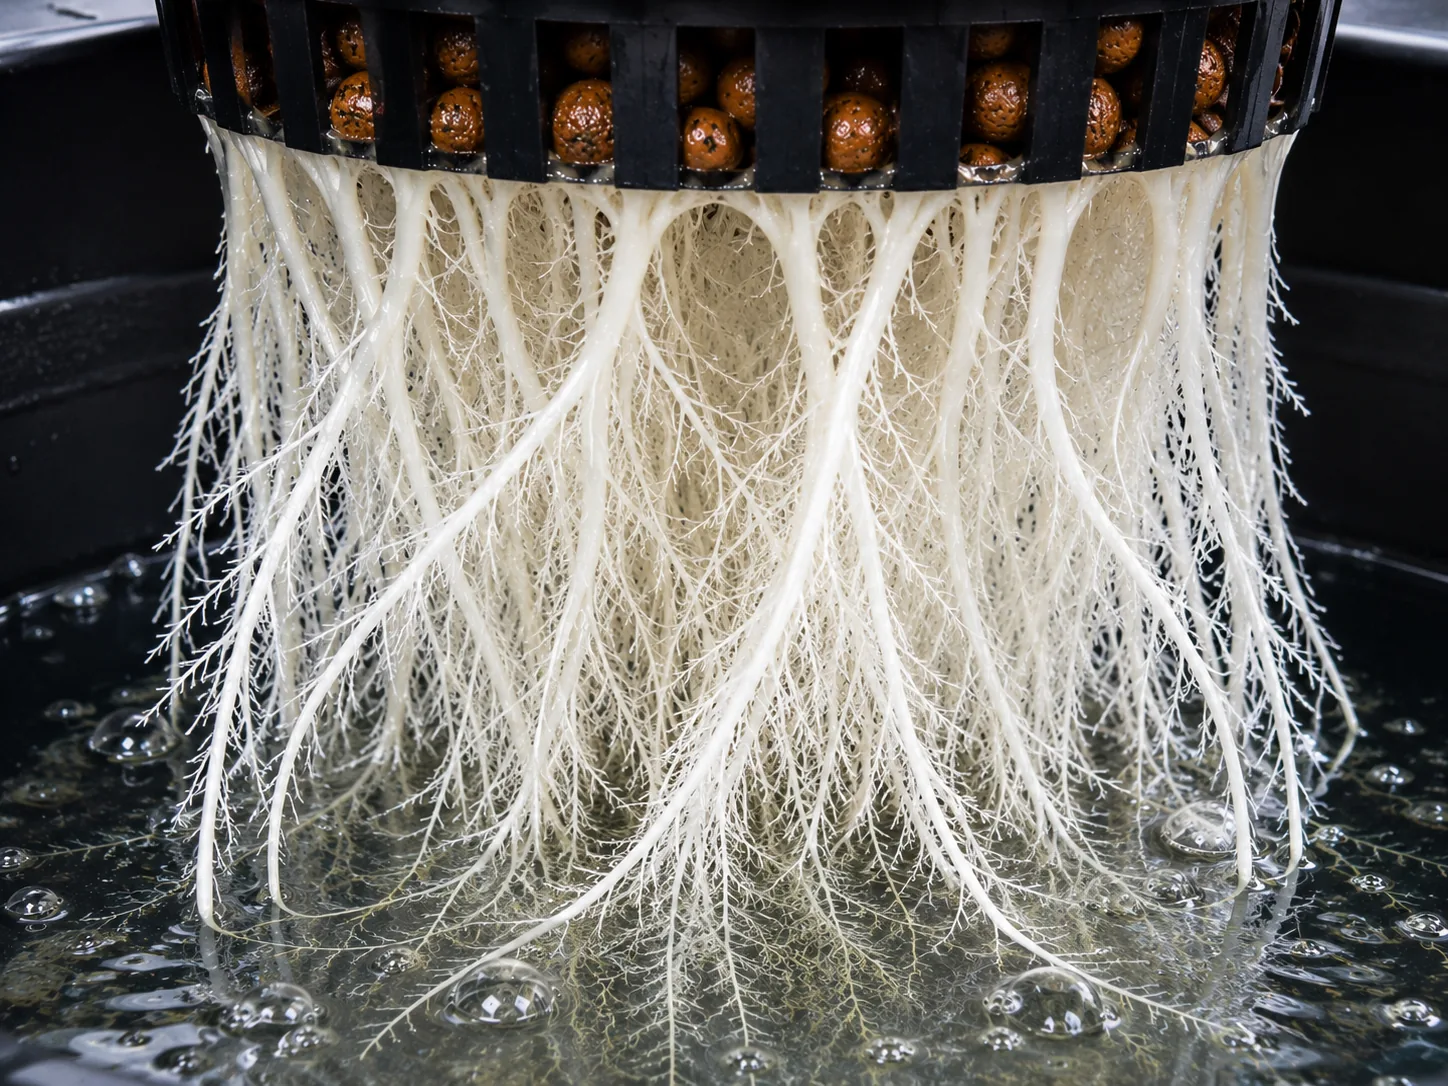
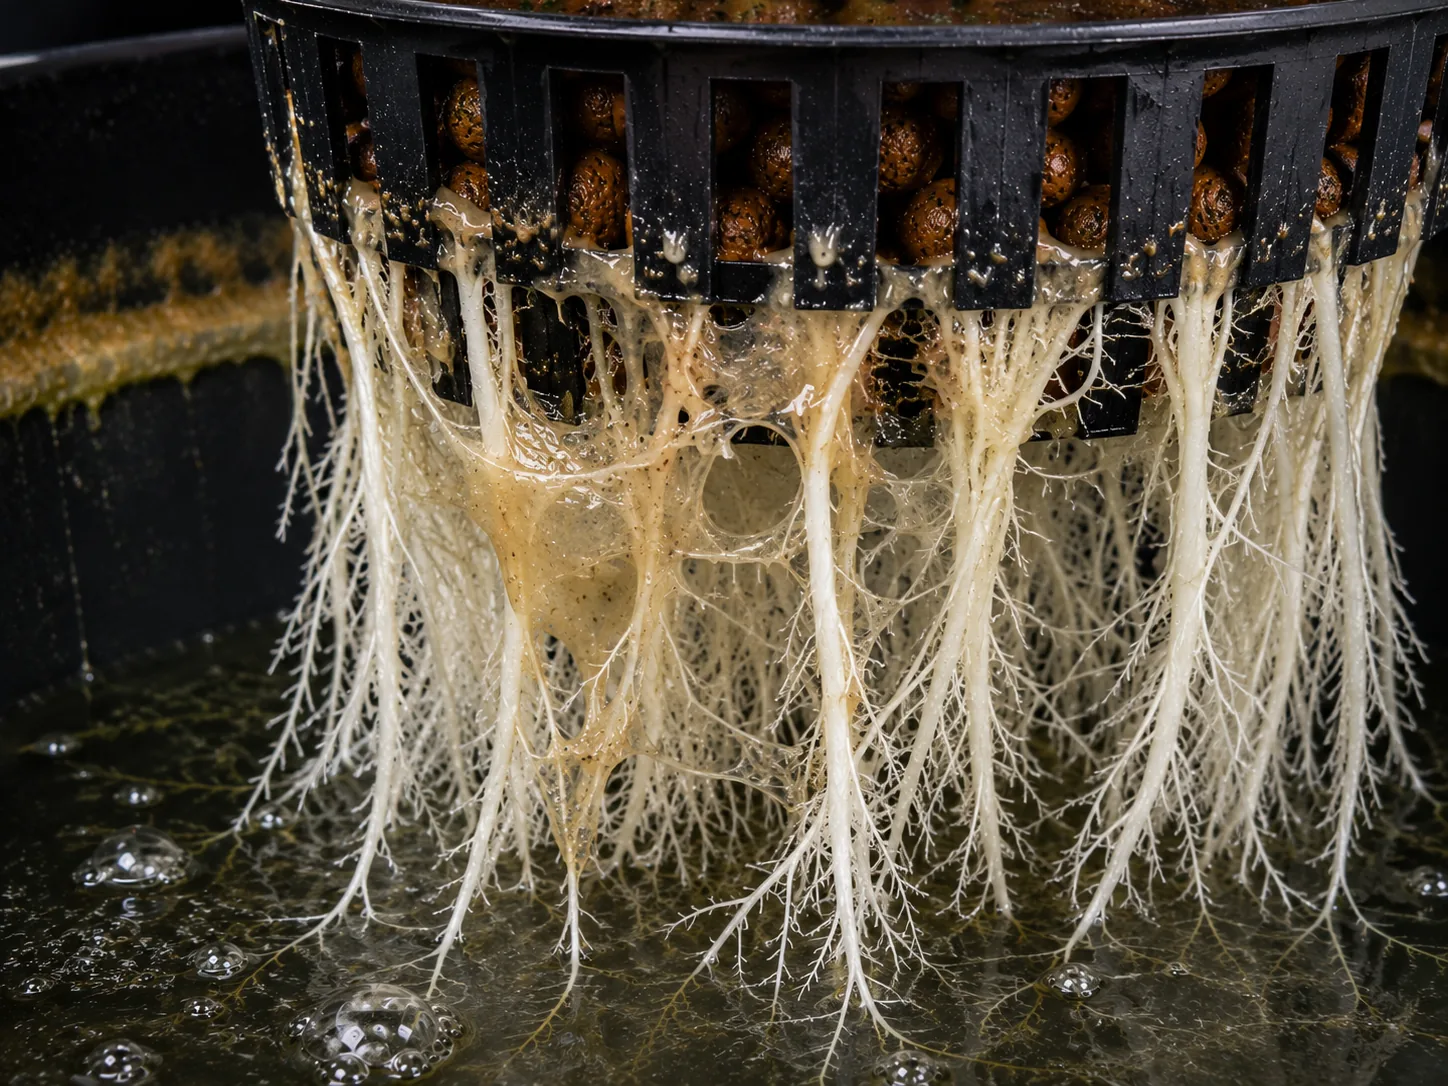
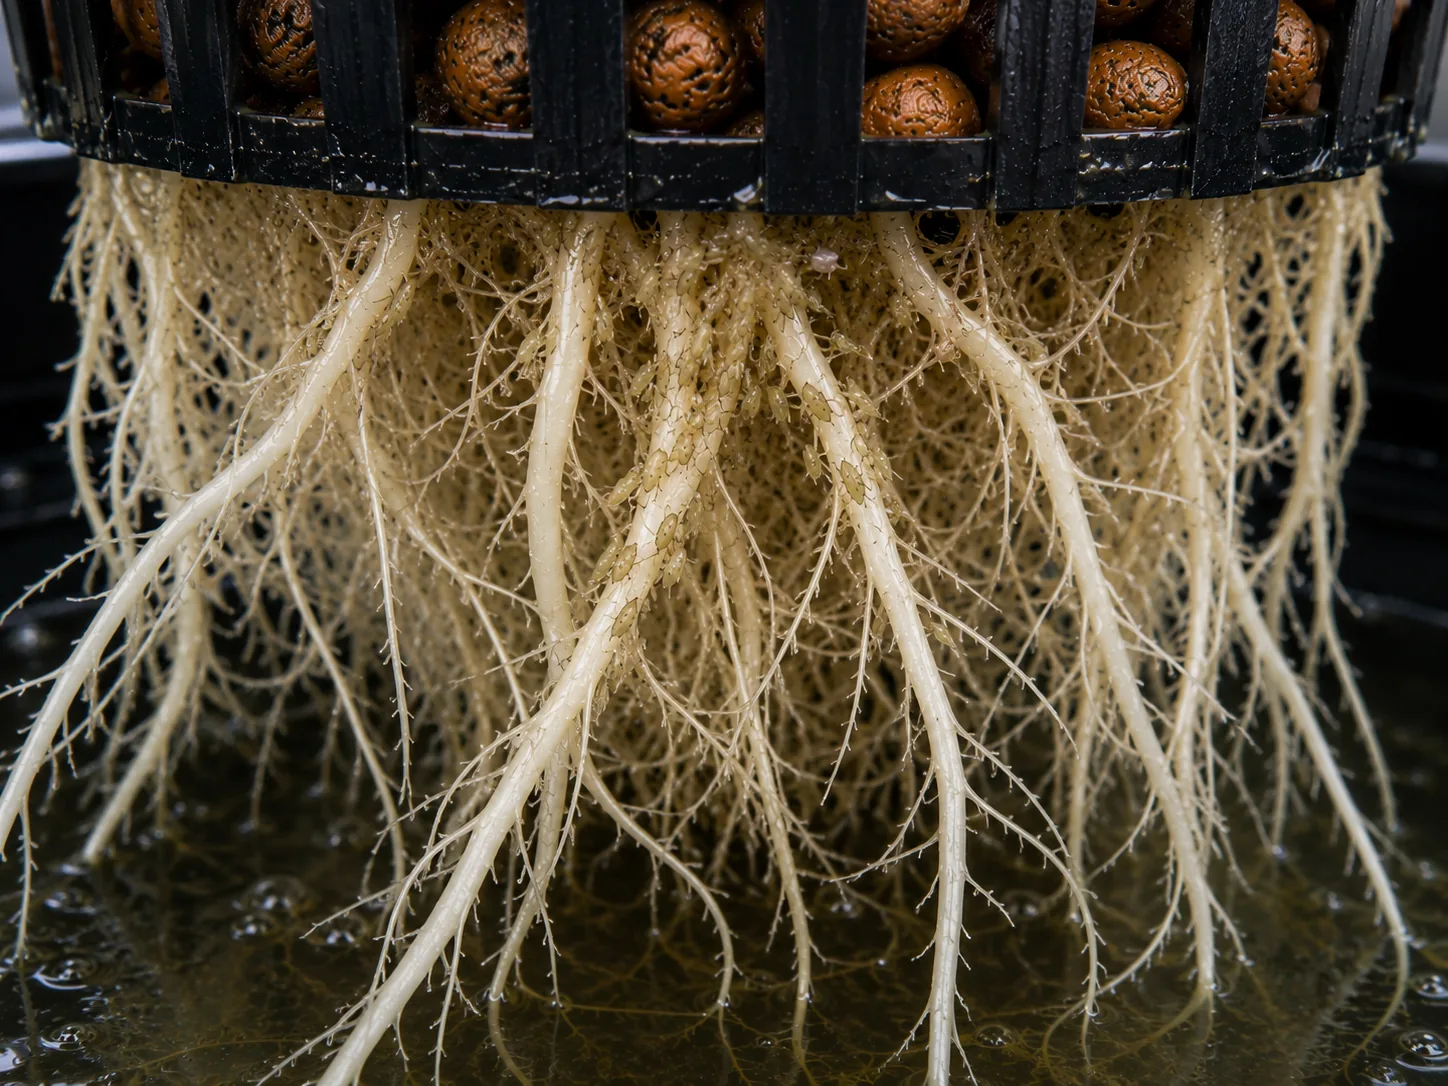
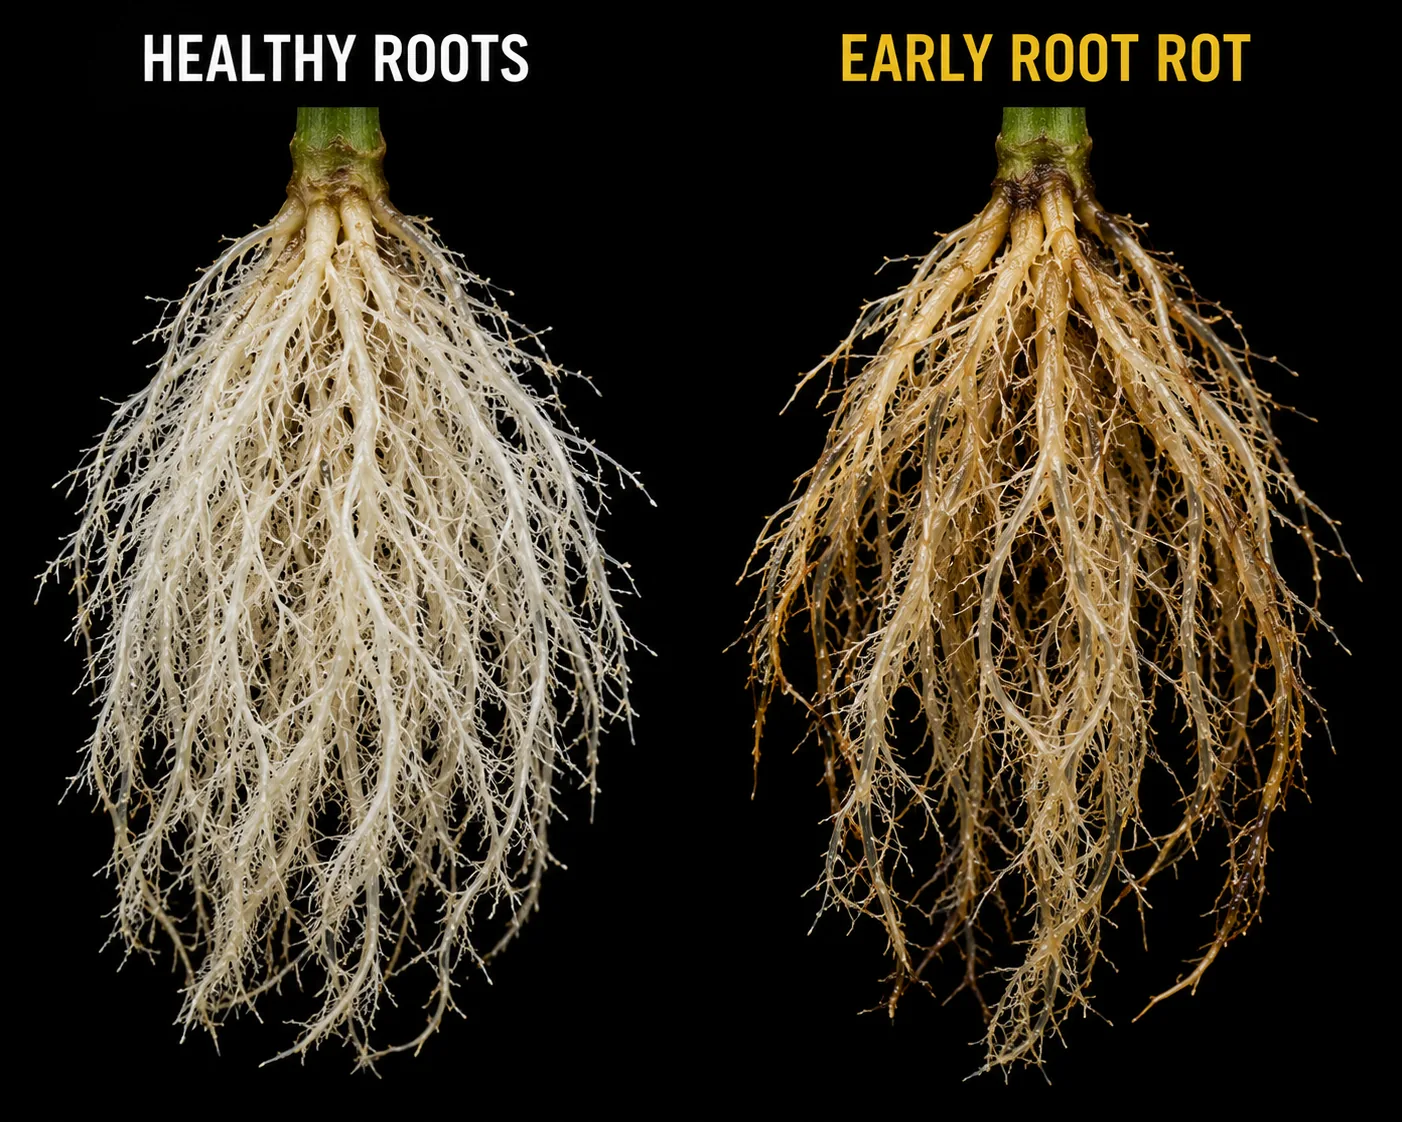
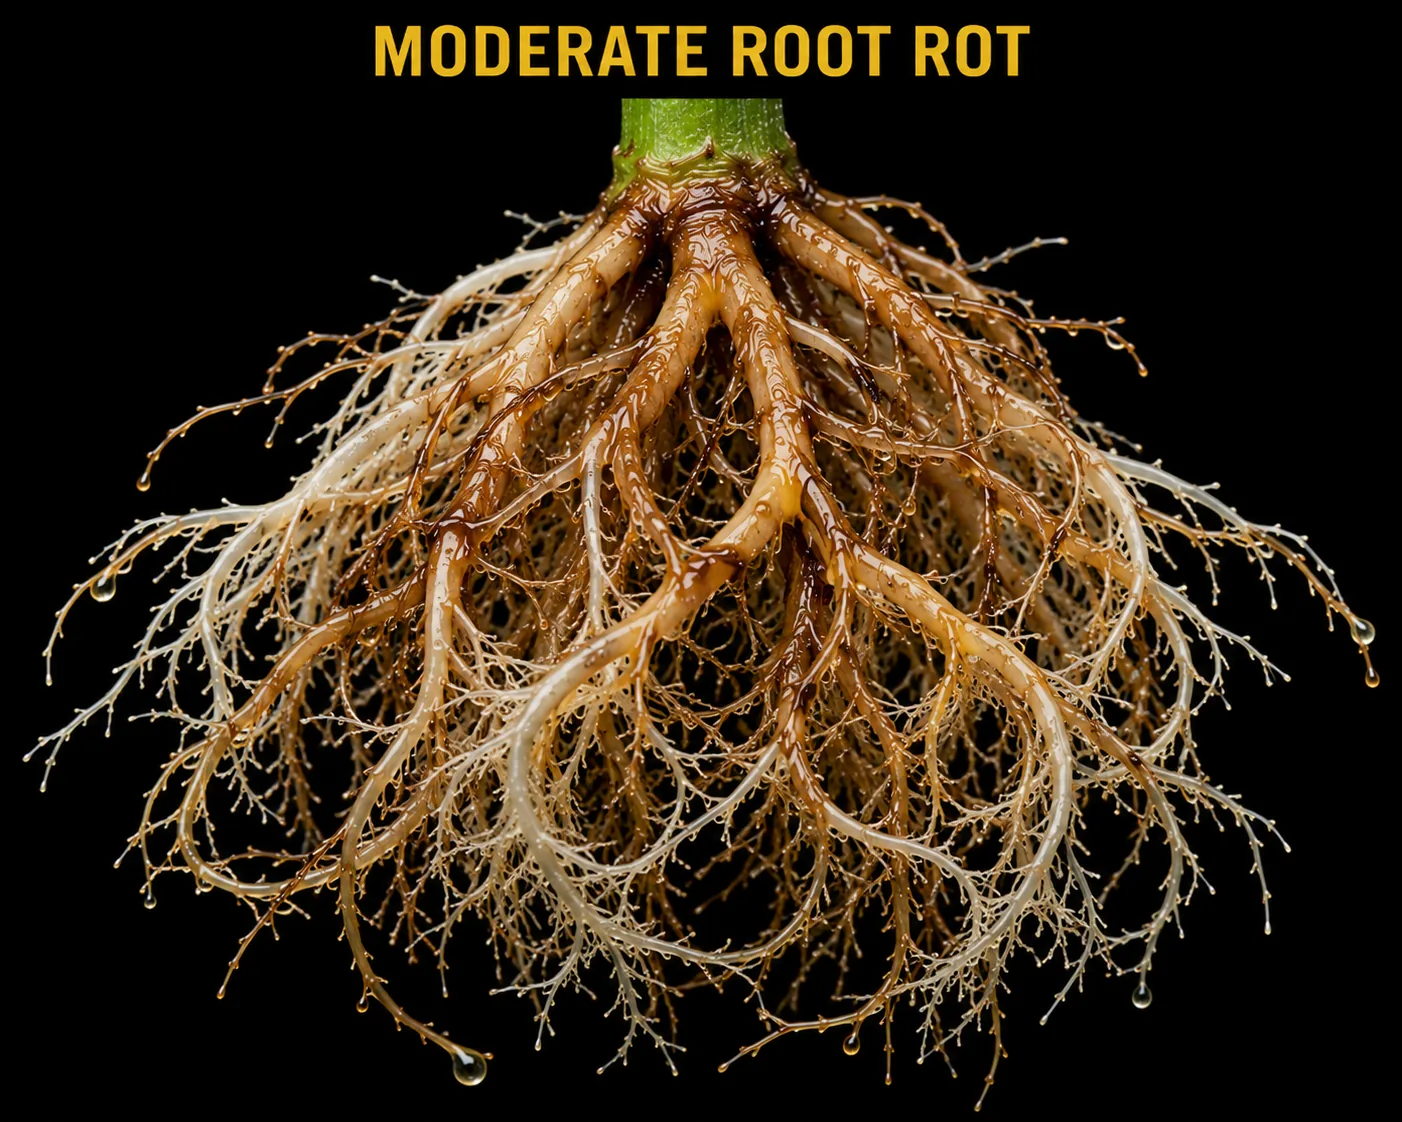
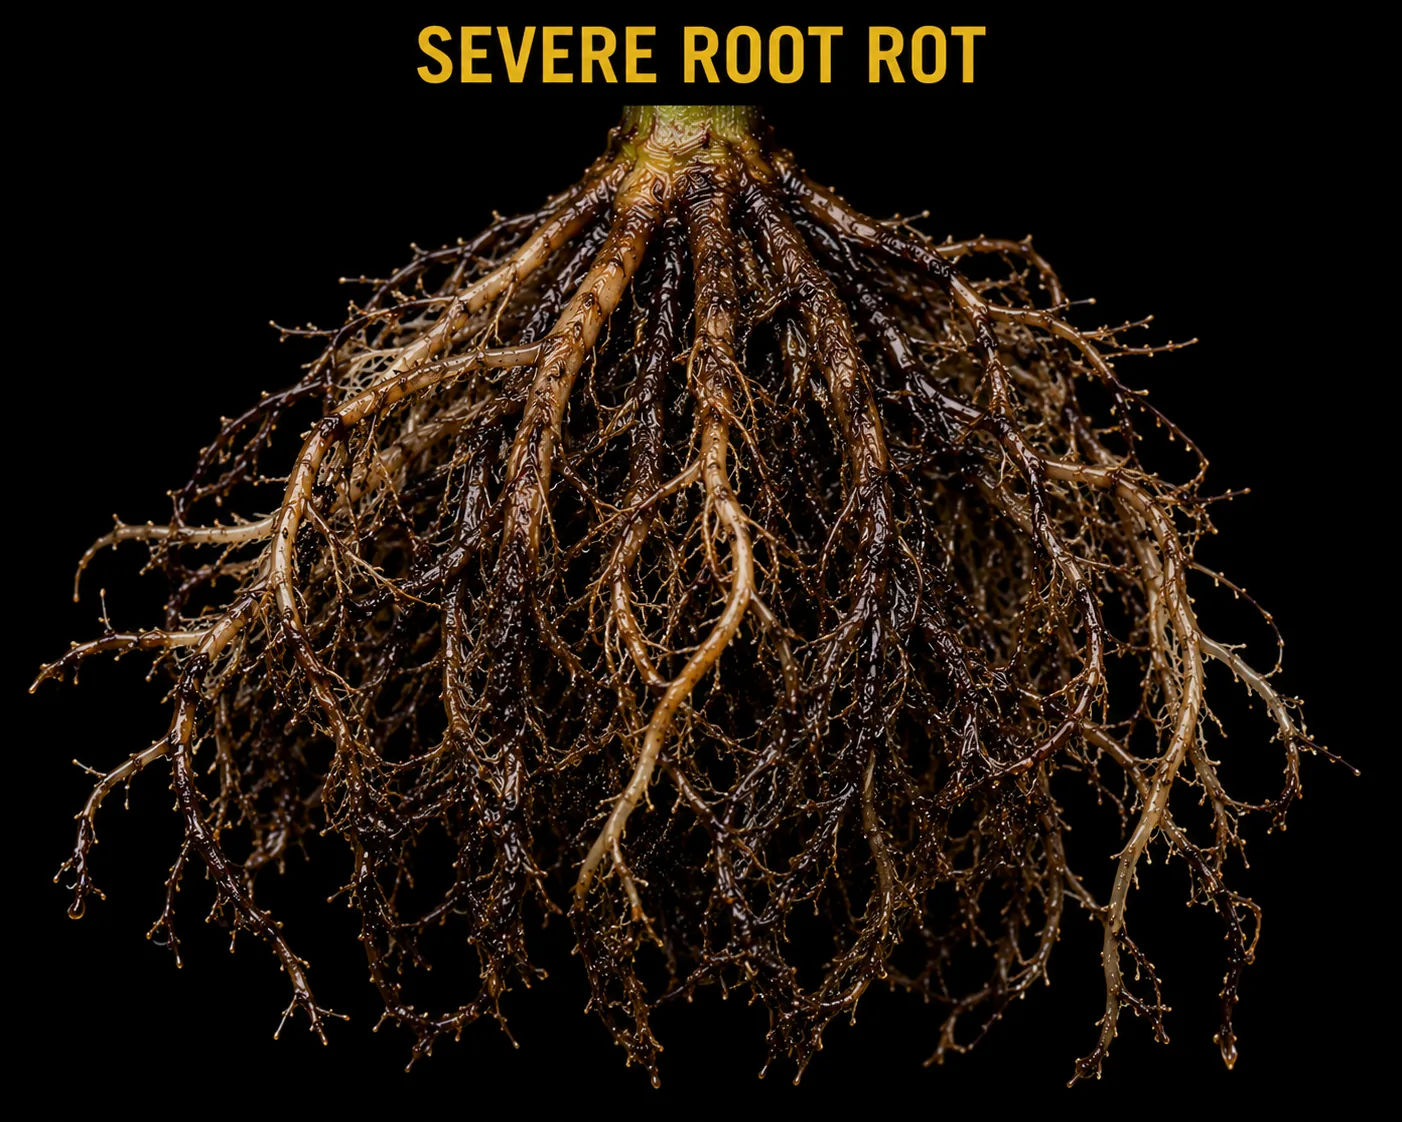
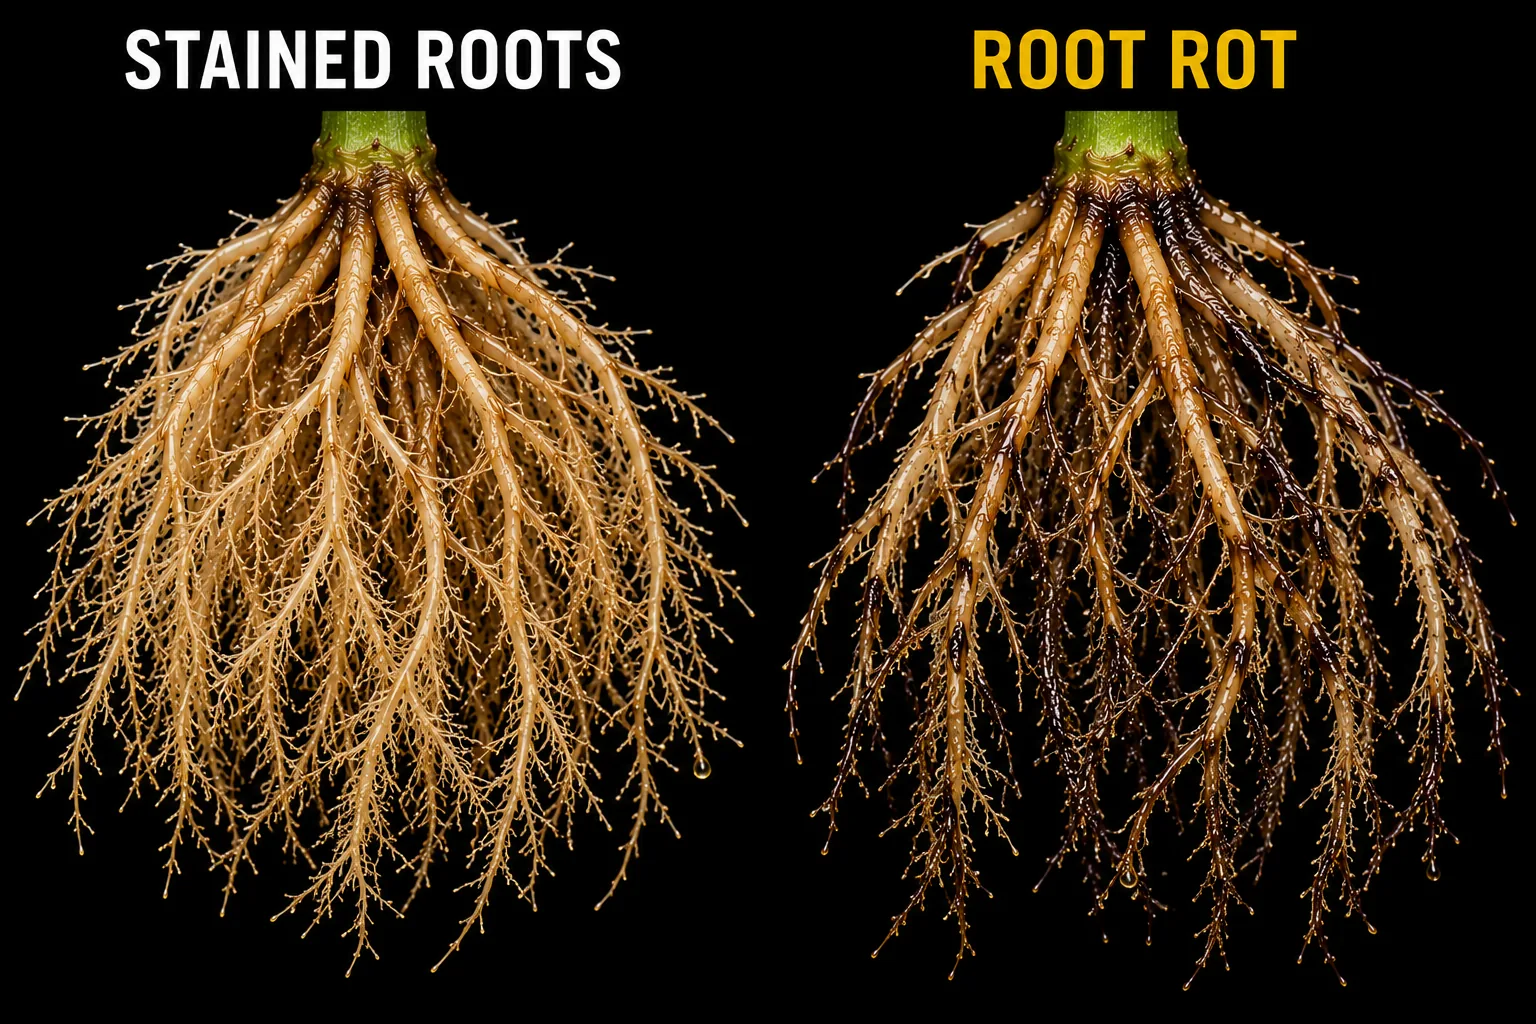
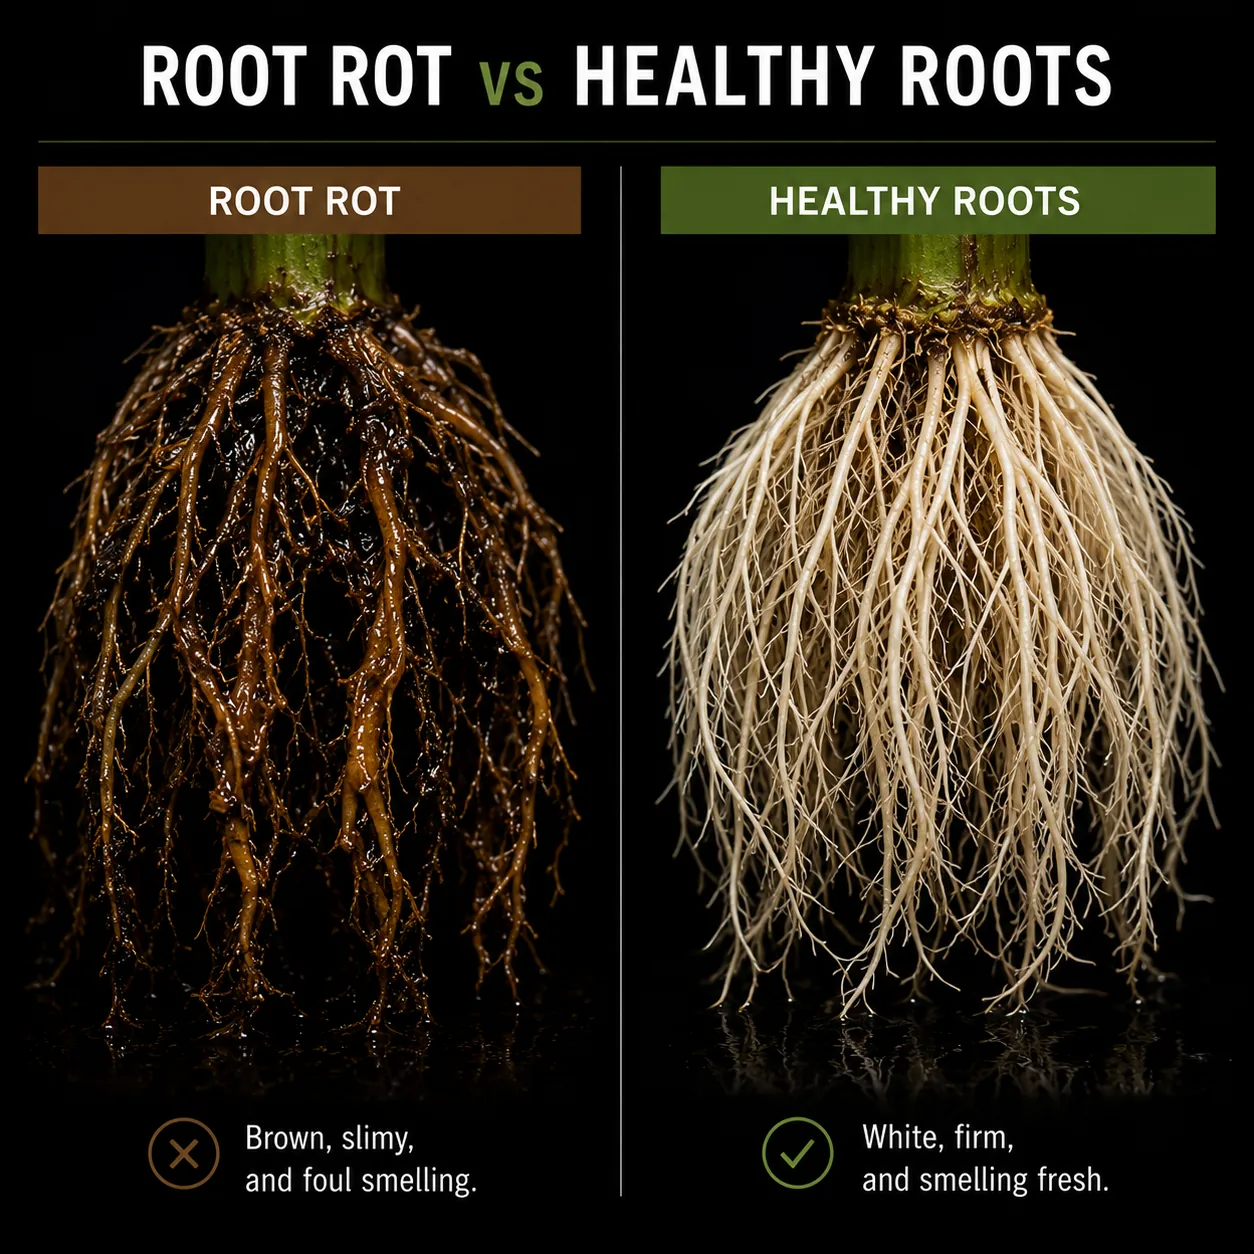
The root zone is the only part of the grow you have to deliberately go and look at, which is why trouble there tends to be caught late. Start with the healthy reference frame and learn what right looks like — bright white, firm, with visible structure — because that is the baseline everything else is measured against. Then work the severity set in order rather than jumping to the worst image. The point of comparing stages is to separate cosmetic discolouration from an actual failure: staining from nutrients or additives tints the roots without changing how they feel or smell, while real rot turns them brown, soft and slimy and takes the whole plant's posture down with it. Panic diagnoses cost more reservoirs than rot does.
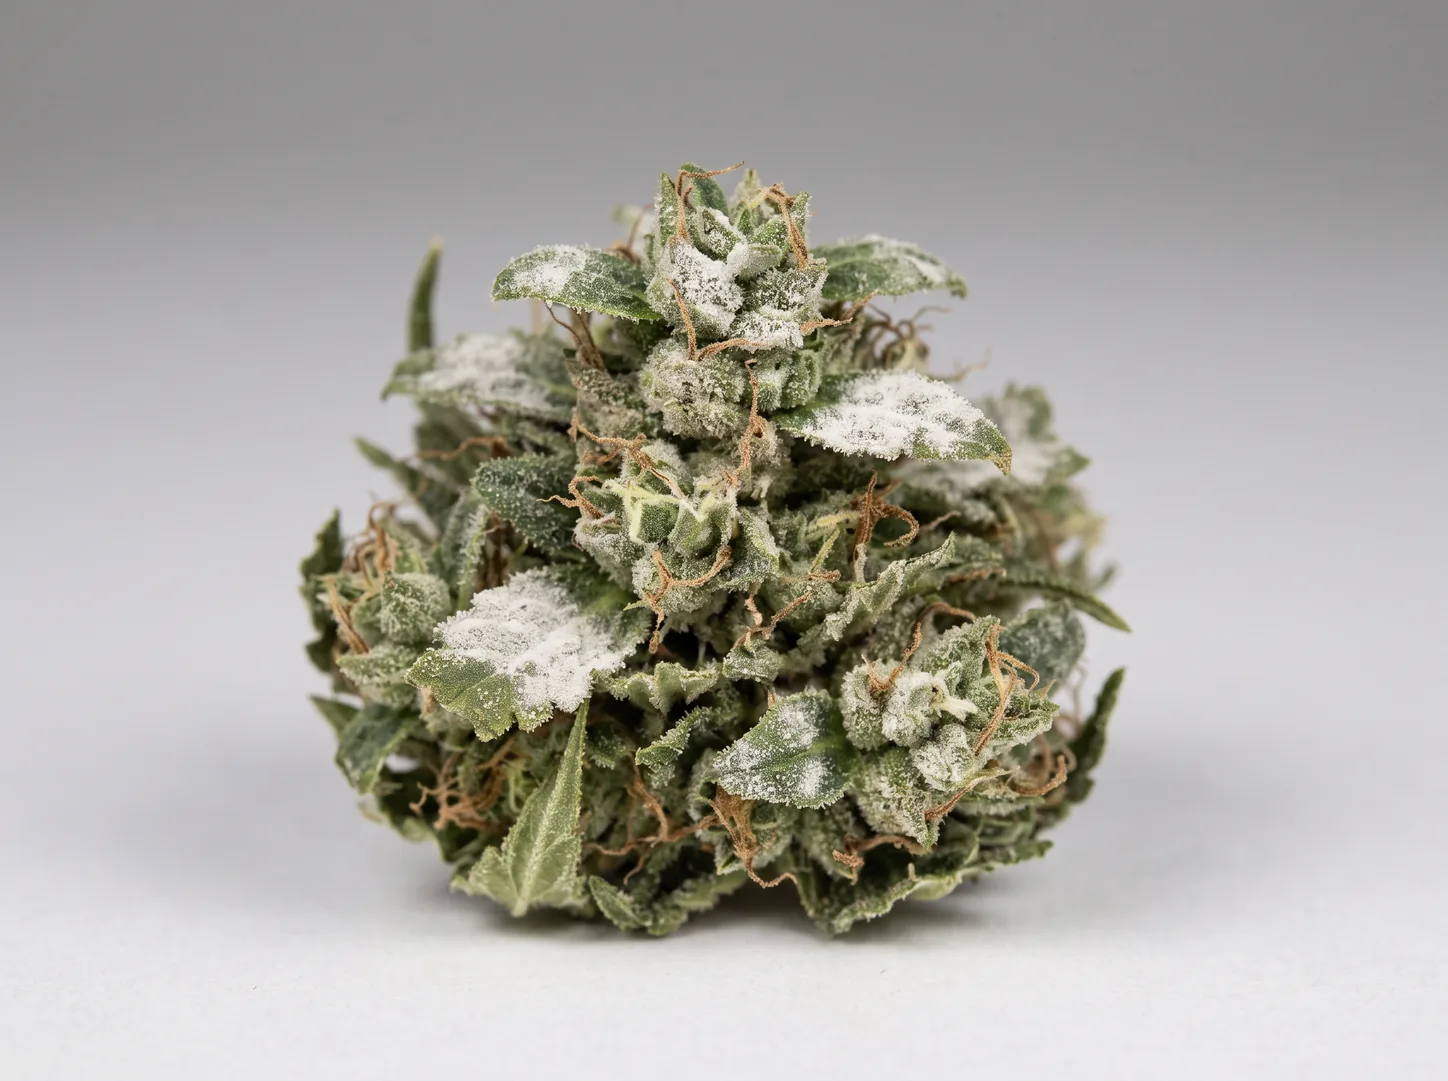
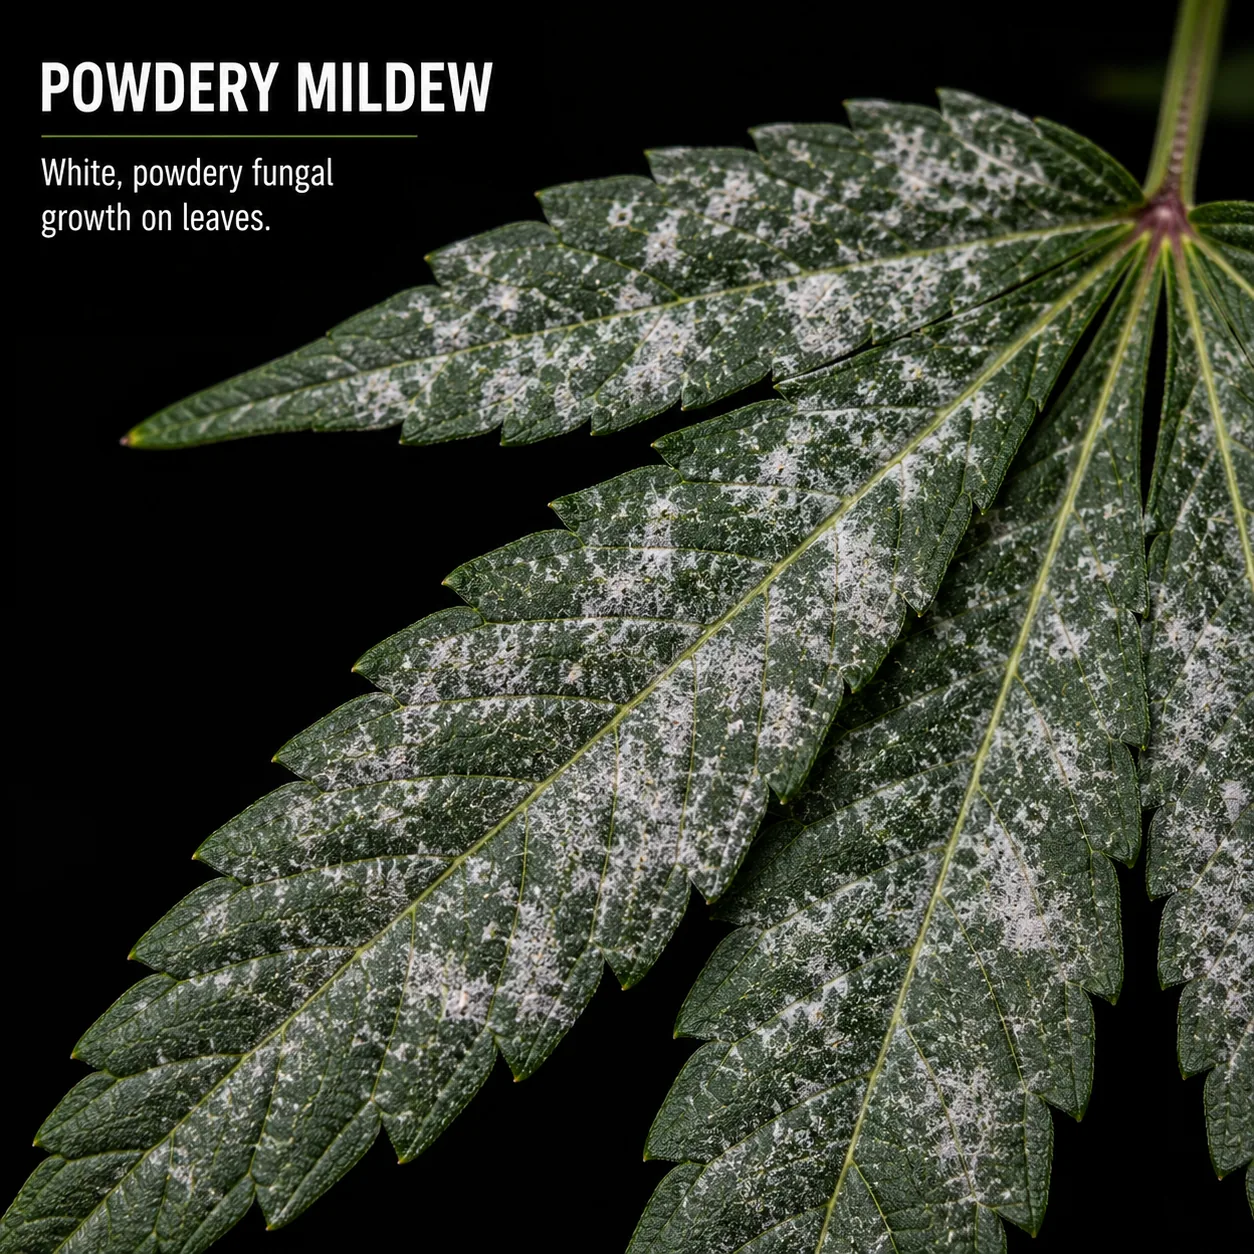
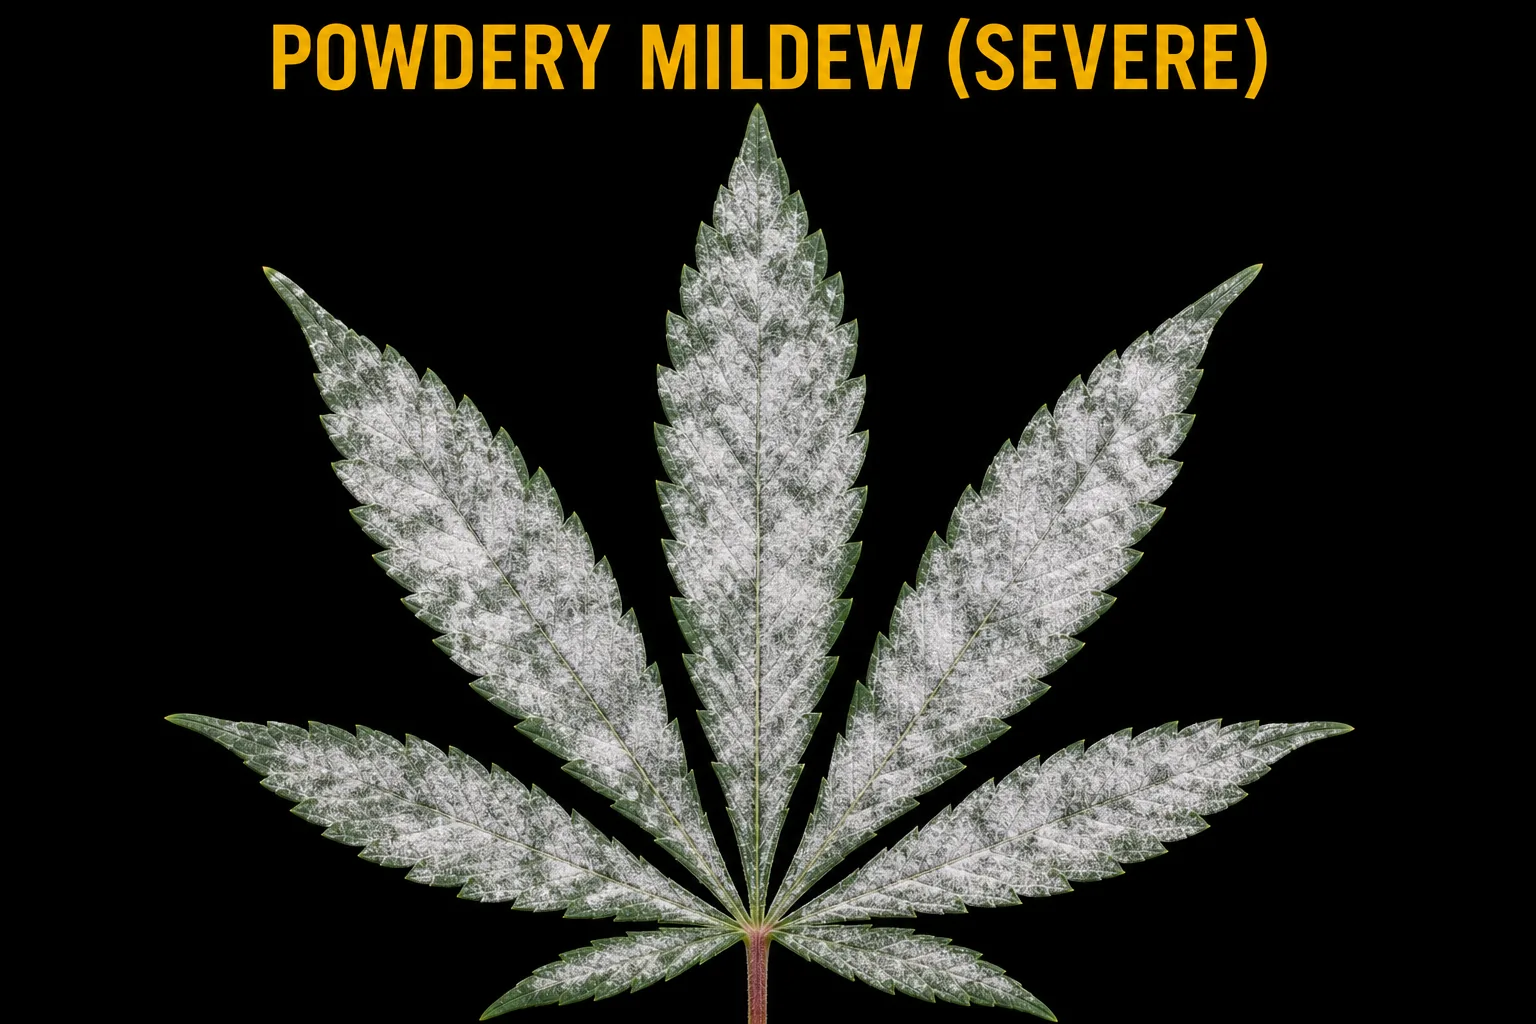
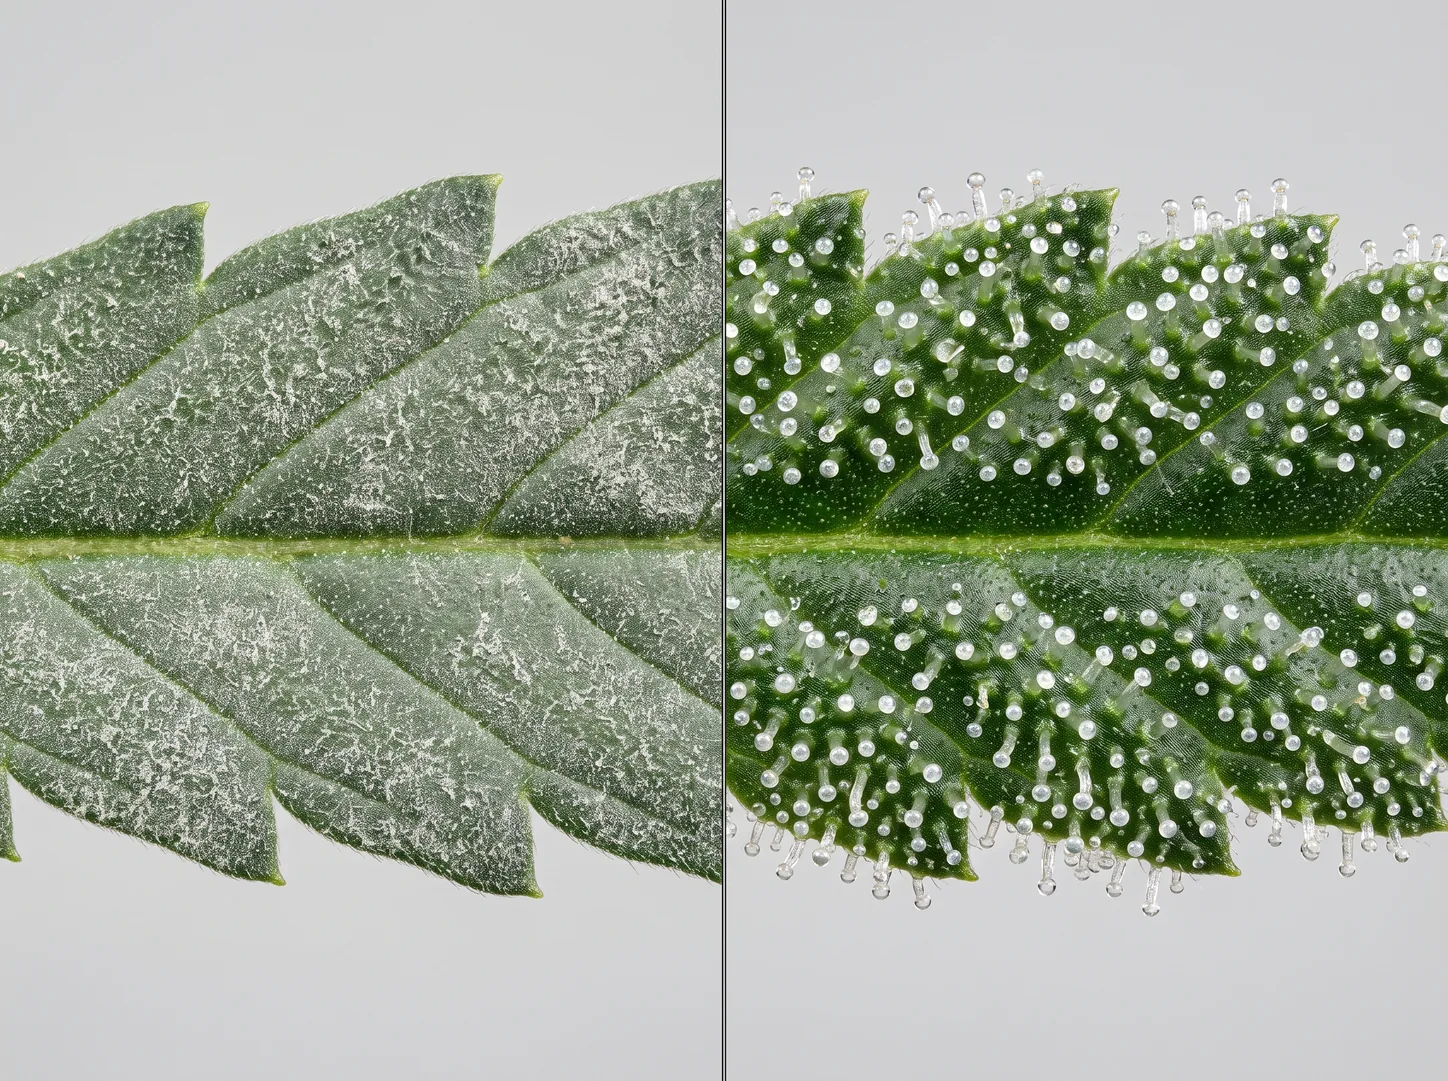
Powdery mildew, bud rot, and pest damage — the safety set.
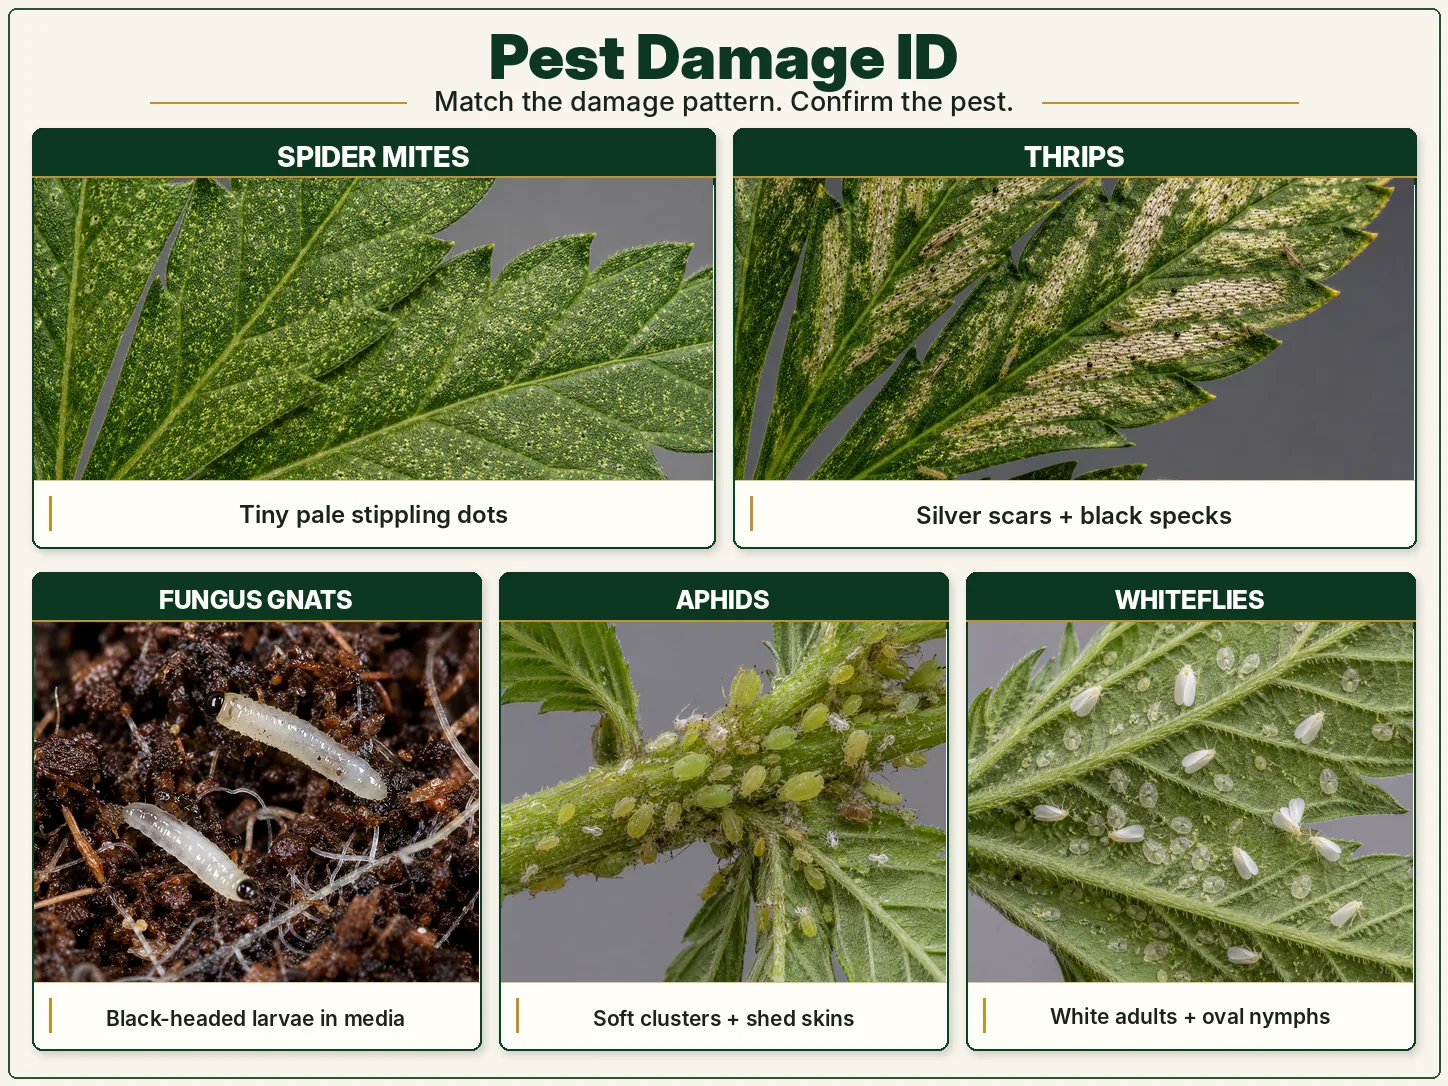
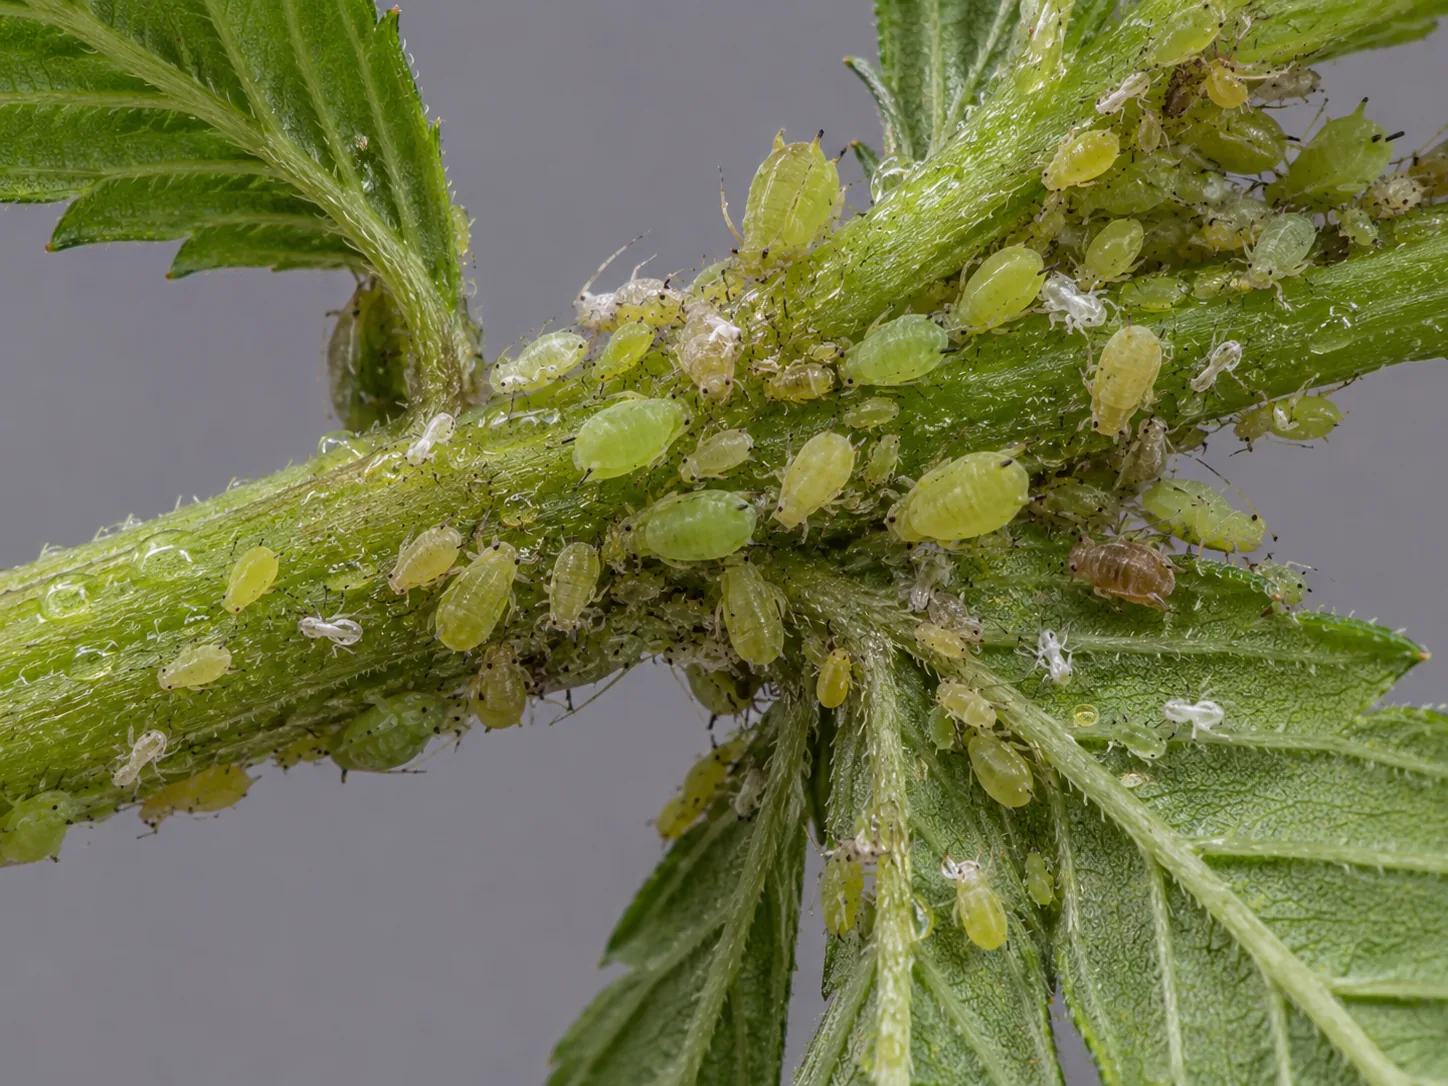
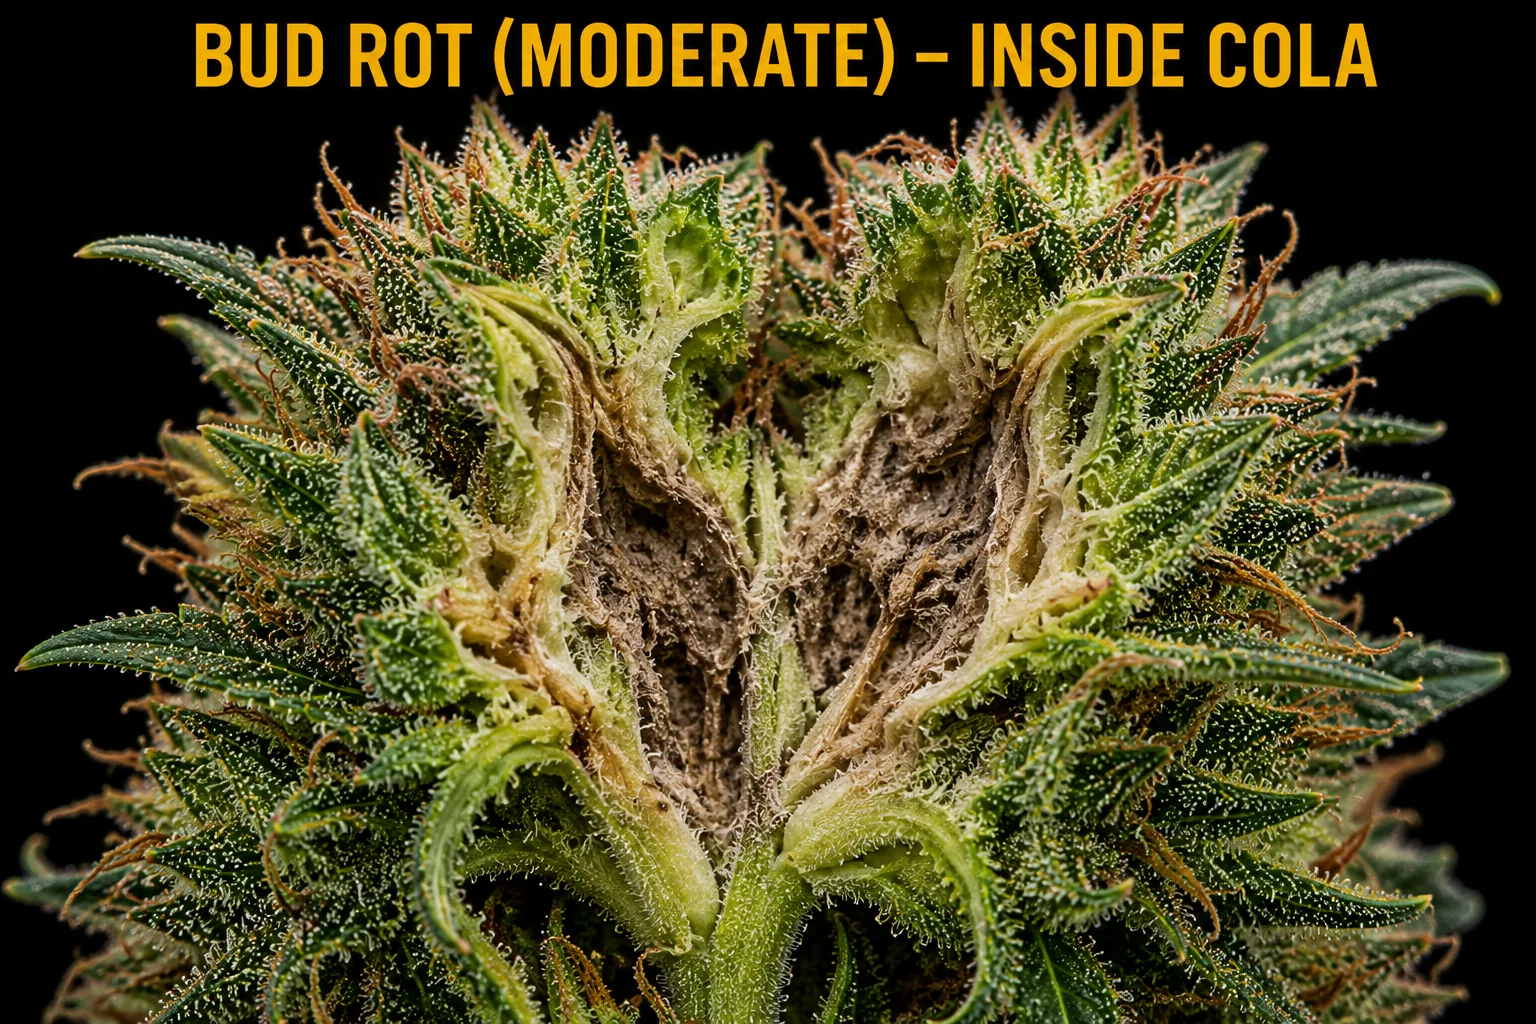
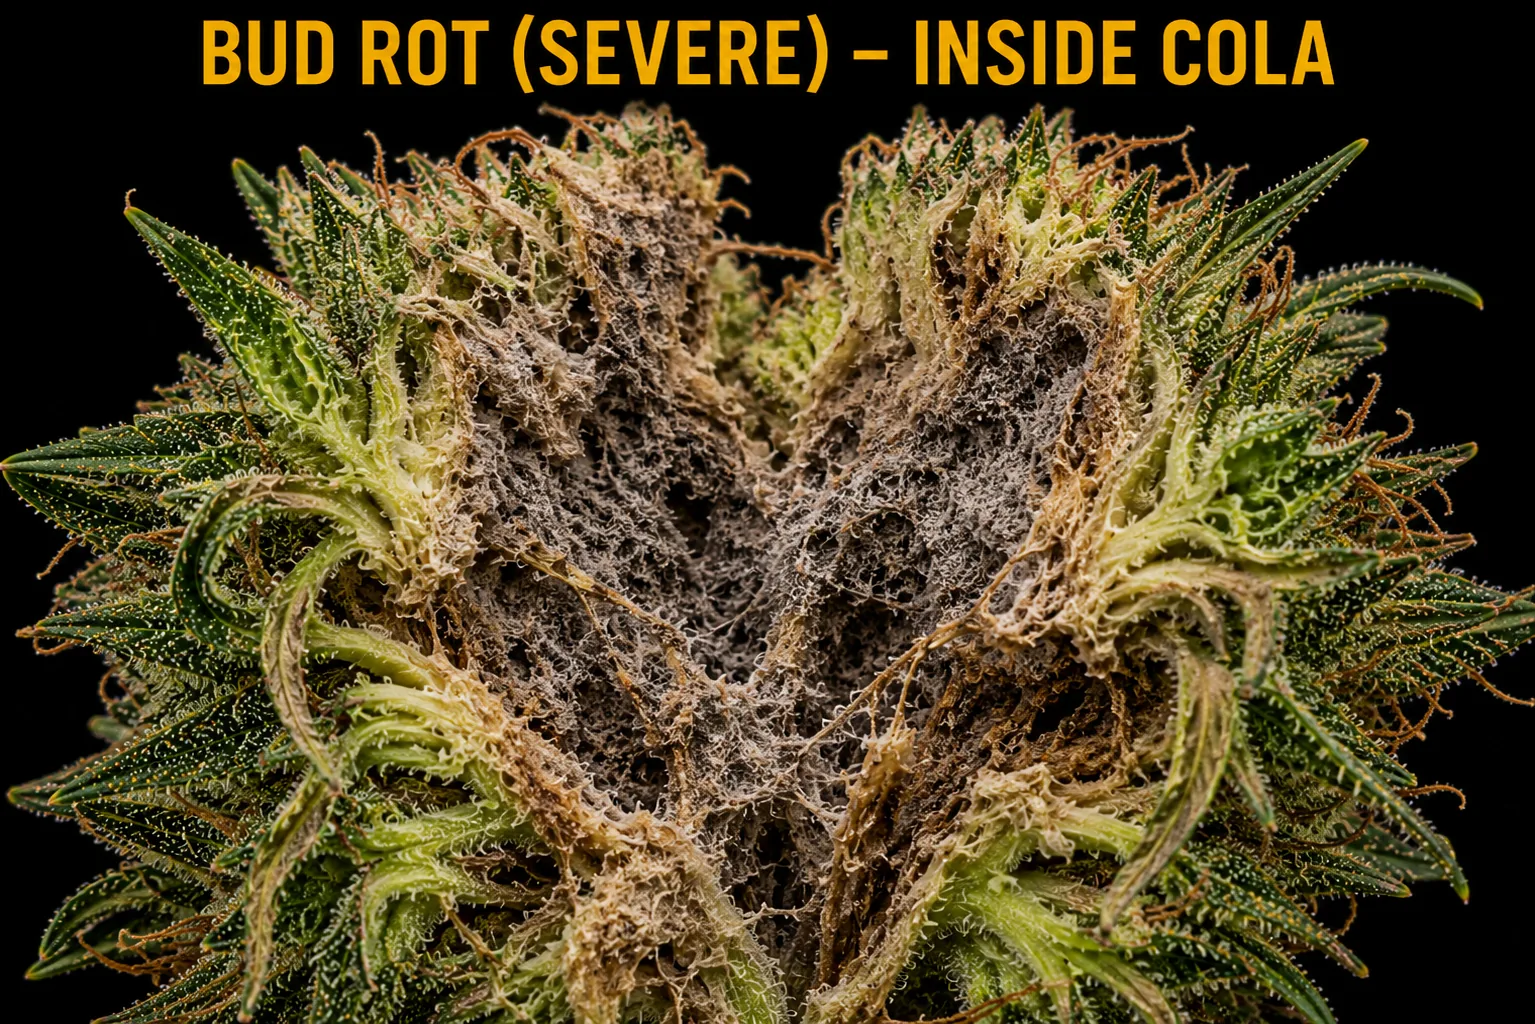
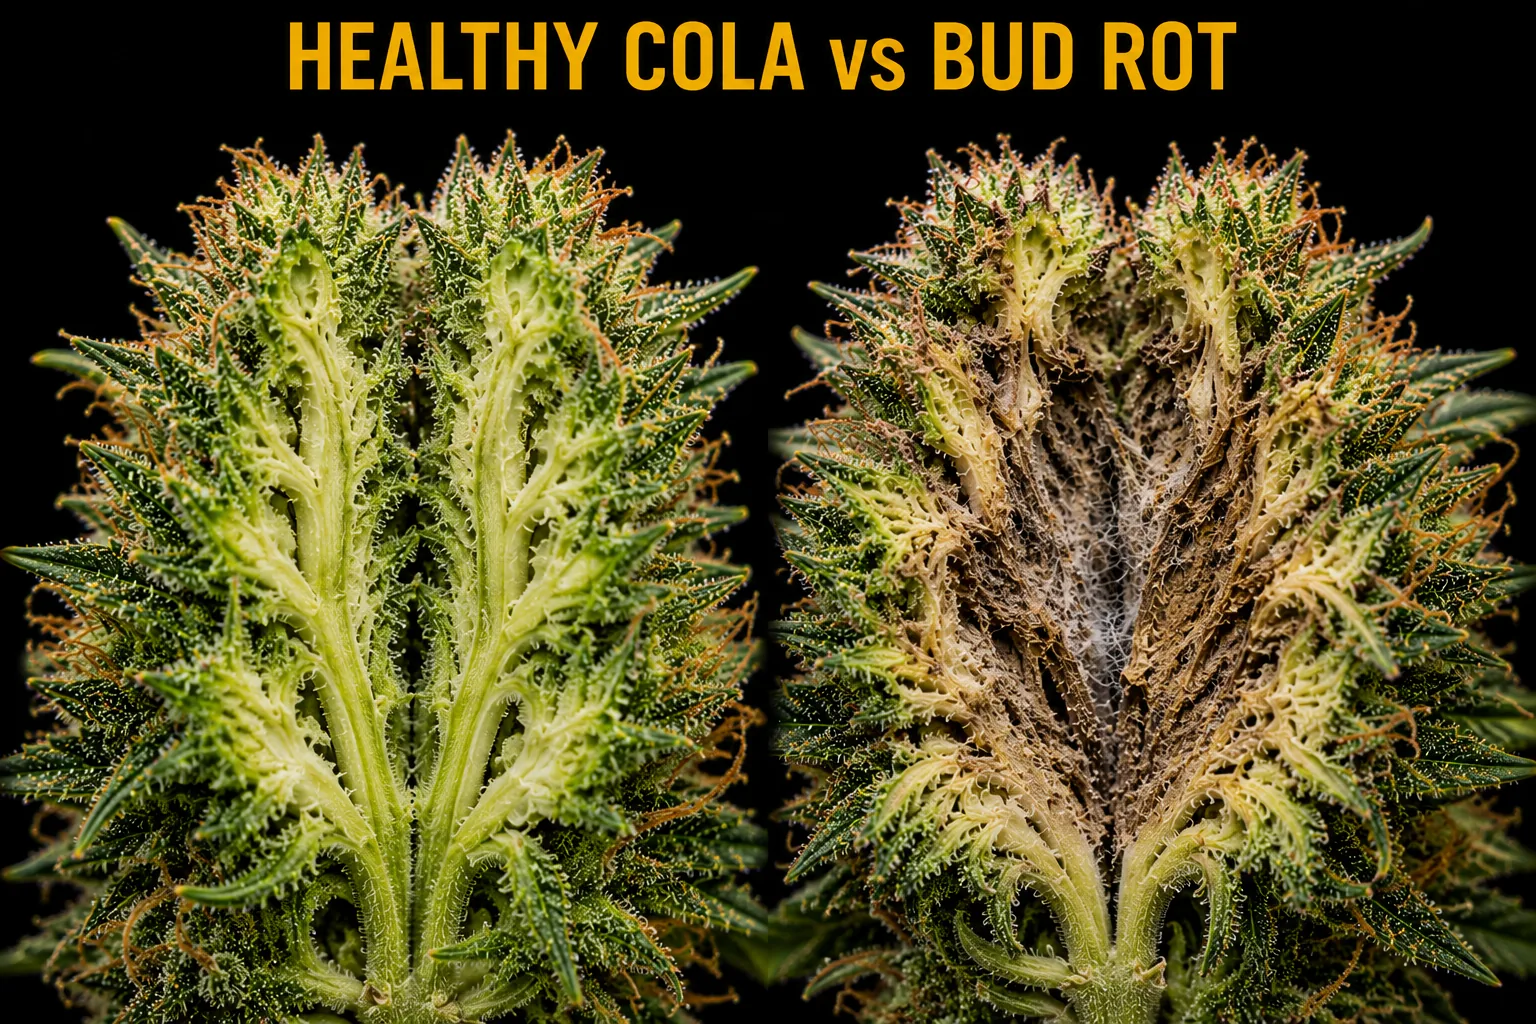
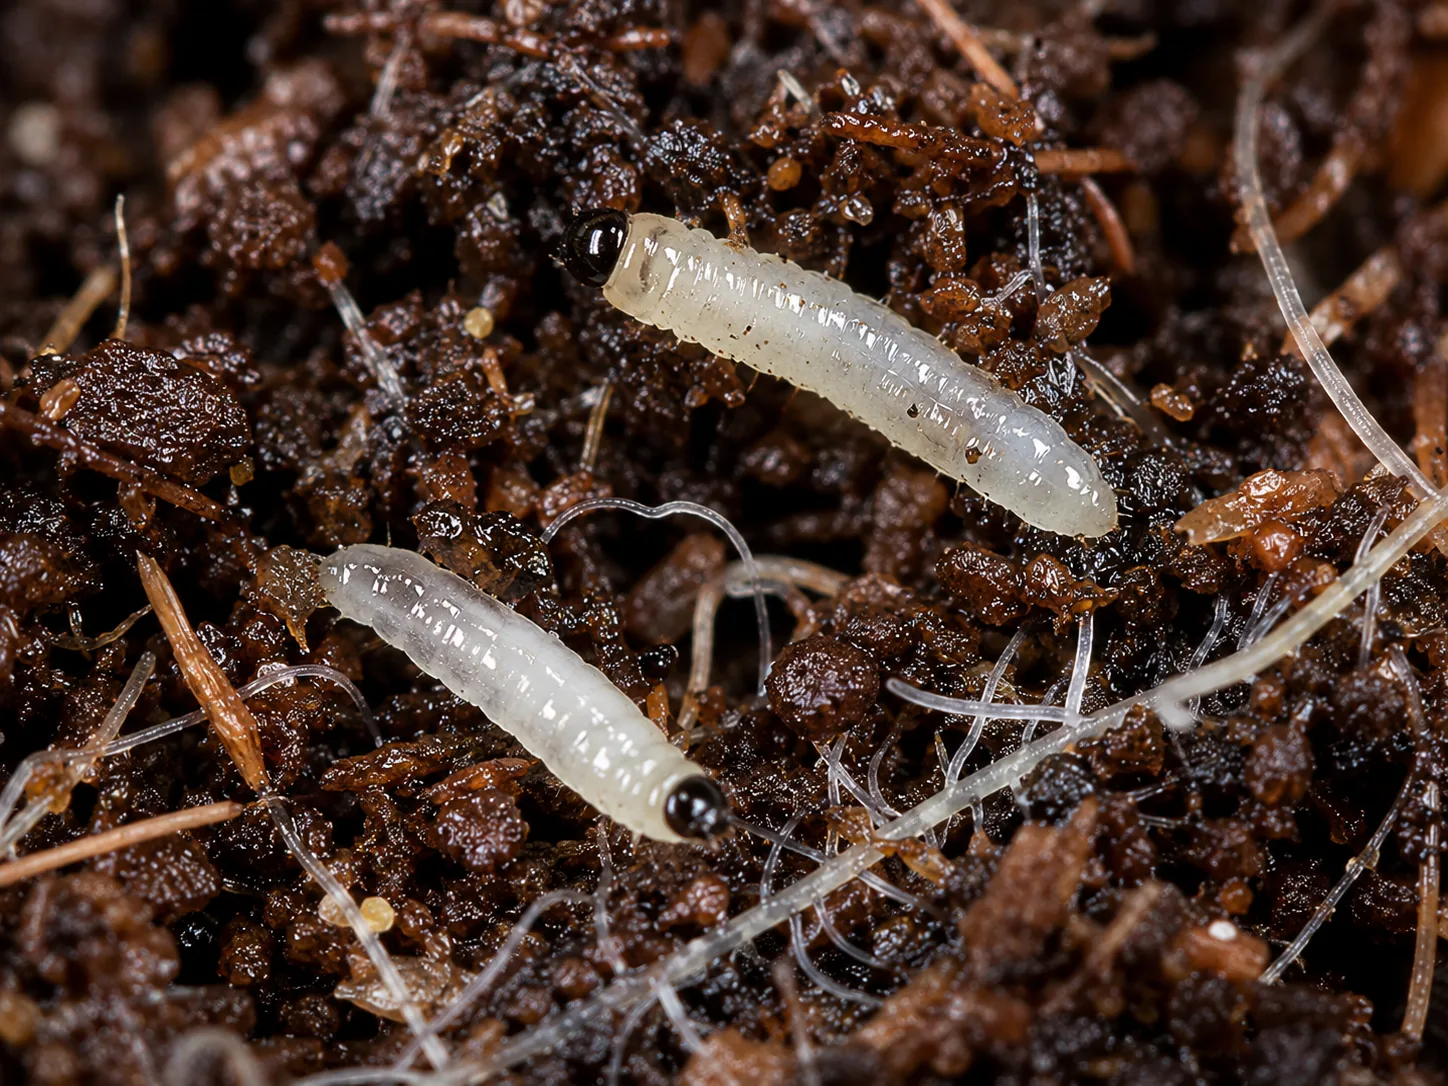
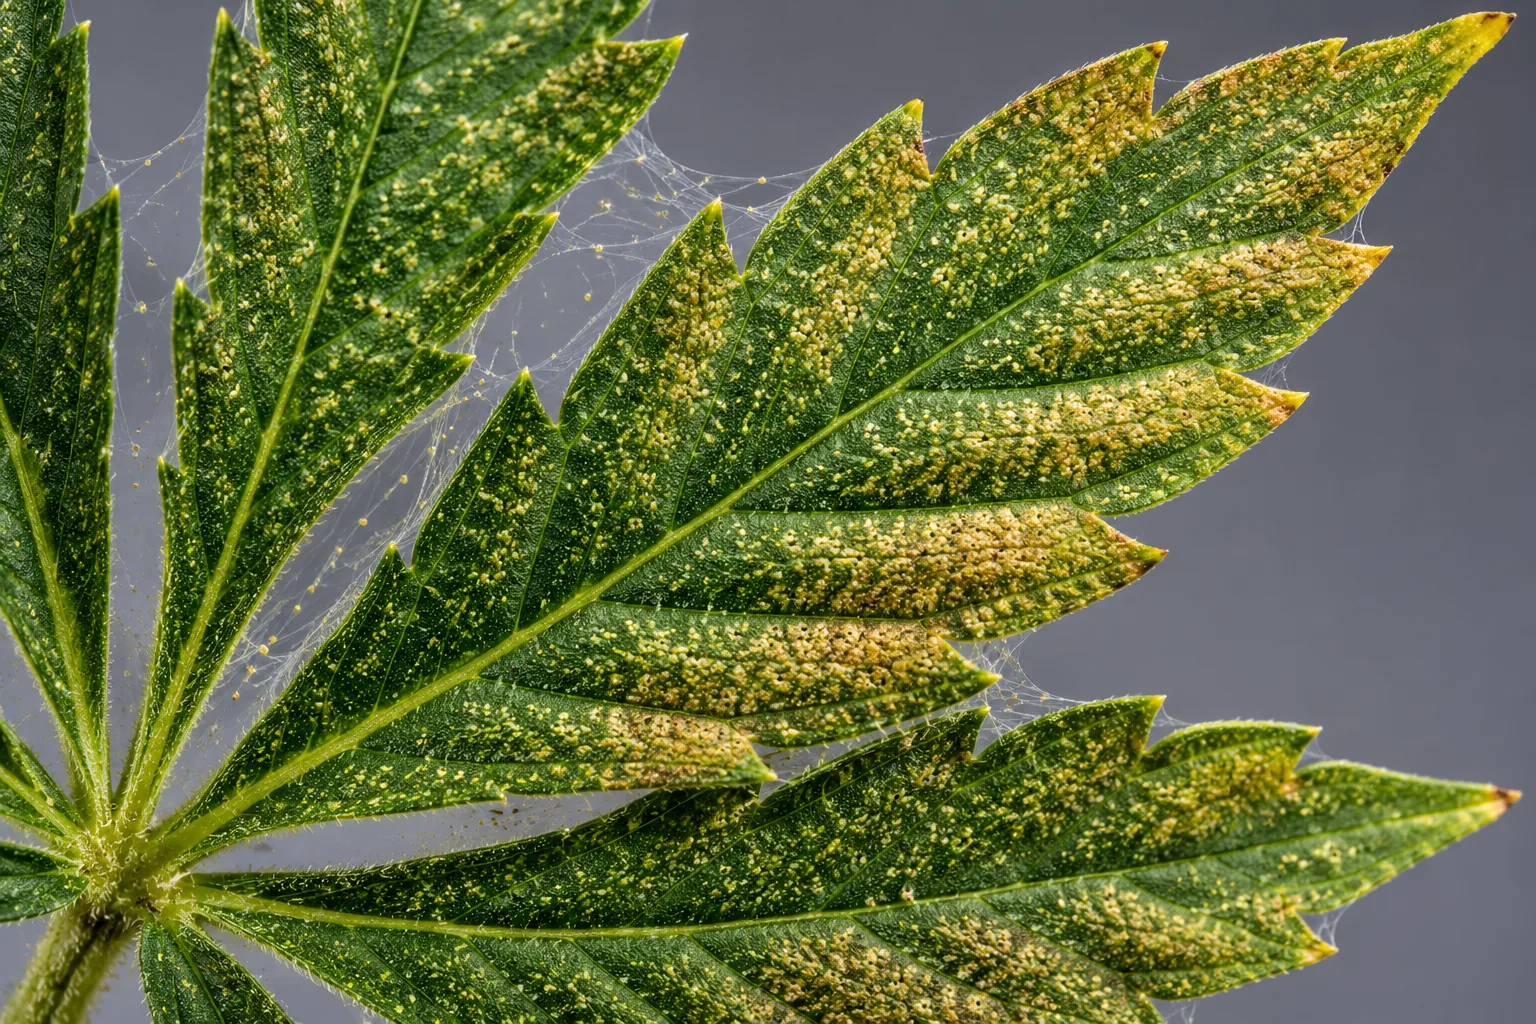
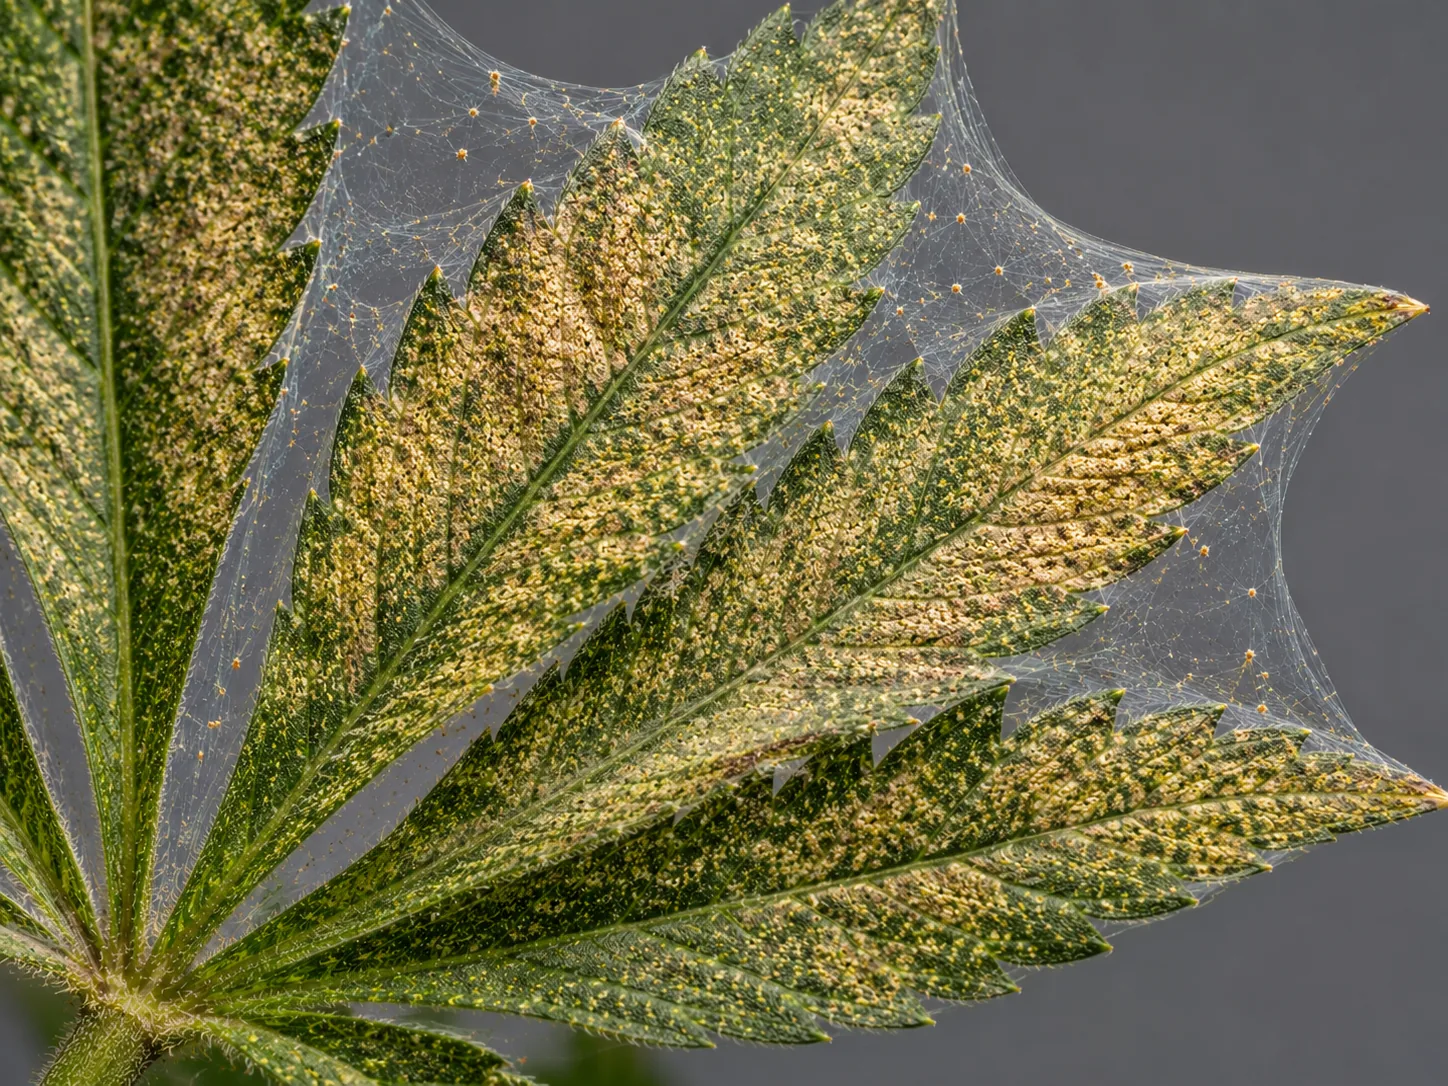
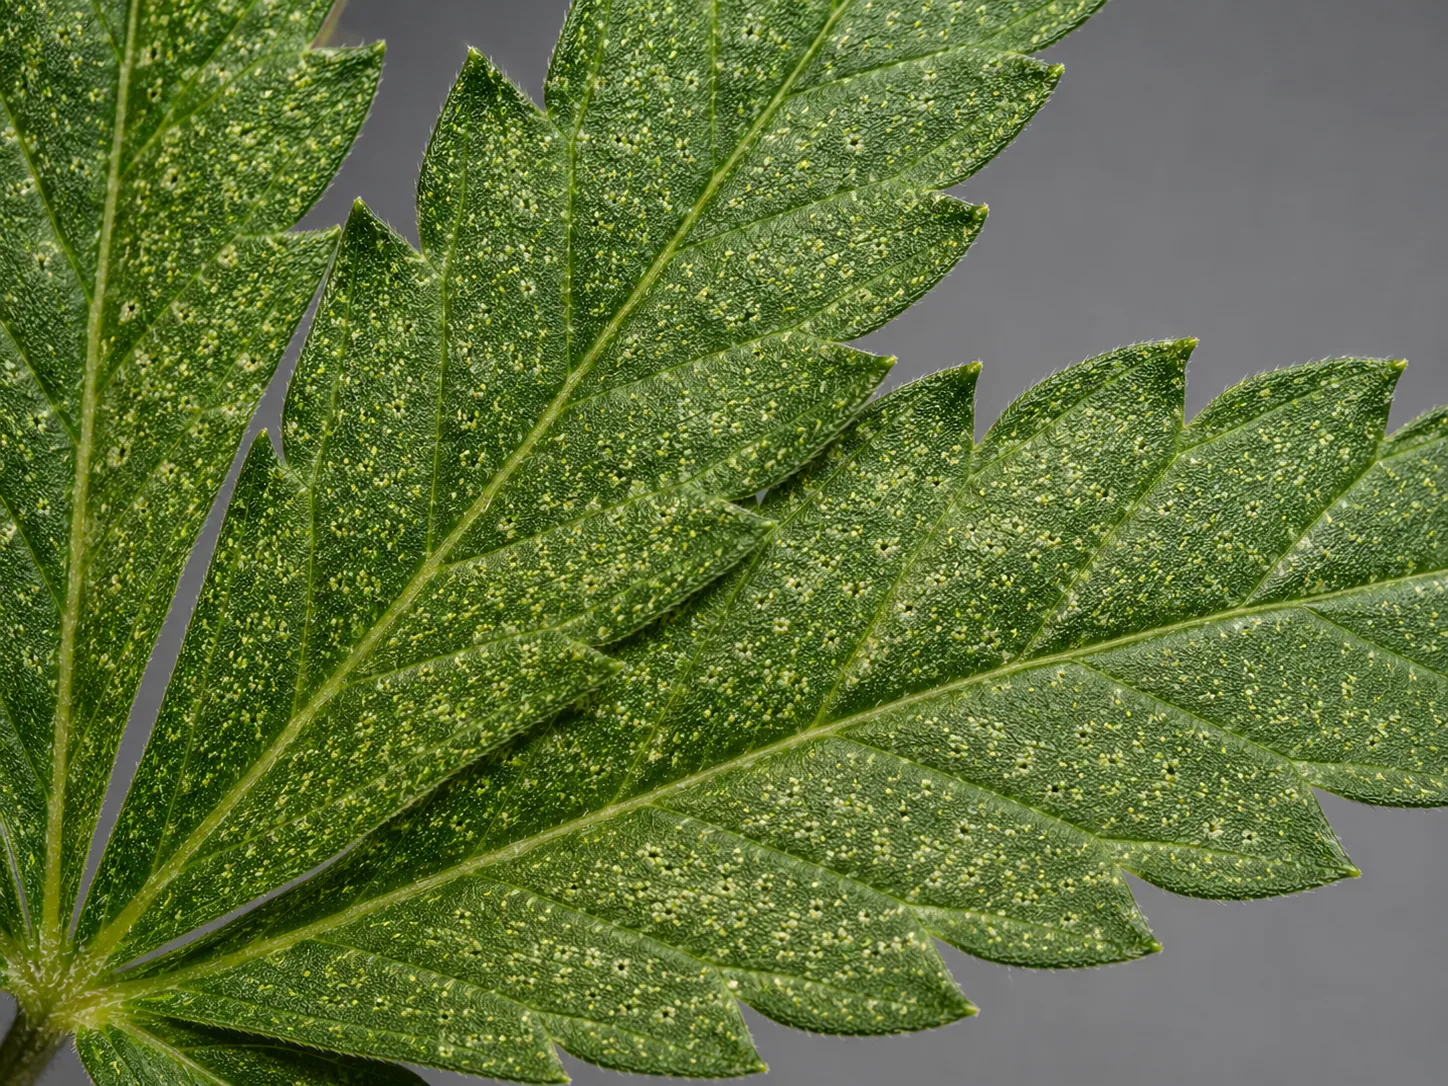
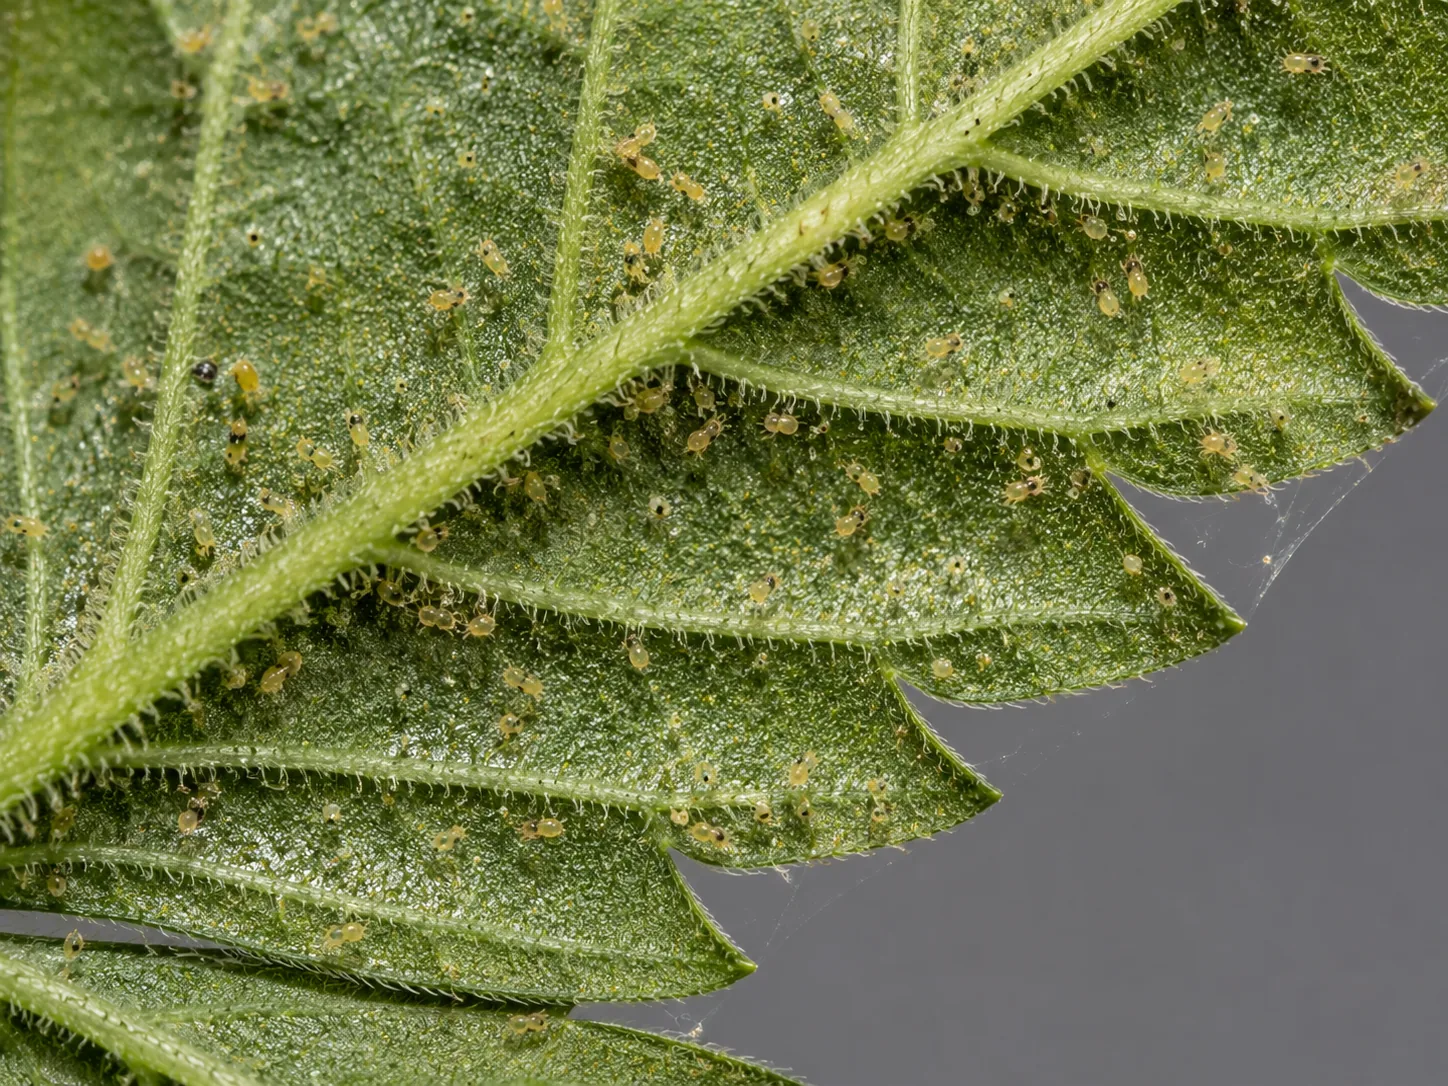
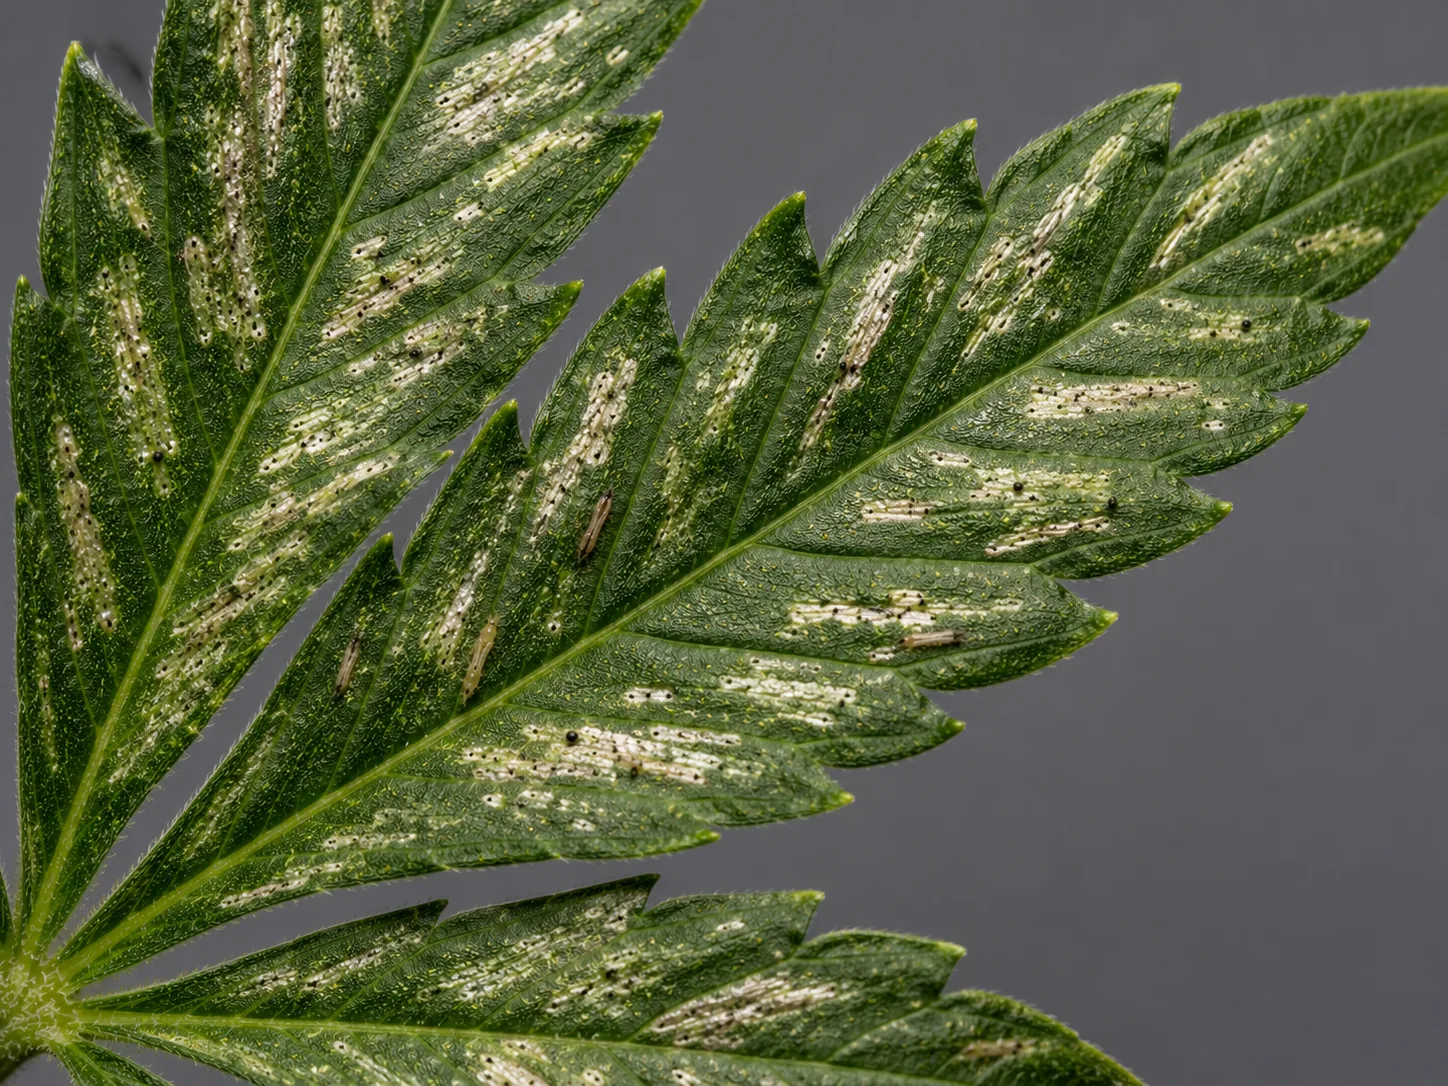
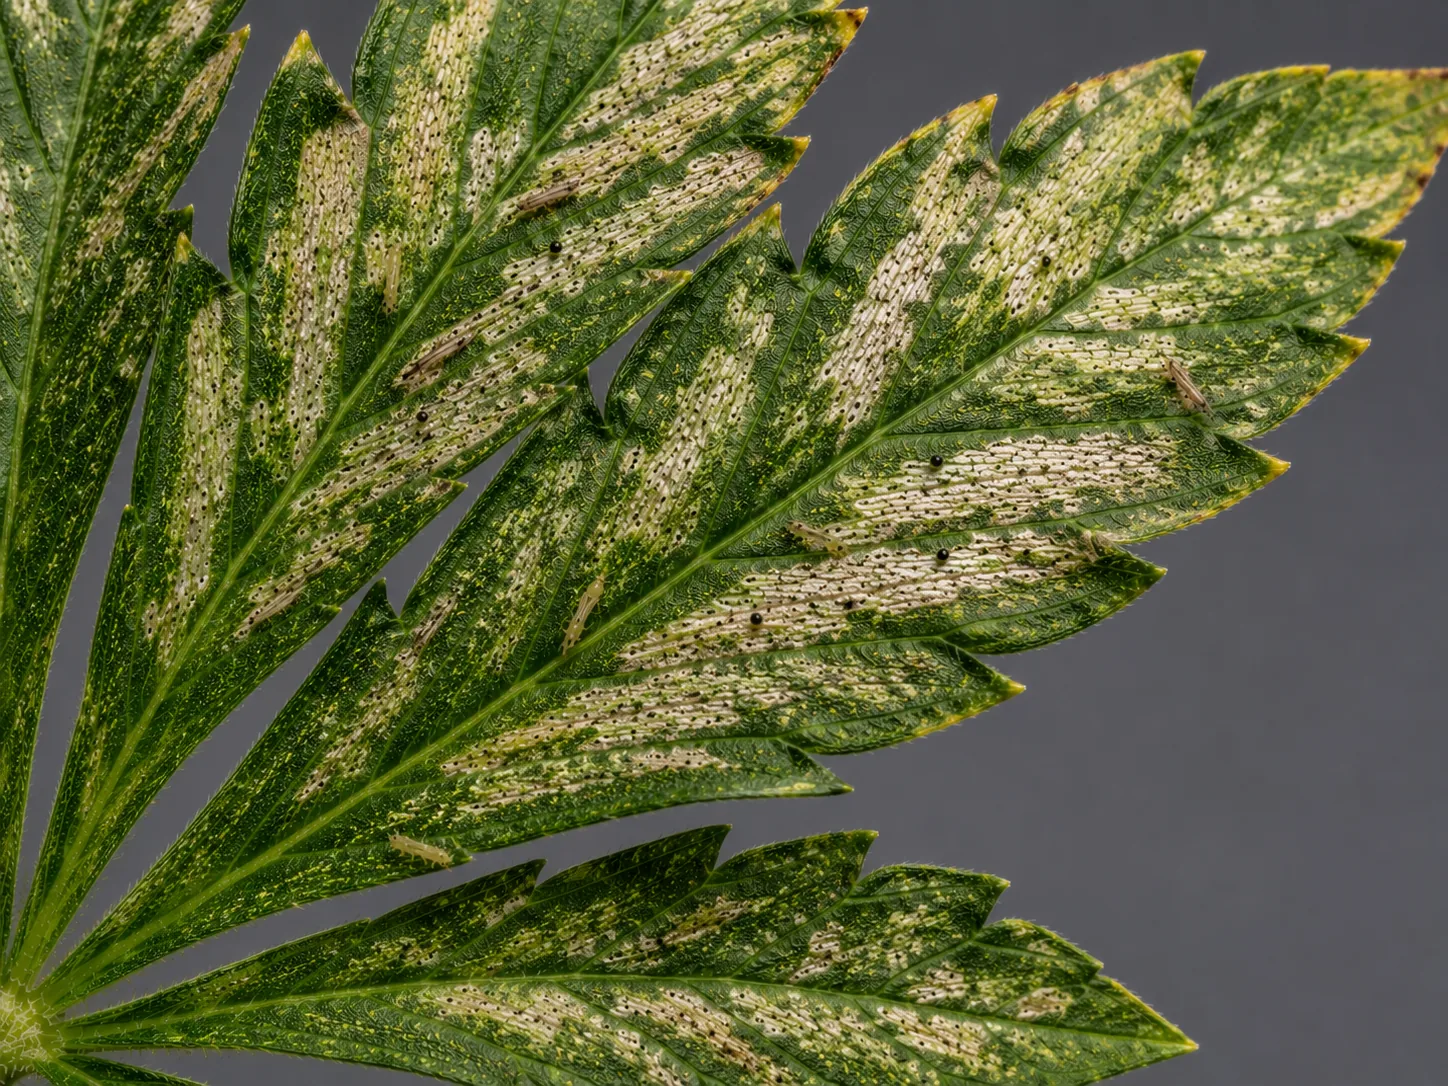
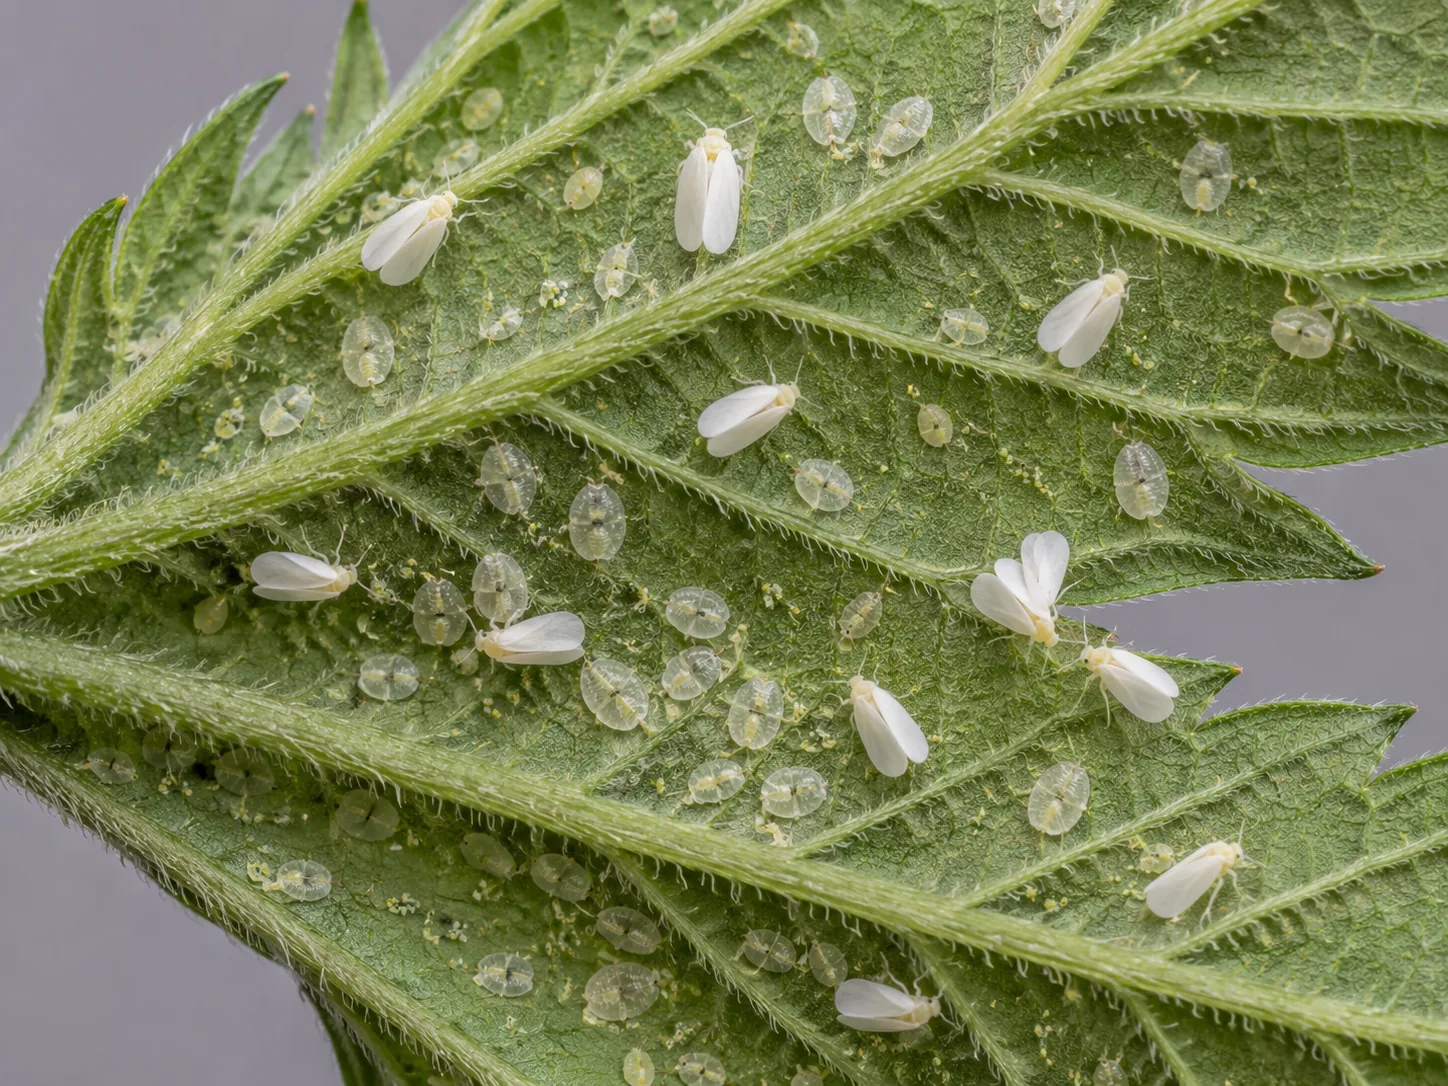
This is the set worth studying before you need it, because these are the problems where recognising them a few days earlier genuinely changes the outcome. The pest frames sort by signature rather than by insect: fine dot stippling that later becomes silk webbing is mites, silvery scarring smeared across the surface is thrips, and damage in the medium rather than on the leaf is a root-zone problem. Learn the signature and you do not need to catch the animal in the act.
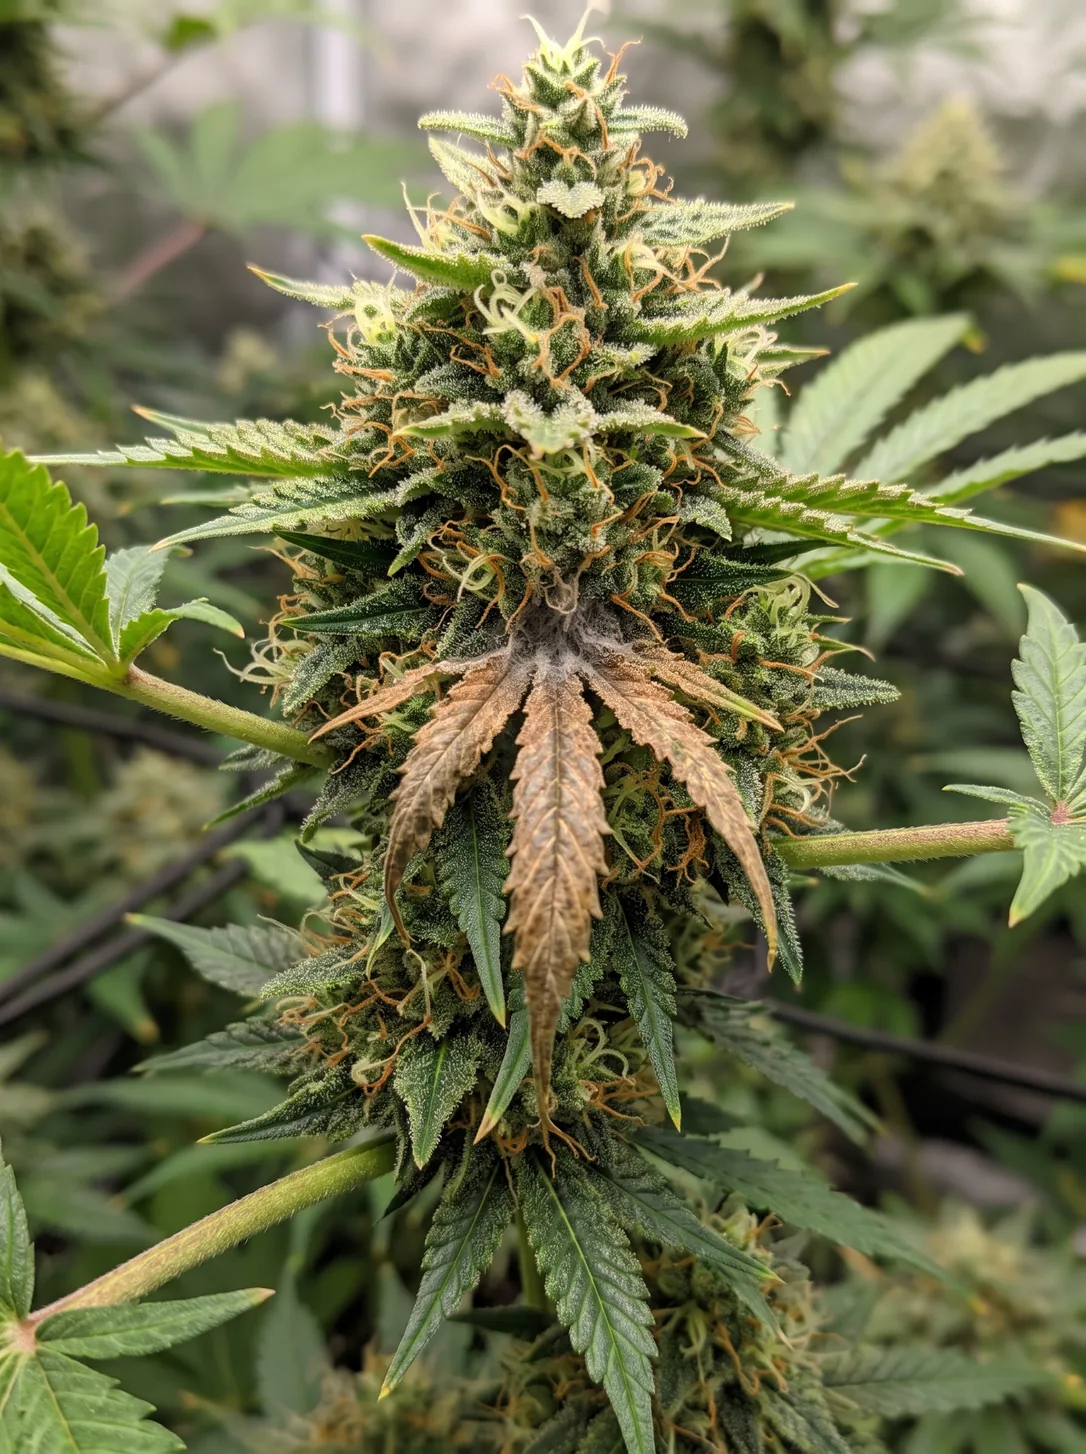
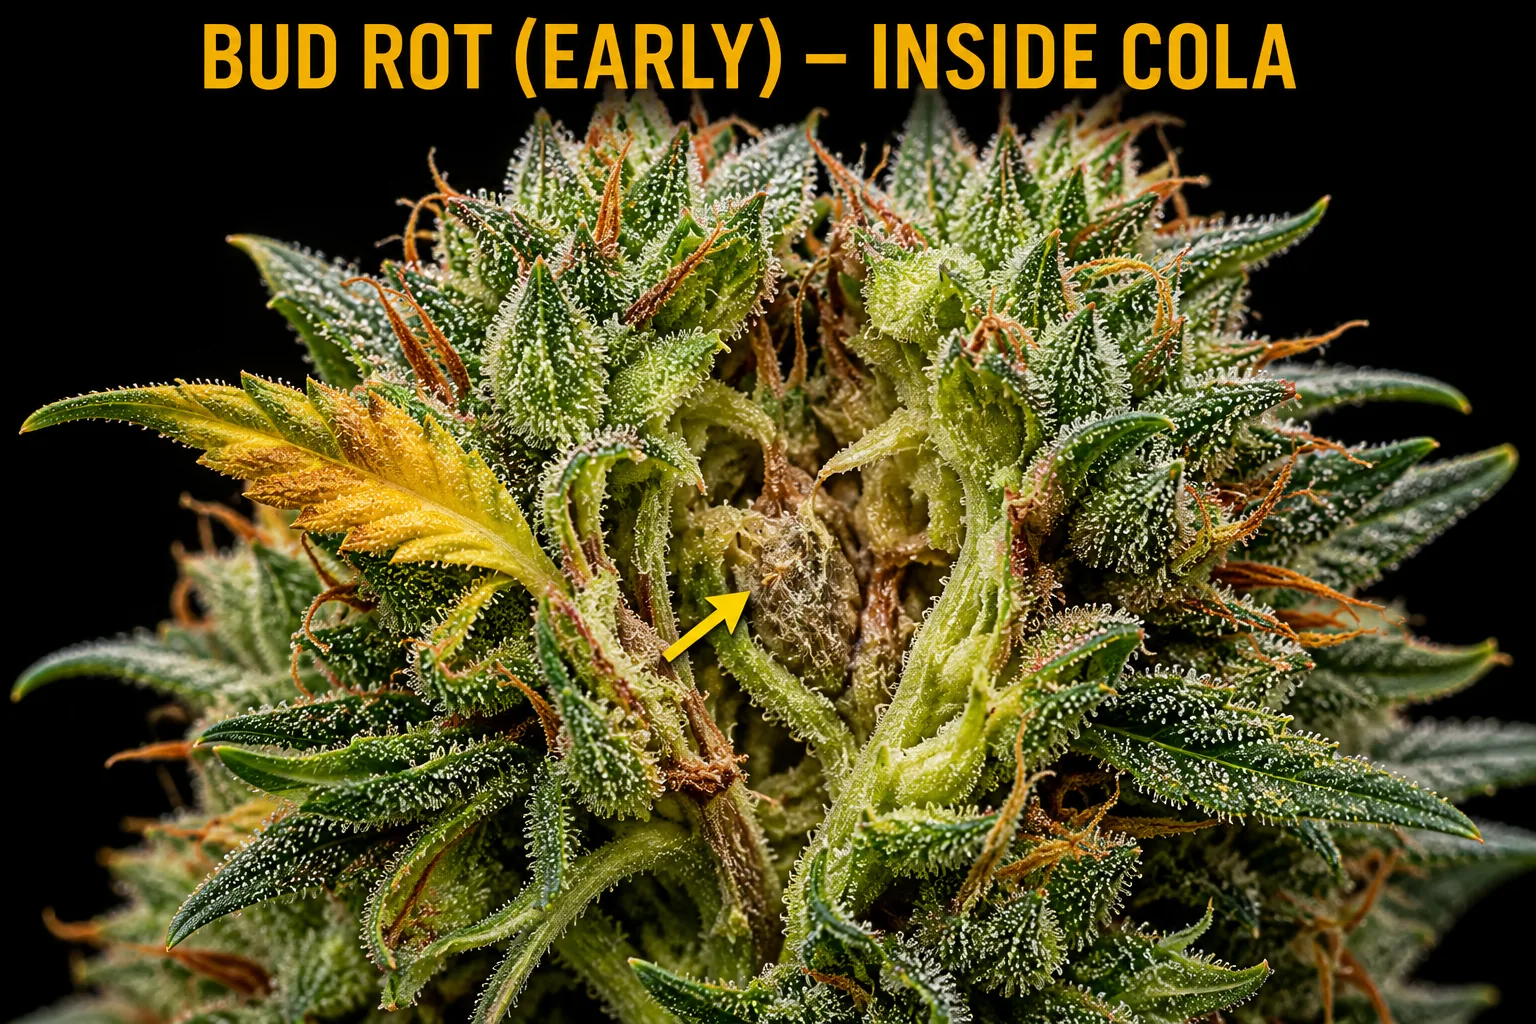
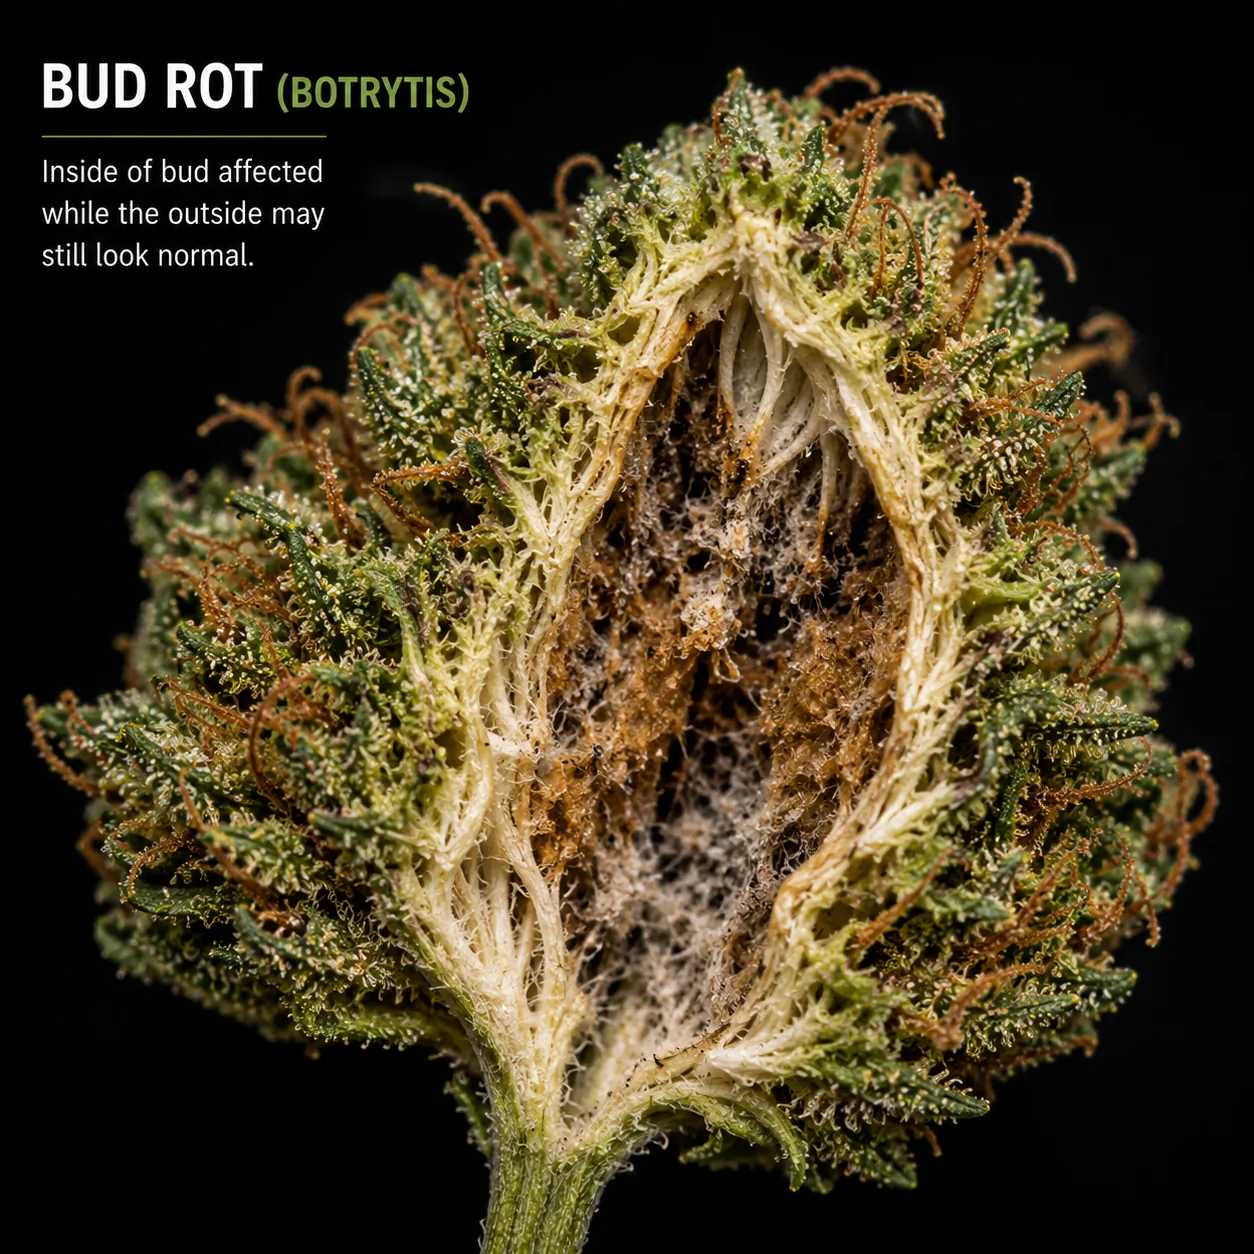
The mold frames deserve a slower look than the rest of the page. Powdery mildew announces itself on the leaf surface, but bud rot works from the inside of a dense cola outward and can be well advanced before anything is visible from the front. Compare the healthy flower interior against the rotted one and note how ordinary the outside can look while the core has already gone. Everything else in this library is something to diagnose calmly; these two are the exception, and the affected flower comes out rather than waiting for a second opinion.
Charts, decision trees, and symptom-to-cause boards — the ER.
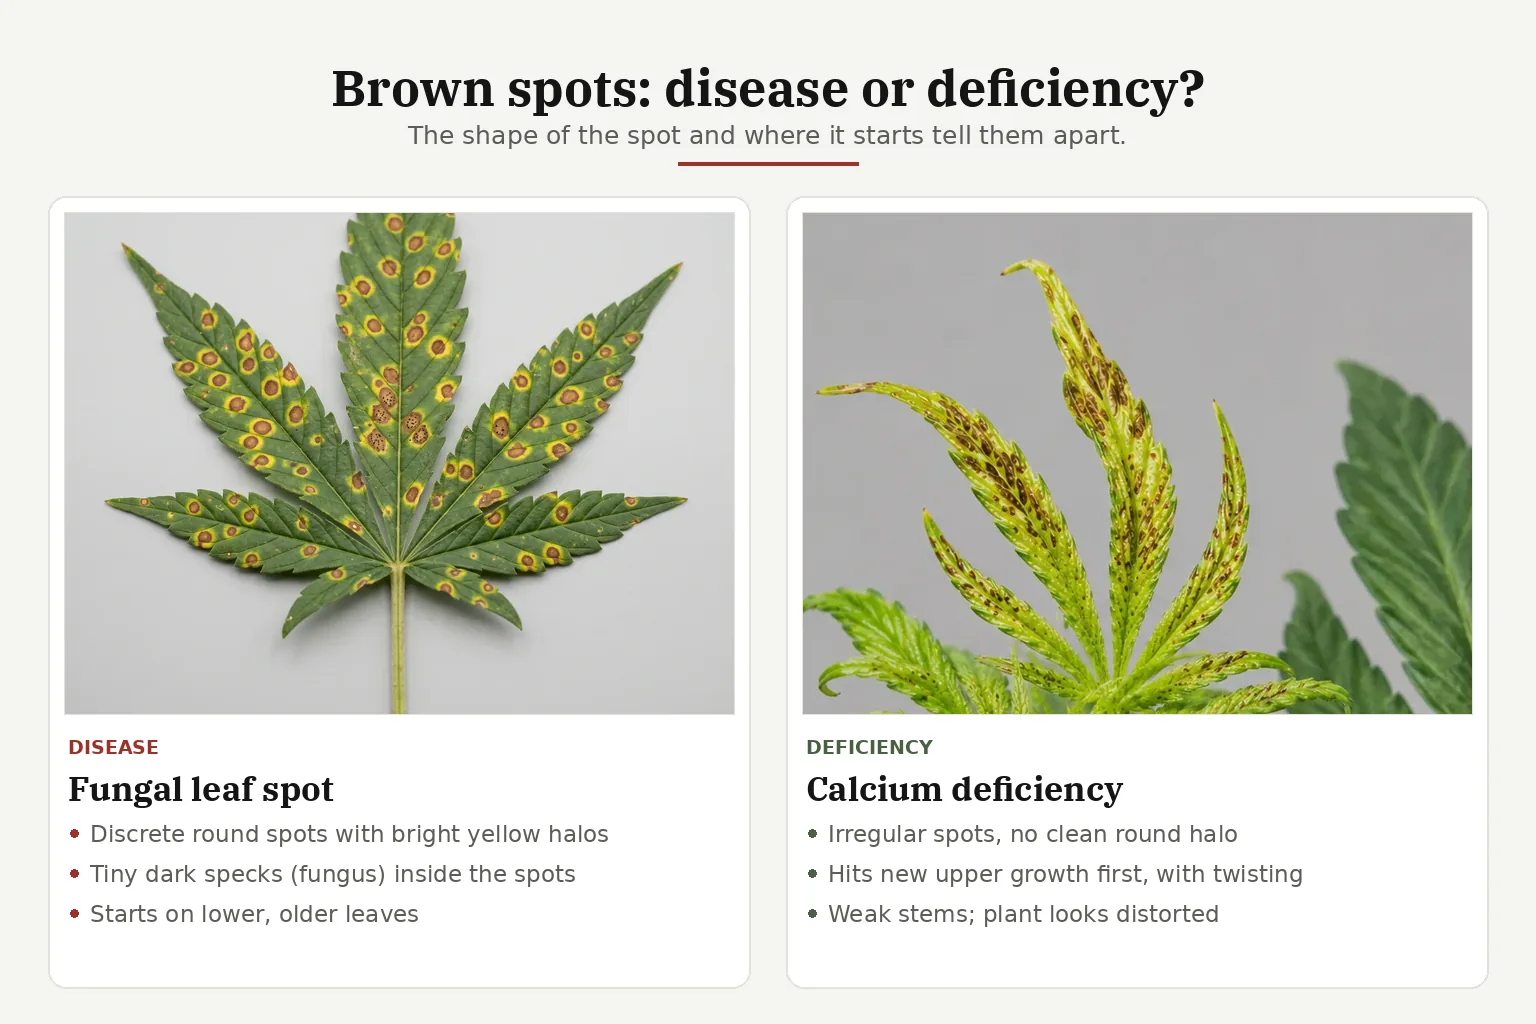
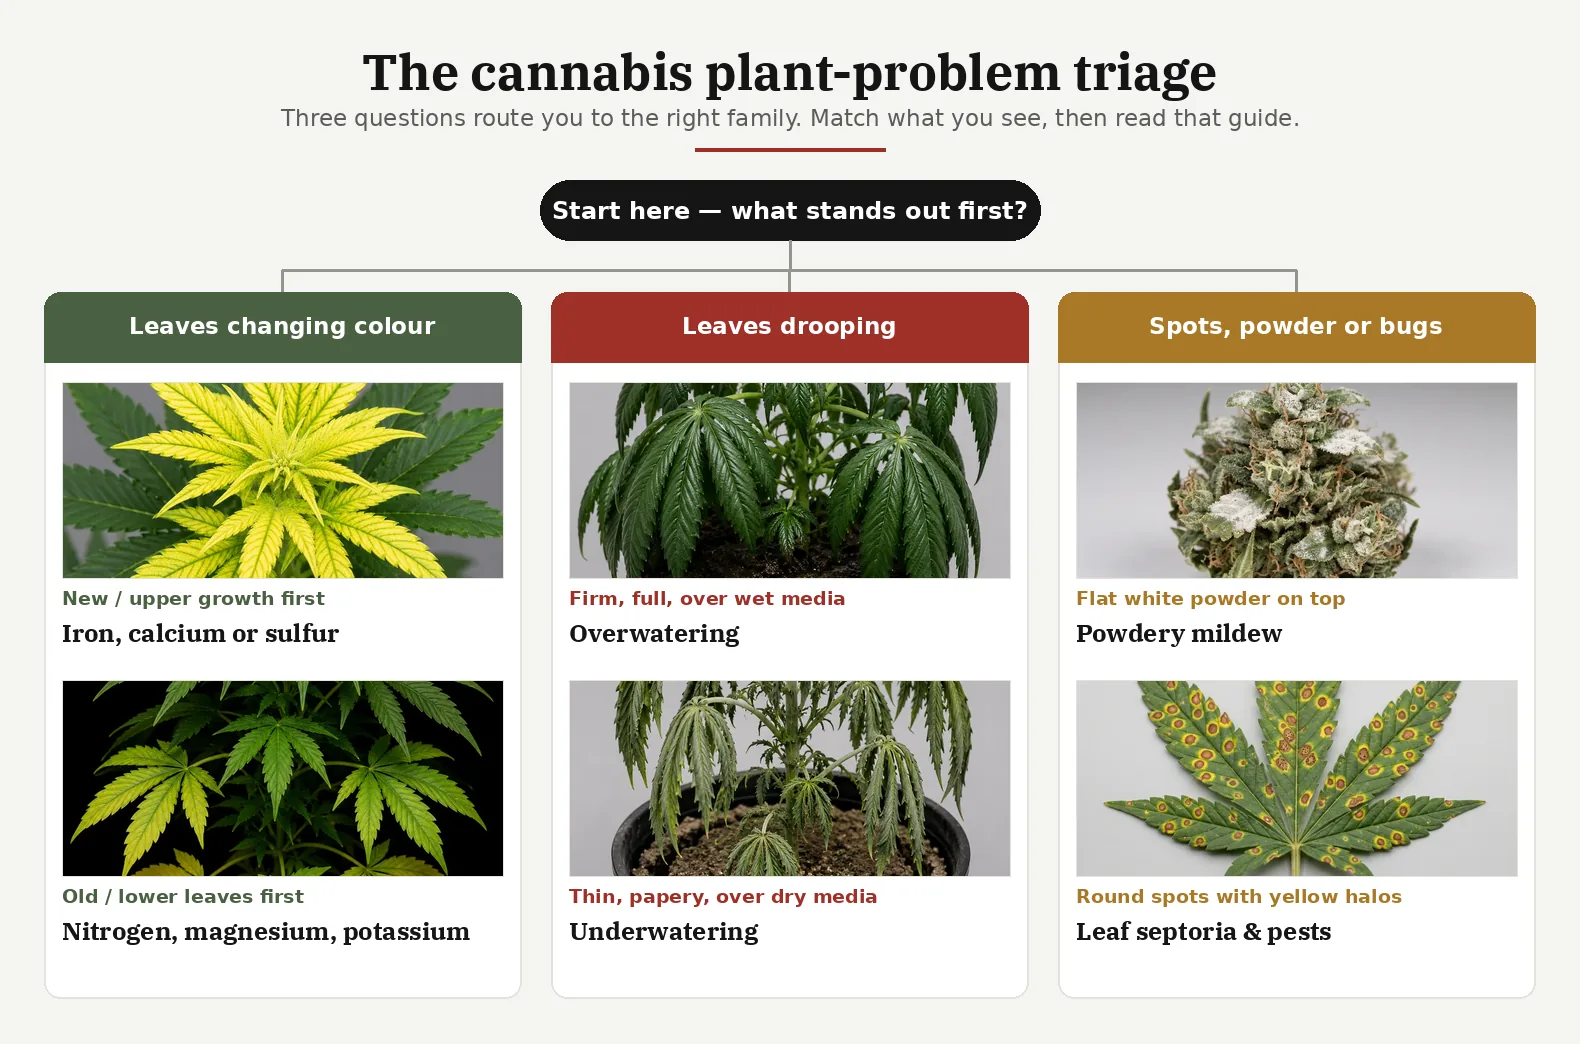
The macros above show you one symptom at a time. These boards do the opposite job: they put the look-alikes next to each other so you can see what separates them. Use them when a single macro has left you between two candidates — yellowing that could be nitrogen or could be iron, spots that could be calcium or could be a fungus, purpling that could be cold or could be phosphorus. Each board is built around the one distinction that settles the pair, which is usually where the damage starts rather than what colour it is. Several of these are worth saving to your phone; they are more useful standing in front of the cabinet than they are read at a desk.