Equipment: the complete image library
Assembling a compact grow as one coordinated system — the smart grow box that grows and dries, and the small kit around it. Every image below is a real teaching asset from the equipment guides — grouped by topic, captioned, and linked to the article it lives on. Click any image to view it full size.
These are buying decisions and setup decisions, drawn rather than described.
Equipment questions are hard to answer in prose because almost all of them are really questions about proportion. Is this box big enough for the corner you have in mind? Is the light meter worth buying, or is it the last thing you need? How much of the money goes into the one purchase that matters and how much drains away into gadgets? Those are comparisons, and comparisons are easier to see than to read. Every board below exists because a diagram settled the question faster than a paragraph could.
Three kinds of image live here, and they answer different questions. Scale and layout frames show you the physical reality — the footprint, the cutaway, where a sensor goes and where it must not go. Ranked boards put things in order of importance, which is the part first-time growers most often get backwards. Honest-split boards take a choice with no correct answer and show both sides of the trade instead of picking a winner. When you hit one of those, the point is not to find the right column; it is to work out which column matches how you intend to grow.
The other thing worth reading across the whole set: the numbers on these boards are targets and rough ranges, not guarantees. A spot-check meter reads big gaps across a canopy, not laboratory values. A dry-mode target is a starting envelope, not a schedule. Use them to know when something is obviously off, then confirm against the plant. Each tile links to the guide it came from — the full VGrow and DWC walkthrough for setup and operation, and the buying order for anything about spending.
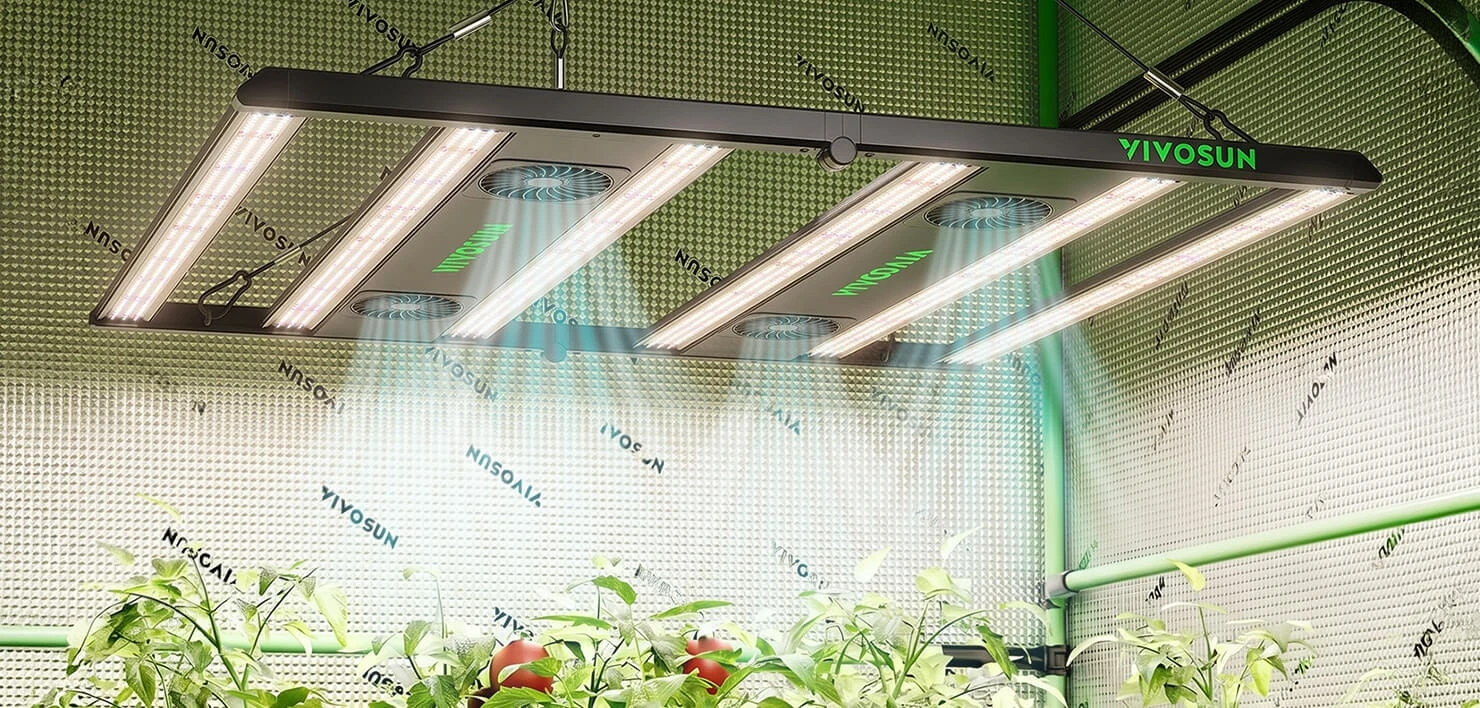
How the parts add up to one coordinated grow, not a pile of gadgets.
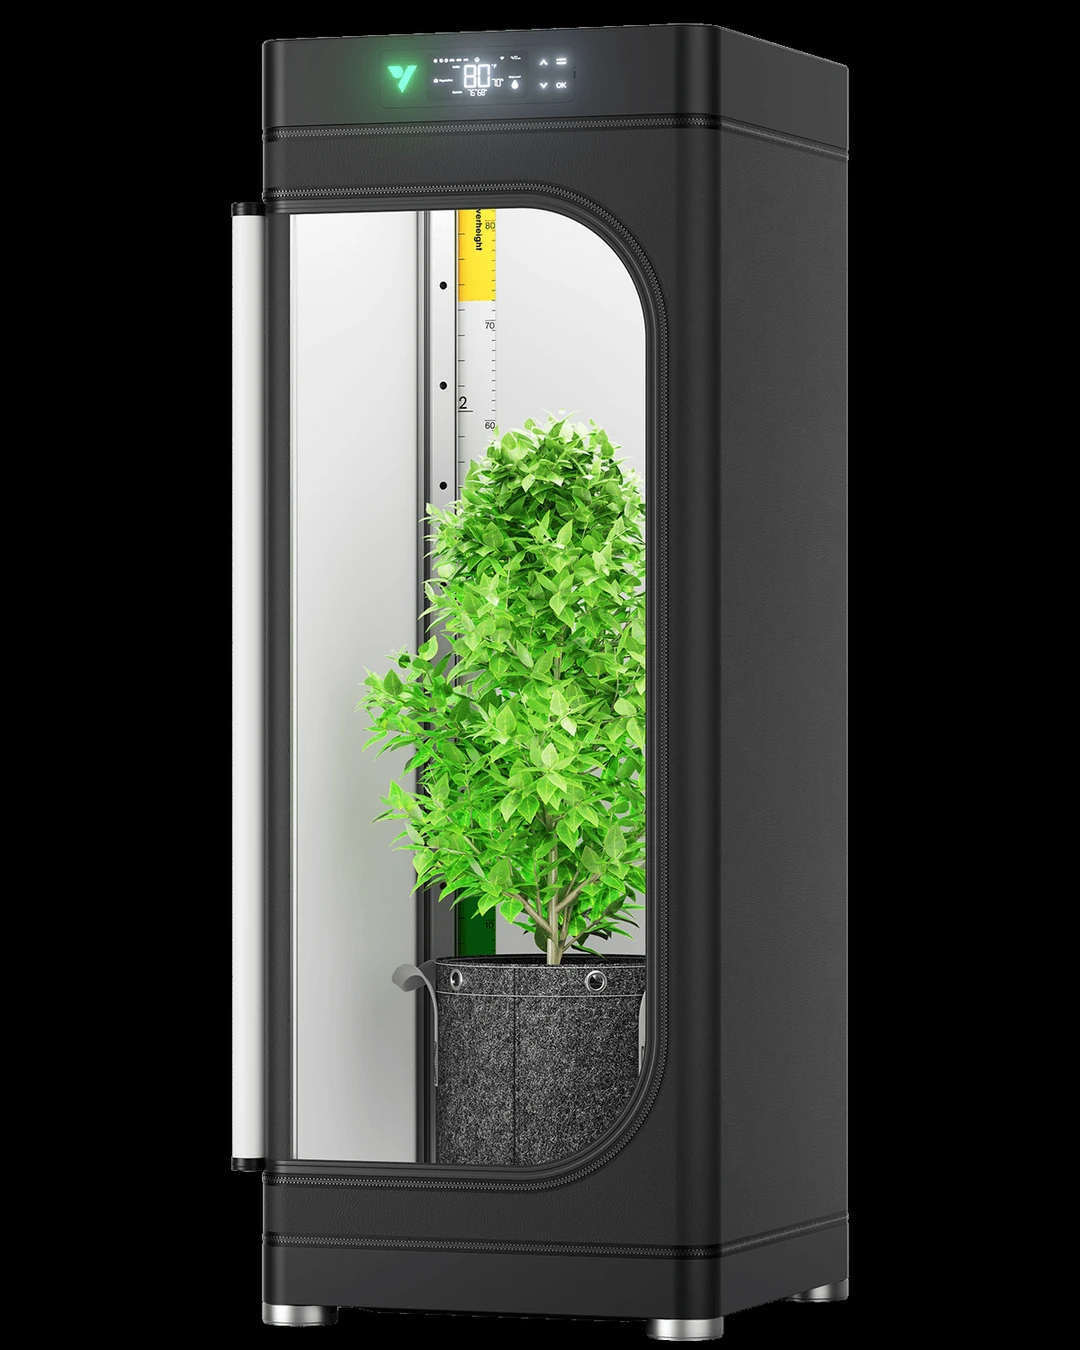
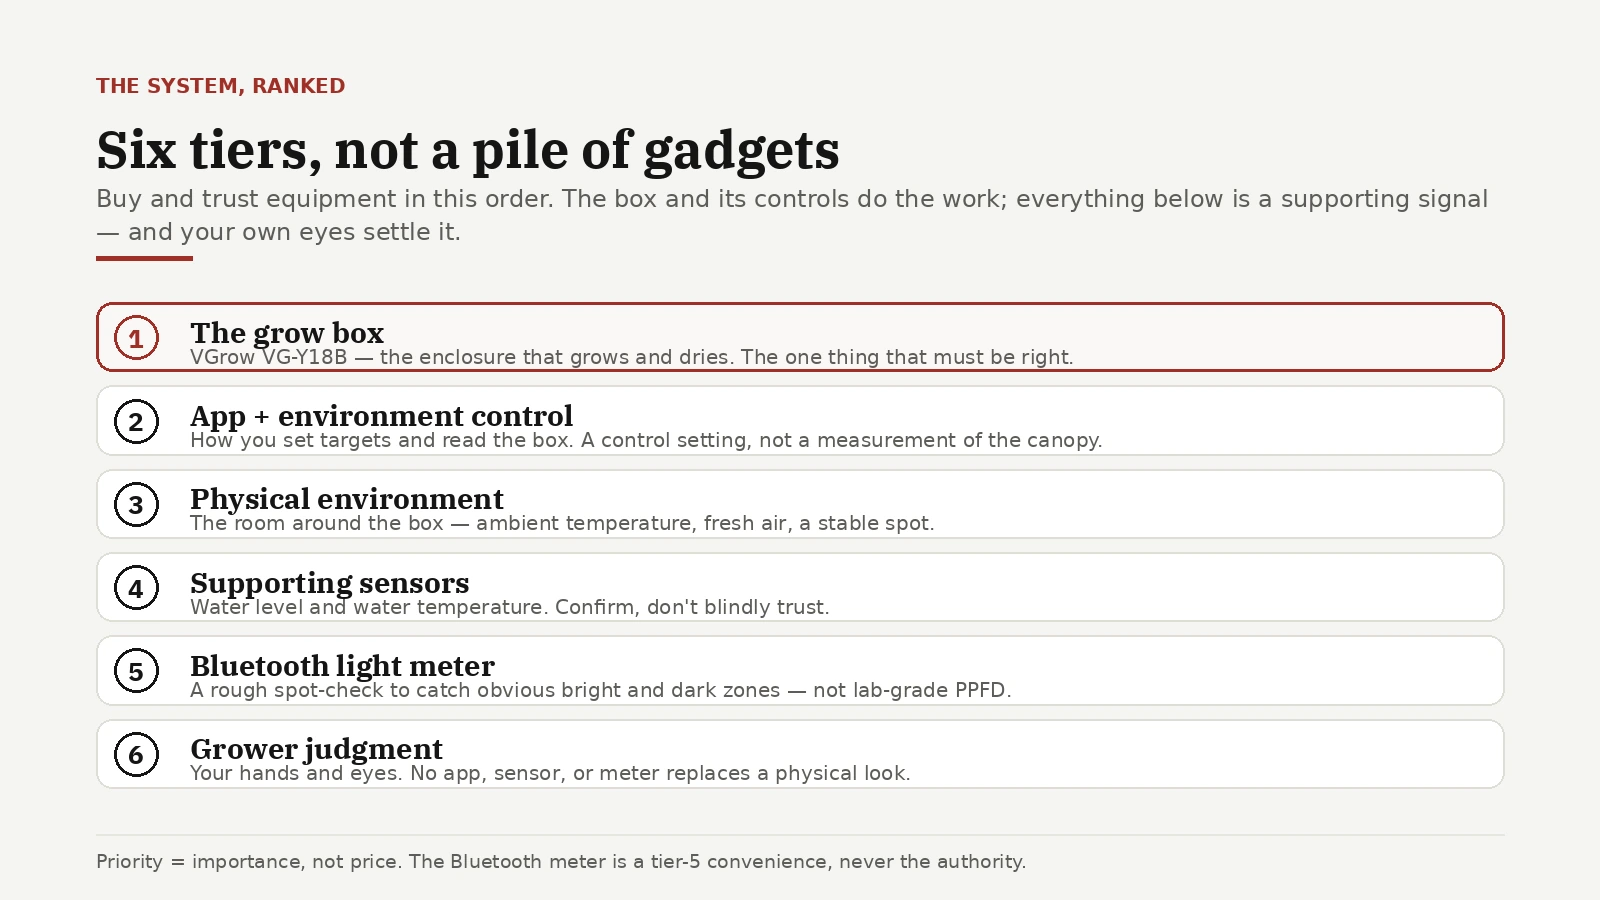
Start here if you are still assembling a mental picture of what a compact grow actually is. The point of these three frames is that the box is the system — lighting, airflow and control are inside one enclosure rather than bolted together from separate purchases. The role-hierarchy board is the important one: it ranks what does the work against what merely reports on it. Sensors and a cheap meter are supporting signals; your own eyes settle disagreements. Read that ranking before you read any of the shopping sections, because it is the logic the rest of them follow.
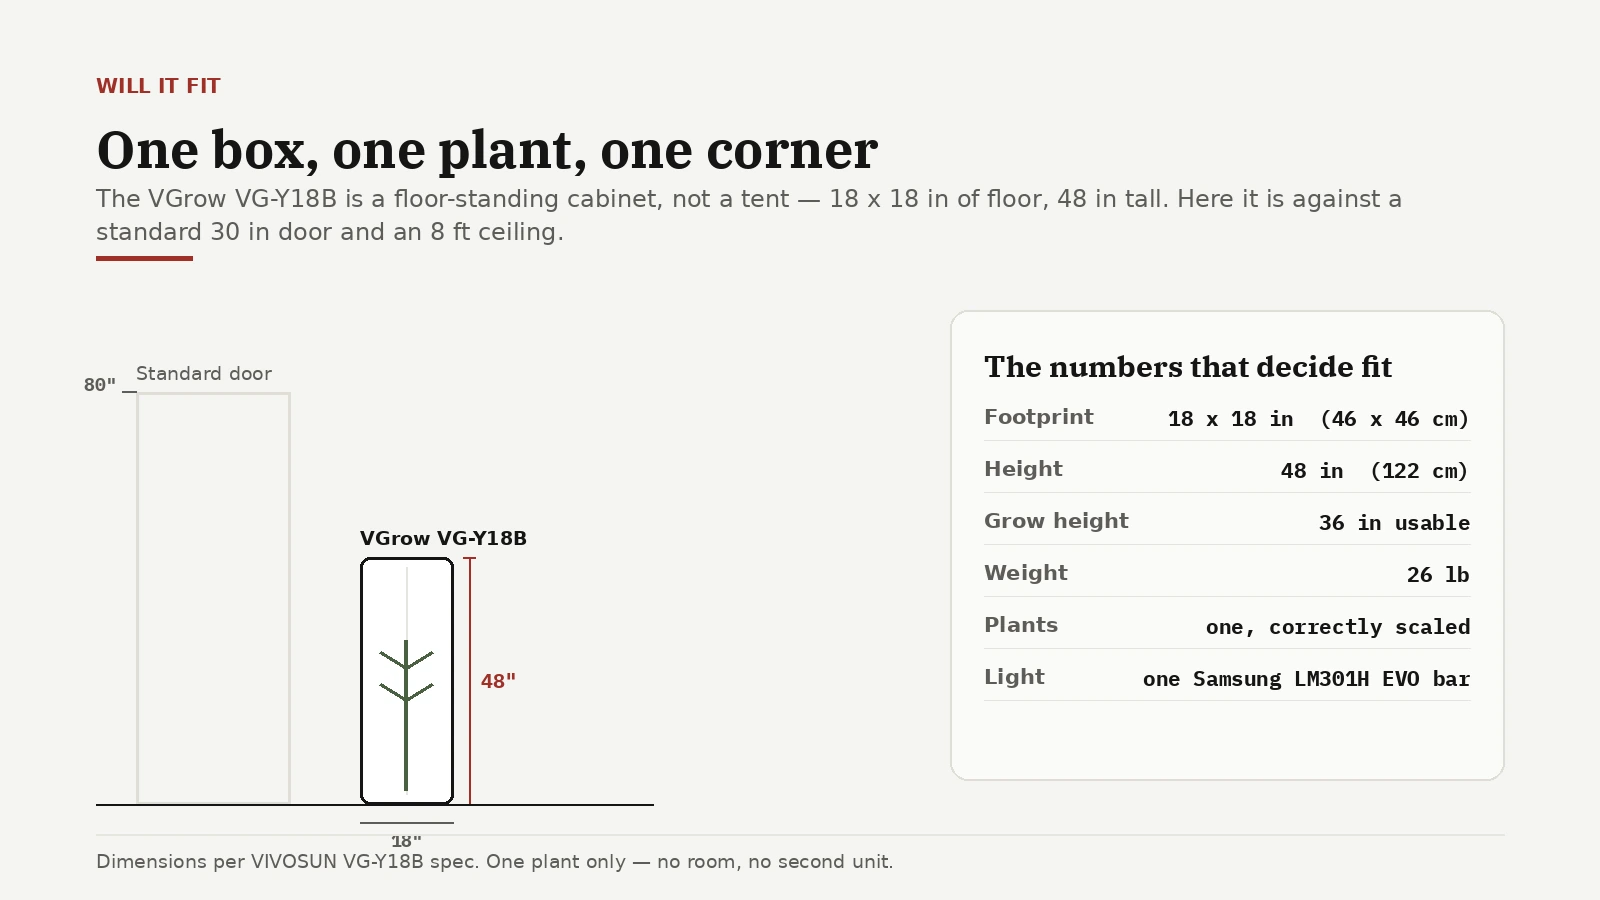
Footprint, height and one-plant capacity — will the box fit your space.
The single most common reason a first grow stalls before it starts is that the space was imagined rather than measured. This board puts the cabinet next to a standard doorway so you can judge it against something you have actually seen, rather than converting dimensions into a feeling. Check the height as carefully as the floor area — a compact box still has to open, and a plant still has to have somewhere to go. If it does not clear the shelf you were planning to put it under, that is worth knowing now rather than after delivery.
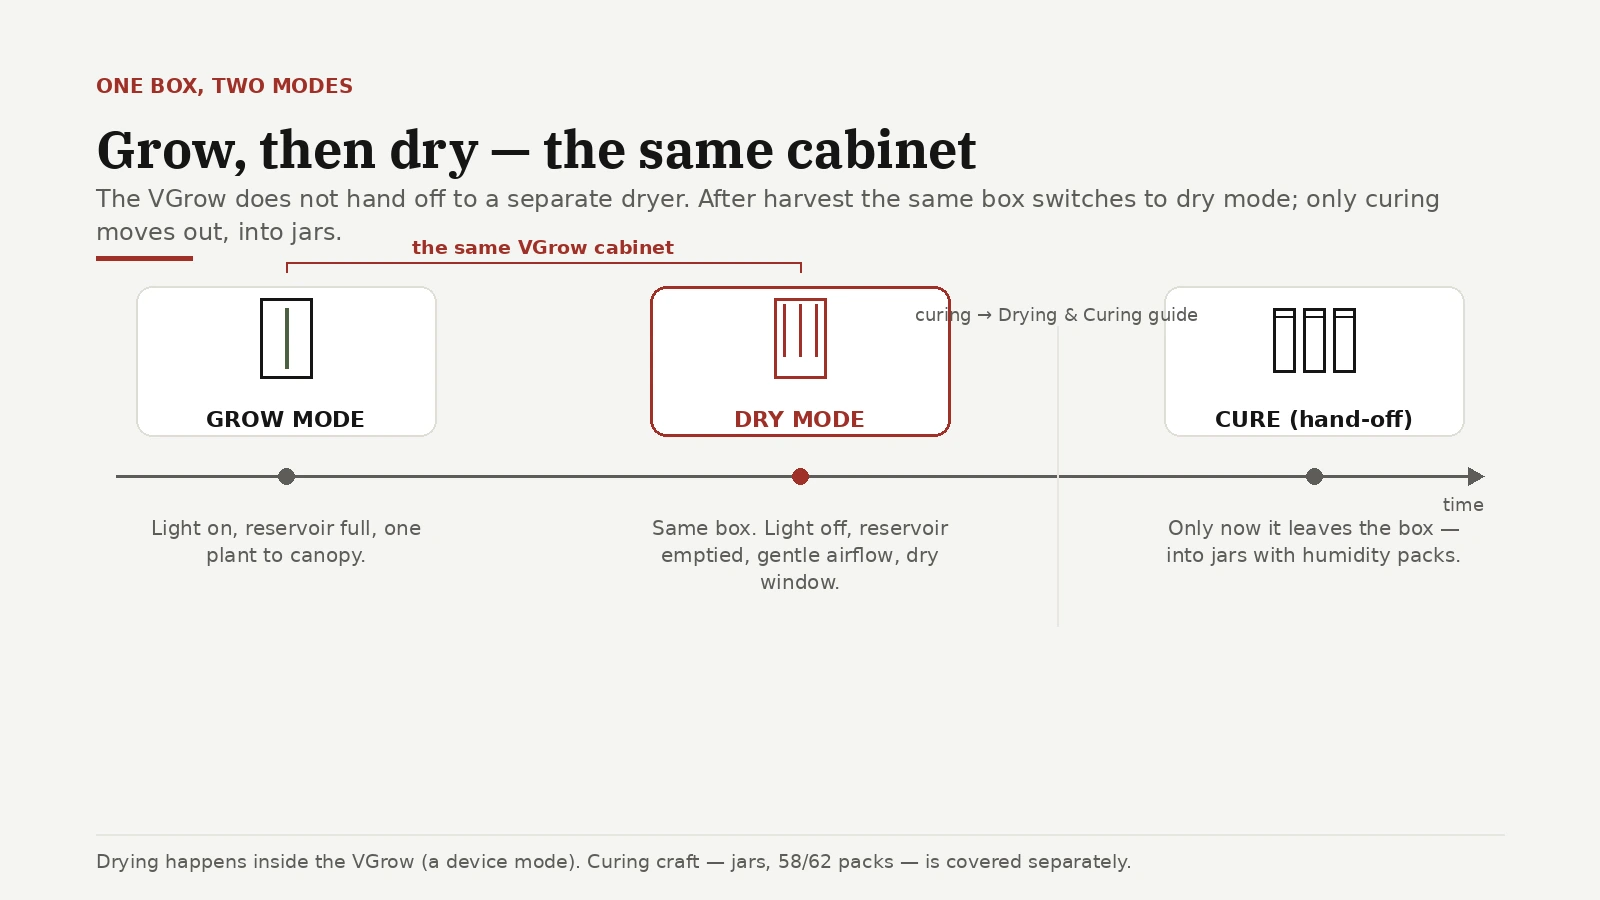
The lifecycle in one view: grow, dry in the same box, hand off to cure.
Worth looking at early, because it answers a question most beginners do not think to ask until harvest week: where is the drying going to happen? On this timeline the same cabinet appears twice, first in grow mode and then in dry mode, and only the cure moves out into jars. That matters for planning a small space — it means you are not quietly committing to finding a second dark, controlled room later. Note where the hand-off sits. Everything left of it is the box's job; everything right of it is glass, humidity packs and patience.
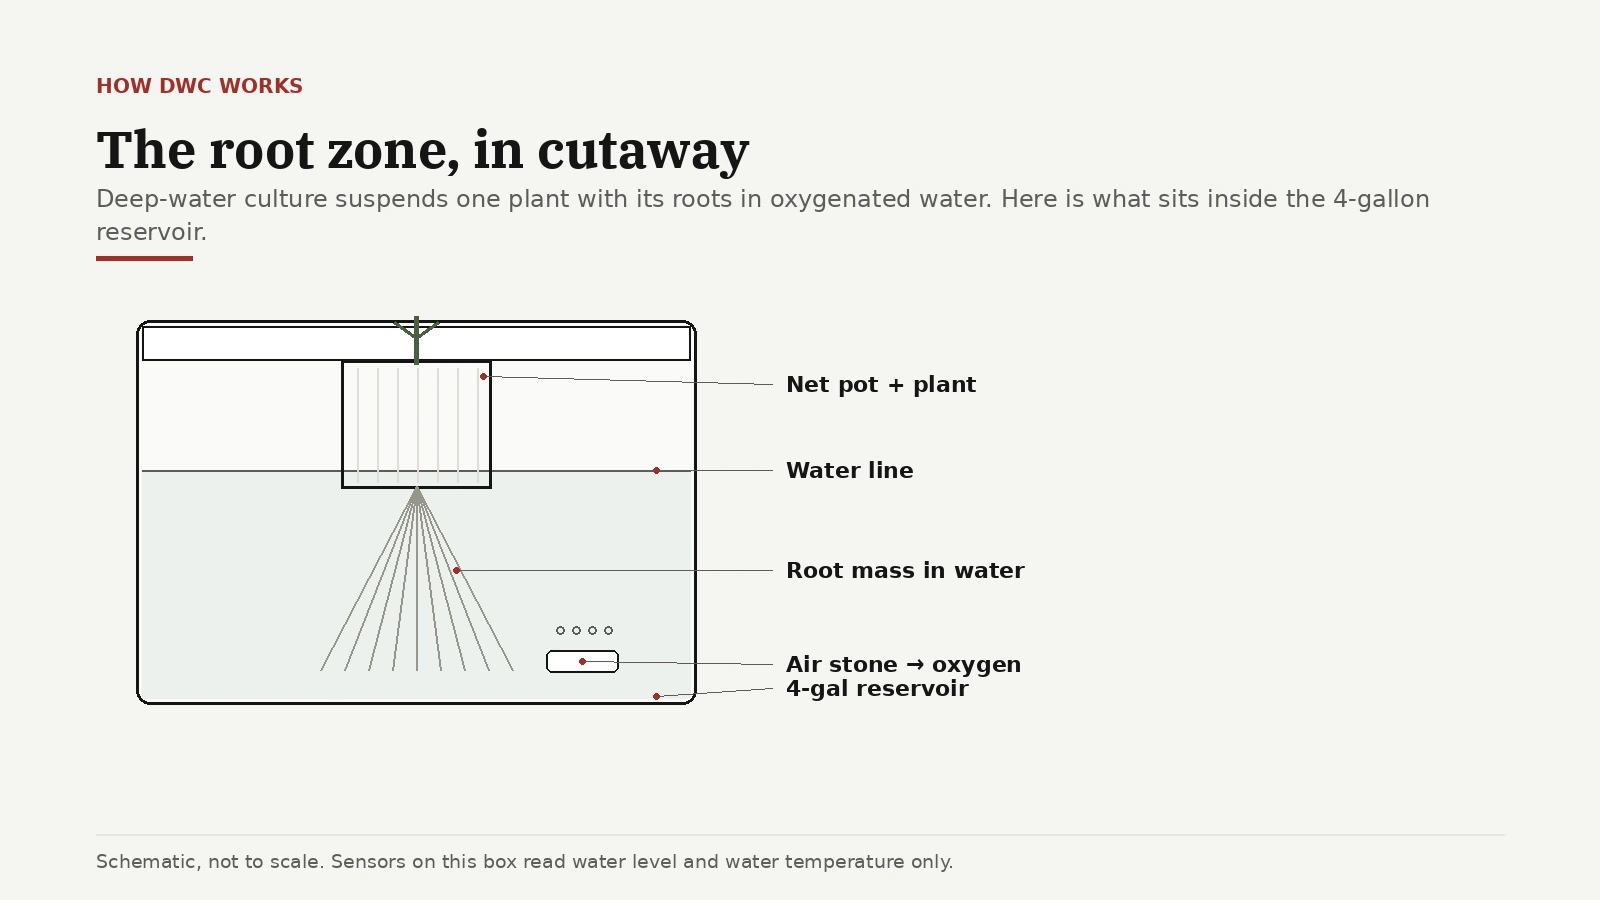
The reservoir, net pot, air stone and what the box senses down there.
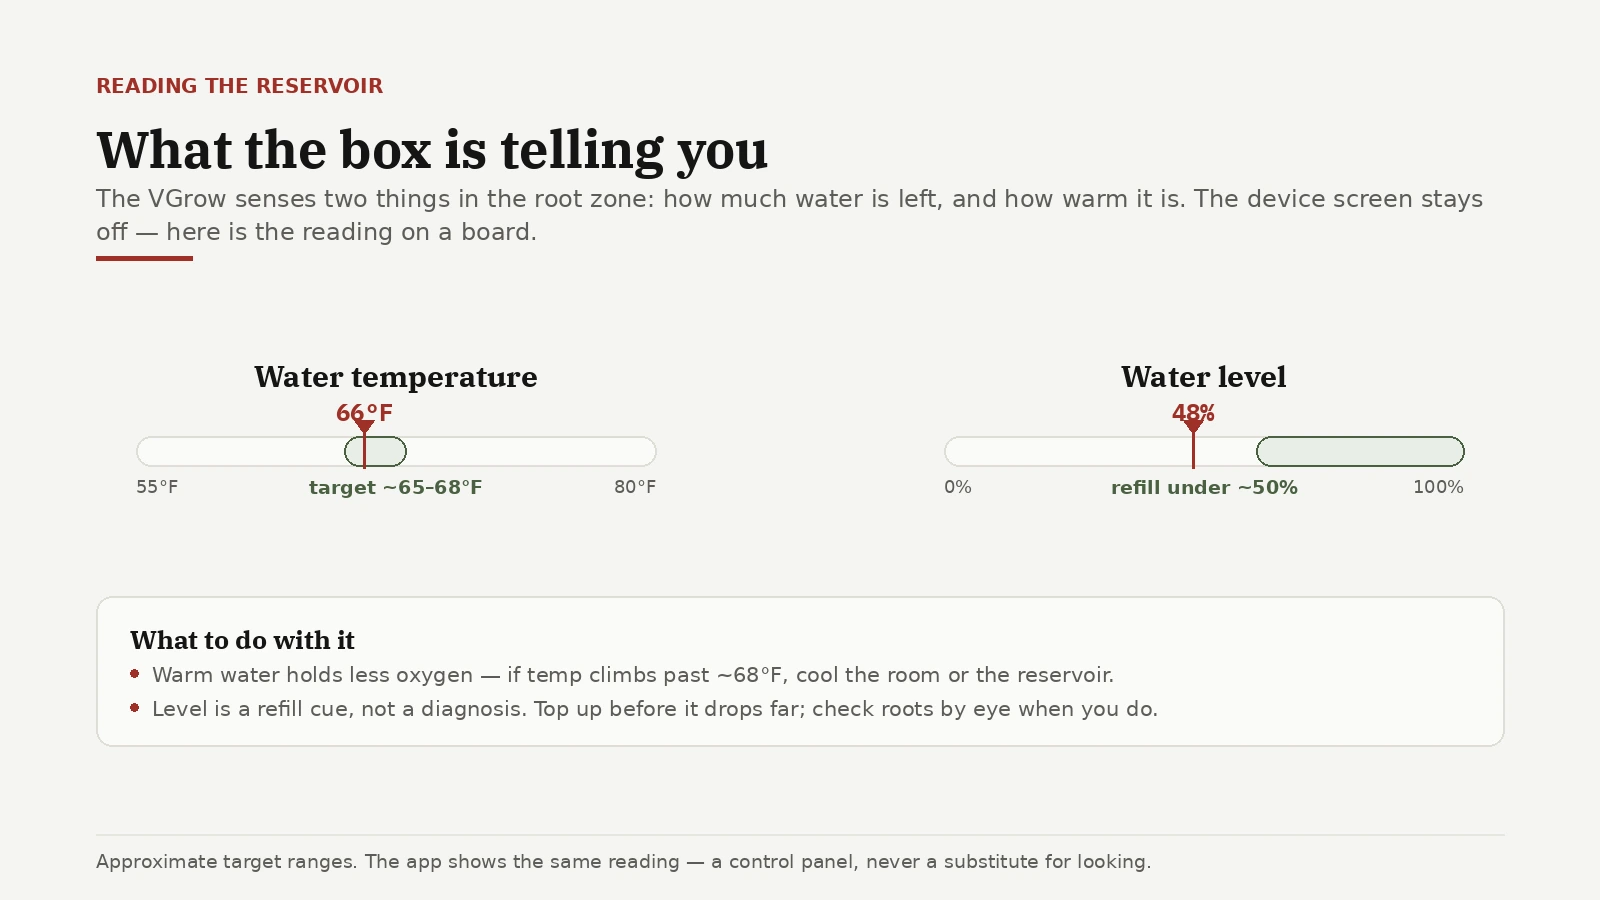
Deep water culture is easy to run and hard to picture, because the working half of it is submerged. The cutaway is here to fix that: one plant suspended in a net pot, roots hanging into oxygenated water, an air stone keeping the water moving. Once you can see the arrangement, the operating advice in the guides stops sounding arbitrary. The readout board next to it shows the two things the box actually reports from down there — water temperature and level. Read both as ranges rather than targets to chase, and remember that a number on a screen is a prompt to go and look at the roots, not a substitute for it. The DWC root-zone guide covers what you are looking for when you do.
Sensor and humidifier placement, and reading the room honestly.
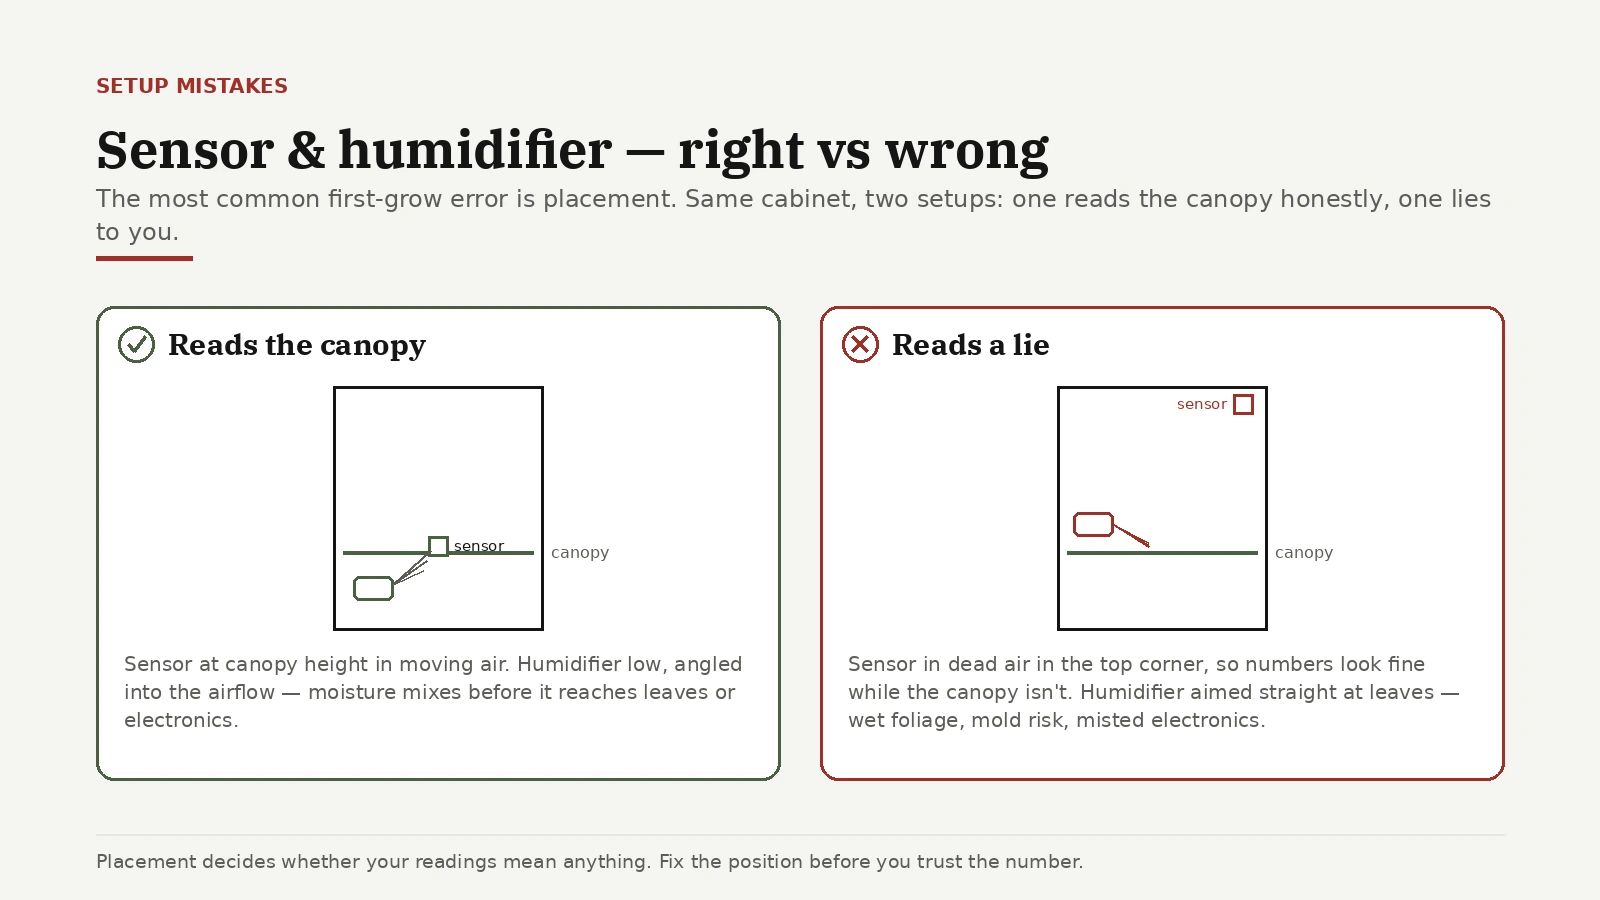
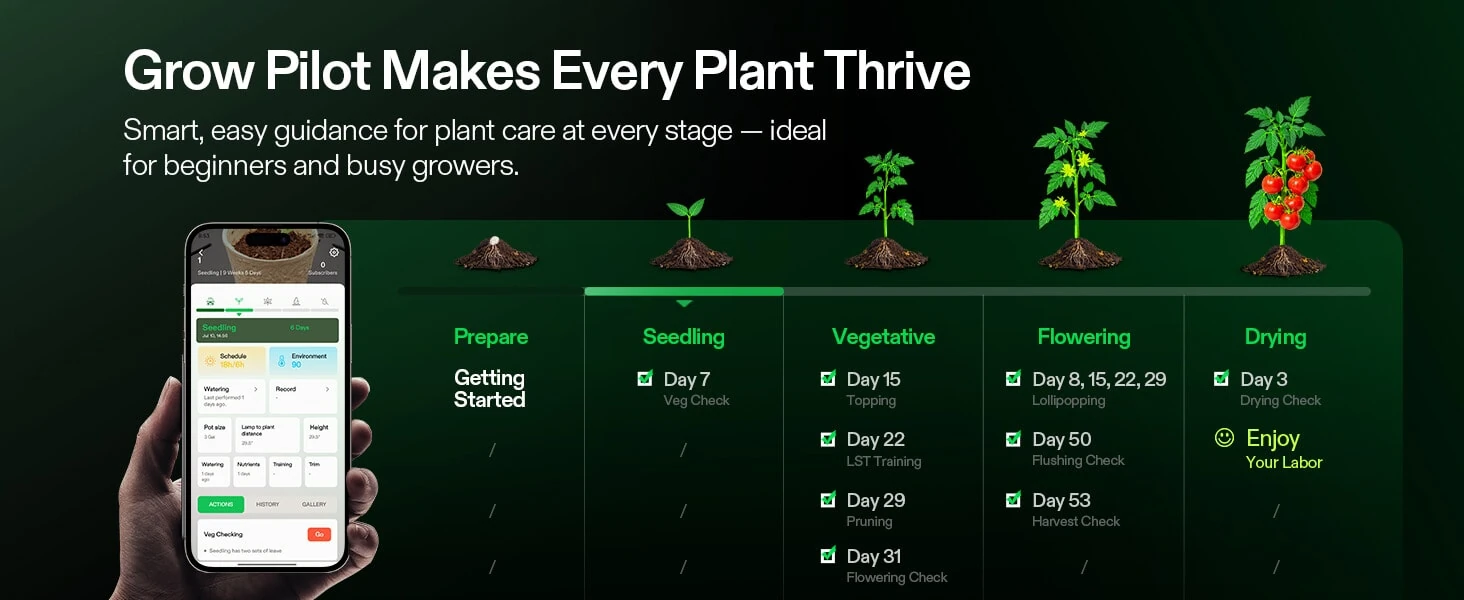
The right-versus-wrong board is one of the highest-value images on this page, because a badly placed sensor does not fail loudly — it reports confidently about a part of the box you do not care about. Compare the two halves carefully. The correct side reads at canopy height in moving air, which is where the plant lives. The wrong side sits in dead air and mists straight onto leaves. Same equipment, same settings, completely different meaning to every number that follows. If your readings and your plant disagree, check the placement before you distrust the plant. The app screenshot belongs in the same conversation: a stage plan is guidance, not diagnosis, and it cannot see what you can see through the door.
What a rough Bluetooth spot-check can and cannot tell you.
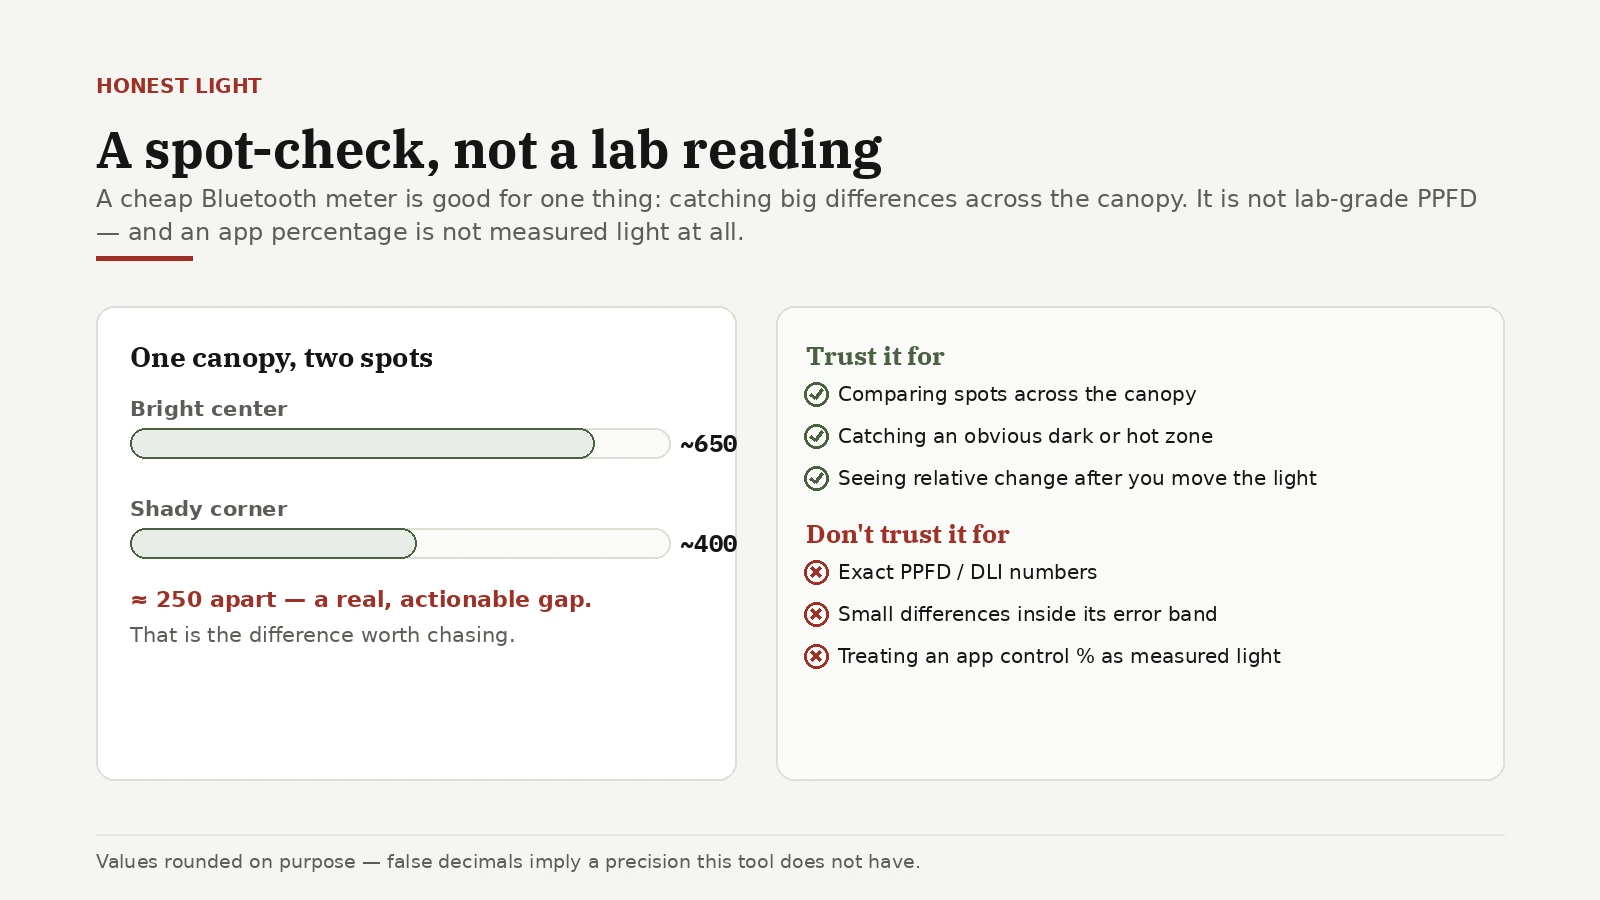
A cheap meter is genuinely useful for one job and misleading for everything else, and this board draws the line. It will tell you that one corner of the canopy is getting substantially less than another, which is a real and fixable problem. It will not give you laboratory-grade values, and a percentage in an app is a setting rather than a measurement of light that arrived at a leaf. Use it comparatively: two readings taken minutes apart across the same canopy mean something, while one reading compared against a number you found on a forum means very little.
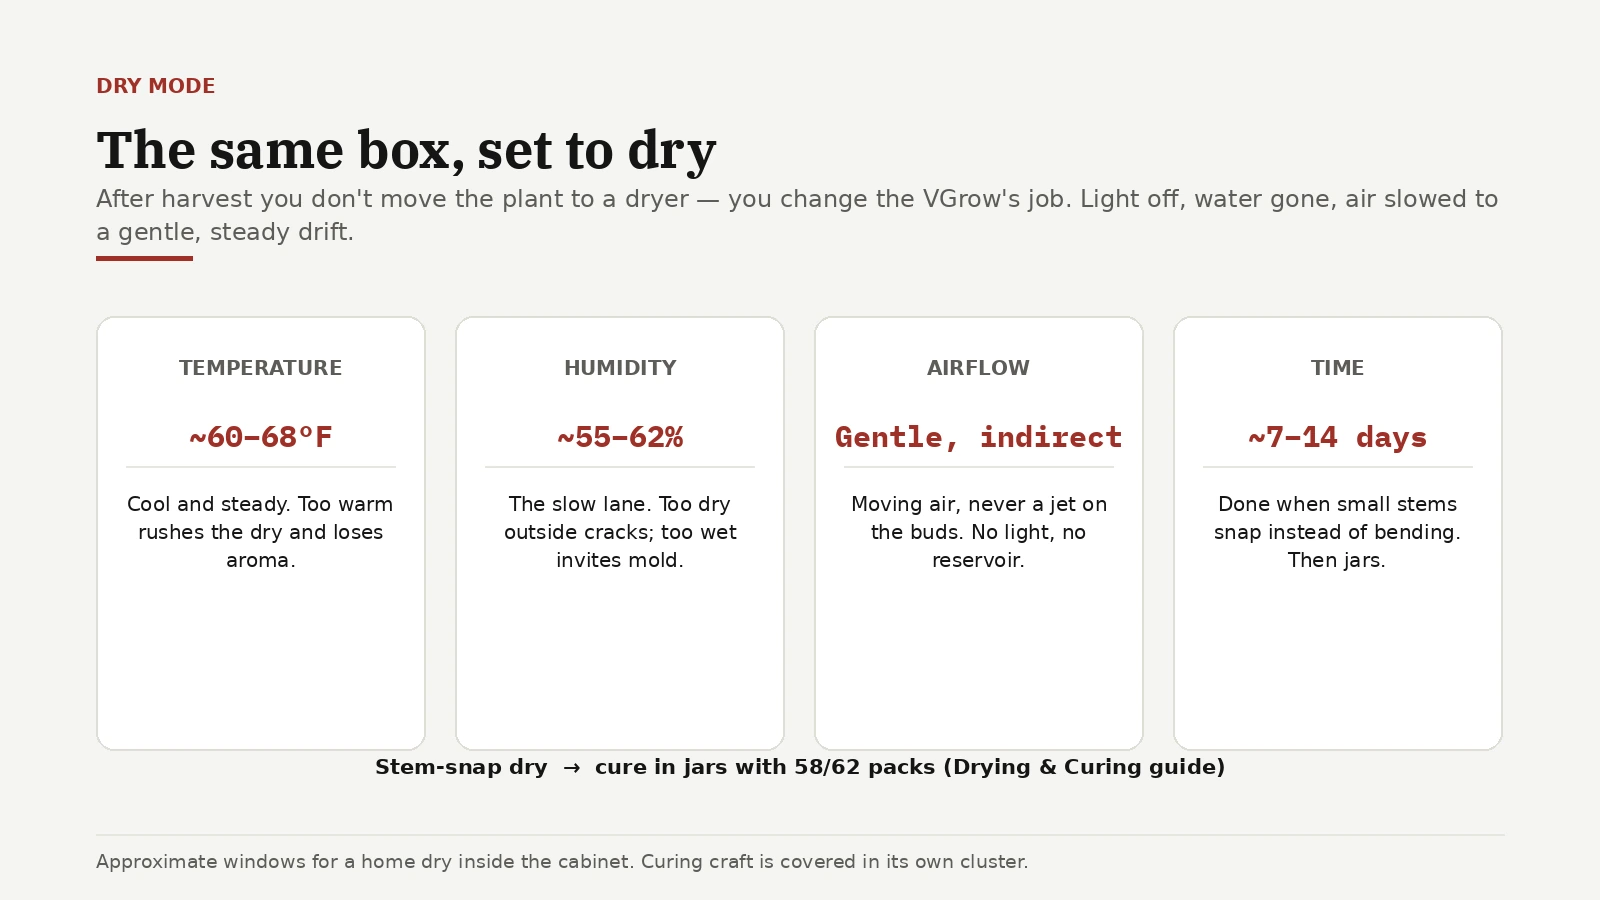
Drying inside the same cabinet, and the clean hand-off to jars.
Dry mode is where a good grow is most easily thrown away, and the board sets the envelope: cooler and steadier than the grow, gentle airflow rather than a gale, and a finish judged by the stem rather than the calendar. The date range on it is an expectation, not an instruction — the plant is done when the stem snaps instead of folding, and rushing that with more airflow or heat costs you the aroma you spent months building. Read this one alongside the drying mistakes guide, which shows what each shortcut does to the flower.
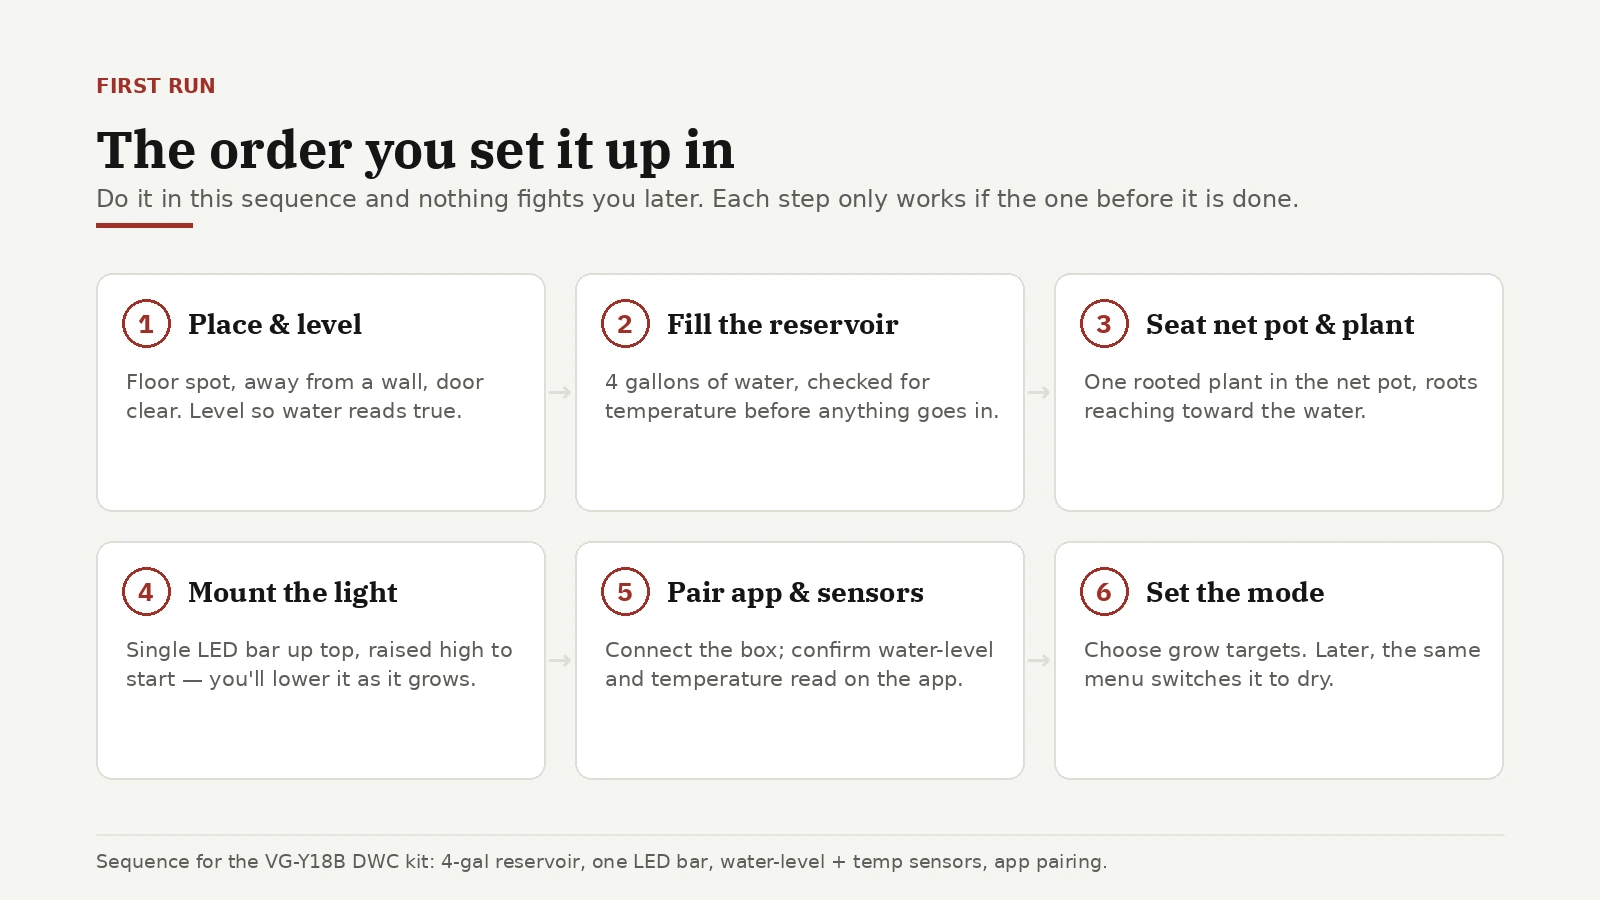
The order you set the box up in for a first run.
The sequence matters more than it looks like it should. Each step on this board depends on the one before it, which is why setting up out of order tends to end with something being drained, unplugged or moved again. Level first, because everything about a water reservoir assumes it. Fill and plumb before the plant goes anywhere near it. Pair and set the mode last, once there is something real for the box to control. Work down the board once with it open on your phone rather than trusting yourself to remember the order halfway through.
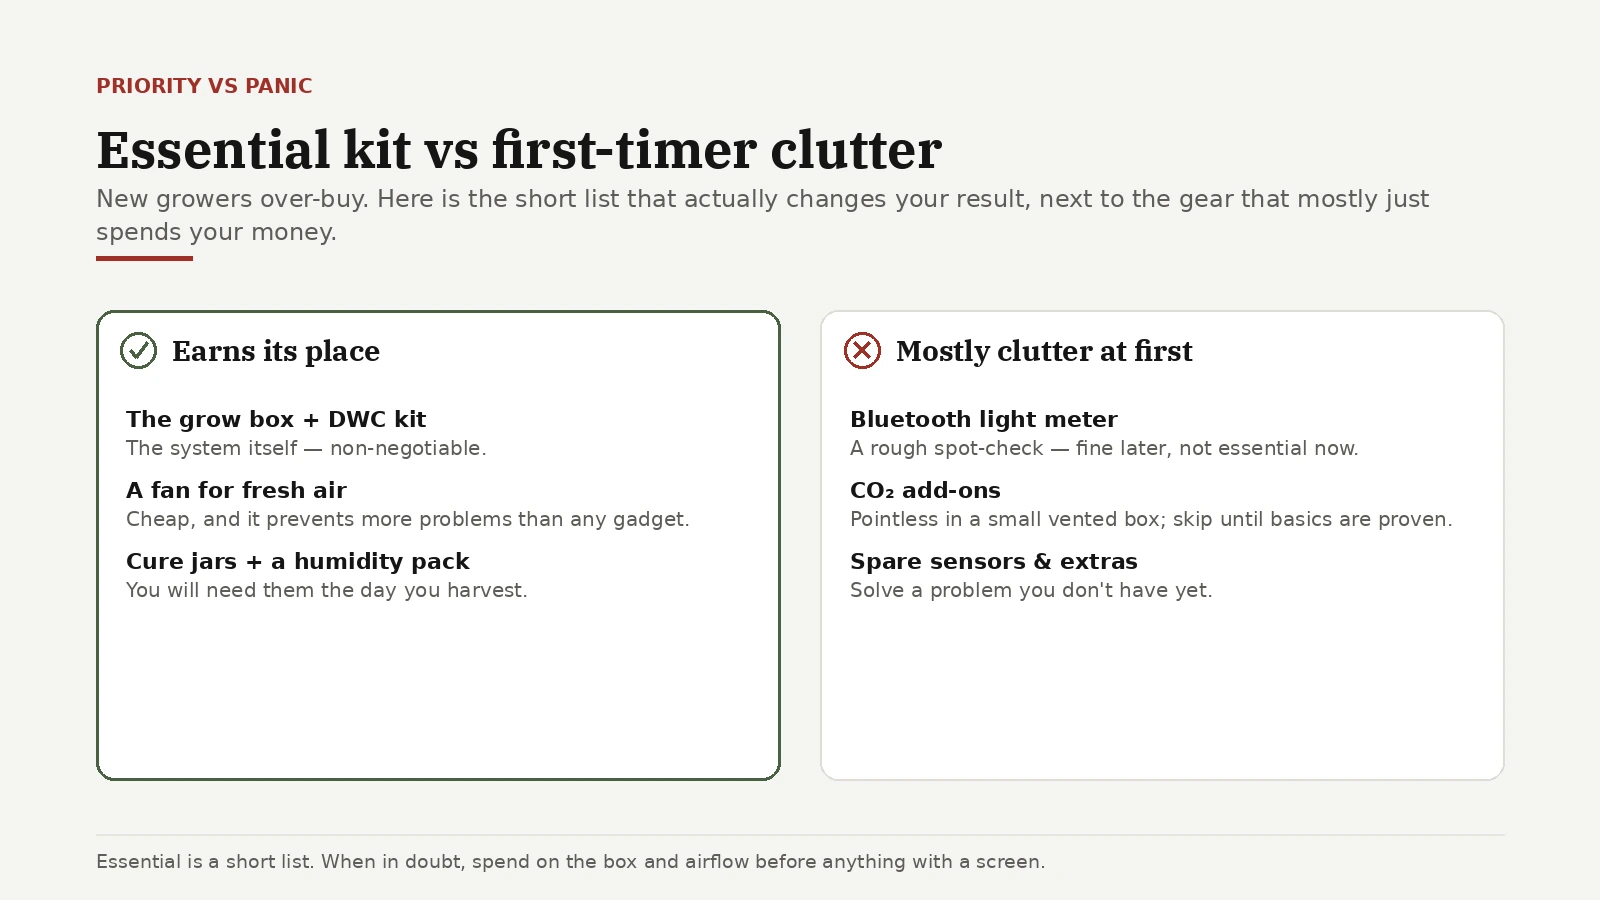
The short priority list, and the gear to skip at the start.
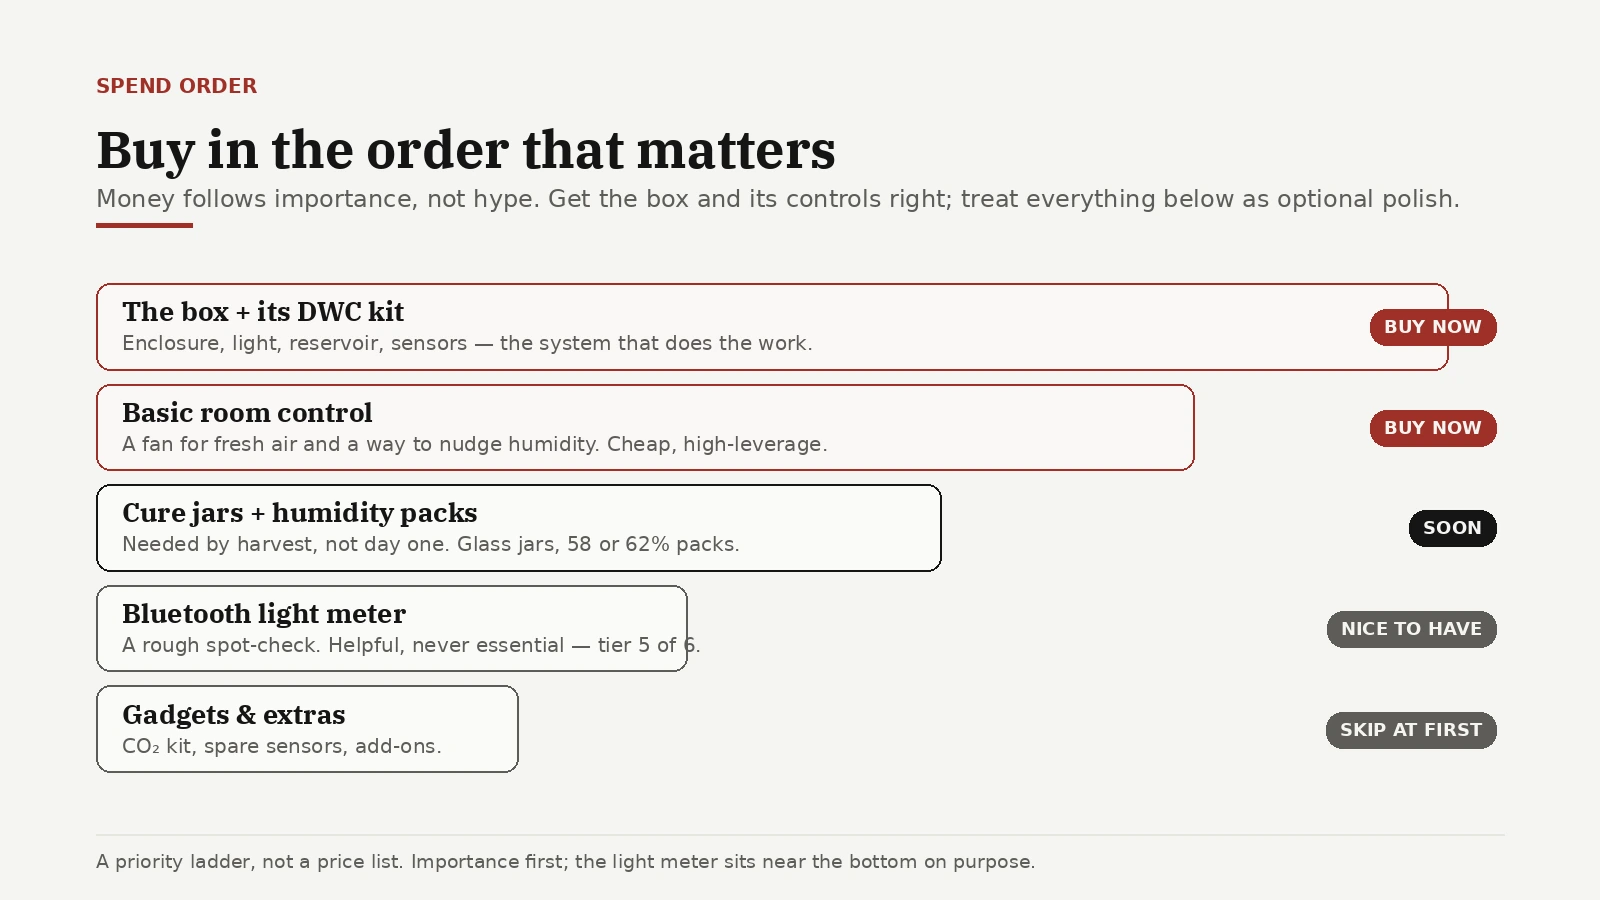
Nearly everyone over-buys on the first run, and nearly everyone over-buys the same things. The essential-versus-clutter split names them plainly: a short list of items that do real work, and a longer list of gadgets that feel like progress while the basics are still unresolved. The priority ladder underneath it turns that into spending order, with the box and basic room control at the top and the accessories deliberately near the bottom.
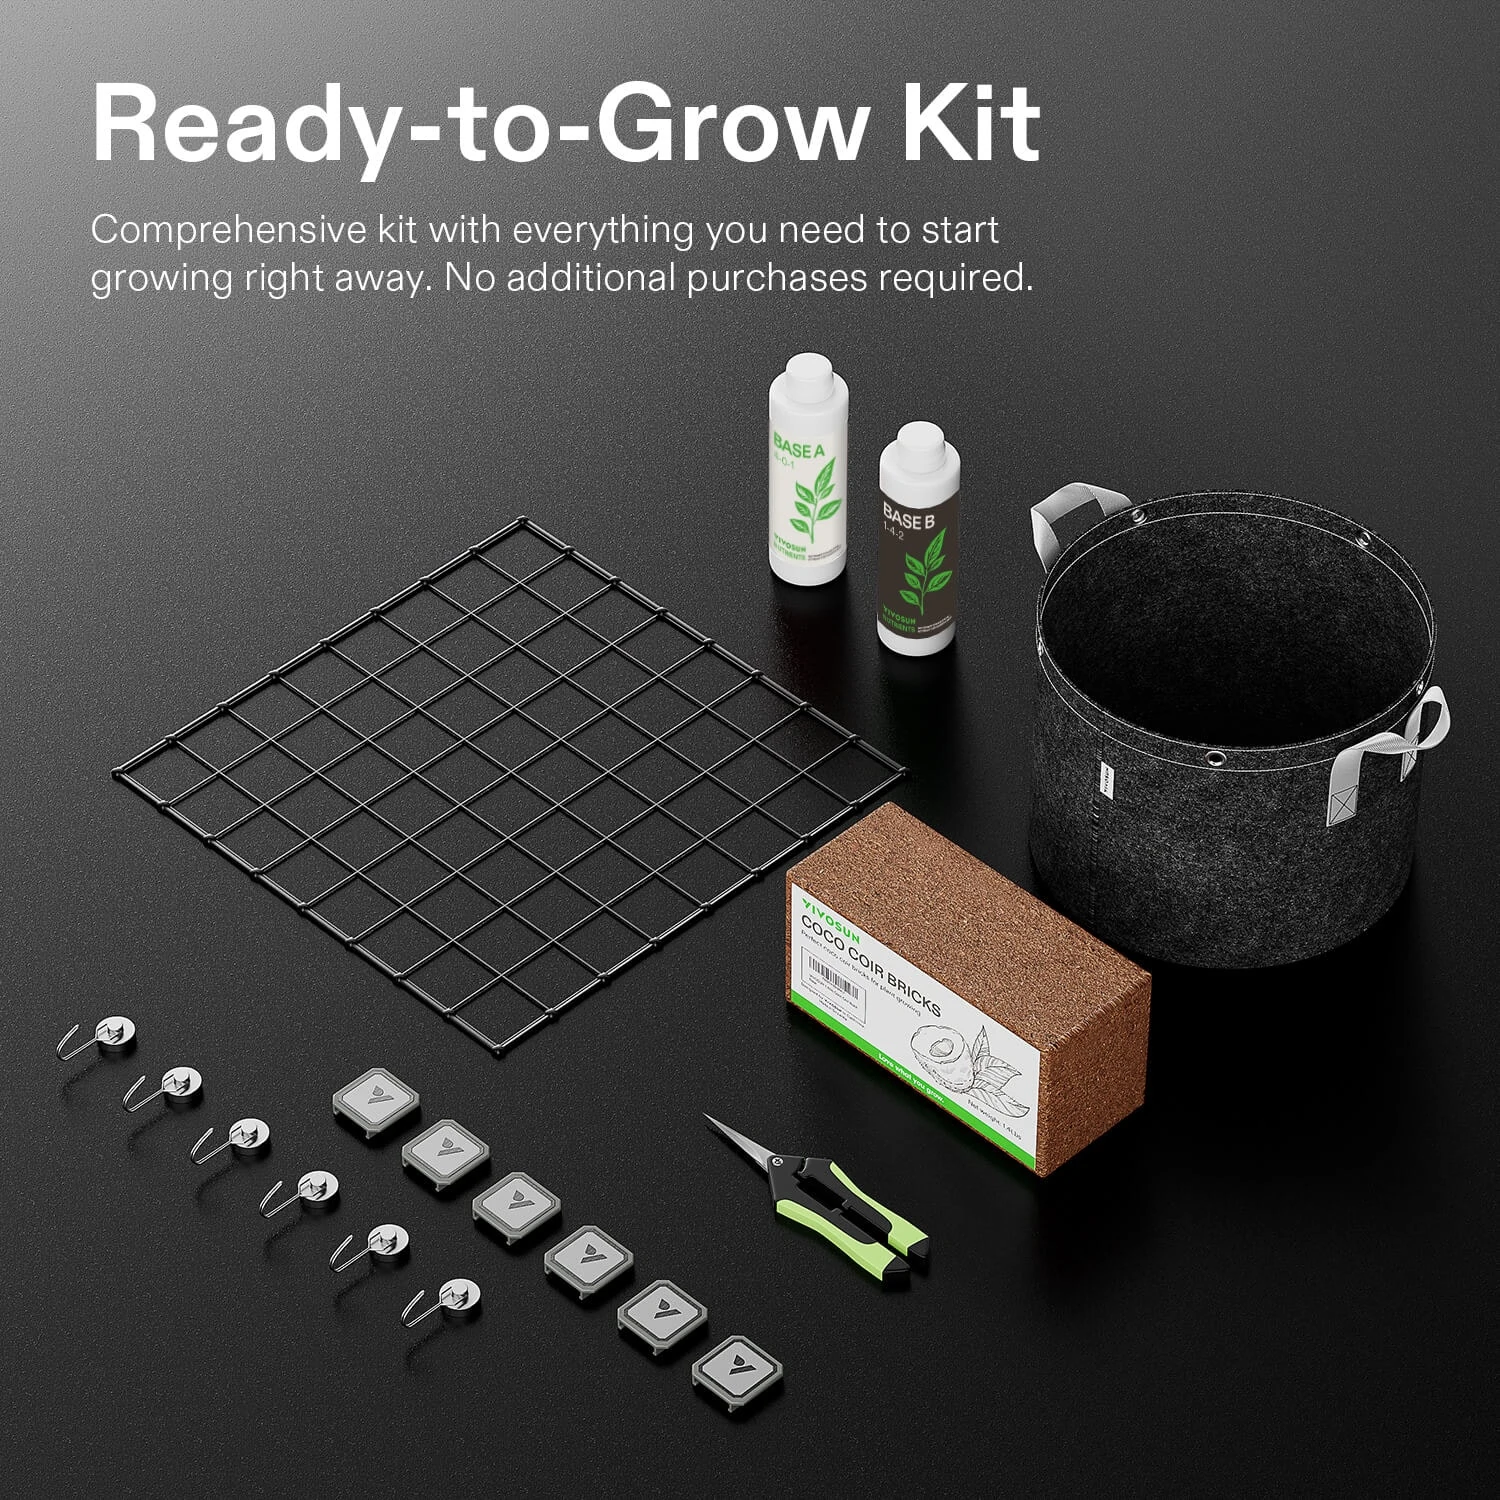
The way to use these two boards is unglamorous. Work down the ladder and buy in that order, and if the budget runs out partway, stop there and grow anyway rather than skipping a rung to afford something further down. A first grow that finishes teaches you more than a fully equipped one that never starts. The kit photo shows what already comes with the system, which is worth checking against your cart before you buy the same parts twice.
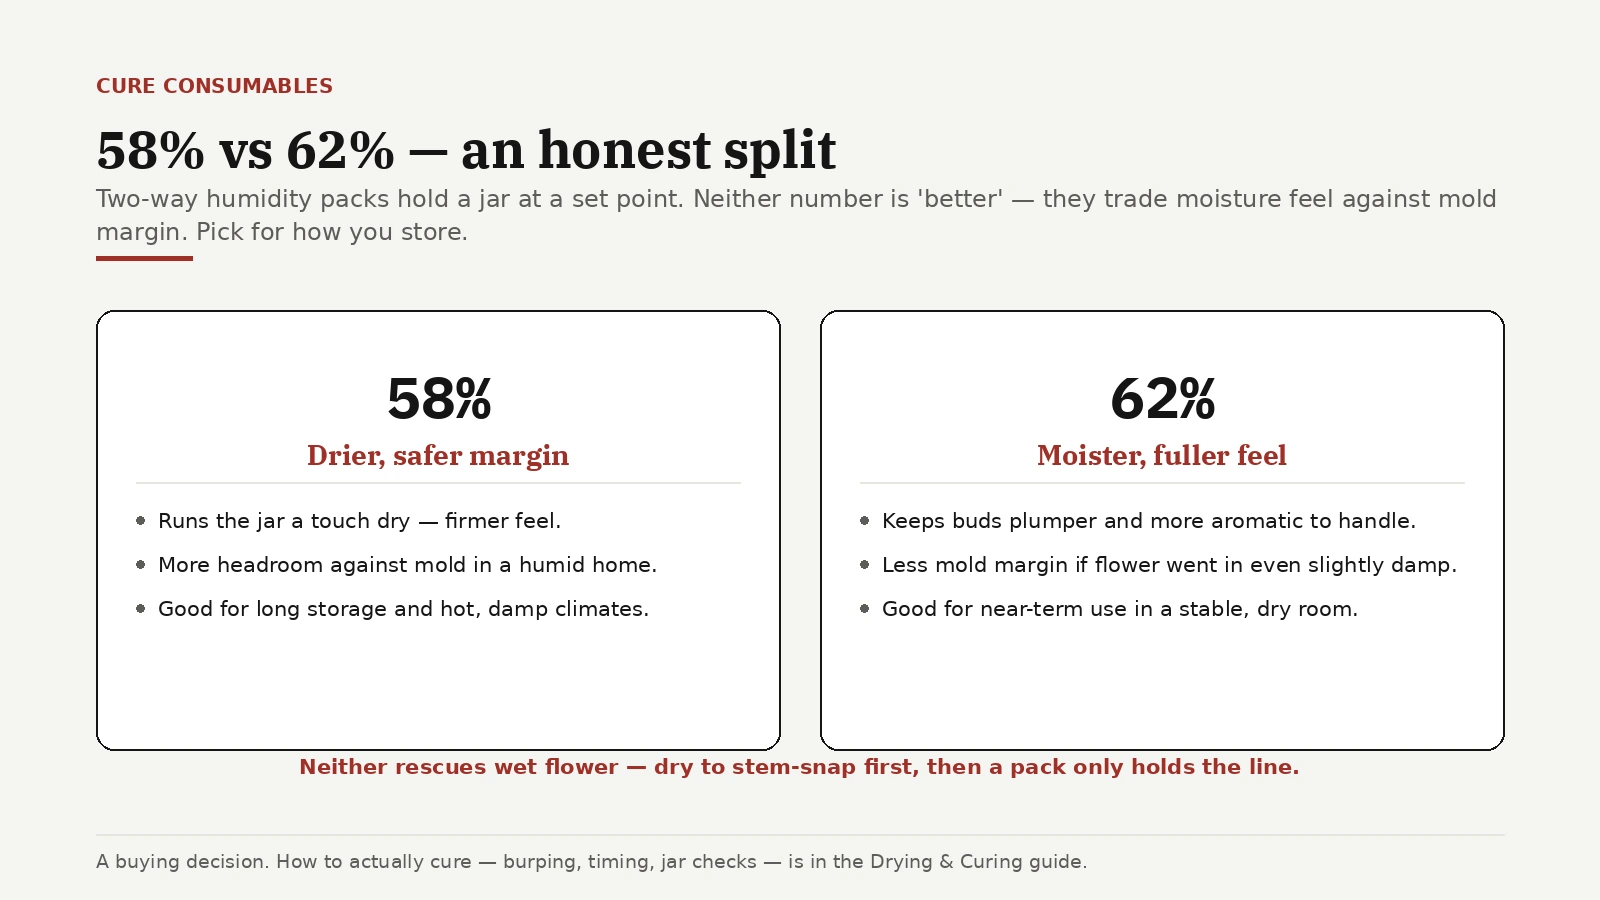
Jars and 58 vs 62 percent humidity packs as a buying decision.
This is an honest-split board, so do not go looking for the winning side. The two pack ratings buy you different things: the drier one gives more margin against mold, the moister one keeps the flower fuller. Which you want depends on how confident you are in your dry and how long the jars are going to sit. The line that matters most is the one both halves share — neither rating rescues flower that went into the jar too wet. A pack manages a cure that is already in range; it does not finish a dry you cut short. The curing guide covers what the jar should be telling you once it is sealed.
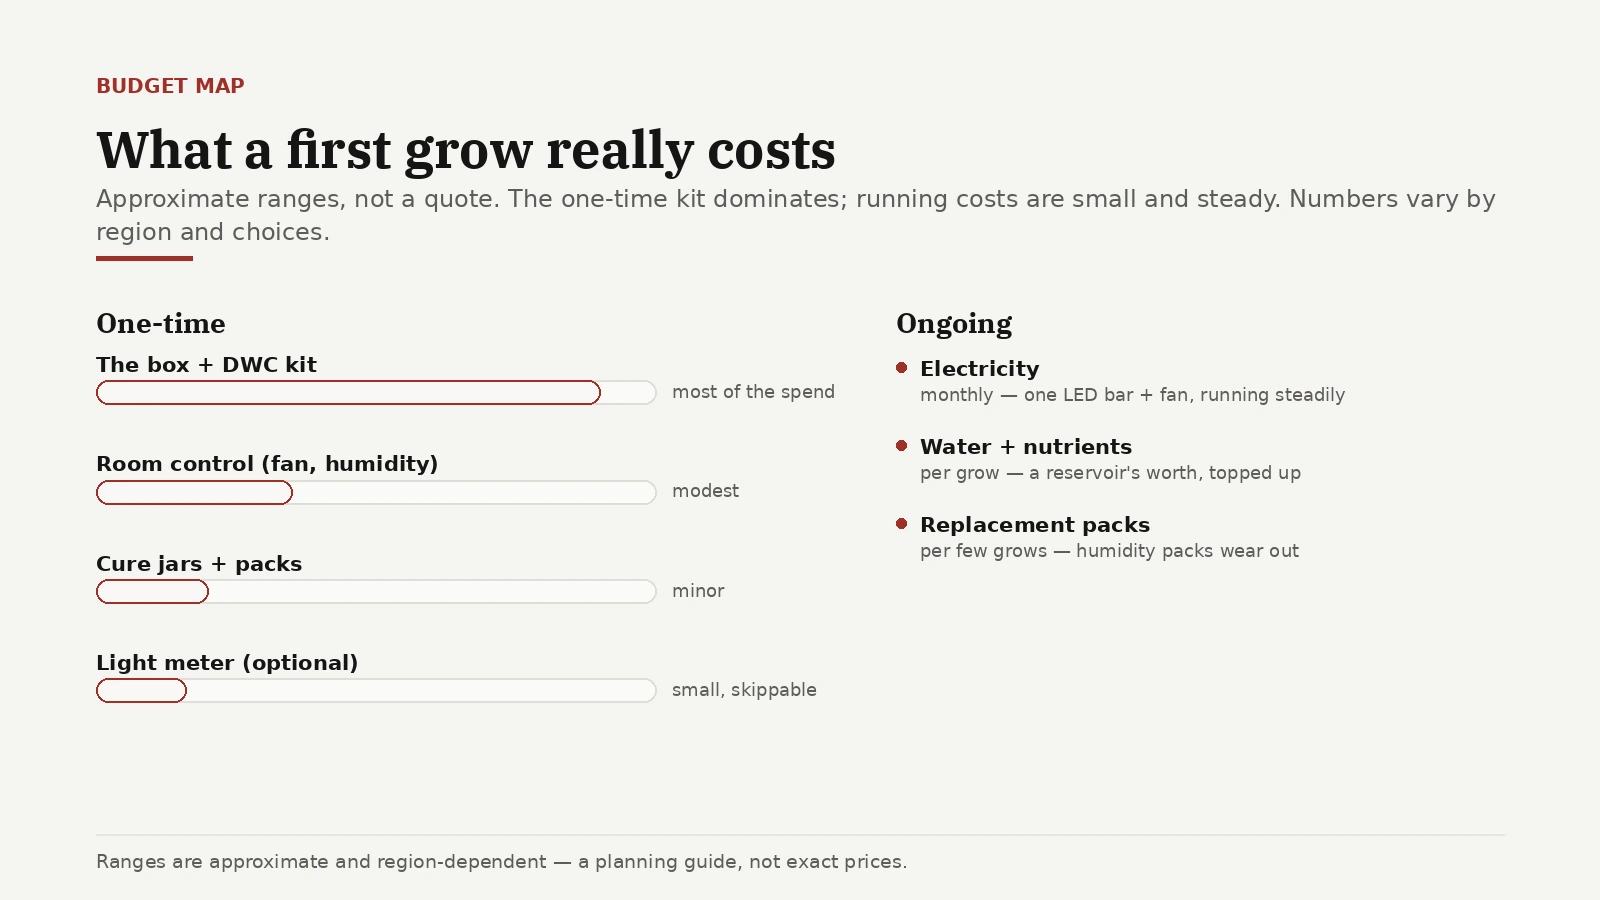
What a first grow really costs, one-time and ongoing.
The useful thing about this board is the shape rather than any individual figure. Almost all of the cost is one-time and lands at the start; what keeps running afterwards — electricity, water, replacement packs — stays small and steady. That shape is what makes a compact grow decidable. You are looking at a single upfront commitment rather than an open-ended drip, and the second run costs a fraction of the first because the equipment is already sitting there. Treat the numbers as the proportions they illustrate, and price your own parts locally before committing.
Vertical lifestyle frames of the cabinet for Discover, Pinterest and social sharing.
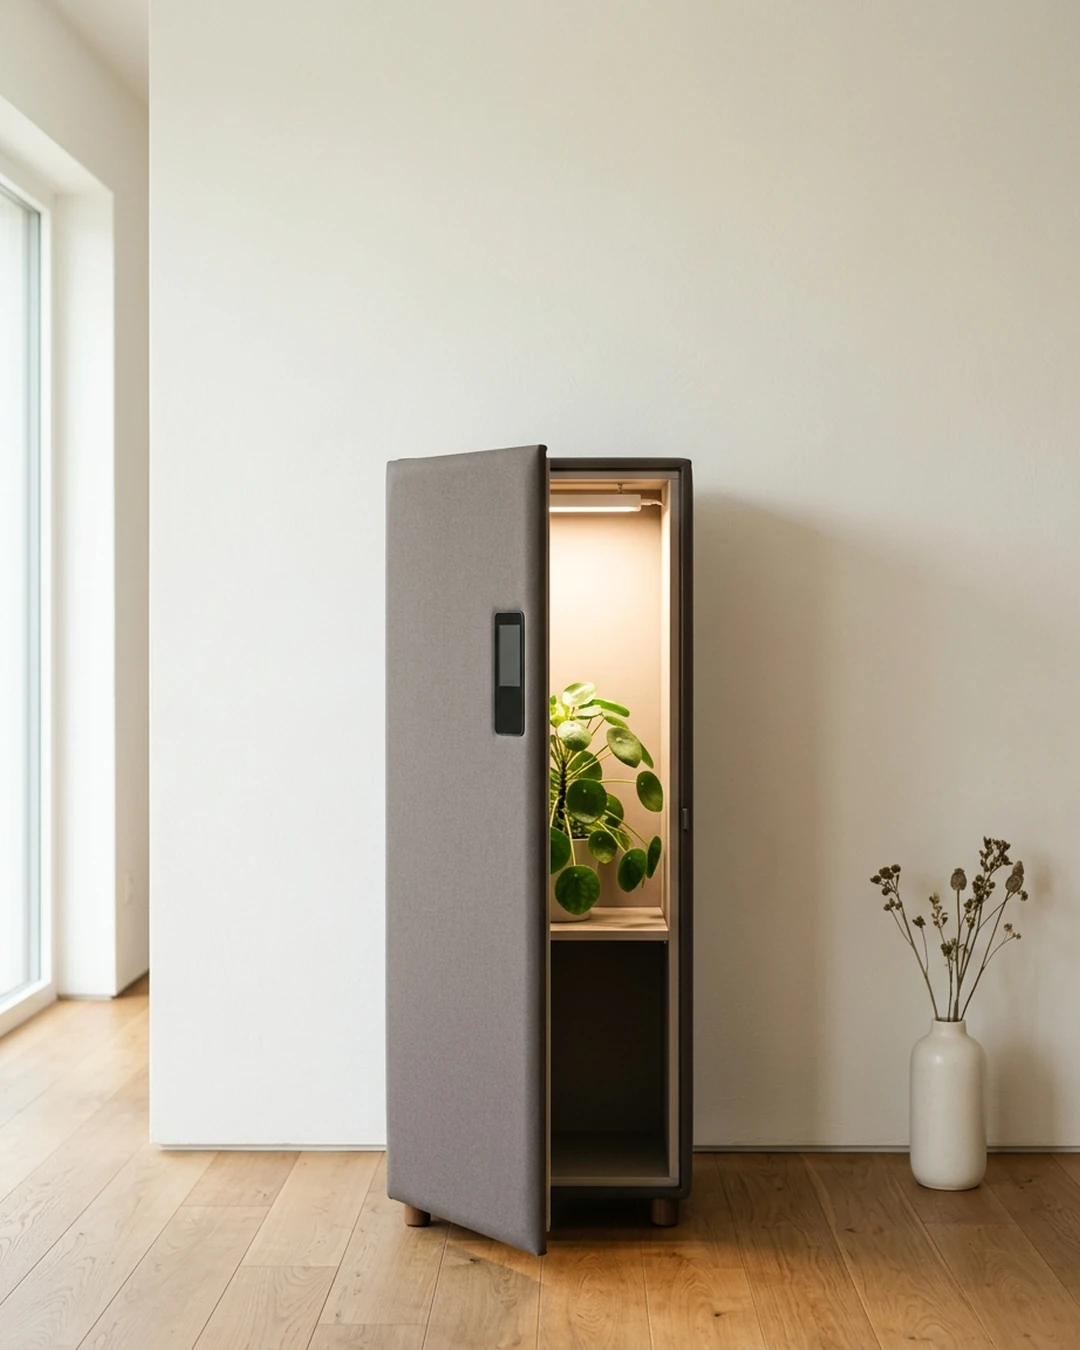
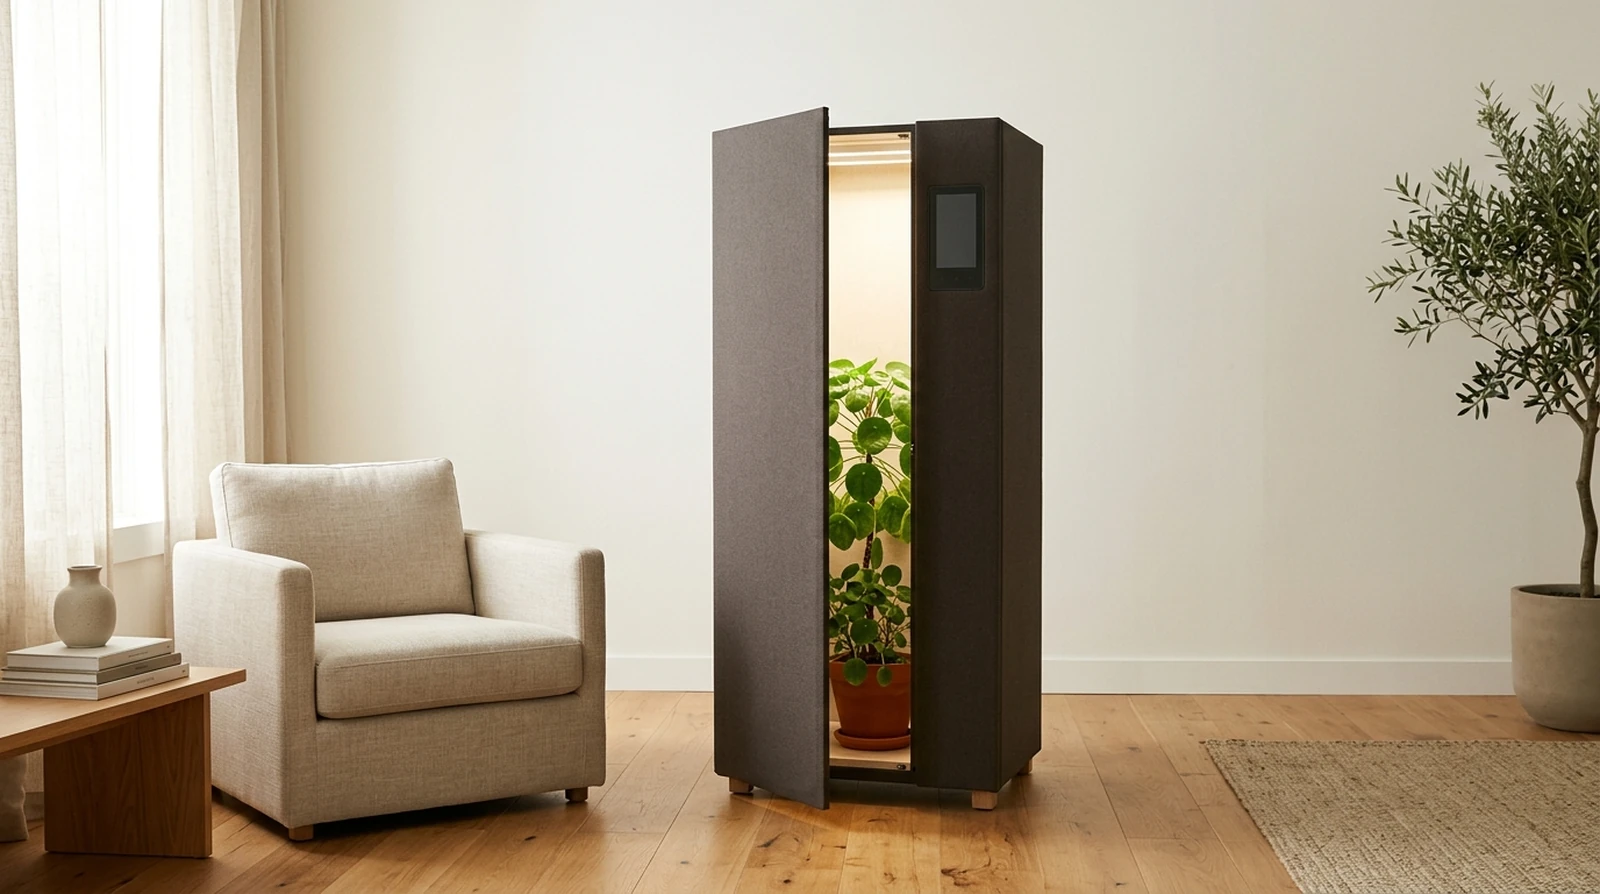
These are the portrait frames, shot for sharing rather than for teaching. They still answer a real question, though, and it is one people are usually too self-conscious to ask: what does this actually look like standing in a room you live in? The answer is a cabinet that reads as furniture, which for a lot of growers is the deciding factor. If discretion is part of why a compact system appealed to you in the first place, these are the frames worth looking at.